1. Git 설치 확인
Github와 연동하기 위해선 먼저 Git이 설치되었는지 확인해야한다.
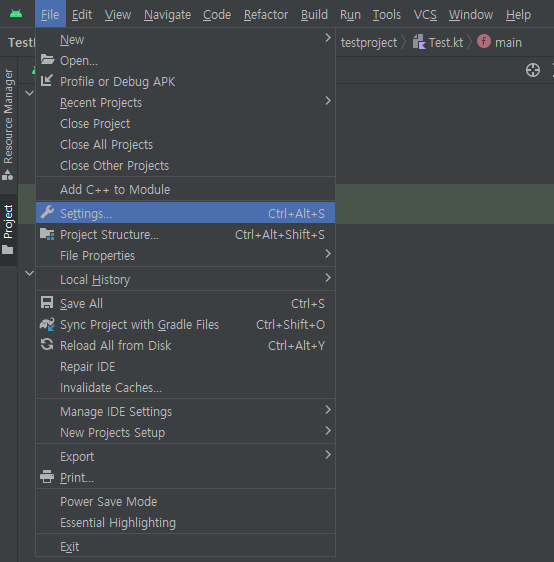
1-1 상단 메뉴에서 File -> Settings를 클릭한다.
1-2 Settings 창에서 Version Control -> Git을 클릭한다.
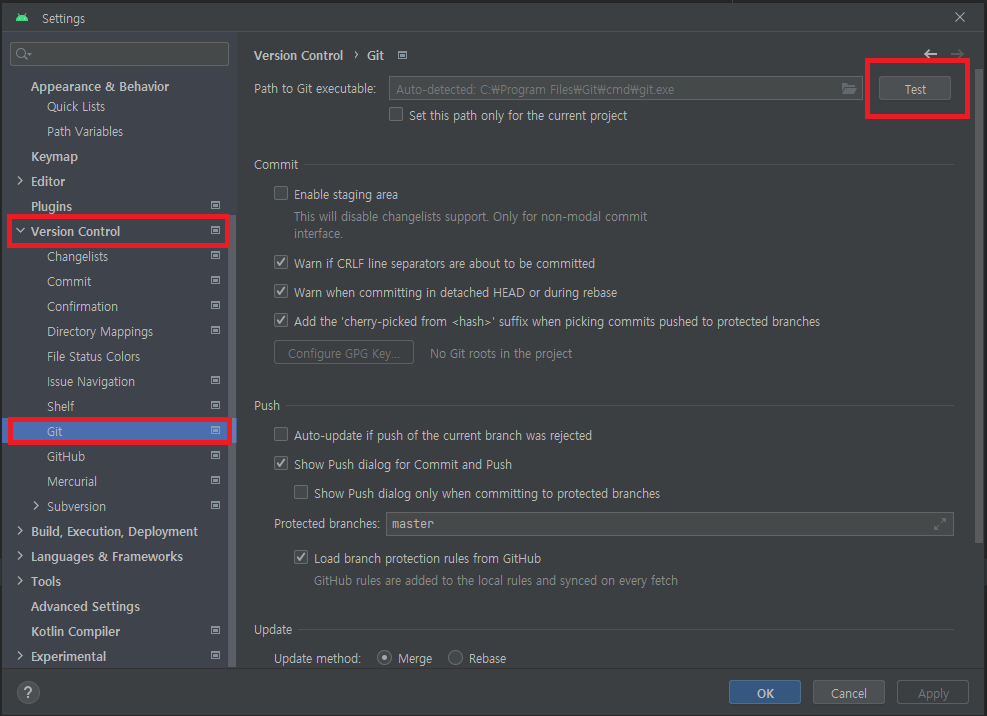
1-3 Test 버튼을 클릭했을 때 버전이 출력된다면 Git이 설치되어 있는 것이다.

2. Github 계정 연동
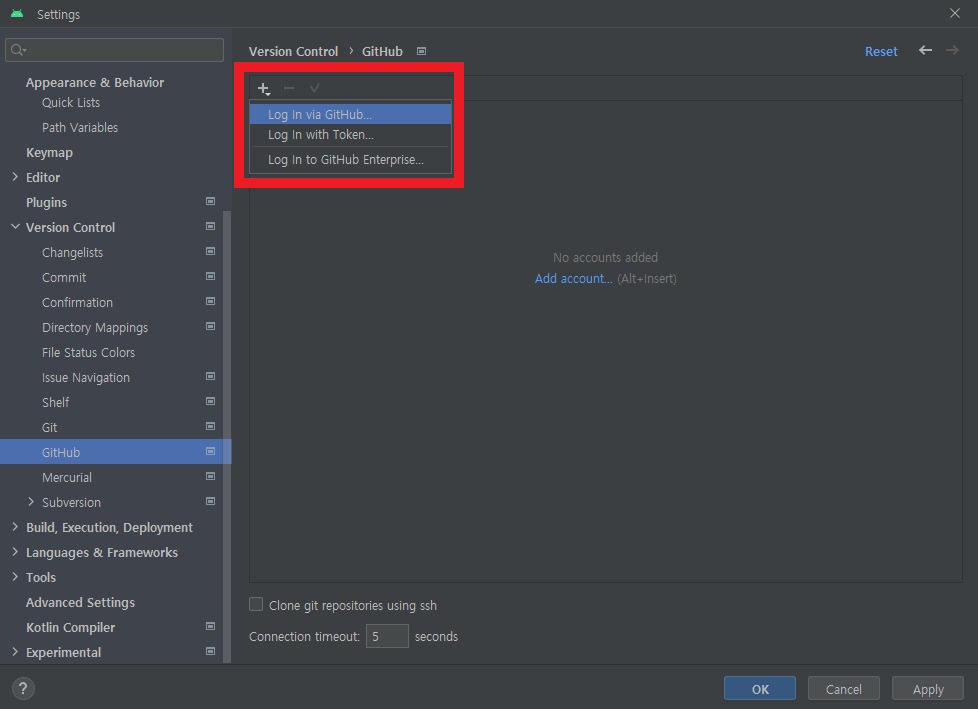
2-1 Settings 창에서 Version Control -> GitHub를 클릭한다.
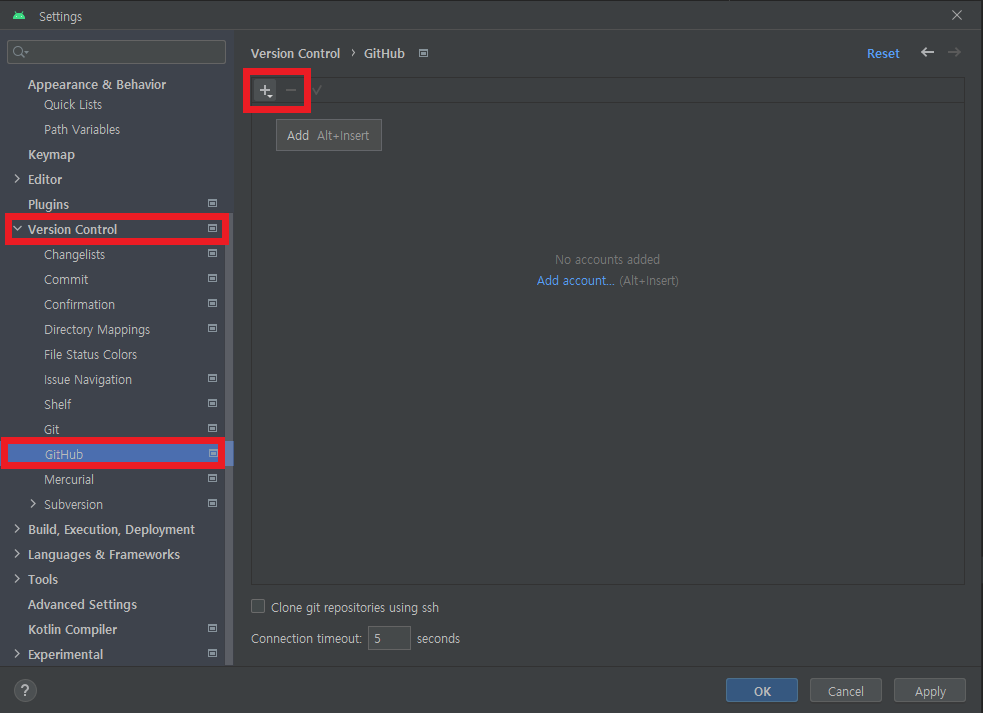
2-2 +버튼을 누르고 Log in via Github를 클릭한다.
2-3 기본 브라우저에서 JetBrains 창이 뜨면 Authorize in GitHub를 클릭한다.

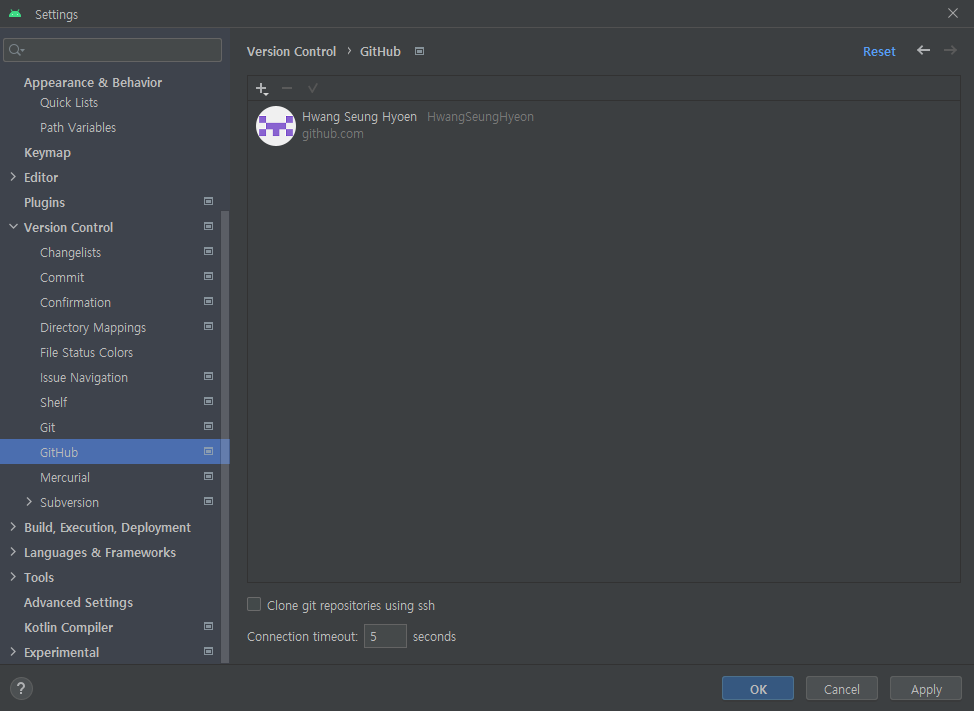
2-4 로그인을 했다면 아래 창이 뜨고, 안드로이드 스튜디오와 연동된 모습을 확인할 수 있다.

3. Github 레포지터리 생성
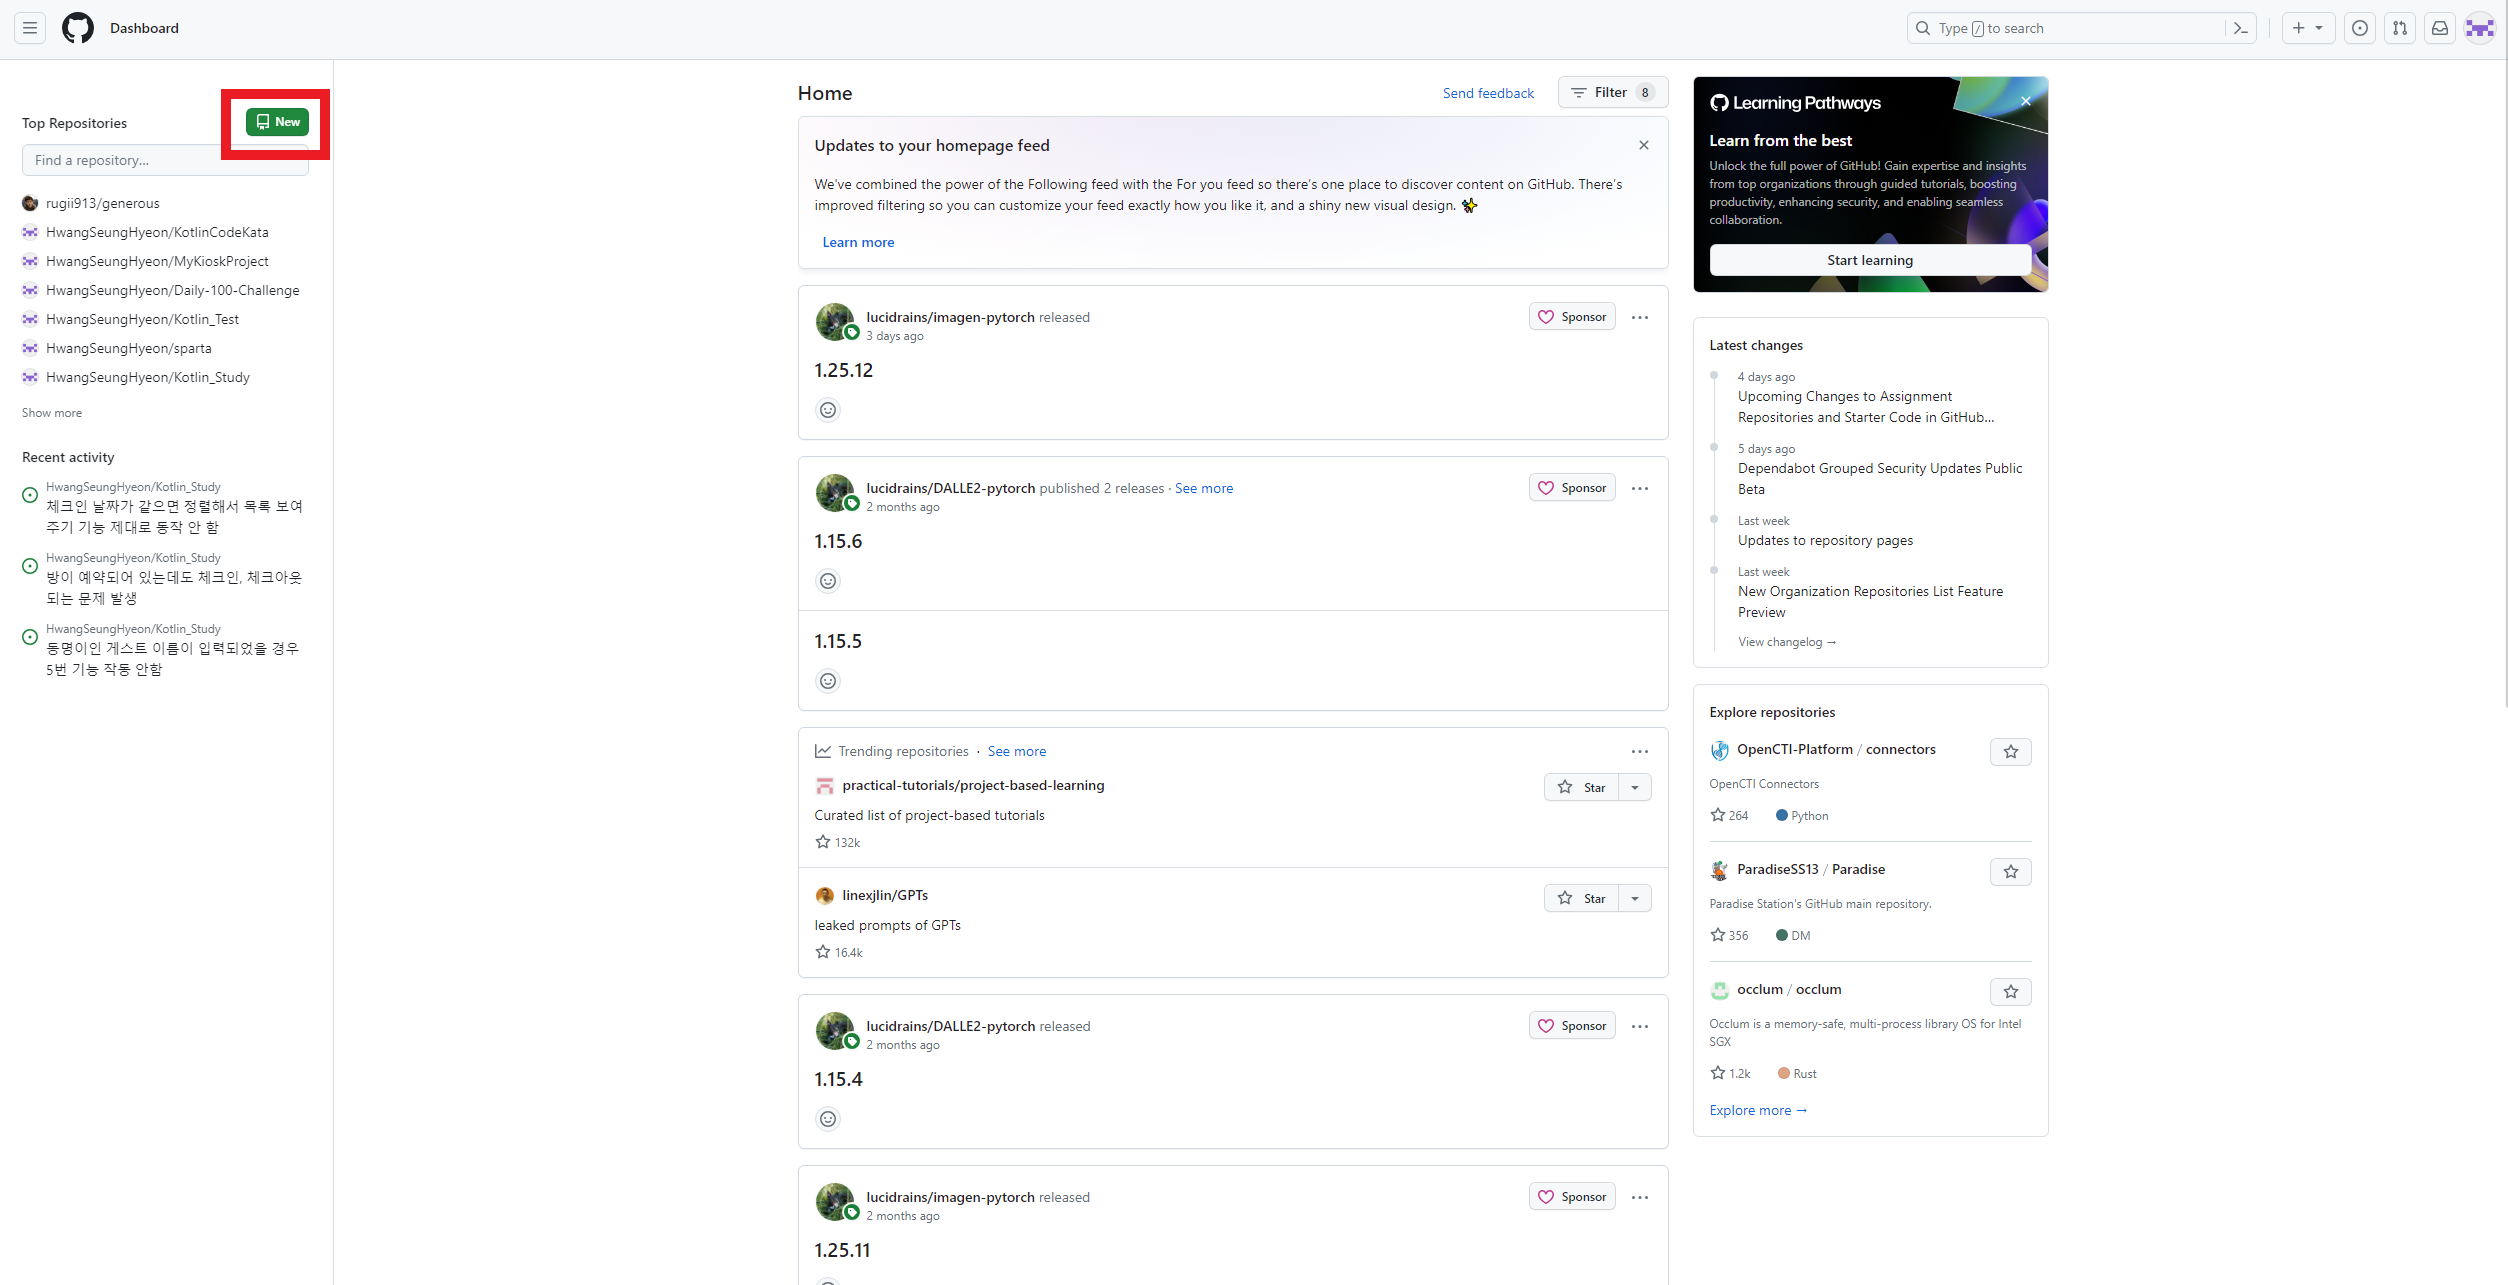
3-1 좌측 상단 New 버튼을 클릭한다.
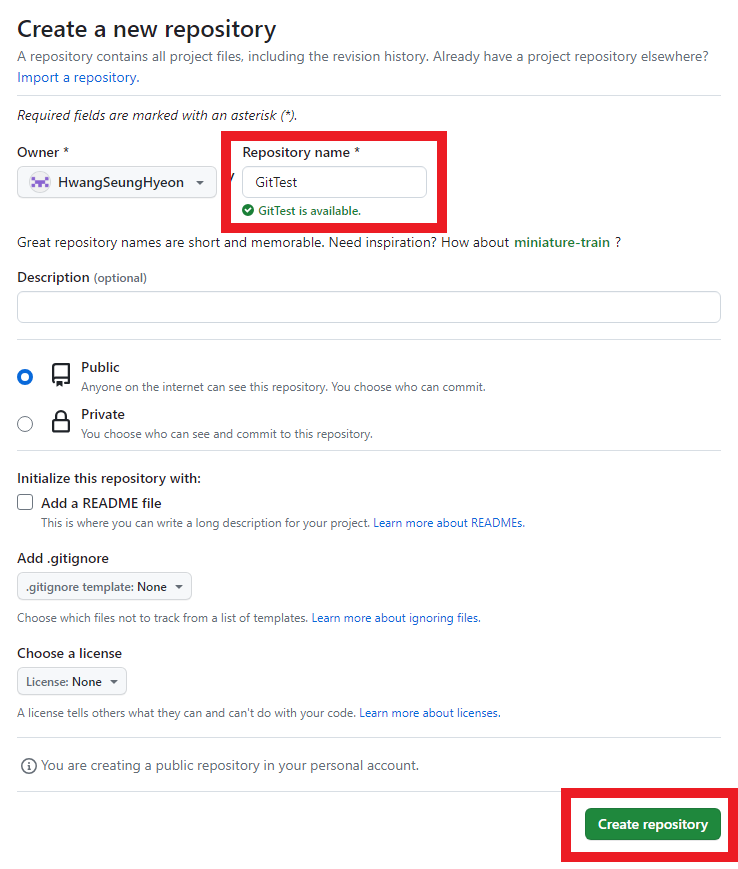
3-2 Repository name을 입력하고, Create repository를 클릭한다.
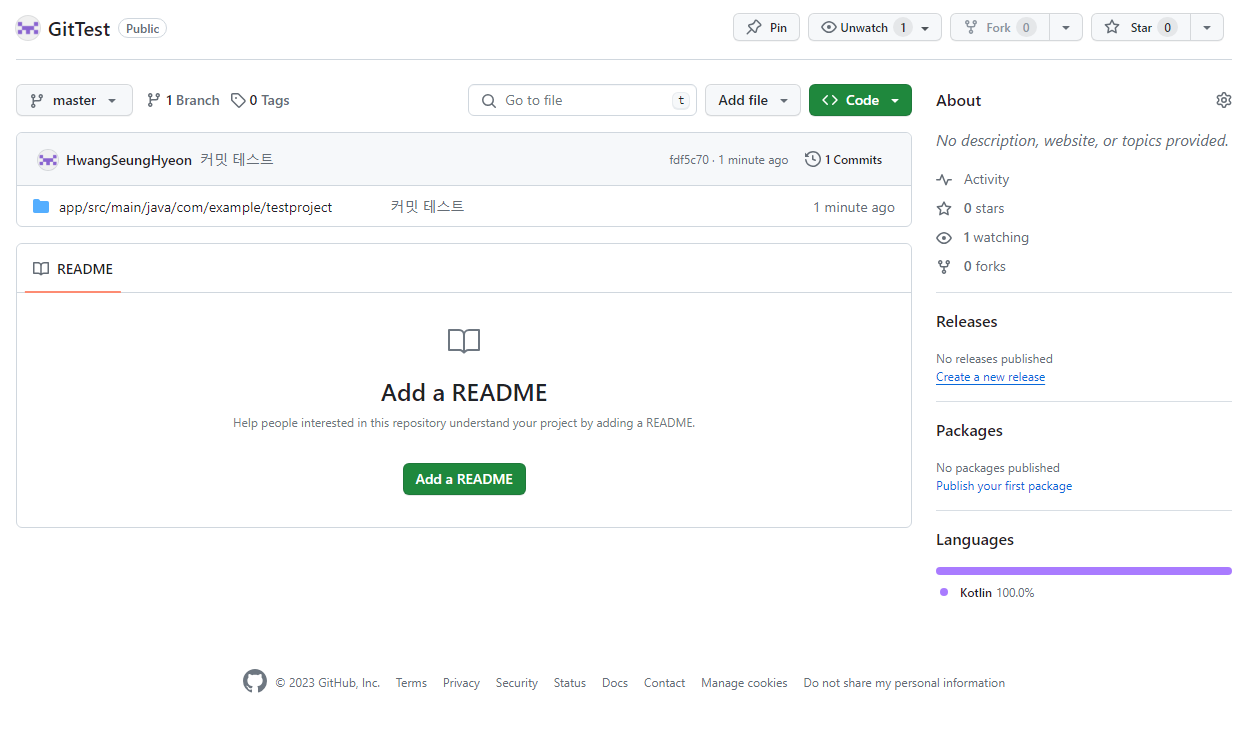
3-3 아래 화면이 출력된다.

4. Github 레포지터리 경로 추가
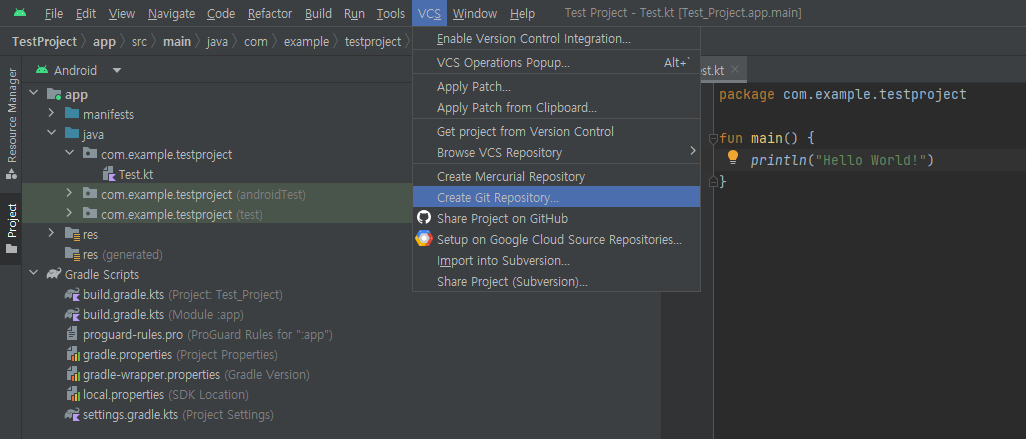
4-1 안드로이드 스튜디오 상단 메뉴에서 VCS -> Create Git Repository를 클릭한다.
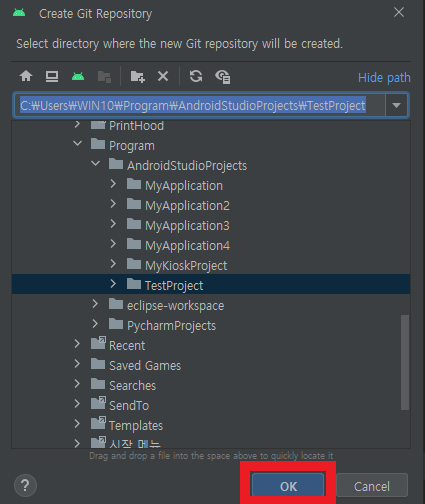
4-2 프로젝트 폴더 내의 원하는 폴더로 설정하고 OK 버튼을 누른다.
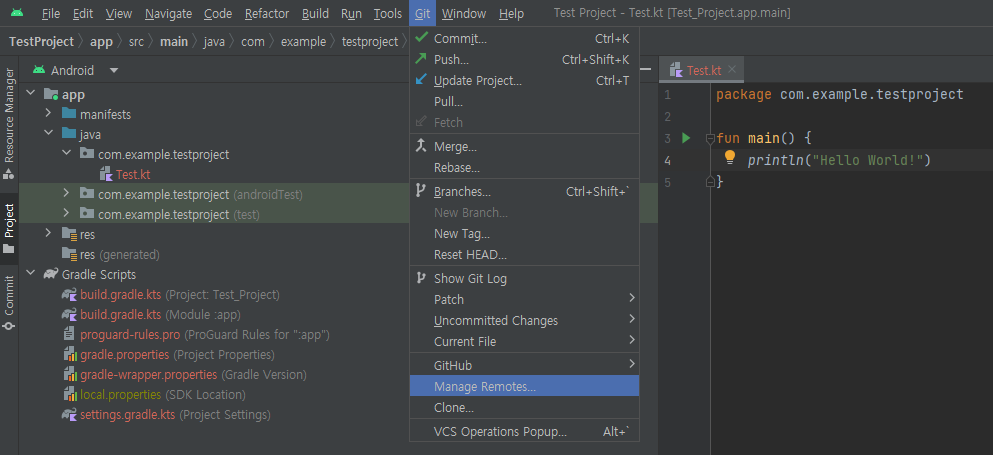
4-3 상단에 새로 생긴 Git메뉴를 클릭하고 Manage Remotes를 클릭한다.
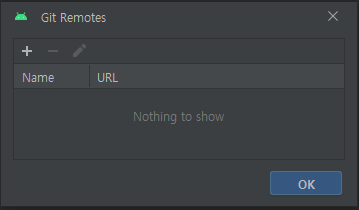
4-4 + 버튼을 클릭한다.
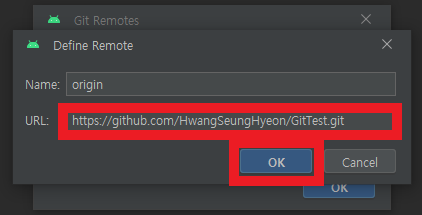
4-5 깃허브 창을 열고 빨간색으로 표시한 버튼을 클릭한다. (깃허브 레포지터리 주소가 복사된다.)

4-6. URL 칸에 주소를 입력하고, OK 버튼을 누른다.
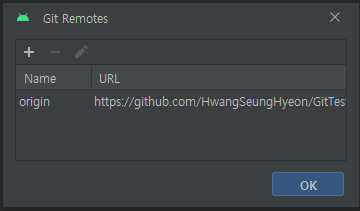
4-7 주소가 등록된 모습을 볼 수 있다.
5. Commit & Push
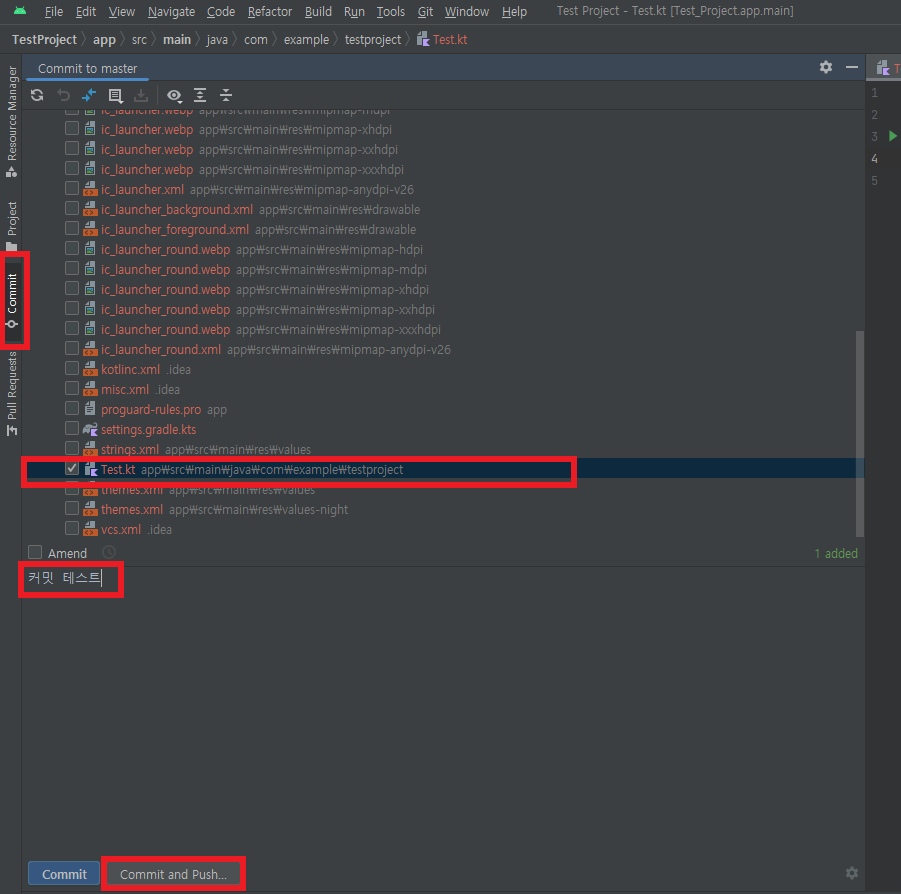
5-1 좌측 메뉴에서 Commit을 클릭한다.
5-2 깃허브에 올리고 싶은 코드만 선택한다.
5-3 하단 커밋 공간에 아무 메시지나 입력한다.
5-4 Commit and Push 버튼을 누른다.
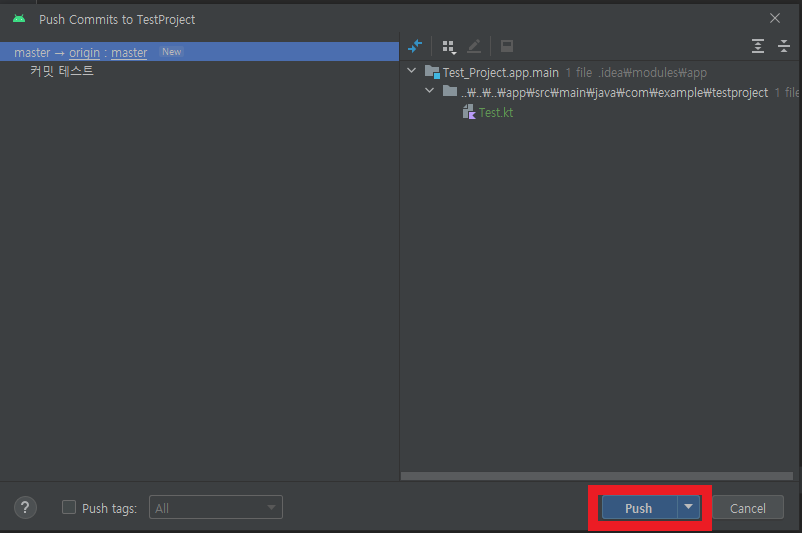
5-5 Push 버튼을 누른다.
5-6 페이지를 새로고침한다.