Next.js + TS에서 ESLint, Prettier 설정하기 (+ styled-components, airbnb, husky, lint-staged)
Next.js

(갑분아몬더Next렙을)
Next.js 공식문서
Next.js, TypeScript 프로젝트에서 ESLint, Prettier 설정하기
개발환경
- next.js - 13.1.1
- typescript - 4.9.4
- eslint (+ airbnb규칙) - 8.31.0
- prettier - 2.8.2
- husky - 8.0.0
- lint-staged - 13.1.0
- styled-components - 5.3.6
Next.js + TS 설치
1. Next.js + TS 새 프로젝트로 생성하는 방법 1
npx create-next-app@latest --ts 프로젝트명
# or
yarn create next-app --typescript 프로젝트명
# or
pnpm create next-app --ts 프로젝트명

# eslint 설치하겠냐는 질문에 yes 선택
// package.json
{
"name": "xmunt",
"version": "0.1.0",
"private": true,
"scripts": {
"dev": "next dev",
"build": "next build",
"start": "next start",
"lint": "next lint"
},
"dependencies": {
"@next/font": "13.1.1",
"@types/node": "18.11.18", //ts 관련 패키지
"@types/react": "18.0.26", //ts 관련 패키지
"@types/react-dom": "18.0.10",
"eslint": "8.31.0",
"eslint-config-next": "13.1.1",
"next": "13.1.1",
"react": "18.2.0",
"react-dom": "18.2.0",
"typescript": "4.9.4"
}
}
2. 기존 프로젝트(Next.js )에서 Next.ts로 생성하는 방법 2
touch tsconfig.json
npm install --save-dev @types/react @types/node
npm run dev  # 잘 실행되면 됨 tsconfig.json에 자동 설정됨
1. ESLint 설정
Next.js 버전 11.0.0 부터 ESLint가 함께 통합됐기 때문에
Next 설치 때 eslint 설치에 yes했다면,
ESLint를 추가 설치하거나 .eslintrc.json을 따로 생성하지 않아도 됨.
(만약 next 설치할때 eslint 설치하겠냐는 질문에 no 했다면 해야겠지만,)
- airbnb, google, next 등 다양한 규칙들이 있다. 그 중에 대표적인 airbnb 규칙을 사용해서 설치하고자 한다.
Airbnb 규칙 설정
1. eslint-config-airbnb - 리액트 관련 규칙
- 리액트 관련된 경우 사용
- eslint-config-airbnb의 의존성 패키지 목록 확인 명령어
npm info "eslint-config-airbnb@latest" peerDependencies- 위 명령어를 통해 조회된 종속 패키지목록이다.
버전에 맞는 패키지들을 같이 설치해줘야 한다{ eslint: '^7.32.0 || ^8.2.0', 'eslint-plugin-import': '^2.25.3', 'eslint-plugin-jsx-a11y': '^6.5.1', 'eslint-plugin-react': '^7.28.0', 'eslint-plugin-react-hooks': '^4.3.0' }
설치하기
# 1. airbnb + 종속 패키지까지 설치하기
npx install-peerdeps --dev eslint-config-airbnb
# 또는 각각 개별적 설치
npm install -D eslint eslint-plugin-import eslint-plugin-react eslint-plugin-react-hooks eslint-plugin-jsx-ally

# 2. TypeScript 관련 airbnb, lint 패키지 설치하기
npm install -D eslint-config-airbnb-typescript @typescript-eslint/eslint-plugin @typescript-eslint/parser
2. eslint-config-airbnb-base - 리액트 제외 규칙
- 리액트를 안 쓰는 경우 설치
- 종속성 패키지 확인 명령어
npm info "eslint-config-airbnb-base@latest" peerDependencies
설치하기
npx install-peerdeps --dev eslint-config-airbnb-base.eslintrc.json에 설정 추가"env": { "browser": true, "node": true, }, "extends": "airbnb-base", "rules": { "linebreak-style": 0, },
2. Prettier 설치
1. Prettier 및 플러그인 설치하기
eslint와 prettier를 함께 사용할 시 규칙들이 충돌됨으로 의존성 패키지들을 설치해야 한다.
npm install -D prettier eslint-plugin-prettier eslint-config-prettiereslint-plugin-prettier: eslint에서 prettier랑 충돌할 규칙 비활성화eslint-config-prettier: 포매팅할때 prettier 사용하게 하기
2. .prettierrc 파일 생성
{
  "semi": false,
  "singleQuote": true,
  "tabWidth": 2,
  "trailingComma": "all"
}
"semi": false- 세미콜론 사용여부. (Next.js는 세미콜론;사용안해서 false함)"singleQuote": true- 작은 따옴표'사용"tabWidth": 2,- 탭 너비 설정"trailingComma": "all"- 여러 줄일때 마지막에 후행 콤마 사용
.eslintrc.json 설정
- 주석설명있는 버전
{
  "root": true,
  "parser": "@typescript-eslint/parser",
  "plugins": ["@typescript-eslint", "prettier"],
  "parserOptions": {
    "project": "./tsconfig.json",
    "createDefaultProgram": true
  },
  "env": { // 전역객체를 eslint가 인식하는 구간
    "browser": true, // document나 window 인식되게 함
    "node": true,
    "es6": true
  },
  "ignorePatterns": ["node_modules/"], // eslint 미적용될 폴더나 파일 명시
  "extends": [
    "airbnb",
    "airbnb-typescript",
    "airbnb/hooks",
    "next/core-web-vitals",
    "plugin:@typescript-eslint/recommended", // ts 권장
    "plugin:prettier/recommended" // eslint의 포매팅을 prettier로 사용.
    "prettier" // eslint-config-prettier prettier와 중복된 eslint 규칙 제거
  ],
  "rules": {
    "react/react-in-jsx-scope": "off", // react 17부턴 import 안해도돼서 기능 끔
    // 경고표시, 파일 확장자를 .ts나 .tsx 모두 허용함
    "react/jsx-filename-extension": ["warn", { "extensions": [".ts", ".tsx"] }],
    "no-useless-catch": "off" // 불필요한 catch 못쓰게 하는 기능 끔
  }
}- rules
배열의 첫번째 값을 0,1,2나 "off", "warn", "error"로 규칙 표시
Error
1.
npm run lint실행 시 뜨는 에러내용Error: "prettier/@typescript-eslint" has been merged into "prettier" in eslint-config-prettier 8.0.0. See: https://github.com/prettier/eslint-config-prettie r/blob/main/CHANGELOG.md#version-800-2021-02-212. 원인
extends에
"prettier/@typescript-eslint"속성 때문
블로그글들 참고하면서 했는데 이 설정 있으면npm run lint가 실행안됨3. 해결방법
eslint-config-prettier 버전 8부터
"prettier/@typescript-eslint"속성이"prettier"로 병합됨
prettier/@typescript-eslint를 extends 설정에서 제거 후"prettier"추가
버전 8부터 병합된 내용 공유한 깃허브
perttier/@typescript-eslint 가 제거됐다는 글
.eslintrc.json
- 주석 없는 버전
{
  "root": true,
  "parser": "@typescript-eslint/parser",
  "plugins": ["@typescript-eslint", "prettier"],
  "parserOptions": {
    "project": "./tsconfig.json",
    "createDefaultProgram": true
  },
  "env": {
    "browser": true,
    "node": true,
    "es6": true
  },
  "ignorePatterns": ["node_modules/"],
  "extends": [
    "airbnb",
    "airbnb-typescript",
    "airbnb/hooks",
    "next/core-web-vitals",
    "plugin:@typescript-eslint/recommended",
    "plugin:prettier/recommended",
    "prettier"
  ],
  "rules": {
    "react/react-in-jsx-scope": "off",
    "react/jsx-props-no-spreading": 0,
    "@typescript-eslint/semi": "off",
    "react/jsx-filename-extension": ["warn", { "extensions": [".ts", ".tsx"] }],
    "no-useless-catch": "off"
  }
}
실행하기
실행 순서
prettier(코드스타일 자동정리) -> eslint(규칙검사) -> 코드 수정
1. prettier 실행
npx prettier --write pages

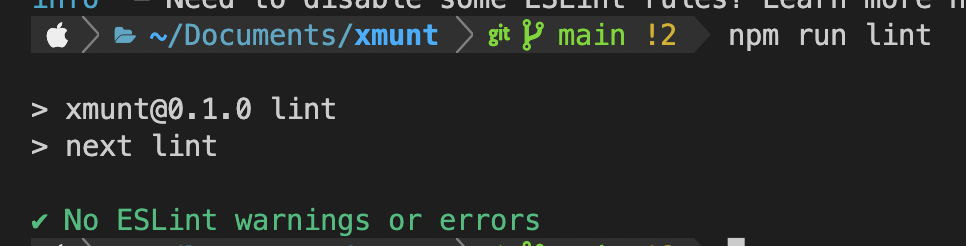
2. eslint 실행
npm run lint- 만약 밑처럼 에러가 난다면 구글링해서
.eslintrcrules에서 해당 속성을 끄거나 설정해주면 된다.
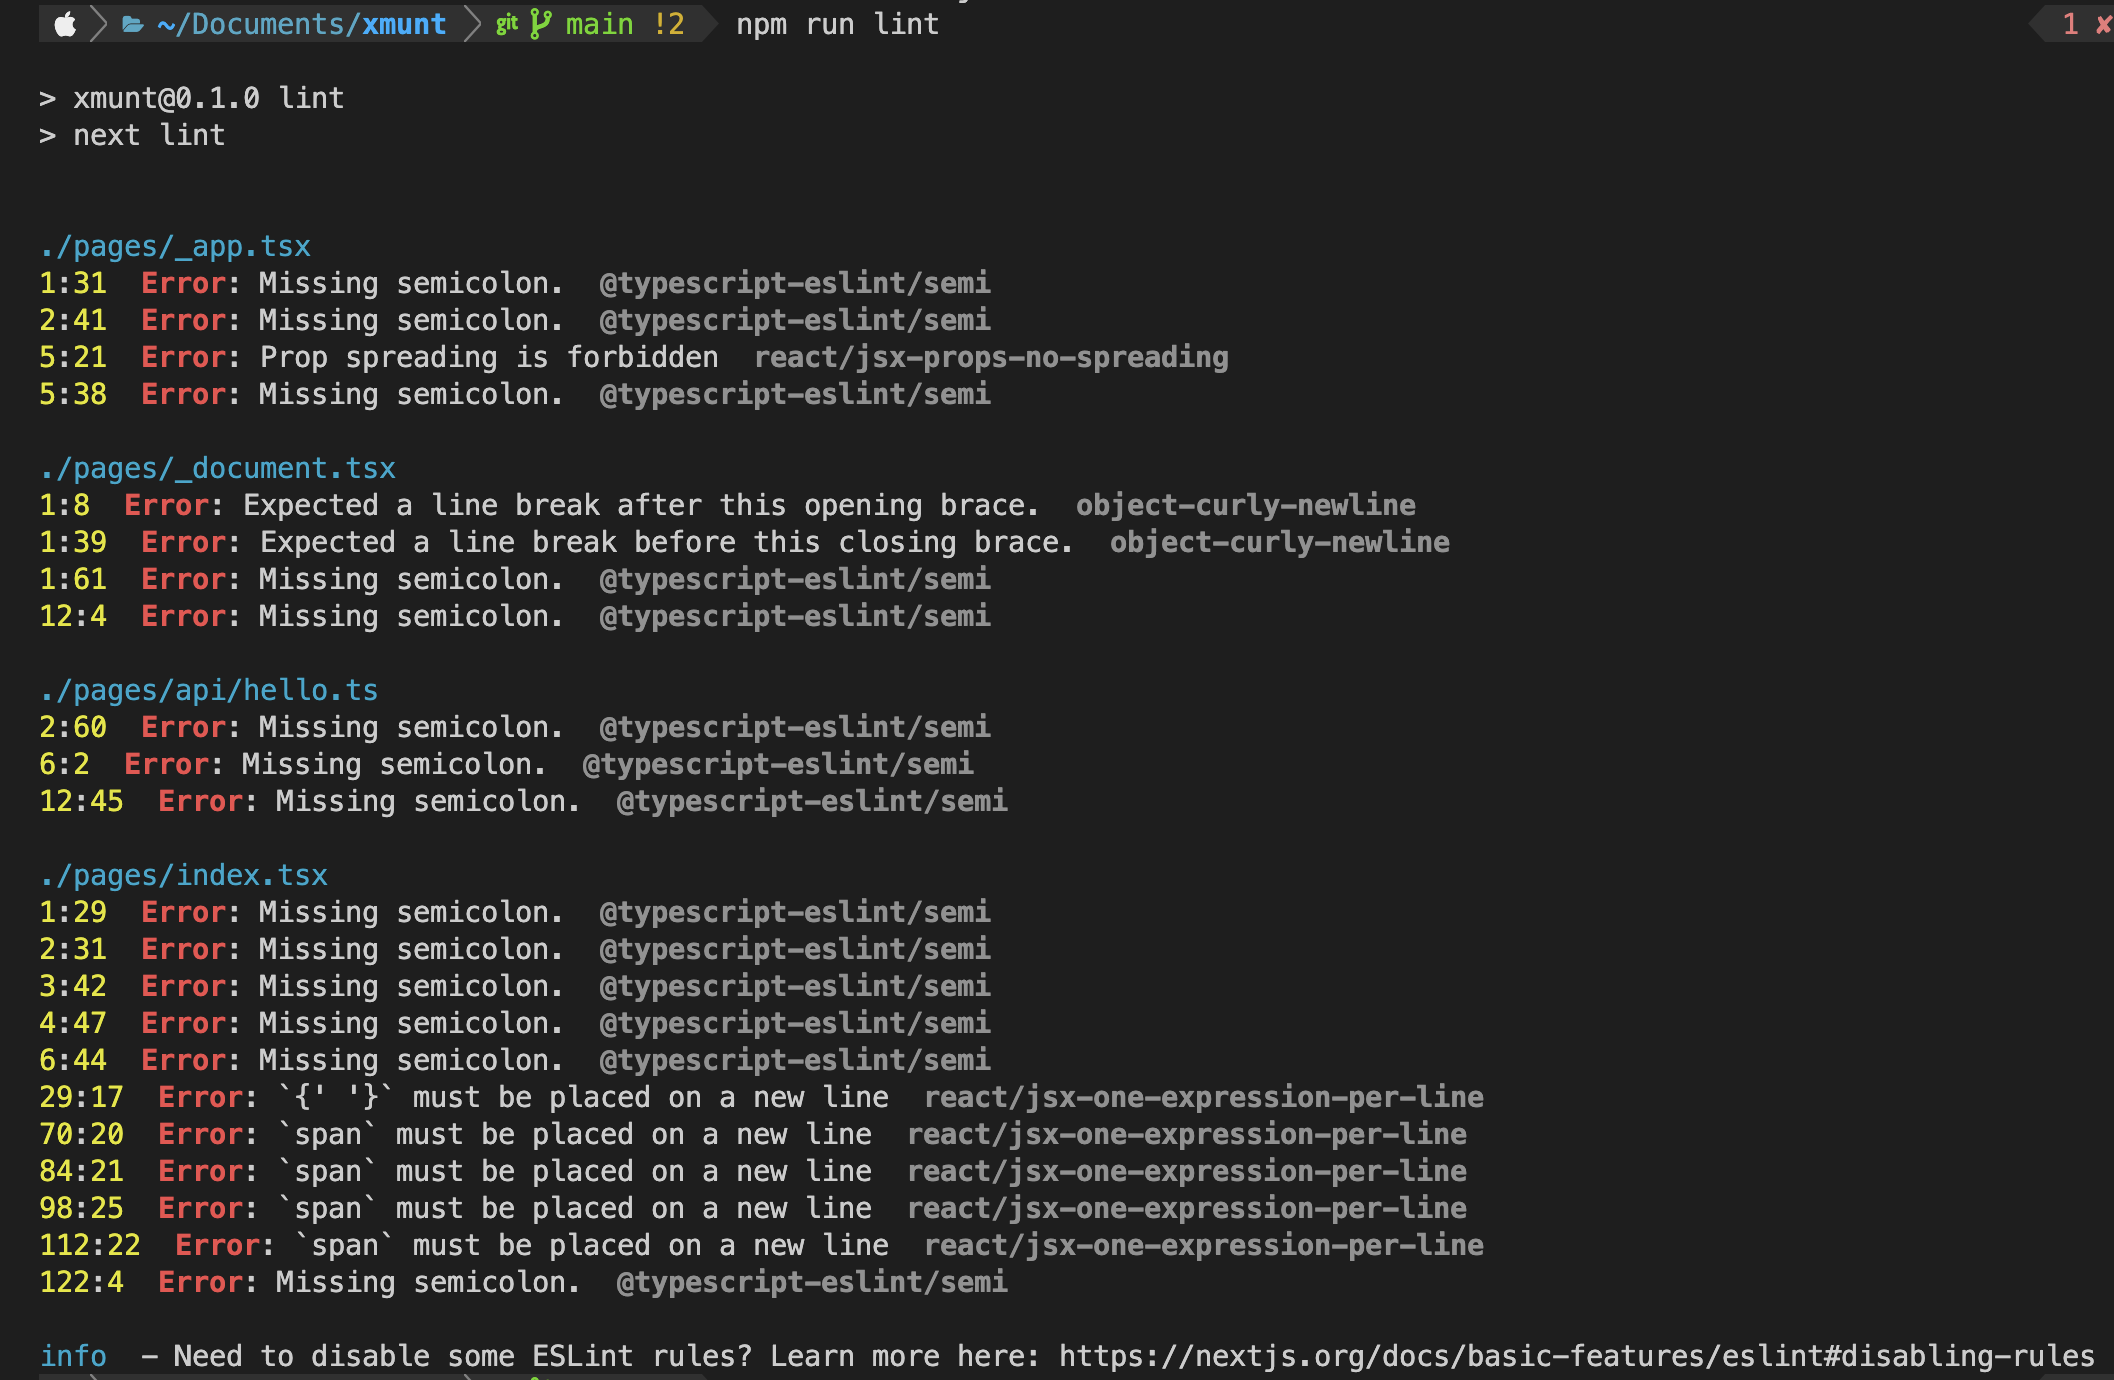
- (난 위에
.eslintrc.json에서 해당 속성들을 설정해뒀다)
3. husky와 lint-staged로 편리하게 사용하기
git commit할 때 변경된 파일만 eslint, prettier 자동 실행하기
1. husky
- git hook(커밋,푸시 등) 제어하는 npm 라이브러리
- git commit 시 eslint, prettier 실행 자동화하기
2. lint-staged
- staged된 파일만 특정 명령어 실행하는 도구
- commit 시 전체가 아니라 변경된 파일만 eslint, prettier 실행하기
설치하기
1. husky 권장설치 공식문서
npx husky-init && npm install       # npm
npx husky-init && yarn              # Yarn 1
yarn dlx husky-init --yarn2 && yarn # Yarn 2+
pnpm dlx husky-init && pnpm install # pnpm- 설치하면 package.json 수정됨, husky 설치됨, .husky/pre-commit 생성
- 설치 후 package.json에 추가된 부분
  "scripts": {
    //
    "prepare": "husky install"
  },
2. lint-staged 설치
npm i -D lint-staged3. package.json에 명령어 추가하기
변경된 js,jsx,ts,tsx 파일만 밑 명령어 실행하게 함
"lint-staged": {
    "*.{js,jsx,ts,tsx}": [
      "prettier --write",
      "eslint --fix"
    ]
  }
4. .husky/pre-commit 에 명령어 추가 (참고)
#!/usr/bin/env sh
. "$(dirname -- "$0")/_/husky.sh"

npx lint-staged # 추가
4. styled-components 설정
설치하기
npm i styled-components
npm i -D @types/styled-components  # ts 위한 설치
1. SSR 설정하기
- 첫 화면 렌더링 때도 css 적용하게 해주기
- Next.js에서 styled-components에 대한 SSR 추가 설정이 필요하다
🔺 옛날 방법 (Next.js 12버전 이하)
- babel 플러그인 설치
npm i -D babel-plugin-styled-components{ "presets": ["next/babel"], "plugins": [ [ "babel-plugin-styled-components", { "ssr": true, "fileName": true, "displayName": true, } ] ] }
✅ 최신방법 (Next.js 12 버전 이상)
next 버전 12부터 컴파일러에서 바벨 플러그인babel-plugin-styled-components을 포트하고 있음
https://nextjs.org/docs/advanced-features/compiler#styled-components
-
next.config.js에 추가 설정하기/** @type {import('next').NextConfig} */ const nextConfig = { reactStrictMode: true, compiler: { // 추가 styledComponents: true, // 추가 }, } module.exports = nextConfig
pages/_document.tsx수정
import Document, {
  Html,
  Head,
  Main,
  NextScript,
  DocumentContext,
  DocumentInitialProps,
} from 'next/document'
import { ServerStyleSheet } from 'styled-components'

class MyDocument extends Document {
  static async getInitialProps(
    ctx: DocumentContext,
  ): Promise<DocumentInitialProps> {
    const sheet = new ServerStyleSheet()
    const originalRenderPage = ctx.renderPage

    try {
      ctx.renderPage = () =>
        originalRenderPage({
          enhanceApp: (App) => (props) =>
            sheet.collectStyles(<App {...props} />),
        })
      const initialProps = await Document.getInitialProps(ctx)

      return {
        ...initialProps,
        styles: (
          <>
            {initialProps.styles}
            {sheet.getStyleElement()}
          </>
        ),
      }
    } finally {
      sheet.seal()
    }
  }

  render() {
    return (
      <Html>
        <Head />
        <body>
          <Main />
          <NextScript />
        </body>
      </Html>
    )
  }
}

export default MyDocument- ssr 적용 전 소스코드에 css 없음

- ssr 적용 후 소스코드에 css가 포함됨

2. GlobalStyle, Theme 적용하기
npm i styled-reset- 기본으로 적용되는 css 리셋하는 패키지 설치
npm i styled-reset1. GlobalStyle 전역스타일 설정
styles/GlobalStyle.ts생성 예시
import { createGlobalStyle } from 'styled-components'
import reset from 'styled-reset'

const GlobalStyle = createGlobalStyle`
  ${reset}
  * {
    box-sizing: border-box;
    padding: 0;
    margin: 0;
  }
  body {
    height: 100%;
  }
  button {
    cursor: pointer;
    background-color: inherit;
  }
  a {
    text-decoration:none;
    color:inherit;
  }
`
export default GlobalStyle
2. Theme 적용하기
- Theme 적용 방법 (여기선 일단 ThemeProvider 사용함)
- ThemeProvider 사용하기
- CSS Variable 사용하기
styles/theme.ts생성 예시
import { DefaultTheme } from 'styled-components'

export const lightTheme: DefaultTheme = {
  accent1: '#f5fbfc',
  accent2: '#f8c291',
  accent3: '#d35400',
  text: '#000000',
  bg1: '#ffffff',
}

export const darkTheme: DefaultTheme = {
  accent1: '#121212',
  accent2: '#bdc3c7',
  accent3: '#2c3e50',
  text: '#ffffff',
  bg1: '#121212',
}
3. pages/_app.tsx 추가
import type { AppProps } from 'next/app'
import { useState } from 'react'
import { RecoilRoot } from 'recoil'
import { ThemeProvider } from 'styled-components'
import GlobalStyle from '../styles/GlobalStyle'
import Layout from '../components/Layout'
import { darkTheme, lightTheme } from '../styles/theme'

export default function App({ Component, pageProps }: AppProps) {

  return (
    <RecoilRoot>
      <ThemeProvider theme={darkTheme}>
        <GlobalStyle />
          <Component {...pageProps} />
      </ThemeProvider>
    </RecoilRoot>
  )
}
4. styles/styled.d.ts 생성
테마 변수들의 타입을 선언하는 파일
import 'styled-components'

declare module 'styled-components' {
  export interface DefaultTheme {
    accent1: string
    accent2: string
    accent3: string
    text: string
    bg1: string
  }
}
참고
밑바닥부터 Next.js 개발 환경 구축하기 - All in One
https://kbwplace.tistory.com/151
eslint 옵션 설명 참고 - https://abangpa1ace.tistory.com/194
husky, lint-staged로 git commit 전에 eslint, prettier 체크하기
다크모드 참고

2개의 댓글

"lint-staged": {
"*.{js,jsx,ts,tsx}": [
"prettier --write",
"eslint --fix"
]
}
Next.js 환경에서는 이 부분 커맨드 next lint --fix 로 대체 가능하지 않나요?
좋은 포스팅 감사합니다! 설치하기 예시로 올려주신 script에 오타가 있네요. eslint-plugin-jsx-ally => eslint-plugin-jsx-a11y 로 수정되면 좋을 것 같습니다.