
Overview
- 노션과 클로드를 연결하여 컨트롤 할 수 있다.
Notion Server Key Feature
Page Operations
- 🔍 Search through your Notion workspace
- 📝 Create new pages with rich markdown content
- 📖 Read page content with clean formatting
- 🔄 Update existing pages
- 💬 Add and retrieve comments
- 🧱 Block-level operations (update, delete)
Enhanced Markdown Support
- Multiple heading levels (H1-H3)
- Code blocks with language support
- Interactive todo items with checkbox states
- Blockquotes with multi-line support
- Horizontal dividers
- Images with captions
- Nested bullet points
Database Operations
- Create and manage databases
- Add and update database items
- Query with filters and sorting
- Support for various property types:
- Title, Rich text, Number
- Select, Multi-select
- Date, Checkbox
- And more!
Setting
Git clone notion-server
https://github.com/v-3/notion-server
Installation
-
Clone the repository:
git clone https://github.com/v-3/notion-server.git cd notion-server -
Install dependencies:
npm install

# mac에서는
brew install node
- 여기까지 똑같이 진행. api 세팅 부분은 뒤에서 따로 진행 예정
- node.js 설치 필요
Get notion api

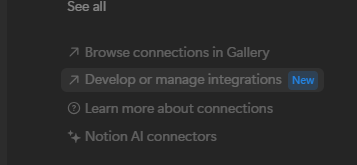
- Manage connections 들어가서 Develop or manage intergrations 클릭
- 이후 왼쪽의 intergration 항목 클릭하고 새 인터그레이션 만들어서 api 만들기
Install Claude desktop
- 설치 후 실행하고 좌측 상단 “도움말>개발자 모드 활성화” 클릭
- 재실행 후 다시 좌측 상단에 “설정>개발자>설정편집” 클릭
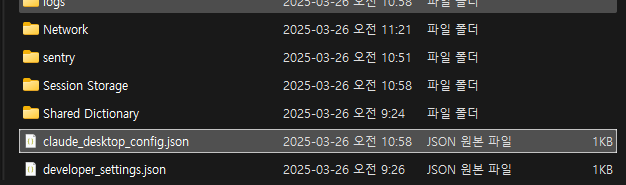
- claude_desktop_config.json 열어서 아래와 같이 편집
    {
        "mcpServers": {
            "notion": {
                "command": "node",
                "args": ["/absolute/path/to/notion-server/build/index.js"],
                "env": {
                    "NOTION_API_KEY": "your_notion_api_key_here"
                }
            }
        }
}- args부분에 위에서 설치한 notion-server 절대 경로 연결
- notion api 키 입력
- 완전 종료 후 실행(작업관리자로 종료 후 실행)
Set notion
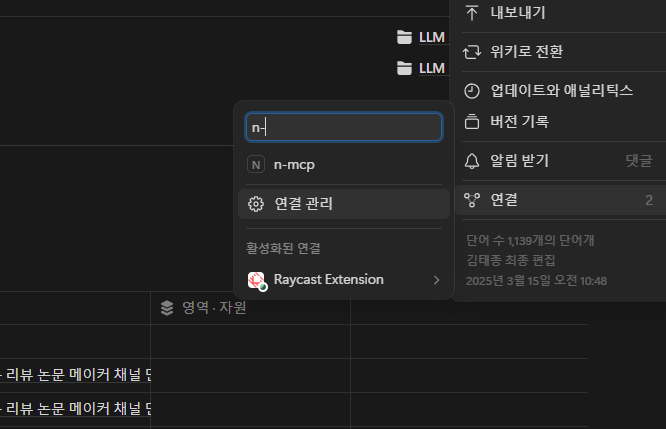
- 아까 만든 api를 연결해주면 해당 페이지를 claude가 조종할 수 있음

AI 엔지니어 김태종입니다. 추천시스템, 이상탐지, LLM에 관심이 있습니다. 블로그에는 공부한 기술, 논문 혹은 개인적인 경험을 올리고 있습니다.