이번 앱잼에서 이미지를 저장할 때에는 URL을 발급받고 버킷에 따로 저장을 하였습니다.
그래서 Signed URL 발급을 위한 POST API가 따로 존재했습니다.
이미지 저장을 위한 API 호출 순서는 다음과 같습니다.
- 버킷에 이미지 저장을 하기 위한 Signed URL 발급을 받기 위한 POST API를 호출합니다. 이미지는 UUID 키로 보내줍니다.
- 발급받은 Signed URL로, 이미지를 Data 형태로 PUT method로 보내줍니다.
- 그 후 이미지와 그외 저장할 내용들을 다시 POST합니다.
🛠 해결 과정
1. 이미지를 UUID 키로 바꾸기
- 처음에 UUID 키라고 해서 좀 어렵게 생각했던 것 같습니다. 이미지 자체를 변환하는 것이 아니라, 이미지를 저장하는 버킷에서 이미지를 구분할 수 있도록 하는 고유한 키값을 만들어서 보내주는 것이라고 생각하였습니다.
//WriteActiveQuestViewController
func saveQuest() {
	let uuidKey = UUID().uuidString
	ByeBooLogger.debug("UUID: \(uuidKey)")
	self.viewModel.action(.didTapCompleteButton(
		questID: self.questID,
		answer: self.answerText,
		emotionState: self.emotionState,
		image: self.image,
		imageKey: uuidKey)
	)
}
뷰컨트롤러에서, 뷰모델의 action 함수를 호출하는 부분에서 UUID를 생성해서 저장할 내용들을 파라미터로 넘겨주었습니다.
func postActiveQuest(
	questID: Int,
	answer: String,
	emotionState: String,
	image: Data,
	imageKey: String
) async throws {
	let url = try await makeSignedURL(imageKey: imageKey)

	try await putImage(signedURL: url, image: image)
	try await saveQuest(questID: questID, answer: answer, emotionState: emotionState, imageKey: imageKey)
}
Repository 안에 있는 하나의 함수에서, 세부 로직을 각각의 비동기 private 함수로 분리하여 순차적으로 호출하도록 구성했습니다.
2. Signed URL 발급 API 호출
private func makeSignedURL(imageKey: String) async throws -> String {
	let userID: Int = userDefaultService.load(key: .userID) ?? 1
	let signedURLRequestDTO = SignedURLRequestDTO(contentType: "image/jpeg", imageKey: imageKey)

	let result = try await network.request(
		QuestAPI.images(userID: userID, request: signedURLRequestDTO),
		decodingType: SignedURLResponseDTO.self
  )

	return result.signedUrl
}
UUID를 Request에 담아 Signed URL을 발급받는 POST API를 호출합니다.
3. Signed URL로 PUT 메서드 호출
 enum QuestAPI {
     case checkQuest(userID: Int, questID: Int)
     case recording(userID: Int, questID: Int, request: SaveQuestRequestDTO)
     case active(userID: Int, questID: Int, request: SaveQuestActiveRequestDTO)
  ....
 }
원래는 엔드포인트가 같은 api들끼리 enum을 나눠서 추상화 후 호출하는 방식으로 코드를 작성했었습니다.
     private func putImage(signedURL: String, image: Data) async throws {
          try await network.request(image: image, signedURL: signedURL)
      }
하지만 PUT 메서드를 보낼 때에는 Signed URL이 엔드포인트 그 자체가 되기 때문에 추상화하여 사용이 불가능했습니다.
그래서 따로 Network service에 request 함수를 더 만들어서, PUT 메소드용으로 사용했습니다.
/// 이미지 처리
func request(image: Data, signedURL: String) async throws {
return try await withCheckedThrowingContinuation { continuation in
AF.upload(
image,
to: signedURL,
method: .put,
headers: ["Content-Type": "image/jpeg"]
)
.validate()
.response { response in
ByeBooLogger.network(response)
if let error = response.error {
ByeBooLogger.error(error)
continuation.resume(throwing: ByeBooError.unknownError)
} else {
ByeBooLogger.debug("이미지 업로드 성공")
continuation.resume()
}
}
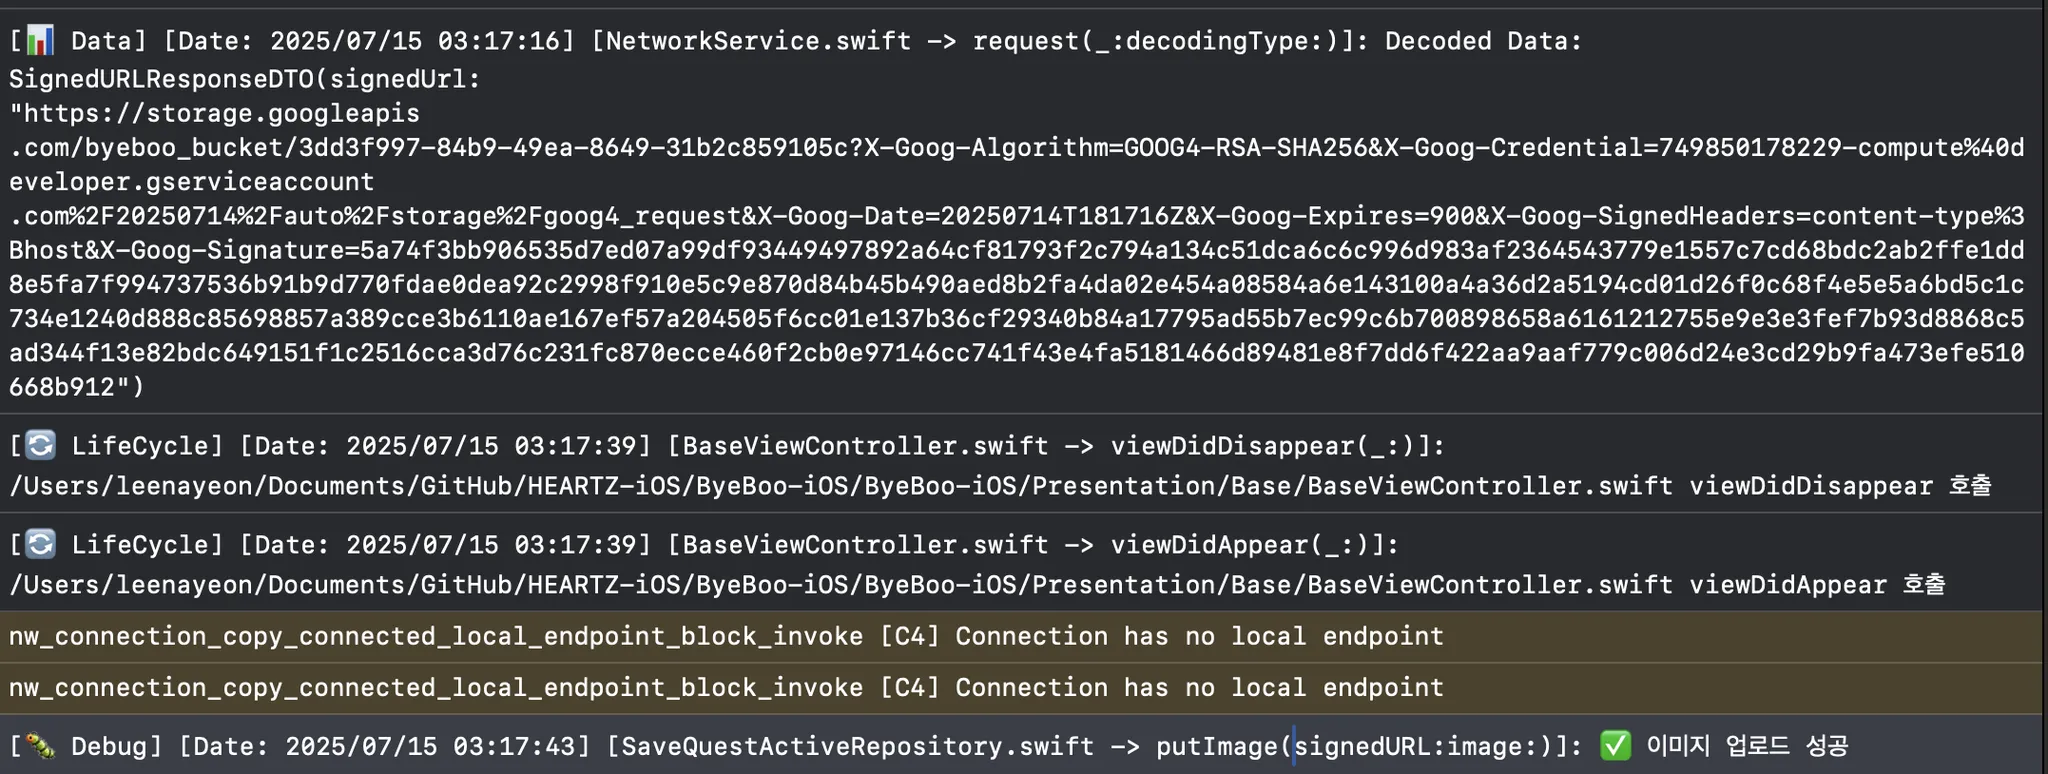
}이렇게 이미지를 보내게 되면, 버킷에 이미지가 성공적으로 저장됩니다.
4. 나머지 정보들 POST 하기
private func saveQuest(
questID: Int,
answer: String,
emotionState: String,
imageKey: String
) async throws {
let userID: Int = userDefaultService.load(key: .userID) ?? 1
let saveQuestActiveDTO = SaveQuestActiveRequestDTO(
imageKey: imageKey,
answer: answer,
questEmotionState: emotionState
)
let _ = try await network.request(
QuestAPI.active(userID: userID, questID: questID, request: saveQuestActiveDTO)
)
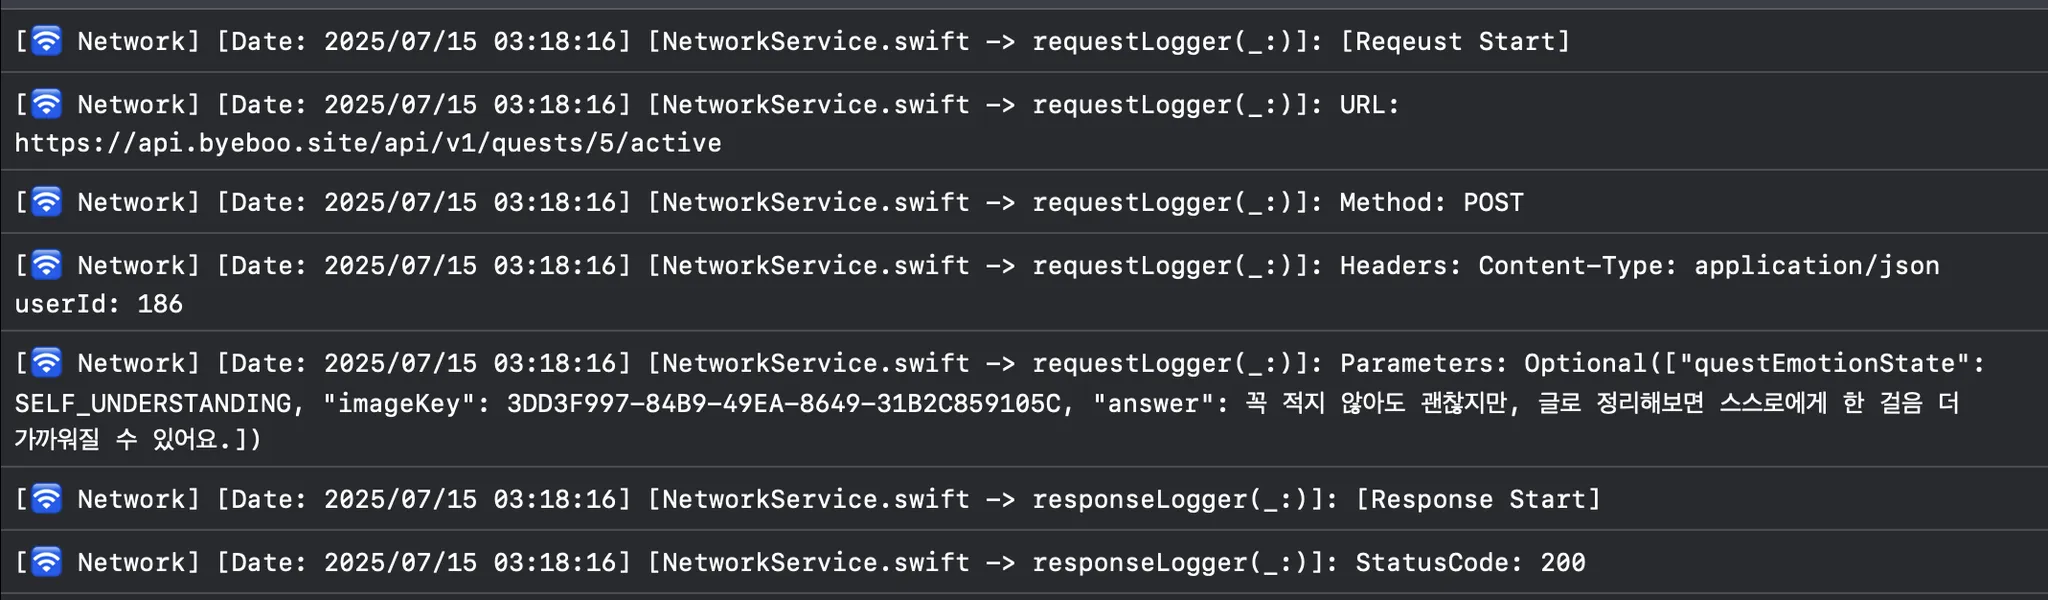
}처음에 만들었던 이미지 UUID 키를 다시 서버로 보내 나머지 정보들을 같이 POST 하면 성공적으로 이미지를 저장할 수 있게 됩니다.
결과


Studying Frontend 👩🏻💻