0. 들어가며
공식문서에서는 UICollectionView를
An object that manages an ordered collection of data items and presents them using customizable layouts.
라고 정의하고 있습니다. 정렬된 data item을 관리하고, 커스터미이징 가능한 레이아웃을 이용해서 아이템들을 화면에 출력하게 한다고 하는데요.
세로 스크롤만 가능한 UITableView와 다르게 UICollevctionView는 가로스크롤도 지원합니다.
이번 글에서는 티빙 홈화면 예제를 통해 UICollectionView의 사용에 대해 정리해보겠습니다.
1. 컬렉션 뷰 객체 생성하기
먼저 컬렉션 뷰 객체를 만들어줍니다.
private let todayRankingCollectionView = UICollectionView(frame: .zero, collectionViewLayout: UICollectionViewFlowLayout())뒤에 뭐가 많이 들어가죠..? 이게 무엇이냐면

UICollectionView를 초기화할 때 필요한 것들인데요.
UITableView와 다르게 UICollectionView를 초기화할 때에는 반드시 layout이 필요합니다. UICollectionViewLayout은 컬렉션 뷰 내의 콘텐츠들이 어떻게 배치될지를 관리합니다.
그래서 UICollectionViewLayout도 지정해주려고 합니다. layout으로는 애플에서 기본적으로 제공하는 flowLayout을 사용하였습니다.
 private func todayRankingSetFlowLayout(){
        let flowLayout = UICollectionViewFlowLayout()

        let screenWidth = UIScreen.main.bounds.width
        let cellHeight: CGFloat = 146
        let visibleItems: CGFloat = 2.3
        let spacing: CGFloat = 12
        let totalSpacing = spacing * (visibleItems - 1)
        let cellWidth = (screenWidth - totalSpacing) / visibleItems

        flowLayout.itemSize = CGSize(width: cellWidth, height: cellHeight)
        flowLayout.scrollDirection = .horizontal
        flowLayout.collectionView?.isScrollEnabled = true
        flowLayout.minimumLineSpacing = spacing
        self.todayRankingCollectionView.setCollectionViewLayout(flowLayout, animated: false)
}- scrollDirection : 스크롤의 방향입니다. 가로방향으로 스크롤할 것이기 때문에 horizontal로 설정했습니다.
- minimumLineSpacing : 셀 사이의 간격을 spacing(12)로 설정했습니다.
- cellWidth를 계산하기 위해 (전체 스크린 width - 총 spacing) / 화면에 보일 아이템 개수 계산식을 사용했습니다.
2. 컬렉션 뷰 셀 만들기
1) 컬렉션 뷰 cell 파일 생성
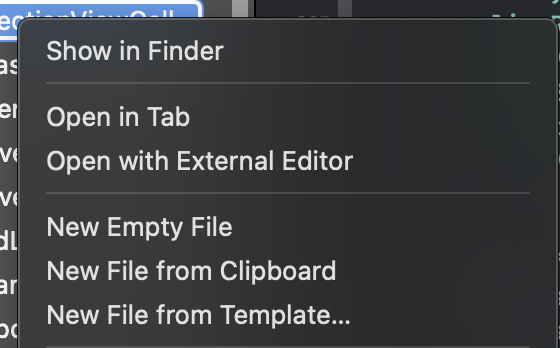 cell을 만들 때에는, New File From Template을 통해 파일을 생성해줍니다.
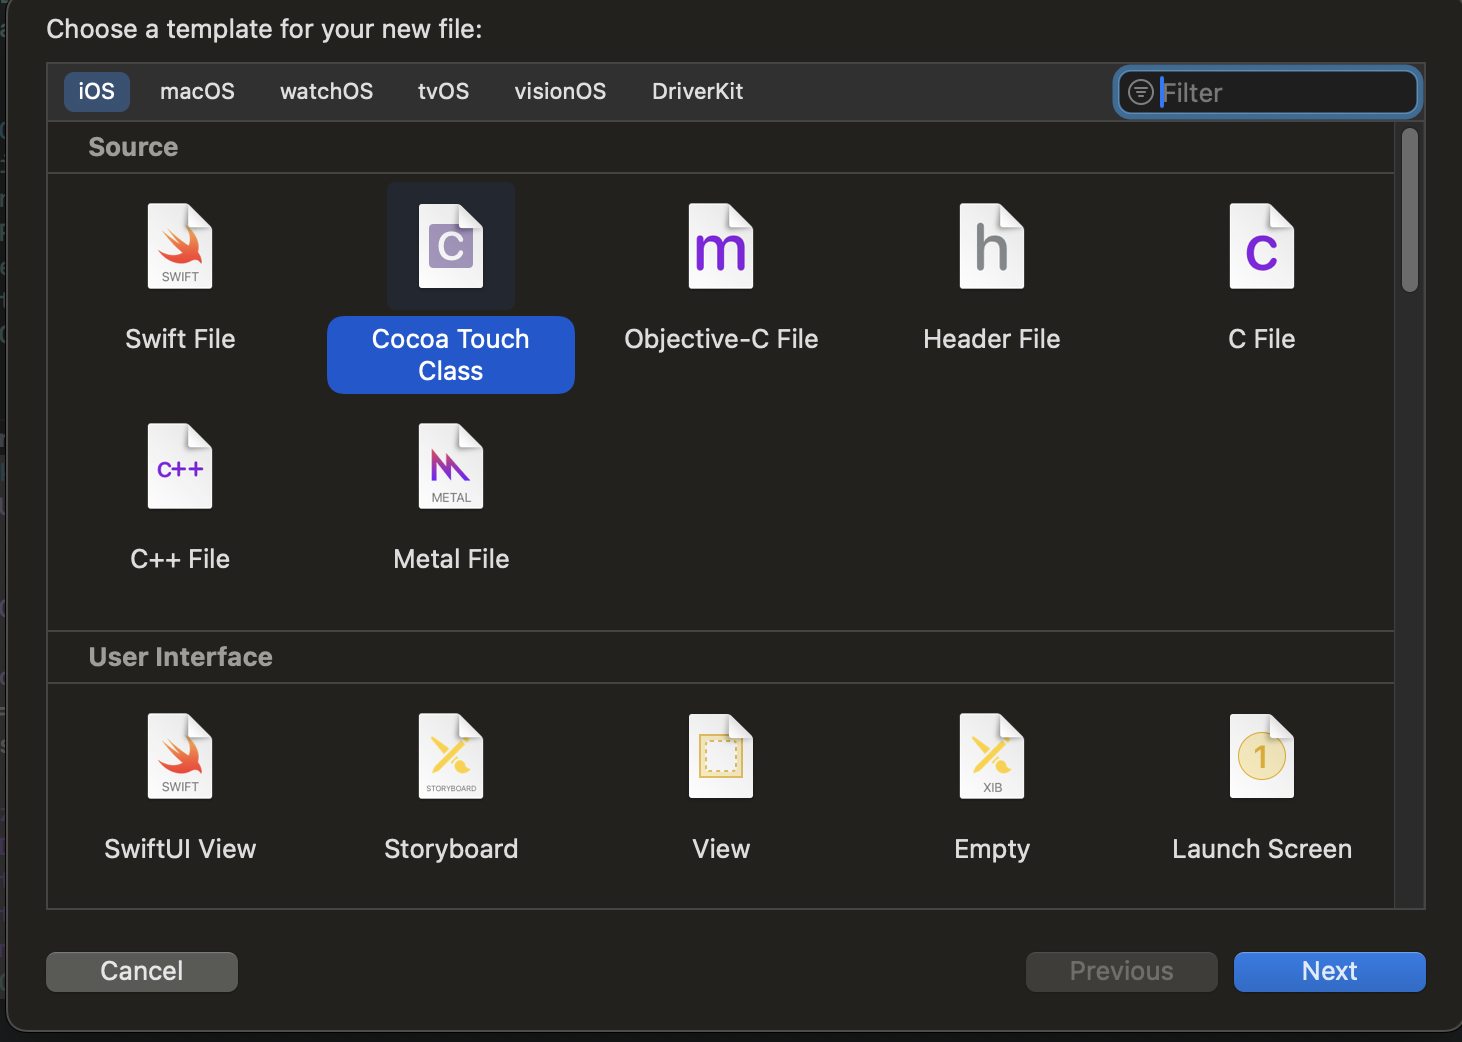 Cocoa Touch Class를 선택 후
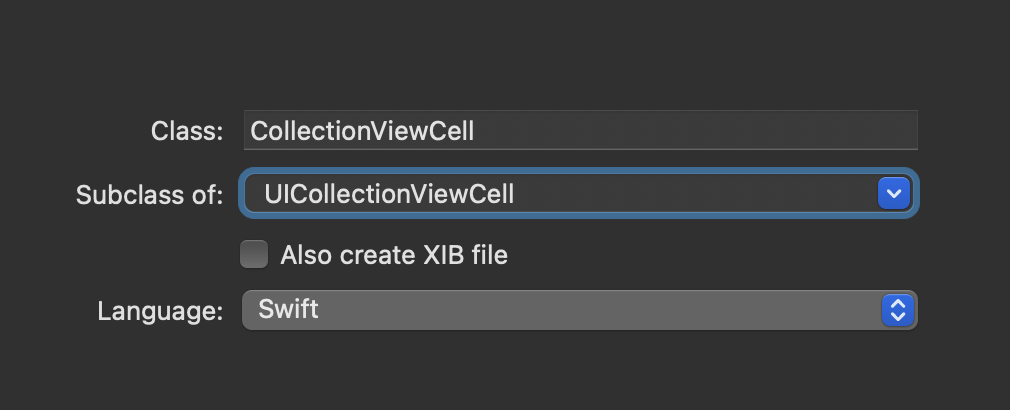
subclass에서 UICollectionViewCell을 선택 후 만들어줍니다.
2) 식별자 생성하기
static let identifier: String = "RankingCollectionViewCell"컬렉션뷰가 사용되는 뷰컨트롤러에 이 cell파일을 등록하기 위해서, cell 파일 내에 식별자를 만들어줍니다.
3) cell item의 AutoLayout 잡기
 cell의 layout을 잡아줍니다. snapkit을 이용해서 잡아주었습니다.
4) data bind 함수 만들기
extension RankingCollectionViewCell {
    func dataBind(_ itemData: MovieRankingModel){
        rankingNumber.text = String(itemData.ranking)
        movieImage.image = itemData.movieImg
    }
}
데이터 바인딩 함수를 만들어줍니다. 여기서는 더미데이터를 사용했기 때문에 Model 파일에서 만든 데이터를 cell 내의 UIComponent와 바인딩했습니다.
3. cell과 view controller 연결하기
다시 컬렉션뷰를 만든 뷰컨으로 돌아와서, 아까 만든 collection view cell과 뷰컨을 연결해주겠습니다.
1) register 함수 작성
아까 cell 파일에서 식별자를 만들어주었습니다. 이 식별자를 이용해 어떤 collection view에 어떤 cell을 사용할지 등록하는 과정을 거쳐야 합니다.
 private func registerTodayRankingCell(){
        todayRankingCollectionView.register(RankingCollectionViewCell.self, forCellWithReuseIdentifier: RankingCollectionViewCell.identifier)
    }
2) delegate, dataSource 채택하기
todayRankingCollectionView.delegate = self
todayRankingCollectionView.dataSource = self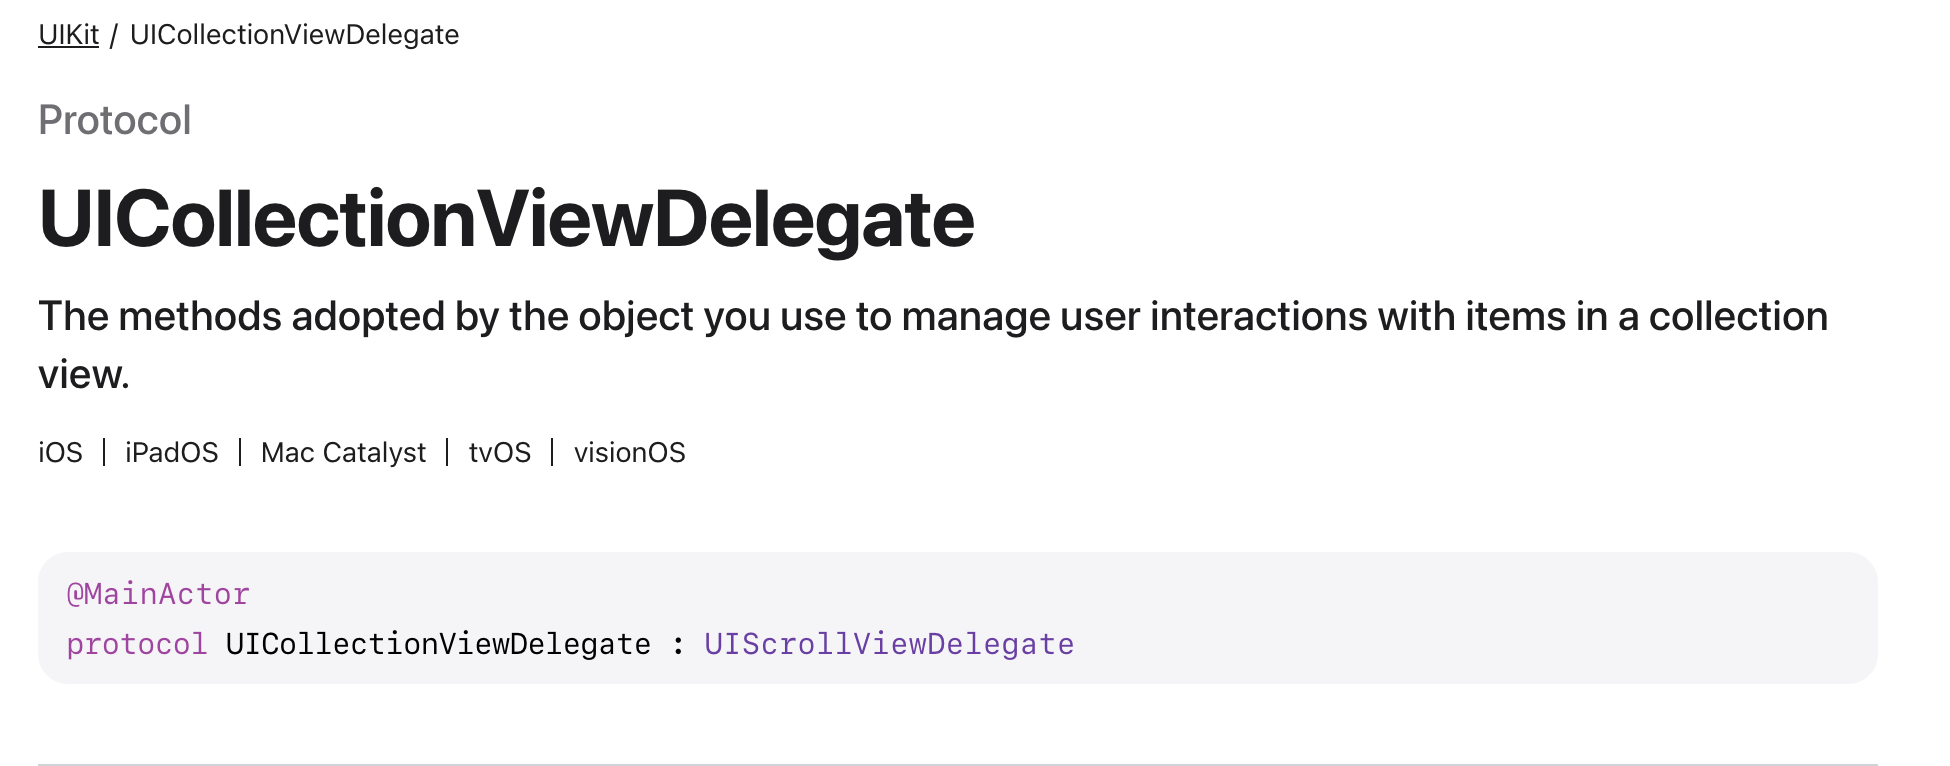
UICollectionViewDelegate는 컬렉션 뷰 내에서 아이템과 사용자간 인터랙션을 관리하는 프로토콜입니다. 스크롤되었을 때 등의 작업을 이 프로토콜에서 합니다.
UICollectionViewDataSource는 컬렉션 뷰 내에서 데이터와 셀을 관리하는 프로토콜입니다. 총 보여지는 셀은 몇개인지, 셀이 선택되었을지 등의 작업을 이 프로토콜이 합니다.
우리는 셀을 원하는대로 동작시키기 위해 이 프로토콜들을 채택하여 이곳에 역할을 위임해주려고 합니다.
3) delegate, dataSource 함수 구현하기
dataSource프로토콜에는 필수적으로 구현해야하는 메소드가 존재합니다. cellForItemAt, numberOfItemInSection 이라는 메소드인데요.
extension HomeTableViewCell : UICollectionViewDataSource {
    func collectionView(_ collectionView: UICollectionView, numberOfItemsInSection section: Int) -> Int {
        todayRankingCollectionView :
            return movieRankingList.count
    }

    func collectionView(_ collectionView: UICollectionView, cellForItemAt indexPath: IndexPath) -> UICollectionViewCell {
	 	guard let cell = collectionView.dequeueReusableCell(withReuseIdentifier: RankingCollectionViewCell.identifier, for: indexPath) as? RankingCollectionViewCell else {
                return RankingCollectionViewCell()
        }

       cell.dataBind(movieRankingList[indexPath.item])
       return cell
}- numberOfItemsInSection : 이 섹션 (컬렉션 뷰)에서 아이템을 총 몇개 표시할 지에 대한 메소드입니다. 여기서는 dummy로 가져온 데이터의 count만큼을 리턴하였습니다.
- cellForItemAt : 화면에 셀이 보여야할 때 이 함수가 호출됩니다.
- 이때, dequeueReusableCell로, 재사용 큐에서 셀을 꺼내고 셀이 존재한다면-
indexPath로 아이템을 구분해서 데이터바인딩을 해주고 셀을 리턴해줍니다.
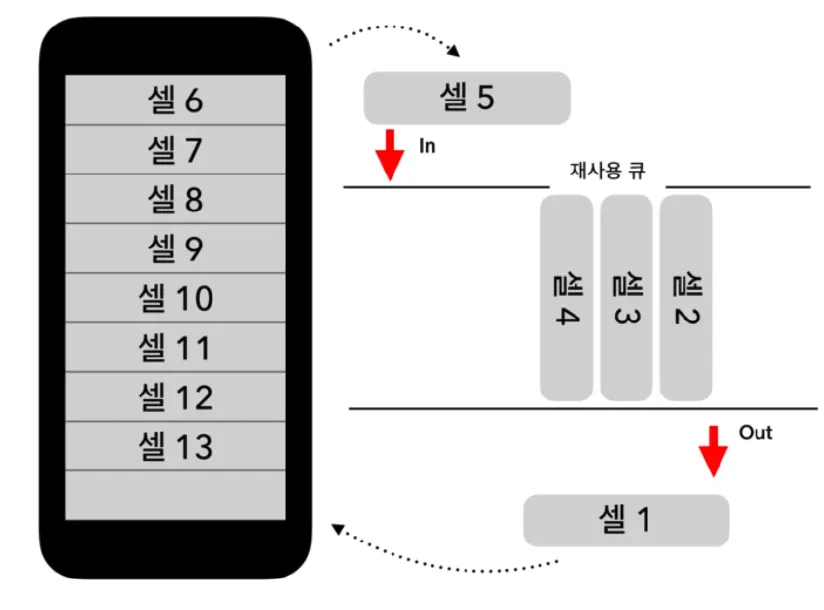 - 메모리 낭비를 줄이기 위해 재사용 큐를 사용합니다. 스크린 밖으로 셀이 나간다면 재사용큐에 다시 셀이 들어가고, 화면에 보이게 된다면 다시 재사용큐에서 셀이 나와 화면에 보이게 됩니다.
-

Collection View을 쓰면서 함수 하나하나 뜯어보셨네요..
저도 쓰면서 궁금한 점 많았는데 정리 깔끔하게 잘하신 것 같아요!
잘보고갑니다!!