안녕하세요. INCHEOL'S 입니다. 오늘은 아이디, 패스워드 기반의 인증을 담당하고 있는 UsernamePasswordAuthenticationFilter 대해 알아보겠습니다.
목차
1. UsernamePasswordAuthenticationFilter
2. AuthenticationManager
3. AuthenticationProvider
1. UsernamePasswordAuthenticationFilter
이 필터는 아이디, 패스워드 기반의 인증을 담당하고 있는 필터입니다. 기본적으로 Spring Security에서 이러한 필터를 제공하며 아이디, 패스워드를 Form 데이터로 받아서 처리하는 녀석입니다.
사실 이 필터가 어떤 책임을 수행하는지도 중요하지만, 이 필터가 상속하고 있는 AbstractAuthenticationProcessingFilter를 기점으로 Spring Security에서 제공하고 있는 확장 및 변경 포인트를 이해하는 것이 중요합니다.
그래서 저는 중요한 두가지 포인트로서 AuthenticationManager, AuthenticationProvider를 소개드릴까 합니다.
하지만 UsernamePasswordAuthenticationFilter가 무슨일을 하는지는 안짚고 넘어갈 수 없으니 폼 로그인 일부를 변경해보고 실제로 로그인이 되는지 그리고 로그인 한 유저의 정보를 가져오는 api를 작성하고 테스트 해보겠습니다.
저는 아래와 같이 Security Config를 작성해보았습니다.
@Configuration
public class SecurityConfig extends WebSecurityConfigurerAdapter {


    @Override
    protected void configure(HttpSecurity http) throws Exception {
        http.mvcMatcher("/**") // 모든 요청에 대해 필터체인을 만든다.
                .formLogin()
                    .usernameParameter("myUsername") // 폼 ID 파라미터를 변경
                    .passwordParameter("myPassword") // 폼 PW 파라미터를 변경
                    .successHandler(new MyAuthenticationSuccessHandler()) // SuccessHandler를 커스텀
                    .failureHandler(new MyAuthenticationFailureHandler()) // FailureHandler를 커스텀
                .and()
                    .authorizeRequests() // 인가를 결정할 때
                        .mvcMatchers("/**").hasRole("USER") // 모든 요청에 대해 USER 롤이 있는지 확인한다.
                ;
    }

    @Override // 인메모리 기반의 인증을 위해 ID/PW를 INCHEOL/incheol로 만들어 저장하였고 Role을 USER로 만듬.
    protected void configure(AuthenticationManagerBuilder auth) throws Exception {
        auth.inMemoryAuthentication()
                .withUser("INCHEOL")
                .password(passwordEncoder().encode("incheol"))
                .roles("USER")
                ;
    }

    @Bean // 패스워드 암호화를 위해 필요하여 Bean으로 선언함.
    public PasswordEncoder passwordEncoder() {
        return new BCryptPasswordEncoder();
    }

}
AuthenticationSuccessHandler와 AuthenticationFailureHandler는 간단히 문자열만 출력하도록 만들었습니다. 그리고 간단한 RestController를 만들어 유저의 정보를 리턴하는 메서드를 만들었습니다.
public class MyAuthenticationSuccessHandler implements AuthenticationSuccessHandler {

    @Override
    public void onAuthenticationSuccess(HttpServletRequest request, HttpServletResponse response, Authentication authentication) throws IOException, ServletException {
        System.out.println("onAuthenticationSuccess!!!");
    }

}
public class MyAuthenticationFailureHandler implements AuthenticationFailureHandler {
@Override
public void onAuthenticationFailure(HttpServletRequest request, HttpServletResponse response, AuthenticationException exception) throws IOException, ServletException {
System.out.println("onAuthenticationFailure!!!");
}
}
@RestController
@RequestMapping("/api/user")
public class UserController {

    @GetMapping("/info")
    public Object getUserInfo() {
        return SecurityContextHolder.getContext().getAuthentication();
    }

}
실제로 로그인이 잘 되는지 확인하고 콘솔에 onAuthenticationSuccess, onAuthenticationFailure 문자열이 잘 뜨는지 확인해 보겠습니다.
저는 Spring Security에서 기본으로 제공하는 로그인 페이지를 사용했습니다.
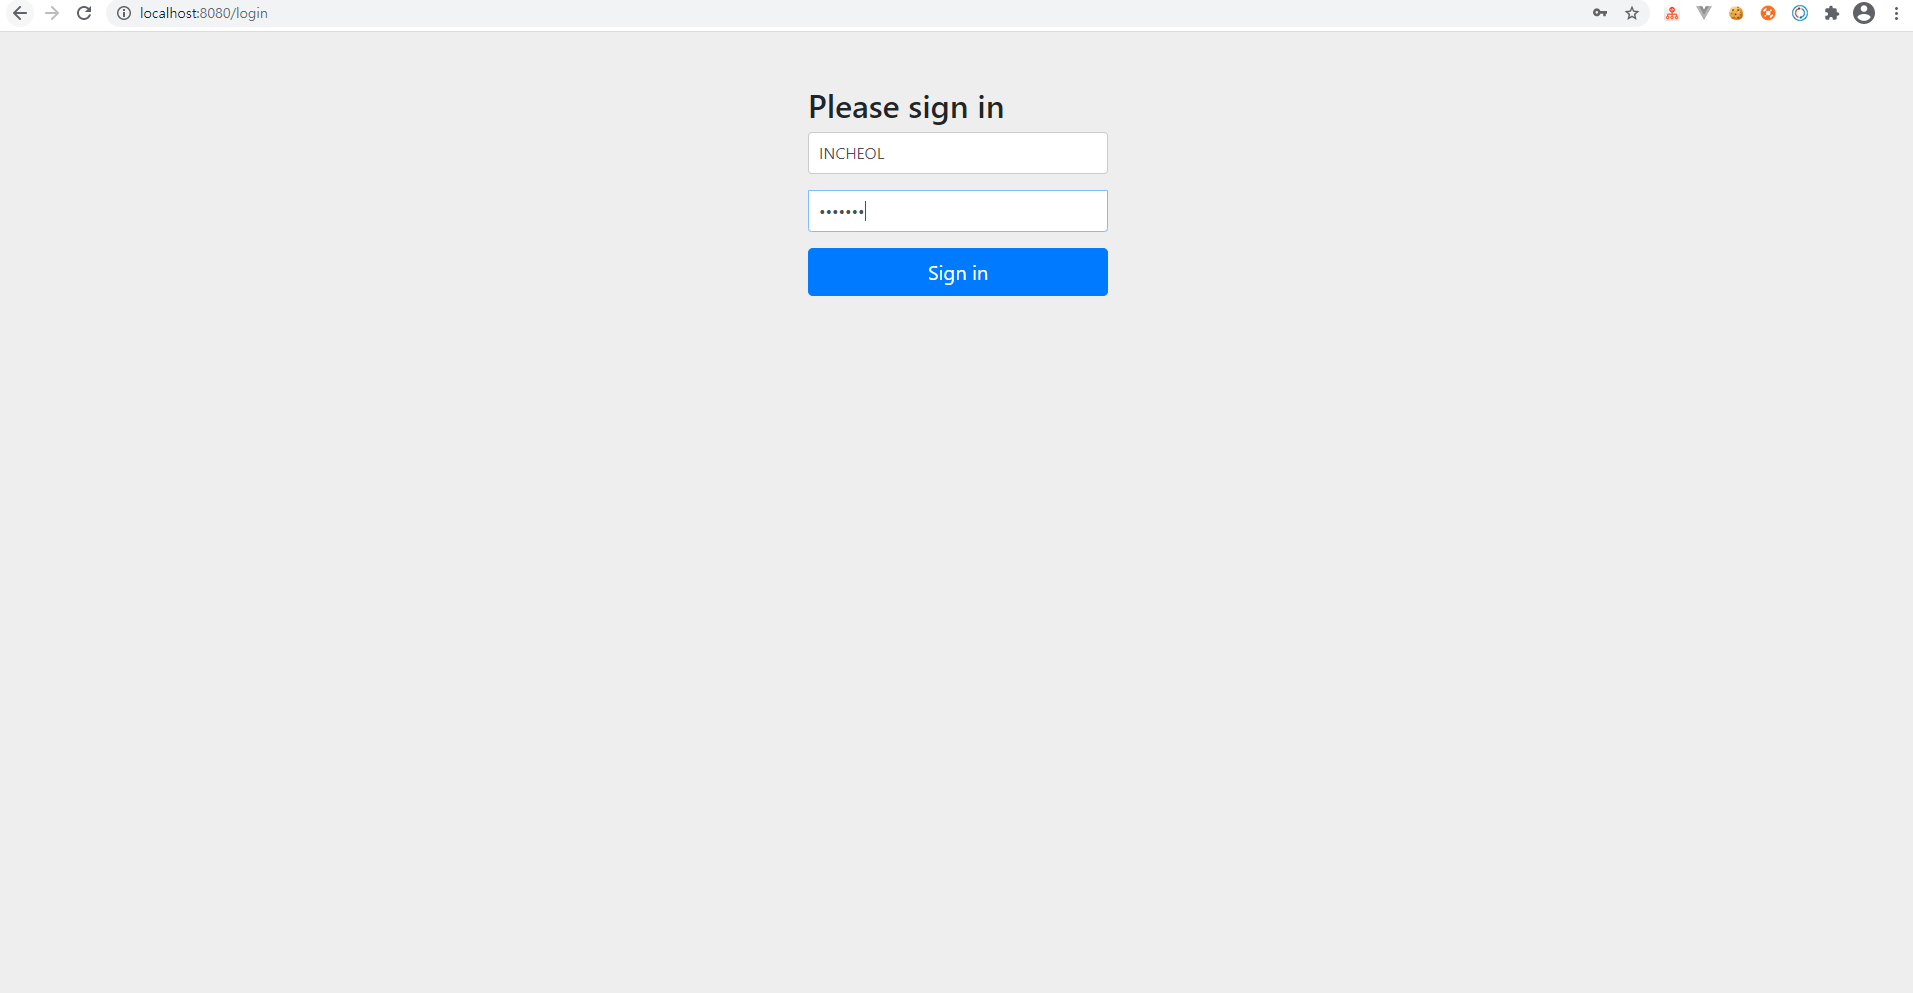
로그인 페이지에서 정상적인 아이디와 패스워드를 입력하여 로그인을 시도하면
커스텀했던 AuthenticationSuccessHandler를 통해 콘솔에 문자열이 찍히는 것을 확인 할 수 있습니다.

그리고 해당 브라우저에서 바로 유저 정보를 제가 작성해놓은 컨트롤러로 요청하게 된다면 인증에 성공했던 유저의 정보를 리턴해주는 것을 확인할 수 있습니다. 이로써 인증에 성공하여 서버에 특정한 요청을 받아 올 수 있는 것을 확인하였습니다.

그렇다면 이러한 인증 과정이 UsernamePasswordAuthentication 필터에서 이루어지는데 여러 책임들을 어떤 방식으로 Spring Security에서는 만들어 놓았는지 알아보겠습니다.
2. AuthenticationManager
먼저, 인증에 관련한 책임을 수행하는 AuthenticationManager입니다. 이 녀석의 인터페이스를 보면 아주 간단한게 Authentication authentication(Authentication authentication)이라는 메시지만 정의하고 있습니다.
public interface AuthenticationManager {

	Authentication authenticate(Authentication authentication) throws AuthenticationException;

}
Spring Security 에서는 가장 일반적인 구현체로 ProviderManager라는 제공하고 있으며 이 녀석은 AuthenticationProvider와 협력하여 인증을 진행합니다. 실제 인증에 대한 책임을 다시 AuthenticationProvider로 위임합니다.
이와 관련하여 하나의 그림을 더 보시겠습니다.
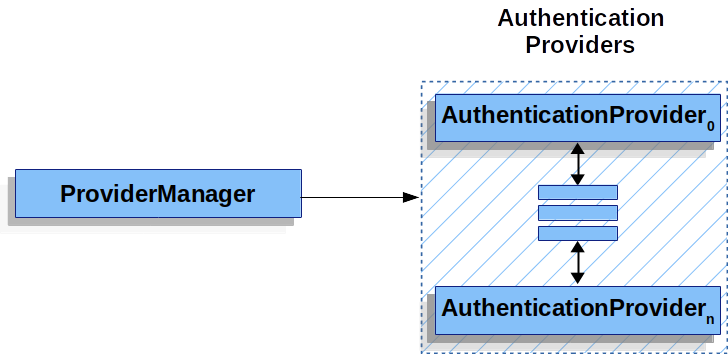
ProviderManager(AuthenticationManager구현체)는 여러개의 AuthenticationProvider와 협력합니다. 인증의 방식에 따라 수행되는 AuthenticationProvider가 선택되며 인증 수행 방식을 AuthenticationManager의 authenticate 호출할 때 Authentication의 구현체를 달리함으로써 선택할 수 있습니다.
예를 들어 우리가 위에서 작성했던 아이디, 패스워드 기반의 인증을 하기 위해 Spring Security는 UsernamePasswordAuthentication객체를 넘겨주며 ProviderManager에서는 이 객체를 처리할 수 있는 AuthenticationProvider를 찾아 인증 그 자체에 대한 책임을 다시 위임합니다. (여기서 AuthenticationProvider는 DaoAuthenticationProvider구현체입니다.)
만약 우리가 다른 인증 방식을 사용하고 싶다면 xxxAuthentication객체를 넘겨주고 그것을 처리할 수 있는 AuthenticationProvider만 등록된다면 변경 된 인증 방식이 적용될 수 있습니다.
즉, 우리는 인증 방식을 바꾸더라도 Security Filter 전체 또는 많은 곳을 수정 할 필요 없이 이 부분만 변경 하더라도 잘 동작할 것이라는 예상을 할 수 있습니다.
이와 관련된 ProviderManager의 일부 코드 입니다.

이처럼 Spring Security는 인증 방식 변경에 대한 영향도를 최소화 할 수 있도록 변경 포인트 지점을 만들어주어 제공하고 있습니다. (for문으로 AuthenticationProvider 리스트를 순회하면서 처리 능력을 가진 녀석을 찾아 해당 객체로 인증 책임을 위임하는 것을 볼 수 있네요.)
3. AuthenticationProvider
위에서 설명드렸지만, 여러개의 AuthenticationProvider들이 ProviderManager에 주입됩니다. 각각의 AuthenticationProvider들은 Authentication의 특정 타입에 대해 인증을 수행할 수 있습니다.
이와 관련하여 AuthenticationProvider의 인터페이스를 보시면 2가지의 메서드를 제공합니다.
실제 인증을 시도하는 authentcate메서드와 프로바이더가 특정 Authencation 객체를 처리할 수 있는지에 대한 여부를 리턴하는 supports 메서드를 볼 수 있습니다.
public interface AuthenticationProvider {

	Authentication authenticate(Authentication authentication) throws AuthenticationException;

	boolean supports(Class<?> authentication);

}
예시로, 이전에 우리가 아이디 패스워드 방식의 인증 방식을 사용했었는데, 이 녀석을 처리하는 DaoAuthenticationProvider를 확인하고 마무리하겠습니다.
해당 클래스의 코드 일부를 가져왔습니다.
	@Override
	public Authentication authenticate(Authentication authentication) throws AuthenticationException {
		Assert.isInstanceOf(UsernamePasswordAuthenticationToken.class, authentication,
				() -> this.messages.getMessage("AbstractUserDetailsAuthenticationProvider.onlySupports",
						"Only UsernamePasswordAuthenticationToken is supported"));
		String username = determineUsername(authentication);
		boolean cacheWasUsed = true;
		UserDetails user = this.userCache.getUserFromCache(username);
		if (user == null) {
			cacheWasUsed = false;
			try {
				user = retrieveUser(username, (UsernamePasswordAuthenticationToken) authentication);
			}
			catch (UsernameNotFoundException ex) {
				this.logger.debug("Failed to find user '" + username + "'");
				if (!this.hideUserNotFoundExceptions) {
					throw ex;
				}
				throw new BadCredentialsException(this.messages
						.getMessage("AbstractUserDetailsAuthenticationProvider.badCredentials", "Bad credentials"));
			}
			Assert.notNull(user, "retrieveUser returned null - a violation of the interface contract");
		}
		try {
			this.preAuthenticationChecks.check(user);
			additionalAuthenticationChecks(user, (UsernamePasswordAuthenticationToken) authentication);
		}
		catch (AuthenticationException ex) {
			if (!cacheWasUsed) {
				throw ex;
			}
			// There was a problem, so try again after checking
			// we're using latest data (i.e. not from the cache)
			cacheWasUsed = false;
			user = retrieveUser(username, (UsernamePasswordAuthenticationToken) authentication);
			this.preAuthenticationChecks.check(user);
			additionalAuthenticationChecks(user, (UsernamePasswordAuthenticationToken) authentication);
		}
		this.postAuthenticationChecks.check(user);
		if (!cacheWasUsed) {
			this.userCache.putUserInCache(user);
		}
		Object principalToReturn = user;
		if (this.forcePrincipalAsString) {
			principalToReturn = user.getUsername();
		}
		return createSuccessAuthentication(principalToReturn, authentication, user);
	}

    	@Override
	protected final UserDetails retrieveUser(String username, UsernamePasswordAuthenticationToken authentication)
			throws AuthenticationException {
		prepareTimingAttackProtection();
		try {
			UserDetails loadedUser = this.getUserDetailsService().loadUserByUsername(username);
			if (loadedUser == null) {
				throw new InternalAuthenticationServiceException(
						"UserDetailsService returned null, which is an interface contract violation");
			}
			return loadedUser;
		}
		catch (UsernameNotFoundException ex) {
			mitigateAgainstTimingAttack(authentication);
			throw ex;
		}
		catch (InternalAuthenticationServiceException ex) {
			throw ex;
		}
		catch (Exception ex) {
			throw new InternalAuthenticationServiceException(ex.getMessage(), ex);
		}
	}

    	@Override
	public boolean supports(Class<?> authentication) {
		return (UsernamePasswordAuthenticationToken.class.isAssignableFrom(authentication));
	}
먼저 가장 아래쪽의 supports메서드를 보시면 UsernamePasswordAuthenticationToken 객체의 인증을 지원하도록 되어있는것을 확인 할 수 있습니다.
또한, authenticate 메서드 안에서는 UsernamePasswordAuthenticationToken 객체로 인증을 요청받았으니 해당 객체의 유저 ID, Password 정보와 우리가 갖고있는 유저의 ID, Password 정보를 비교하여 인증 성공 여부를 판단합니다.
여기서는 retrieveUser를 통해 레파지토리에서 유저의 정보를 가져옵니다.
retrieveUser안에서는 UserDetailsService라는 인터페이스를 사용하는데, 이 부분에서 우리는 유저의 정보를 가져오는 방식을 마음대로 구현할 수 있습니다. UserDetailsService 역시 변경 가능 포인트입니다.
이전 예제에서는 인메모리 방식으로 유저를 저장하여 사용하도록 설정했기 때문에 Spring Security에서 기본적으로 제공하는 InMemoryUserDetailsManager를 사용하였습니다.
보통은 데이터베이스에 저장된 유저를 꺼내오기 위해 UserDetailsService를 구현하여 사용하며 해당 구현 객체를 Bean으로만 만든다면 DaoAuthenticationProvider에 주입되도록 설정됩니다.
다음 시간에는 UserDetailsService를 간략하게 구현하여 사용하여 로그인 처리를 해보겠습니다.
