UIAlertController
- 사용자에게 경고(알림) 메시지를 표시하는 객체
종류
.alert.actionSheet
사용법
- 먼저 AlertController 만든다
- 이때
title,message,preferredStyle를 설정할 수 있다- title: 제목
- message: 경고(알림) 문구 또는 내용
- preferredStyle: .alert와 .actionSheet 중 하고싶은거
- 이때
- 그리고 AlertController 들어갈 AlertAction을 만들어야한다
- 이때
title,style,handler를 설정할 수 있다- title: 버튼에 들어갈 문구
- style: 어떤 종류의 버튼인지
default: 기본destructive: 데이터가 변경되거나 삭제될 수 있음을 알릴 때(빨간색)cancel: 취소할 때
- handler: 이것을 눌렀을 때 어떤 작업을 할지
- 이때
- 이제 AlertController에 만들어둔 AlertAction을 추가한다(
addAction) - 마지막으로
present해준다
예시
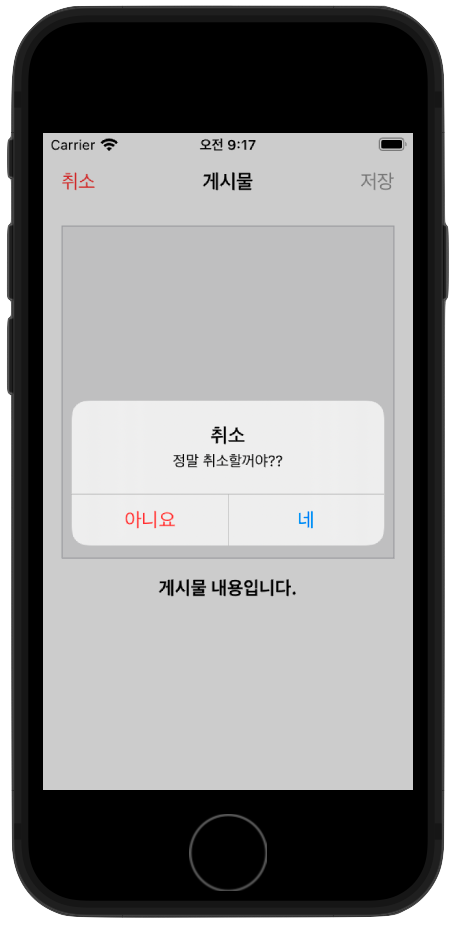
-
.alert 모양
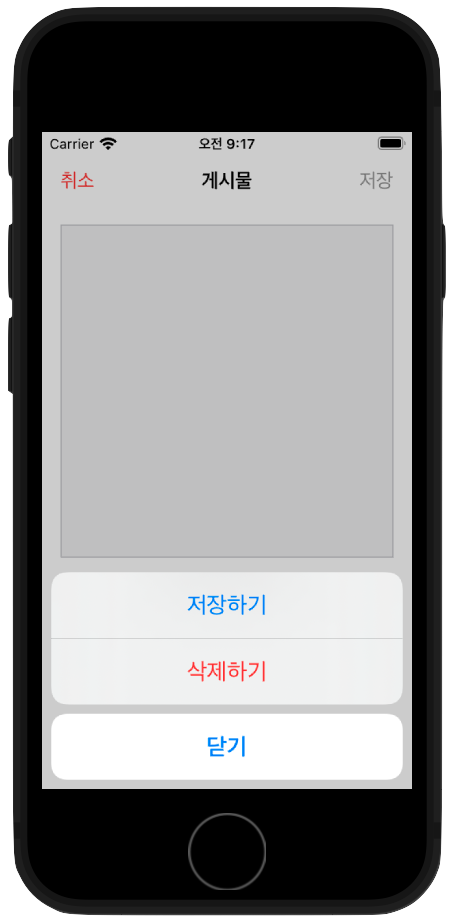
-
.actionSheet 모양
전체 코드
import UIKit
import SnapKit

class ViewController: UIViewController {

    private lazy var imageView: UIImageView = {
        let imageView = UIImageView()

        imageView.backgroundColor = .tertiarySystemFill
        imageView.layer.borderColor = UIColor.systemGray3.cgColor
        imageView.layer.borderWidth = 1.0

        return imageView
    }()
    private lazy var titleLabel: UILabel = {
        let titleLabel = UILabel()

        titleLabel.text = "게시물 내용입니다."
        titleLabel.font = .systemFont(ofSize: 16.0, weight: .bold)
        titleLabel.textColor = .label
        titleLabel.textAlignment = .center

        return titleLabel

    }()

    override func viewDidLoad() {
        super.viewDidLoad()

        setupNavigationItems()
        setupLayout()
    }

}
// ################ 여기서 부터 ################
private extension ViewController {
    func setupNavigationItems() {
        navigationItem.title = "게시물"
        navigationItem.rightBarButtonItem = UIBarButtonItem(
            title: "저장",
            style: .plain,
            target: self,
            action: #selector(didTapRightBarButton)
        )
        navigationItem.leftBarButtonItem = UIBarButtonItem(
            title: "취소",
            style: .plain,
            target: self,
            action: #selector(didTapLeftBarButton)
        )
        navigationItem.leftBarButtonItem?.tintColor = .systemRed
    }

    @objc func didTapRightBarButton() {

        let alertController = UIAlertController(title: nil, message: nil, preferredStyle: .actionSheet)

        let saveAction = UIAlertAction(title: "저장하기", style: .default, handler: nil)
        let reportAction = UIAlertAction(title: "삭제하기", style: .destructive, handler: nil)
        let cancelAction = UIAlertAction(title: "닫기", style: .cancel, handler: nil)

        [ saveAction, reportAction, cancelAction ].forEach { alertController.addAction($0) }

        present(alertController, animated: true, completion: nil)

    }
    @objc func didTapLeftBarButton() {

        let alertController = UIAlertController(title: "취소", message: "정말 취소할꺼야??", preferredStyle: .alert)

        let okAction = UIAlertAction(title: "네", style: .default, handler: nil)
        let cancelAction = UIAlertAction(title: "아니요", style: .destructive, handler: nil)

        [ cancelAction, okAction ].forEach { alertController.addAction($0) }

        present(alertController, animated: true, completion: nil)

    }
// ################ 여기까지 ################


    func setupLayout() {
        [ imageView, titleLabel ].forEach { view.addSubview($0) }

        let inset = 16.0

        imageView.snp.makeConstraints { make in
            make.leading.trailing.equalToSuperview().inset(inset)
            make.top.equalTo(view.safeAreaLayoutGuide).inset(inset)
            make.height.equalTo(imageView.snp.width)
        }

        titleLabel.snp.makeConstraints { make in
            make.leading.trailing.equalToSuperview().inset(inset)
            make.top.equalTo(imageView.snp.bottom).offset(inset)

        }
    }
}
iOS Developer 🐢