javax.servlet.jsp package
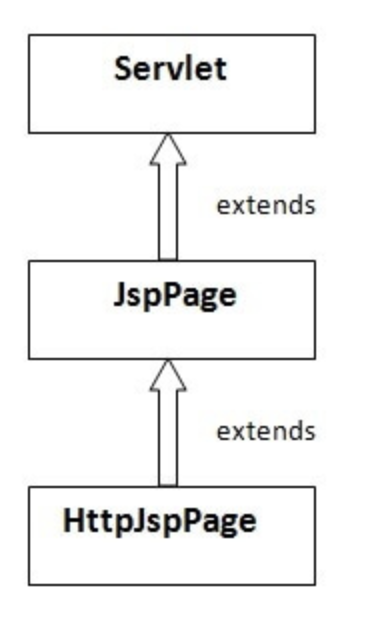
javax.servlet.jsp package의 interfaces
JspPage
HttpJspPage

JspPage interface의 method
public void jspInit():
JSP 페이지가 처음 요청 될 때 JSP 수명주기 동안 한 번만 호출
초기화를 수행하는 데 사용
서블릿 인터페이스의 init () 메소드와 동일
Optional Method
<%! ~ %> declaration 태그에 정의
public void jspDestroy():
JSP 페이지가 파괴되기 전에 JSP 수명주기 동안 한 번만 호출
정리 작업을 수행하는 데 사용
해당 페이지가 변경되어 새로이 load될 필요가 있을 때 이미 load된 instance는 destroy가 호출되고 새로운 instance의 init이 호출
Optional Method
<%! ~ %> declaration 태그에 정의한다
HttpJspPage interface의 method
인터페이스는 JSP의 하나의 수명주기 방법을 제공
JspPage 인터페이스를 확장
public void jspService():
JSP 페이지 요청이 컨테이너에 올 때마다 호출
요청을 처리하는 데 사용
밑줄 은이 방법을 재정의 할 수 없음을 나타냄
jsp의 <% %>의 내용과 html태그들이 이 메서드 안에 삽입
매개변수2개
-
HttpServletRequest request -
HttpServletResponse response
필요한 지역변수
-
PageContext pageContext = null; -
HttpSession session = null; -
ServletContext application = null; -
ServletConfig config = null; -
JspWriter out = null; -
Object page = this; -
JspFactory _jspxFactory = null; -
String _value = null;
지역변수초기화
-
_jspxFactory = JspFactory.getDefaultFactory(); -
pageContext = _jspxFactory.getPageContext(this, request, response, "", true, 8192, true); -
application = pageContext.getServletContext(); -
config = pageContext.getServletConfig(); -
session = pageContext.getSession(); -
out = pageContext.getOut();
javax.servlet.jsp package의 class
JspWriter
PageContext
JspFactory
JspEngineInfo
JspException
JspError
JSP 실행
전에 만들어놓은 개발환경에서 시작한다
개발환경 만들기 정리: https://velog.io/@ye050425/JSP-개발환경-만들기-3ak54mdaf7
프로젝트 생성 및 JSP 파일 생성
File Menu -> New -> dynamic web project로 들어가서 프로젝트 이름을 적고 생성한다
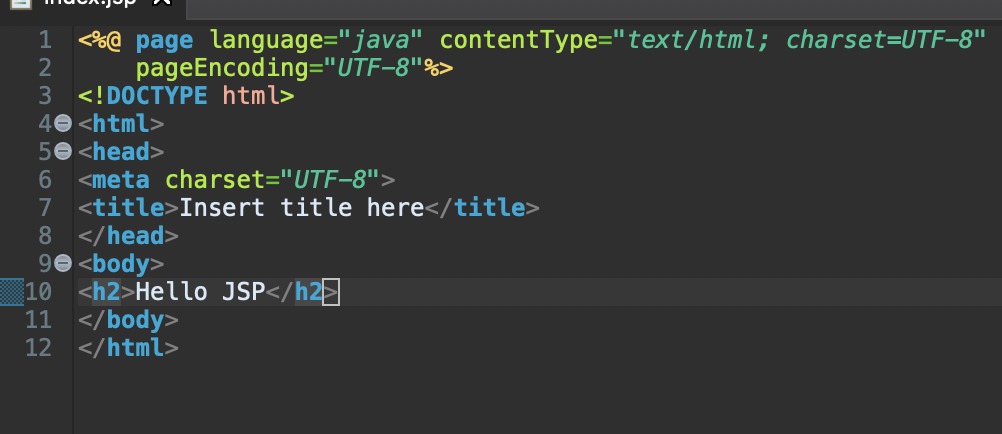
생성한 프로젝트 밑에 있는 WebContent -> New -> jsp file로 들어가서 jsp file 이름을 적고 생성한다.

<%@ page language="java" contentType="text/html; charset=UTF-8"
    pageEncoding="UTF-8"%>
<!DOCTYPE html>
<html>
<head>
<meta charset="UTF-8">
<title>Insert title here</title>
</head>
<body>
<h2>Hello JSP</h2>
</body>
</html>
이런 식으로 내용을 적고 저장한다
파일 실행
server에서 전에 설치했던 tomcat을 열어서 start를 눌러 서버를 실행한다.
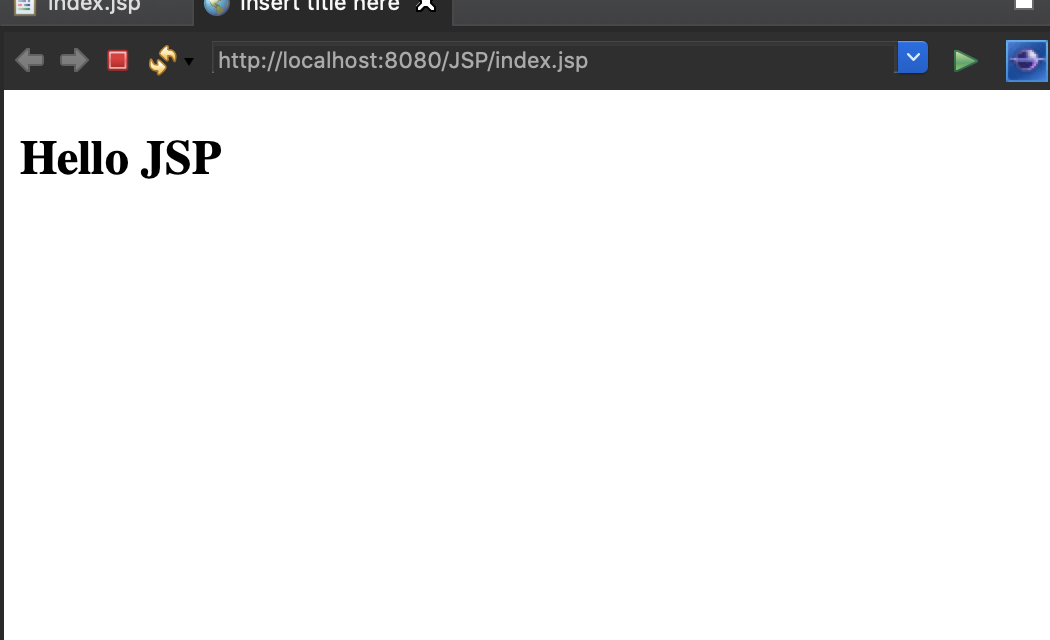
마우스 오른쪽 -> run as -> server를 눌러서 파일을 실행한다.
위에 코드 처럼 내용을 적었다면 아래 처럼 실행될 것이다.

JSP Scripting elements
jsp 내에 Java 코드를 삽입하는 기능을 제공
scriptlet tag
JSP에서 Java 소스 코드를 실행하는 데 사용
<% 자바 소스 코드 %>
< html >
< body>
< % out.print ( "jsp에 오신 것을 환영합니다"); % >
</ body >
</ html >
예시) html 폼으로 입력받아서 jsp로 받기
<%@ page language="java" contentType="text/html; charset=UTF-8"
    pageEncoding="UTF-8"%>
<!DOCTYPE html>
<html>
<head>
<meta charset="UTF-8">
<title>jsp practice</title>
</head>
<body>
<h2>Hello JSP</h2>
<form action="welcome.jsp">
<input type="text" name="uname">
<input type="submit" value="go"><br/>
</form>
</body>
</html>
welcome.jsp 파일
<%@ page language="java" contentType="text/html; charset=UTF-8"
    pageEncoding="UTF-8"%>
<!DOCTYPE html>
<html>
<head>
<meta charset="UTF-8">
<title>Insert title here</title>
</head>
<body>
<%
String name=request.getParameter("uname");
out.print("welcome "+name);
%>
</body>
</html>
실행 사진


expression tag
JSP 식 태그가 되는 응답의 출력 스트림에 기록함.
따라서 데이터를 쓰기 위해 out.print ()를 쓸 필요가 없다.
주로 변수 또는 방법의 값을 인쇄하는 데 사용
<%= statement %>
<html>
<body>
<%= "welcome to jsp" %>
</body>
</html>
예시)
시간 출력
<html>
<body>
Current Time: <%= java.util.Calendar.getInstance().getTime() %>
</body>
</html>
입력받은 이름으로 인사하기(welcome.jsp)
<html>
<body>
<%= "Welcome "+request.getParameter("uname") %>
</body>
</html>
실행 사진

declaration tag
field와 methods에 사용
자동 생성 서블릿의 service () 메소드 외부에 배치
매 실행마다 메모리를 가지지는 않음
<%! field or method declaration %>
| JSP Scriptlet Tag | JSP Declaration Tag |
|---|---|
| methods가 아닌 변수만 선언 | 변수와 method까지 선언 가능 |
| _jspService()안에 위치 | _jspService()밖에 위치 |
예시)
<html>
<body>
<%! int data=50; %>
<%= "Value of the variable is:"+data %>
</body>
</html> <html>
<body>
<%!
int cube(int n){
return n*n*n*;
}
%>
<%= "Cube of 3 is:"+cube(3) %>
</body>
</html> 실행 사진

JSP Implicit Objects
9 jsp implicit objects
모든 JSP 페이지에서 사용할 수 있는 웹 컨테이너 로 작성
사용할 수 있는 객체
| Object | Type |
|---|---|
| out | JspWriter |
| request | HttpServletRequest |
| response | HttpServletResponse |
| config | ServletConfig |
| application | ServletContext |
| session | HttpSession |
| pageContext | PageContext |
| page | Object |
| exception | Throwable |
버퍼에 데이터를 기록하기 위해 JSP는 이름이 지정된 암시 적 객체를 제공
PrintWriter out=response.getWriter();
JSP request implicit object
JSP 요청에 대해 생성 유형 HttpServletRequest의 내장 객체
매개 변수, 헤더 정보, 원격 주소, 서버 이름, 서버 포트, 컨텐츠 유형, 문자 인코딩 등과 같은 요청 정보를 얻는 데 사용
속성을 설정, 가져 오기 및 제거에 사용
<%
String name=request.getParameter("uname");
out.print("welcome "+name);
%>
JSP response implicit object
HttpServletResponse 유형의 객체
웹 컨테이너에 의해 작성
다른 자원으로의 응답 재전송, 오류 전송 등과 같은 응답을 추가하거나 조작하는 데 사용
< %
response.sendRedirect ( "http://www.google.com");
% > 
JSP config implicit object
ServletConfig 타입
특정 JSP 페이지에 대한 초기화 매개 변수를 가져 오는 데 사용
일반적으로 web.xml 파일에서 초기화 매개 변수를 가져 오는 데 사용
<%
out.print("Welcome "+request.getParameter("uname"));

String driver=config.getInitParameter("dname");
out.print("driver name is="+driver);
%>
JSP application implicit object
ServletContext 타입
애플리케이션 또는 프로젝트가 서버에 배치 될 때 웹 컨테이너에 의해 한 번만 작성
구성 파일 (web.xml)에서 초기화 매개 변수를 가져 오는 데 사용
응용 프로그램 범위에서 특성을 가져 오거나 설정하거나 제거하는 데 사용
모든 jsp 페이지에서 사용할 수 있음
<%

out.print("Welcome "+request.getParameter("uname"));

String driver=application.getInitParameter("dname");
out.print("driver name is="+driver);

%>
session implicit object
HttpSession 타입
Java 개발자는 이 객체를 사용하여 속성을 설정, 가져 오기 또는 제거하거나 세션 정보를 얻을 수 있음
welcome.jsp
<html>
<body>
<%

String name=request.getParameter("uname");
out.print("Welcome "+name);

session.setAttribute("user",name);

<a href="second.jsp">second jsp page</a>

%>
</body>
</html>
second.jsp
<html>
<body>
<%

String name=(String)session.getAttribute("user");
out.print("Hello "+name);

%>
</body>
</html> 

pageContext implicit object
PageContext 타입
page, request, session, applicatipn 속성을 설정, 가져 오기 또는 제거하는 데 사용
예시) 위와 같이 second page에도 내용 전달되도록 함.
<html>
<body>
<%

String name=request.getParameter("uname");
out.print("Welcome "+name);

pageContext.setAttribute("user",name,PageContext.SESSION_SCOPE);

<a href="second.jsp">second jsp page</a>

%>
</body>
</html> <html>
<body>
<%
String name=(String)pageContext.getAttribute("user",PageContext.SESSION_SCOPE);
out.print("Hello "+name);
%>
</body>
</html> page implicit object:
Object 클래스 타입
자동 생성 된 서블릿 클래스의 참조에 할당
이 객체를 사용하려면 servelet 유형으로 캐스트되어야함
<% (HttpServlet)page.log("message"); %>
jsp에서 객체를 직접 사용해야하므로 덜 사용됨
<% this.log("message"); %>
exception implicit object
java.lang.Throwable 유형
예외 인쇄 가능
오류 페이지에서만 사용할 수 있으므로 페이지 지시문 이후에 배우는 것이 좋음
<%@ page isErrorPage="true" %>
<html>
<body>

Sorry following exception occured:<%= exception %>

</body>
</html> 

잘 보고 갑니다!