ListView
📎 ListView를 그리는 세가지 방법
- addView
- ListView
- RecyclerView
📌 addView
📎 addView 방식
- item을 담을 xml을 만든다.
- container view에 만든 item을 더해준다.
📎 addView 방식 예제
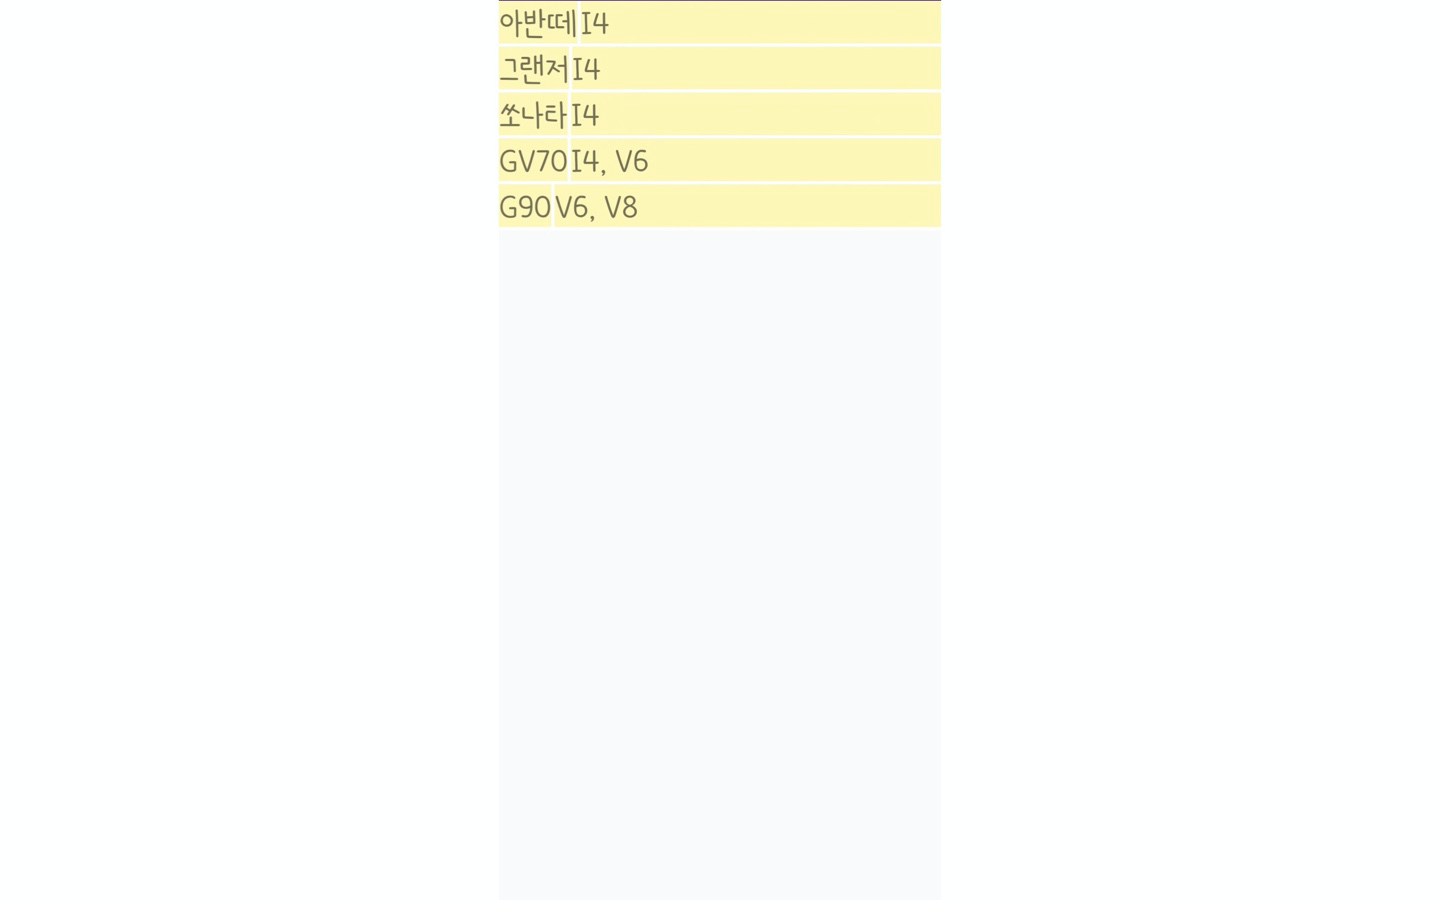
- 자동차의 이름과 엔진을 담는 item들의 리스트 만들기
1. Activity에 리스트뷰를 담을 container 생성
- addView 방식은 자동으로 스크롤이 추가되지 않기 때문에 container view를 ScrollView로 감싸주어야 한다.
<?xml version="1.0" encoding="utf-8"?>
<LinearLayout xmlns:android="http://schemas.android.com/apk/res/android"
xmlns:tools="http://schemas.android.com/tools"
android:layout_width="match_parent"
android:layout_height="match_parent"
tools:context=".AddViewActivity">
<ScrollView
android:layout_width="match_parent"
android:layout_height="match_parent">
<LinearLayout
android:id="@+id/addView_container"
android:orientation="vertical"
android:layout_width="match_parent"
android:layout_height="wrap_content">
</LinearLayout>
</ScrollView>
</LinearLayout>
2. Item을 담을 xml 생성
<?xml version="1.0" encoding="utf-8"?>
<LinearLayout xmlns:android="http://schemas.android.com/apk/res/android"
android:layout_width="match_parent"
android:layout_height="match_parent"
android:background="#FFF7B3"
android:orientation="vertical">
<LinearLayout
android:layout_width="match_parent"
android:layout_height="match_parent"
android:orientation="horizontal">
<TextView
android:id="@+id/car_name"
android:layout_width="wrap_content"
android:layout_height="wrap_content"
android:textSize="30dp"
android:gravity="center" />
<TextView
android:layout_width="3dp"
android:layout_height="match_parent"
android:textSize="30dp"
android:background="#ffffff" />
<TextView
android:id="@+id/car_engine"
android:layout_width="wrap_content"
android:layout_height="wrap_content"
android:gravity="center"
android:textSize="30dp"/>
</LinearLayout>
<LinearLayout
android:layout_width="match_parent"
android:layout_height="3dp"
android:background="#ffffff"/>
</LinearLayout>
3. Activity에 Car 클래스를 생성해서 Item List 만들기
class Car(val name: String, val engine: String){
}
val carList = ArrayList<Car>()
carList.add(Car("아반떼","I4"))
carList.add(Car("그랜저","I4"))
carList.add(Car("쏘나타","I4"))
carList.add(Car("GV70","I4, V6"))
carList.add(Car("G90","V6, V8"))
4. Container View에 Item View 그려서 추가하기
val container = findViewById<LinearLayout>(R.id.addView_container)
val inflater = LayoutInflater.from(this)
for(i in 0 until carList.size){
val itemView = inflater.inflate(R.layout.item_view, null)
val carNameView = itemView.findViewById<TextView>(R.id.car_name)
val carEngineView = itemView.findViewById<TextView>(R.id.car_engine)
carNameView.text = carList[i].name
carEngineView.text = carList[i].engine
container.addView(itemView)
}
결과


