LSTM 모델을 사용하는 이유: 순차적 종속성을 모델링 하기 위함이다.
📢 CNN과 LSTM 을 연결하여 이미지나 동영상을 가져와 텍스트를 출력하는 하이브리드 모델을 구성해보자.텍스트 인코딩 데모
PyTorch is a deep learning library.
- 각 단어/토큰을 숫자에 매핑한다.
: 0
PyTorch : 1
is: 2
a: 3
deep: 4
learning: 5
library: 6. : 7
: 8
사전 → [0, 1, 2, 3, 4, 5, 6, 7, 8]
파이토치로 이미지 캡션 생성하기
COCO(Common Objects in Context) 데이터셋 사용
이미지 캡션 데이터셋 다운로드
# Windows를 포함한 모든 환경에서 실습할 수 있게 파이썬 코드를 작성했습니다. - 위키북스

import urllib
import zipfile
from tqdm import tqdm

#https://stackoverflow.com/a/53877507/1558946
class DownloadProgressBar(tqdm):
    def update_to(self, b=1, bsize=1, tsize=None):
        if tsize is not None:
            self.total = tsize
        self.update(b * bsize - self.n)

def download_data(url):
    print(f"{url} 다운로드 중 ...")
    with DownloadProgressBar(unit='B', unit_scale=True,
                             miniters=1, desc=url.split('/')[-1]) as t:
        zip_path, _ = urllib.request.urlretrieve(url, reporthook=t.update_to)

    print("압축을 푸는 중 ...")
    with zipfile.ZipFile(zip_path, "r") as f:
        for name in tqdm(iterable=f.namelist(), total=len(f.namelist())):
            f.extract(member=name, path="data_dir")

download_data("http://msvocds.blob.core.windows.net/annotations-1-0-3/captions_train-val2014.zip")
download_data("http://images.cocodataset.org/zips/train2014.zip")
download_data("http://images.cocodataset.org/zips/val2014.zip")- 해당 url 에서 데이터를 다운하여 사용 가능하도록 압축을 풀어준다.
캡션(텍스트)데이터 전처리
import os #운영체제 상호작용
import nltk #자연서 툴킷, 사전구축
import pickle #텍스트 이외의 자료형을 파일로 저장
import numpy as np #계산
from PIL import Image #이미지 호출
from collections import Counter #생성자에 문자열을 인자로>>각 문자가 문자열에서 몇 번씩 나타나는지
from pycocotools.coco import COCO #COCO Dataset annotation 파일
import matplotlib.pyplot as plt #그래프

import torch
import torch.nn as nn #torch.nn.functional 의 함수/광범위한 손실, 활성화 함수, 신경망을 생성하기 위한 풀링 함수
import torch.utils.data as data #데이터셋을 제공하는 추상 클래스
from torchvision import transforms #이미지 변환 기능
import torchvision.models as models #아키텍처 모델
import torchvision.transforms as transforms  #다양한 이미지 변환 기능
from torch.nn.utils.rnn import pack_padded_sequence #가변 길이 시퀀스의 묶음 배치를 채움.nltk.download('punkt')
#푼크트 토크나이저 모델을 내려받는다.class Vocab(object):
"""Simple vocabulary wrapper."""
def __init__(self):
self.w2i= {}
self.i2w= {}
self.index= 0
def __call__(self, token):
ifnot tokenin self.w2i:
return self.w2i['<unk>']
return self.w2i[token]
def __len__(self):
return len(self.w2i)
def add_token(self, token):
ifnot tokenin self.w2i:
self.w2i[token]= self.index
self.i2w[self.index]= token
self.index+= 1
def build_vocabulary(json, threshold):
    """Build a simple vocabulary wrapper."""
    coco= COCO(json)
    counter= Counter()
    ids= coco.anns.keys()
for i, idin enumerate(ids):
        caption= str(coco.anns[id]['caption'])
        tokens= nltk.tokenize.word_tokenize(caption.lower())
        counter.update(tokens)

if (i+1)% 1000== 0:
            print("[{}/{}] Tokenized the captions.".format(i+1, len(ids)))

# If the word frequency is less than 'threshold', then the word is discarded.tokens= [tokenfor token, cntin counter.items()if cnt>= threshold]

# Create a vocab wrapper and add some special tokens.vocab= Vocab()
    vocab.add_token('<pad>')
    vocab.add_token('<start>')
    vocab.add_token('<end>')
    vocab.add_token('<unk>')

# Add the words to the vocabulary.for i, tokenin enumerate(tokens):
        vocab.add_token(token)
return vocab

vocab= build_vocabulary(json='data_dir/annotations/captions_train2014.json', threshold=4)
vocab_path= './data_dir/vocabulary.pkl'
with open(vocab_path, 'wb')as f:
    pickle.dump(vocab, f)
print("Total vocabulary size: {}".format(len(vocab)))
print("Saved the vocabulary wrapper to '{}'".format(vocab_path))build_vocabulary(json, threshold)함수:- 이미지 캡셔닝 모델을 훈련하기 위한 어휘를 구축. 인수는 json과 threshold.
- 어휘 구축:
build_vocabulary함수는json파일로부터 어휘를 구축하고,threshold이하의 빈도수를 가진 단어들은 제외
- 어휘 저장:
pickle을 사용하여 어휘 객체vocab을 지정된 경로에 저장
이미지 데이터 전처리
📢 데이터 다운로드 하고 텍스트 캡션에 대해 사전을 구축한 다음 이미지 데이터 전처리def reshape_image(image, shape):
"""Resize an image to the given shape."""
return image.resize(shape, Image.ANTIALIAS)
def reshape_images(image_path, output_path, shape):
"""Reshape the images in 'image_path' and save into 'output_path'."""
if not os.path.exists(output_path):
os.makedirs(output_path)
images = os.listdir(image_path)
num_im = len(images)
for i, im in enumerate(images):
with open(os.path.join(image_path, im), 'r+b') as f:
with Image.open(f) as image:
image = reshape_image(image, shape)
image.save(os.path.join(output_path, im), image.format)
if (i+1) % 100 == 0:
print ("[{}/{}] Resized the images and saved into '{}'."
.format(i+1, num_im, output_path))
image_path = './data_dir/train2014/'
output_path = './data_dir/resized_images/'
image_shape = [256, 256]
reshape_images(image_path, output_path, image_shape)reshape_image(image, shape)함수:- 크기가 조정된 이미지를 반환
reshape_images(image_path, output_path, shape)함수:image_path디렉토리 내의 이미지들을 크기 조정하고, 결과 이미지를output_path디렉토리에 저장
이미지 캡션 데이터 로더 정의하기
데이터를 파이토치 데이터셋 객체로 캐스팅 하는 작업을 수행한다.
class CustomCocoDataset(data.Dataset):
    """COCO Custom Dataset compatible with torch.utils.data.DataLoader."""
    def __init__(self, data_path, coco_json_path, vocabulary, transform=None):
        """Set the path for images, captions and vocabulary wrapper.

        Args:
            root: image directory.
            json: coco annotation file path.
            vocab: vocabulary wrapper.
            transform: image transformer.
        """
        self.root = data_path
        self.coco_data = COCO(coco_json_path)
        self.indices = list(self.coco_data.anns.keys())
        self.vocabulary = vocabulary
        self.transform = transform

    def __getitem__(self, idx):
        """Returns one data pair (image and caption)."""
        coco_data = self.coco_data
        vocabulary = self.vocabulary
        annotation_id = self.indices[idx]
        caption = coco_data.anns[annotation_id]['caption']
        image_id = coco_data.anns[annotation_id]['image_id']
        image_path = coco_data.loadImgs(image_id)[0]['file_name']

        image = Image.open(os.path.join(self.root, image_path)).convert('RGB')
        if self.transform is not None:
            image = self.transform(image)

        # Convert caption (string) to word ids.
        word_tokens = nltk.tokenize.word_tokenize(str(caption).lower())
        caption = []
        caption.append(vocabulary('<start>'))
        caption.extend([vocabulary(token) for token in word_tokens])
        caption.append(vocabulary('<end>'))
        ground_truth = torch.Tensor(caption)
        return image, ground_truth

    def __len__(self):
return len(self.indices)CustomCocoDataset클래스:torch.utils.data.Dataset클래스를 상속하여 데이터셋을 정의. 데이터셋을 사용하여 데이터를 효율적으로 로드하고 모델에 공급
__init__(self, data_path, coco_json_path, vocabulary, transform=None)메서드:- 클래스의 생성자 메서드로, 데이터셋을 초기화
__getitem__(self, idx)메서드:- 데이터셋에서 특정 인덱스
idx에 해당하는 데이터 샘플을 반환
- 데이터셋에서 특정 인덱스
__len__(self)메서드:- 데이터셋의 전체 길이(데이터 샘플의 수)를 반환
def collate_function(data_batch):
    """Creates mini-batch tensors from the list of tuples (image, caption).

    We should build custom collate_fn rather than using default collate_fn,
    because merging caption (including padding) is not supported in default.
    Args:
        data: list of tuple (image, caption).
            - image: torch tensor of shape (3, 256, 256).
            - caption: torch tensor of shape (?); variable length.
    Returns:
        images: torch tensor of shape (batch_size, 3, 256, 256).
        targets: torch tensor of shape (batch_size, padded_length).
        lengths: list; valid length for each padded caption.
    """
    # Sort a data list by caption length (descending order).
    data_batch.sort(key=lambda d: len(d[1]), reverse=True)
    imgs, caps = zip(*data_batch)

    # Merge images (from list of 3D tensors to 4D tensor).
    # Originally, imgs is a list of <batch_size> number of RGB images with dimensions (3, 256, 256)
    # This line of code turns it into a single tensor of dimensions (<batch_size>, 3, 256, 256)
    imgs = torch.stack(imgs, 0)

    # Merge captions (from list of 1D tensors to 2D tensor), similar to merging of images donw above.
    cap_lens = [len(cap) for cap in caps]
    tgts = torch.zeros(len(caps), max(cap_lens)).long()
    for i, cap in enumerate(caps):
        end = cap_lens[i]
        tgts[i, :end] = cap[:end]
return imgs, tgts, cap_lensPyTorch 데이터 로더(
DataLoader)가 미니 배치(mini-batch)를 생성하는 데 사용하는 사용자 지정collate_function함수를 정의
주어진 미니 배치 데이터를 처리하고 이미지와 캡션 데이터를 결합하여 효과적으로 텐서로 변환하는 역할
collate_function(data_batch)함수:DataLoader에 의해 미니 배치로 처리될 데이터를 받아 처리합니다.
def get_loader(data_path, coco_json_path, vocabulary, transform, batch_size, shuffle, num_workers):
    """Returns torch.utils.data.DataLoader for custom coco dataset."""
    # COCO caption dataset
    coco_dataser = CustomCocoDataset(data_path=data_path,
                       coco_json_path=coco_json_path,
                       vocabulary=vocabulary,
                       transform=transform)

    # Data loader for COCO dataset
    # This will return (images, captions, lengths) for each iteration.
    # images: a tensor of shape (batch_size, 3, 224, 224).
    # captions: a tensor of shape (batch_size, padded_length).
    # lengths: a list indicating valid length for each caption. length is (batch_size).
    custom_data_loader = torch.utils.data.DataLoader(dataset=coco_dataser,
                                              batch_size=batch_size,
                                              shuffle=shuffle,
                                              num_workers=num_workers,
                                              collate_fn=collate_function)
return custom_data_loader주어진 데이터 경로, COCO JSON 파일 경로, 어휘(wrapper), 이미지 변환 및 기타 매개변수를 기반으로 데이터 로더를 설정하고 반환합니다.
get_loader(data_path, coco_json_path, vocabulary, transform, batch_size, shuffle, num_workers)함수:- 데이터 로더를 반환
- 사용자 지정 데이터셋 생성:
CustomCocoDataset클래스를 사용하여 COCO 데이터셋에 대한 사용자 지정 데이터셋을 생성
CNN-LSTM 모델 정의하기
class CNNModel(nn.Module):
def __init__(self, embedding_size):
        """Load the pretrained ResNet-152 and replace top fc layer."""
        super(CNNModel, self).__init__()
        resnet= models.resnet152(pretrained=True)
        module_list= list(resnet.children())[:-1]# delete the last fc layer.self.resnet_module= nn.Sequential(*module_list)
        self.linear_layer= nn.Linear(resnet.fc.in_features, embedding_size)
        self.batch_norm= nn.BatchNorm1d(embedding_size, momentum=0.01)

def forward(self, input_images):
        """Extract feature vectors from input images."""
with torch.no_grad():
            resnet_features= self.resnet_module(input_images)
        resnet_features= resnet_features.reshape(resnet_features.size(0),-1)
        final_features= self.batch_norm(self.linear_layer(resnet_features))
return final_features
이미지 특성을 추출하기 위한 합성곱 신경망(CNN) 모델인 CNNModel을 정의합니다. 이 모델은 미리 훈련된 ResNet-152 모델을 기반으로 하며, 이미지를 입력으로 받아 이미지 특성을 추출하는 역할을 합니다.
CNNModel클래스:nn.Module을 상속하여 PyTorch 모델을 정의
forward(self, input_images)메서드:- 모델의 순방향(forward) 전파를 정의
input_images는 이미지 데이터를 나타냄
class LSTMModel(nn.Module):
def __init__(self, embedding_size, hidden_layer_size, vocabulary_size, num_layers, max_seq_len=20):
        """Set the hyper-parameters and build the layers."""
        super(LSTMModel, self).__init__()
        self.embedding_layer= nn.Embedding(vocabulary_size, embedding_size)
        self.lstm_layer= nn.LSTM(embedding_size, hidden_layer_size, num_layers, batch_first=True)
        self.linear_layer= nn.Linear(hidden_layer_size, vocabulary_size)
        self.max_seq_len= max_seq_len

def forward(self, input_features, capts, lens):
        """Decode image feature vectors and generates captions."""
        embeddings= self.embedding_layer(caps)
        embeddings= torch.cat((input_features.unsqueeze(1), embeddings), 1)
        lstm_input= pack_padded_sequence(embeddings, lens, batch_first=True)
        hidden_variables, _= self.lstm_layer(lstm_input)
        model_outputs= self.linear_layer(hidden_variables[0])
return model_outputs 이미지 캡셔닝을 위한 LSTM (Long Short-Term Memory) 기반 모델인 LSTMModel을 정의
-
LSTMModel클래스:nn.Module을 상속하여 PyTorch 모델을 정의
-
__init__(self, embedding_size, hidden_layer_size, vocabulary_size, num_layers, max_seq_len=20)메서드:- 생성자 메서드는 모델의 하이퍼파라미터를 설정하고 모델의 레이어를 구성
-
모델 레이어 구성:
nn.Embedding을 사용하여 임베딩 레이어를 정의. 이 레이어는 단어 ID를 임베딩 벡터로 변환nn.LSTM을 사용하여 LSTM 레이어를 정의
-
forward(self, input_features, capts, lens)메서드:- 순방향 메서드는 모델의 입력 및 출력 흐름을 정의
def sample(self, input_features, lstm_states=None):
        """Generate captions for given image features using greedy search."""
        sampled_indices = []
        lstm_inputs = input_features.unsqueeze(1)
        for i in range(self.max_seq_len):
            hidden_variables, lstm_states = self.lstm_layer(lstm_inputs, lstm_states)          # hiddens: (batch_size, 1, hidden_size)
            model_outputs = self.linear_layer(hidden_variables.squeeze(1))            # outputs:  (batch_size, vocab_size)
            _, predicted_outputs = model_outputs.max(1)                        # predicted: (batch_size)
            sampled_indices.append(predicted_outputs)
            lstm_inputs = self.embedding_layer(predicted_outputs)                       # inputs: (batch_size, embed_size)
            lstm_inputs = lstm_inputs.unsqueeze(1)                         # inputs: (batch_size, 1, embed_size)
        sampled_indices = torch.stack(sampled_indices, 1)                # sampled_ids: (batch_size, max_seq_length)
return sampled_indicessample(self, input_features, lstm_states=None)메서드:- 이미지 특성(
input_features)을 기반으로 캡션을 생성하는 역할 lstm_states는 LSTM 레이어의 초기 상태
- 이미지 특성(
CNN-LSTM 모델 훈련하기
# Device configuration #장치설정
device = torch.device('cuda' if torch.cuda.is_available() else 'cpu')

# Create model directory
if not os.path.exists('models_dir/'):
os.makedirs('models_dir/')- 작업 디렉토리에서 'models_dir/'이라는 디렉토리가 있는지 확인하고, 디렉토리가 없는 경우 새로 생성
# Image preprocessing, normalization for the pretrained resnet
transform = transforms.Compose([
    transforms.RandomCrop(224),
    transforms.RandomHorizontalFlip(),
    transforms.ToTensor(),
    transforms.Normalize((0.485, 0.456, 0.406),
                         (0.229, 0.224, 0.225))])
- transforms.Compose([ ... ]) - 변환 조합:
transforms.Compose함수를 사용하여 여러 이미지 전처리 및 변환 단계를 하나의 변환 시퀀스로 결합
- transforms.RandomCrop(224) - 랜덤 크롭:
- 이미지를 무작위로 잘라내는 변환
- 데이터 증강(data augmentation)의 한 형태로, 모델을 노이즈와 다양한 시각적 변형에 노출시키는 데 도움
- transforms.RandomHorizontalFlip() - 랜덤 수평 뒤집기:
- 이미지를 수평으로 무작위로 뒤집는 변환
- 이미지의 다양성을 높이고, 모델이 이미지의 대칭 여부에 무감각하게 만듦
- transforms.ToTensor() - 텐서로 변환:
- 이미지를 PyTorch 텐서로 변환
- 이미지 데이터를 NumPy 배열에서 PyTorch 텐서로 변환하여 모델이 이를 처리
- transforms.Normalize((mean), (std)) - 정규화:
- 이미지를 정규화하는 변환입
- 평균(
mean) 및 표준편차(std) 값이 주어지며, 각 이미지 채널에 대해 평균을 빼고 표준편차로 나누어 정규화 - 이것은 이미지 픽셀 값을 표준화하여 모델이 훈련 데이터와 일관된 분포로 입력을 받도록,,
- 주어진 값 (0.485, 0.456, 0.406) 및 (0.229, 0.224, 0.225)은 ImageNet 데이터셋에 대한 평균 및 표준편차 값 (보편적으로 사용되는 값)
# Load vocabulary wrapper
with open('data_dir/vocabulary.pkl', 'rb') as f:
    vocabulary = pickle.load(f)


# Build data loader
custom_data_loader = get_loader('data_dir/resized_images', 'data_dir/annotations/captions_train2014.json', vocabulary,
                         transform, 128,
shuffle=True, num_workers=0) - Load Vocabulary Wrapper
- 어휘(wrapper) 객체를 로드하는 역할
- Build Data Loader (데이터 로더 생성):
get_loader함수를 사용하여 데이터 로더 객체(custom_data_loader)를 생성
-dummy data로 최적의 값을 찾는게 베스트!_greedy
num_workers=0 (단일 스레드):
- 데이터 로딩은 메인 프로세스(주 스레드)에서 처리됩니다.
- 데이터 로딩이 메인 스레드에서 수행되므로, 다른 작업(예: 모델 학습)과 동시에 수행되지 않으며, 데이터 로딩이 메인 스레드에서 처리되기 때문에 다른 작업을 차단(block)할 수 있습니다.
- 병렬 로딩이 없으므로 CPU 코어 중 하나에서 데이터 로딩이 처리됩니다.
num_workers=2 (두 개의 병렬 스레드):
- 데이터 로딩은 여러 병렬 작업(스레드)에서 동시에 수행됩니다.
- 데이터 로딩은 별도의 백그라운드 스레드에서 처리되므로 메인 작업(예: 모델 학습)과 병렬로 실행됩니다.
- 따라서 CPU 코어 중 여러 개에서 데이터 로딩이 병렬로 처리됩니다.
- 이로 인해 데이터 로딩이 훨씬 빠르게 수행될 수 있으며, 모델 학습과 데이터 로딩이 동시에 진행되므로 효율적으로 리소스를 활용할 수 있습니다.
# Build the models
encoder_model = CNNModel(256).to(device)
decoder_model = LSTMModel(256, 512, len(vocabulary), 1).to(device)


# Loss and optimizer
loss_criterion = nn.CrossEntropyLoss()
parameters = list(decoder_model.parameters()) + list(encoder_model.linear_layer.parameters()) + list(encoder_model.batch_norm.parameters())
optimizer = torch.optim.Adam(parameters, lr=0.001)- 모델 구축 (Build the models):
CNNModel및LSTMModel객체를 생성합니다. 이 두 모델은 이미지 특성을 추출하고, 이미지와 캡션을 조합하여 캡션을 생성하는 역할
- 손실 및 옵티마이저 설정 (Loss and optimizer):
nn.CrossEntropyLoss()를 사용하여 손실 함수를 정의. 모델의 출력과 정답(타겟)을 비교하여 손실을 계산
# Train the models
total_num_steps = len(custom_data_loader)
for epoch in range(5):
    for i, (imgs, caps, lens) in enumerate(custom_data_loader):

        # Set mini-batch dataset
        imgs = imgs.to(device)
        caps = caps.to(device)
        tgts = pack_padded_sequence(caps, lens, batch_first=True)[0]

        # Forward, backward and optimize
        feats = encoder_model(imgs)
        outputs = decoder_model(feats, caps, lens)
        loss = loss_criterion(outputs, tgts)
        decoder_model.zero_grad()
        encoder_model.zero_grad()
        loss.backward()
        optimizer.step()
- 에폭 반복 (Epoch Loop):
total_num_steps에는 전체 학습 단계 수가 저장- 전체 학습 데이터를 5번 반복
- 미니 배치 데이터 설정 (Set mini-batch dataset):
- 미니 배치의 이미지(
imgs), 캡션(caps), 및 캡션 길이(lens)를 GPU(device)로 전송
- 미니 배치의 이미지(
- 순방향, 역방향 및 최적화 (Forward, backward and optimize):
- 인코더 모델에 이미지를 전달하여 이미지 특성을 추출하고(
feats) 디코더 모델에 전달 - 디코더 모델은 이미지 특성과 캡션을 사용하여 캡션을 생성하고(
outputs) 손실을 계산
- 인코더 모델에 이미지를 전달하여 이미지 특성을 추출하고(
        # Print log info
        if i % 10 == 0:
            print('Epoch [{}/{}], Step [{}/{}], Loss: {:.4f}, Perplexity: {:5.4f}'
                  .format(epoch, 5, i, total_num_steps, loss.item(),
                          np.exp(loss.item())))

        # Save the model checkpoints
        if (i+1) % 1000 == 0:
            torch.save(decoder_model.state_dict(), os.path.join(
                'models_dir/', 'decoder-{}-{}.ckpt'.format(epoch+1, i+1)))
            torch.save(encoder_model.state_dict(), os.path.join(
'models_dir/', 'encoder-{}-{}.ckpt'.format(epoch+1, i+1)))- 로그 정보 출력 (Print log info):
- 학습 중에 주기적으로 학습 상태를 출력
- 퍼플렉서티는 손실의 지수 함수로, 모델이 캡션을 얼마나 잘 예측하는지를 나타내는 지표
- 모델 체크포인트 저장 (Save the model checkpoints):
- 체크포인트는 학습 중간에 모델 상태를 저장하고 나중에 모델을 재로드하여 학습을 재개하거나 추론을 수행할 때 사용
훈련된 모델로 이미지 캡션 생성하기
image_file_path = 'sample.jpg'
# Device configuration
device = torch.device('cuda' if torch.cuda.is_available() else 'cpu')
def load_image(image_file_path, transform=None):
img = Image.open(image_file_path).convert('RGB')
img = img.resize([224, 224], Image.LANCZOS)
if transform is not None:
img = transform(img).unsqueeze(0)
return img
# Image preprocessing
transform = transforms.Compose([
transforms.ToTensor(),
transforms.Normalize((0.485, 0.456, 0.406),
(0.229, 0.224, 0.225))])
# Load vocabulary wrapper
with open('data_dir/vocabulary.pkl', 'rb') as f:
vocabulary = pickle.load(f)
# Build models
encoder_model = CNNModel(256).eval() # eval mode (batchnorm uses moving mean/variance)
decoder_model = LSTMModel(256, 512, len(vocabulary), 1)
encoder_model = encoder_model.to(device)
decoder_model = decoder_model.to(device)
# Load the trained model parameters
encoder_model.load_state_dict(torch.load('models_dir/encoder-2-3000.ckpt'))
decoder_model.load_state_dict(torch.load('models_dir/decoder-2-3000.ckpt'))
# Prepare an image
img = load_image(image_file_path, transform)
img_tensor = img.to(device)
# Generate an caption from the image
feat = encoder_model(img_tensor)
sampled_indices = decoder_model.sample(feat)
sampled_indices = sampled_indices[0].cpu().numpy() # (1, max_seq_length) -> (max_seq_length)
# Convert word_ids to words
predicted_caption = []
for token_index in sampled_indices:
word = vocabulary.i2w[token_index]
predicted_caption.append(word)
if word == '<end>':
break
predicted_sentence = ' '.join(predicted_caption)
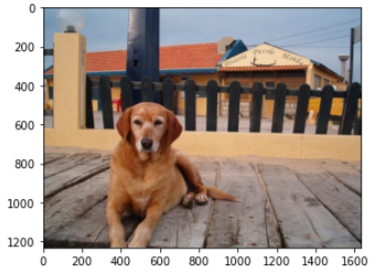
# Print out the image and the generated caption
%matplotlib inline
print (predicted_sentence)
img = Image.open(image_file_path)
plt.imshow(np.asarray(img))-
이미지 파일 경로 설정 (image_file_path):
pythonCopy code
image_file_path = 'sample.jpg'
-
장치 설정 (Device configuration):
device = torch.device('cuda' if torch.cuda.is_available() else 'cpu') -
이미지 로드 및 전처리 (Load image and preprocessing):
img = Image.open(image_file_path).convert('RGB') img = img.resize([224, 224], Image.LANCZOS)- 대상 이미지를 열고, RGB 색상 모드로 변환하고, 224x224 픽셀 크기로 변경
transform = transforms.Compose([ transforms.ToTensor(), transforms.Normalize((0.485, 0.456, 0.406), (0.229, 0.224, 0.225))])- 이미지 전처리를 수행하기 위한 변환(transform) 파이프라인을 설정
-
어휘(Vocabulary) 로드:
with open('data_dir/vocabulary.pkl', 'rb') as f: vocabulary = pickle.load(f)- 학습 단계에서 사용했던 어휘(wrapper)를 로드
-
모델 생성 및 파라미터 로드 (Build models and load model parameters):
encoder_model = CNNModel(256).eval() decoder_model = LSTMModel(256, 512, len(vocabulary), 1) encoder_model = encoder_model.to(device) decoder_model = decoder_model.to(device) encoder_model.load_state_dict(torch.load('models_dir/encoder-2-3000.ckpt')) decoder_model.load_state_dict(torch.load('models_dir/decoder-2-3000.ckpt'))- 훈련된 이미지 캡셔닝 모델을 생성하고, 해당 모델의 파라미터를 불러옴
.eval()메서드는 모델을 추론 모드로 설정하며, 배치 정규화의 이동 평균 및 분산을 사용
-
이미지 준비 및 추론 (Prepare an image and generate a caption):
img = load_image(image_file_path, transform) img_tensor = img.to(device) feat = encoder_model(img_tensor) sampled_indices = decoder_model.sample(feat)- 대상 이미지를 준비하고 이미지를 모델에 전달하여 이미지 특성을 추출하고, 디코더 모델을 사용하여 캡션을 생성
decoder_model.sample(feat)을 호출하여 이미지 특성을 기반으로 캡션을 샘플링
-
캡션을 단어로 변환 (Convert word_ids to words):
predicted_caption = [] for token_index in sampled_indices: word = vocabulary.i2w[token_index] predicted_caption.append(word) if word == '<end>': break- 샘플링된 캡션을 단어로 변환.
-
결과 출력 (Print out the image and the generated caption):