사용자가 입력한 텍스트를 이미지로 저장하는 웹앱을 만들기로 했습니다.
- 텍스트 입력은
textarea를 사용해야겠다.- 이미지로 저장은 해당 영역을 캡쳐해야겠다.
- 캡쳐는 어떻게 하지?
💊 html2canvas를 사용하면 됩니다.
html2canvas는 element를 캔버스로 변환해주는 자바스크립트 라이브러리입니다.
제가 html2canvas를 어떻게 사용했는지, 어떤 에러를 겪었는지 코딩 단계별로 설명하도록 하겠습니다.
Step1. 인터페이스 만들기
<!DOCTYPE html>
<html lang="ko">
  <head>
    <meta charset="UTF-8" />
    <meta http-equiv="X-UA-Compatible" content="IE=edge" />
    <meta name="viewport" content="width=device-width, initial-scale=1.0" />
    <title>📧 Message 📧</title>
    <link rel="stylesheet" href="./style.css" />
  </head>
  <body>
    <div id="text-section" class="text-section">
      <textarea
        name="text-input"
        id="text-input"
        class="text-input"
        placeholder="메세지를 입력해주세요"
      ></textarea>
    </div>
    <button type="button" class="download-button">이미지 저장하기</button>

    <div class="modal hidden">
      <section class="capture-modal"></section>
      <div class="overlay"></div>
    </div>
  </body>
</html>
body {
padding: 10px;
position: relative;
}
.text-section {
margin-bottom: 16px;
width: 250px;
min-height: 19px;
background-color: pink;
padding: 8px 12px;
}
.text-input {
width: 100%;
overflow-y: hidden;
font-size: 16px;
background-color: transparent;
resize: none;
border: none;
outline: none;
}
.download-button {
padding: 4px 8px;
background-color: #ddd;
border: none;
cursor: pointer;
}
.modal {
position: fixed;
top: 0;
left: 0;
display: block;
visibility: visible;
width: 100vw;
height: 100vh;
}
.modal.hidden {
display: none;
visibility: hidden;
}
.capture-modal {
position: absolute;
top: 50%;
left: 50%;
transform: translate(-50%, -50%);
}
.overlay {
width: 100%;
height: 100%;
background-color: rgba(0, 0, 0, 0.5);
}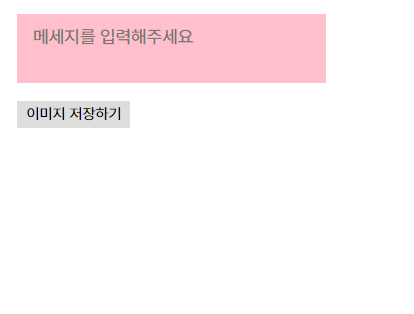
텍스트 입력창과 버튼, 캡쳐 이미지가 보여질 모달까지 만들어줍니다.
step2. 줄바꿈 할 때 textarea 사이즈 조절
<!--위와 동일-->
	<div id="text-section" class="text-section">
      <textarea
        name="text-input"
        id="text-input"
        class="text-input"
        placeholder="메세지를 입력해주세요"
        onkeydown="resize(this)"
        onkeyup="resize(this)"
      ></textarea>
    </div>
<!--위와 동일-->
	<script src="./main.js"></script>
  </body>
</html>
function resize(obj) {
obj.style.height = "1px";
obj.style.height = 0 + obj.scrollHeight + "px";
}
Step3. 캡쳐 기능 구현
<!DOCTYPE html>
<html lang="ko">
  <head>
    <!-- 위와 동일-->
    <script src="https://html2canvas.hertzen.com/dist/html2canvas.min.js"></script>
  </head>
  <body>
    <!-- 위와 동일-->

    <script src="./main.js"></script>
  </body>
</html>
// 위와 동일
const downloadButton = document.querySelector(".download-button");
const captureModal = document.querySelector(".capture-modal");
const modal = document.querySelector(".modal");
const overlay = document.querySelector(".overlay");

const captureExport = function () {
  html2canvas(document.querySelector("#text-section"), {
    logging: true,
    letterRendering: 1,
    allowTaint: true,
    useCORS: true,
    width: 274,
  }).then((canvas) => {
    captureModal.appendChild(canvas).classList.add("canvas");
  });

  modal.classList.remove("hidden");
};

downloadButton.addEventListener("click", captureExport);
Step4. 모달 닫기 구현
// 위와 동일
const removeCapture = function () {
captureModal.removeChild(captureModal.firstElementChild);
modal.classList.add("hidden");
};
overlay.addEventListener("click", removeCapture);
window.addEventListener("keydown", (e) => {
if (e.key === "Escape") {
removeCapture();
}
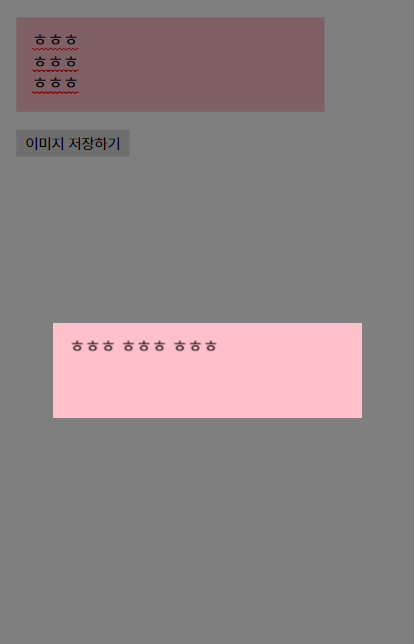
});여기서 문제!
줄바꿈이 적용되지 않습니다.
💊 해결법
textarea 태그를 버리고 contenteditable="true" 속성이 사용된 pre태그를 쓰는겁니다.
Step5. textarea를 pre로 변경
<!--위와 동일-->
	<div id="text-section" class="text-section">
      <pre
        class="text-input"
        contenteditable="true"
        onkeyup="resize()"
        onkeydown="resize()"
      ></pre>
      <div class="text-placeholder">write a letter</div>
    </div>
<!--위와 동일-->
.text-section {
position: relative;
margin-bottom: 16px;
width: 250px;
min-height: 19px;
background-color: pink;
padding: 8px 12px;
}
.text-placeholder {
position: absolute;
top: 50%;
left: 12px;
transform: translateY(-50%);
display: block;
color: #777;
}
.text-placeholder.hidden {
display: none;
}
.text-input {
display: block;
margin: 0;
width: 100%;
overflow-y: hidden;
font-size: 16px;
background-color: transparent;
resize: none;
border: none;
outline: none;
}const textSection = document.querySelector(".text-section");
const textInput = document.querySelector(".text-input");
const textPlaceholder = document.querySelector(".text-placeholder");
const resize = (e) => {
if (textInput) {
textInput.style.height = "auto";
let height = textInput.scrollHeight;
textInput.style.height = `${height}px`;
}
if (textInput.childNodes.length != 0) {
textPlaceholder.classList.add("hidden");
} else {
textPlaceholder.classList.remove("hidden");
}
};
// 이하 동일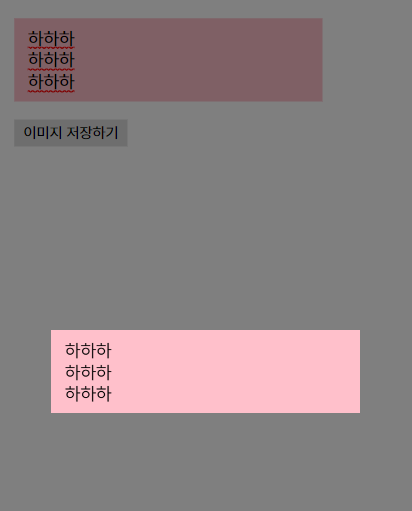
여기서 문제!
PC에선 '마우스 우클릭 > 다른이름으로 저장'으로 저장이 가능합니다.
하지만 모바일에선 마우스를 사용할 수 없고 꾹- 눌러도 이미지 저장을 할 수 없습니다.
💊 해결법
저장버튼 클릭 시 자동으로 저장해줍니다.
Step6. 자동으로 이미지 저장하기
// 위와 동일
const captureExport = function () {
  console.log("실행");
  html2canvas(document.querySelector("#text-section"), {
    logging: true,
    letterRendering: 1,
    allowTaint: true,
    useCORS: true,
  }).then((canvas) => {
    captureModal.appendChild(canvas).classList.add("canvas");
    let el = document.createElement("a");
    el.href = canvas.toDataURL("image/jpeg");
    el.download = "letter.jpg";
    el.click();
  });

// 위와 동일
결과
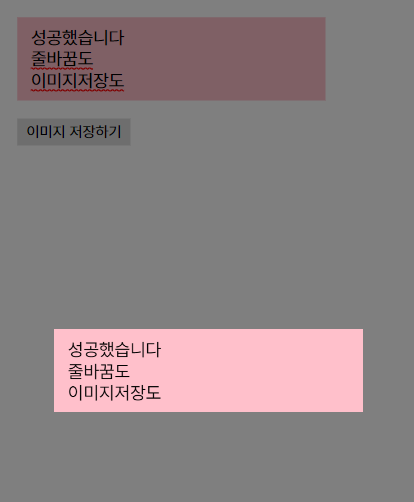

코드 전문 : https://github.com/YeonsuBaek/TIL/tree/main/test/save-text
줄바꿈만 없었으면 참 간단하게 완성할 수 있었을 텐데..
전 이제 줄바꿈이 무섭지 않습니다.
그리고 색과 폰트 변경하는데 막히고 마는데
To be continue...
🍀 an evenful day, life, journey