지난 편에 이어 나머지 provider도 정리해보자.
FutureProvider
FutureProvider는 주로 비동기 작업을 수행하고 그 결과를 다른 곳에서 사용해야 할 때 사용한다. 비동기 작업이 완료될 때까지 UI를 로딩 상태로 유지하는 등의 작업을 처리할 수 있다.
사용자 정보를 fetch 해오는 상황을 가정한 코드를 작성했다.
- User 모델클래스 생성
- FutureProvider를 사용해서 사용자 정보를 가져옴
- UI 구현. FutureProvider watch하여 값을 가져오면 AsyncValue 타입으로 가져와진다. 아래 예제와 같이 when을 사용하여 바로 UI를 구현하고싶은것이 아니라 async, await를 사용한 처리를 하고싶다면 .future를 이용하면 된다.
.when 을 이용하면 데이터가 도착했을 때, 로딩 상태일때 ,에러 상태일 때의 UI를 편리하게 구현할 수 있다.
import 'package:flutter/material.dart';
import 'package:flutter_riverpod/flutter_riverpod.dart';
void main() {
runApp(
const ProviderScope(
child: MyApp(),
),
);
}
// 1. 사용자 정보를 나타내는 모델 클래스
class User {
final int id;
final String name;
final String email;
User({required this.id, required this.name, required this.email});
}
//2. FutureProvider를 사용하여 비동기적으로 사용자 정보를 가져온다.
final userInfoProvider = FutureProvider<User>((ref) {
return fetchUserInfo(); // 비동기적으로 사용자 정보를 가져오는 함수
});
// 비동기 작업을 수행하여 사용자 정보를 가져오는 예시 함수
Future<User> fetchUserInfo() async {
// 사용자 정보를 가져오는 비동기 작업 수행...
await Future.delayed(Duration(seconds: 2)); // 2초간 딜레이
// 예시 사용자 정보를 반환합니다.
return User(id: 1, name: 'forest', email: 'forest@example.com');
}
class MyApp extends ConsumerWidget {
const MyApp({super.key});
// This widget is the root of your application.
Widget build(BuildContext context, WidgetRef ref) {
return MaterialApp(
title: 'Flutter Demo',
theme: ThemeData(
colorScheme: ColorScheme.fromSeed(seedColor: Colors.deepPurple),
useMaterial3: true,
),
home: MyHomePage(),
);
}
}
// 3. UI
class MyHomePage extends ConsumerWidget {
const MyHomePage({super.key});
Widget build(BuildContext context, WidgetRef ref) {
final AsyncValue<User> userInfo = ref.watch(userInfoProvider); // FutureProvider 값을 가져오면 AsyncValue 타입으로 가져와짐
final Future<User> userInfoFuture = ref.read(userInfoProvider.future); // .future를 붙이면 Future 타입으로 가져올 수 있음
return Scaffold(
appBar: AppBar(
title: Text('FutureProvider 예시'),
),
body: userInfo.when(
data: (data) =>
Center(child: Text('사용자 정보: ${data.name}, ${data.email}')),
error: (error, stackTrace) => Text('에러: $error'),
loading: () => const Center(child: CircularProgressIndicator()),
));
}
}
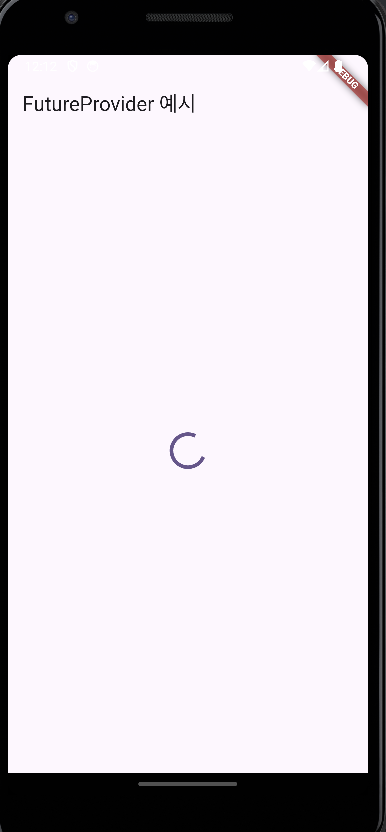
실행결과
 |  |
|---|
AsyncNotifierProvider
AsyncNotifierProvider는 비동기적으로 상태를 관리하고 상태 변경을 감지할 수 있는 프로바이더이다. 비동기 작업의 상태를 관리하고, UI를 업데이트할 때 필요한 state를 제공한다. AsyncNotifier 클래스는 상태를 변경할 수 있는 메서드를 제공하고, 변경 사항을 구독하는 관찰자에게 알릴 수 있다. 이를 통해 비동기 작업의 state를 관리하고, state와 관련된 UI를 업데이트할 수 있다.
위와 같은 상황이다. 사용자 정보를 fetch 해오는 상황을 가정하였고, 한가지 추가된것은 버튼을 클릭하면 사용자의 데이터를 업데이트 하도록 구현했다.
-
User 모델클래스 생성
-
AsyncNotifier를 extends한 class를 구현. build 메소드 안에는 초기값을 넣으면 되는데, state에 loading 상태를 저장한 후 fetchUserInfo()함수가 실행 완료되면 그 값을 state에 저장하도록 했다.
updateUserInfo()함수는 비동기 처리를 좀 더 안전하게 하기 위해 guard를 사용했다. 기존 유저 데이터를 가져와서 새로운 유저 데이터를 생성한 뒤 state에 다시 저장하였다. -
UI 구현. 사용은 FutureProvider와 stateNotifierProvider를 적당히 섞은것 처럼 비슷하게 하면 된다. '사용자 정보 업데이트' 버튼을 클릭하면 updateUserInfo()함수가 실행되도록 했다.
import 'dart:async';
import 'package:flutter/material.dart';
import 'package:flutter_riverpod/flutter_riverpod.dart';
void main() {
runApp(
const ProviderScope(
child: MyApp(),
),
);
}
// 1. 사용자 정보를 나타내는 모델 클래스
class User {
final int id;
final String name;
final String email;
User({required this.id, required this.name, required this.email});
}
//2. AsyncNotifierProvider를 사용하여 비동기적으로 사용자 정보 상태를 관리.
class UserInfoNotifier extends AsyncNotifier<User>{
FutureOr<User> build() {
state = const AsyncValue.loading(); // state에 로딩 상태임을 저장
return fetchUserInfo(); // 초기값을 state에 저장
}
Future<void> updateUserInfo() async{ // 유저 정보 업데이트 같인 추가적인 처리 가능
state = const AsyncValue.loading(); // state에 로딩 상태임을 저장
state = await AsyncValue.guard(() async{
User user = await fetchUserInfo();
User newUser = User(id: user.id, name: 'burn_wood', email: 'burn_wood@a.com');
return newUser; // state에 새로운 상태값을 저장
},);
}
}
final userInfoProvider = AsyncNotifierProvider<UserInfoNotifier,User>(() => UserInfoNotifier());
// 비동기 작업을 수행하여 사용자 정보를 가져오는 예시 함수
Future<User> fetchUserInfo() async {
// 사용자 정보를 가져오는 비동기 작업 수행...
await Future.delayed(Duration(seconds: 2)); // 2초간 딜레이
// 예시 사용자 정보를 반환합니다.
return User(id: 1, name: 'forest', email: 'forest@example.com');
}
class MyApp extends ConsumerWidget {
const MyApp({super.key});
// This widget is the root of your application.
Widget build(BuildContext context, WidgetRef ref) {
return MaterialApp(
title: 'Flutter Demo',
theme: ThemeData(
colorScheme: ColorScheme.fromSeed(seedColor: Colors.deepPurple),
useMaterial3: true,
),
home: MyHomePage(),
);
}
}
// 3. UI
class MyHomePage extends ConsumerWidget {
const MyHomePage({super.key});
Widget build(BuildContext context, WidgetRef ref) {
final AsyncValue<User> userInfo = ref.watch(userInfoProvider); // FutureProvider 값을 가져오면 AsyncValue 타입으로 가져와짐
final Future<User> userInfoFuture = ref.read(userInfoProvider.future); // .future를 붙이면 Future 타입으로 가져올 수 있음
return Scaffold(
appBar: AppBar(
title: Text('FutureProvider 예시'),
),
body: Center(
child: Column(
mainAxisAlignment: MainAxisAlignment.center,
children: [
userInfo.when(
data: (data) =>
Text('사용자 정보: ${data.name}, ${data.email}'),
error: (error, stackTrace) => Text('에러: $error'),
loading: () => const Center(child: CircularProgressIndicator()),
),
ElevatedButton(onPressed: () async {
await ref.read(userInfoProvider.notifier).updateUserInfo();
}, child: const Text('사용자 정보 업데이트'))
],
),
));
}
}
실행결과
 |  |  |
|---|
FutureProvider VS AsyncNotifierProvider
- FutureProvider는 주로 한 번의 비동기 작업을 처리하고 그 결과를 사용하는 경우에 사용된다.
- 반면 AsyncNotifierProvider는 클래스를 기반으로 구현하기 때문에 상태를 변경할 수 있는 메서드를 만들고 UI를 업데이트 할 수 있다.
버튼 콜백함수 처럼 (위의 예제처럼 버튼을 클릭하면 작동시킬 수 있는 함수) 상호작용적인 UI 처리를 할 수 있다.
provider를 더이상 사용하지 않는다면
provider를 더이상 사용하지 않는다면 (값을 유지하고싶지 않다면) .autoDispose를 사용하면 된다. 화면이 pop 되는 상황에서 state를 더이상 유지하고싶지 않다면 .autoDispose를 쓰면 된다.
final countStateProvider = StateProvider.autoDispose<int>((ref) => 0); // int 0을 state에 저장
