Gatsby를 선택한 이유
Github 블로그를 만들 때 주로 Jekyll와 Gatsby를 사용한다.
Jekyll은 Rudy 언어로, Gatsby는 React를 기반으로 만들어졌다.
평소에 React에 관심이 있었기 때문에 Gatsby를 선택하게 되었다.
Gatsby 및 테마 설치하기
Gatsby CLI를 설치해야 한다.
npm install -g gatsby-cli원하는 테마를 골라 새 Gatsby 사이트를 만든다.
// gatsby new [이름] [테마 URL]
gatsby new portfolio-minimal https://github.com/konstantinmuenster/gatsby-starter-portfolio-minimal-theme
설치 도중 아래와 같은 오류가 발생한다면 참고할 수 있다.
⚠️ gyp verb check python checking for Python executable "python2" in the PATH
원인 : Nodejs 설치 시 파이썬 등 필수 요소가 자동적으로 설치되어야 하는데 실패하여 Python이 설치되지 않았음.
해결 방법 : default 경로인 C:\Python27에 Python 2.7을 설치한다.
⚠️ gyp err! stack error: c:\windows\microsoft.net\framewaork\v4.0.30319\msbuild.exe failed with exit code: 1
원인 : node-sass와 sass-loader 버전이 충돌하였음.
해결 방법 :
npm uninstall node-sass
npm install node-sass 혹은 yarn add node-sass
프로젝트 내의 node_modules 폴더, yarn.lock, package-lock.json 삭제
yarn install 혹은 npm install 재설치
Gatsby 실행하기
gatsby develop를 통해 실행할 수 있다.
cd portfolio-minimal
gatsby develop
# open localhost:8000
Github Pages를 통해 배포하기
Gatsby 테마를 GitHub 페이지에 올리기 위해 gh-pages라는 패키지를 설치해야 한다.
npm install gh-pages --save-dev설치한 후 package.json에 설정을 추가해준다.
{
  "scripts": {
    "deploy": "gatsby build && gh-pages -d public" // 추가
  }
}
npm run deploy를 통해 Github Pages에 배포할 수 있다.
좀 기다린 후에 Published 라는 메시지를 받았다면 배포가 완료된 것이다.
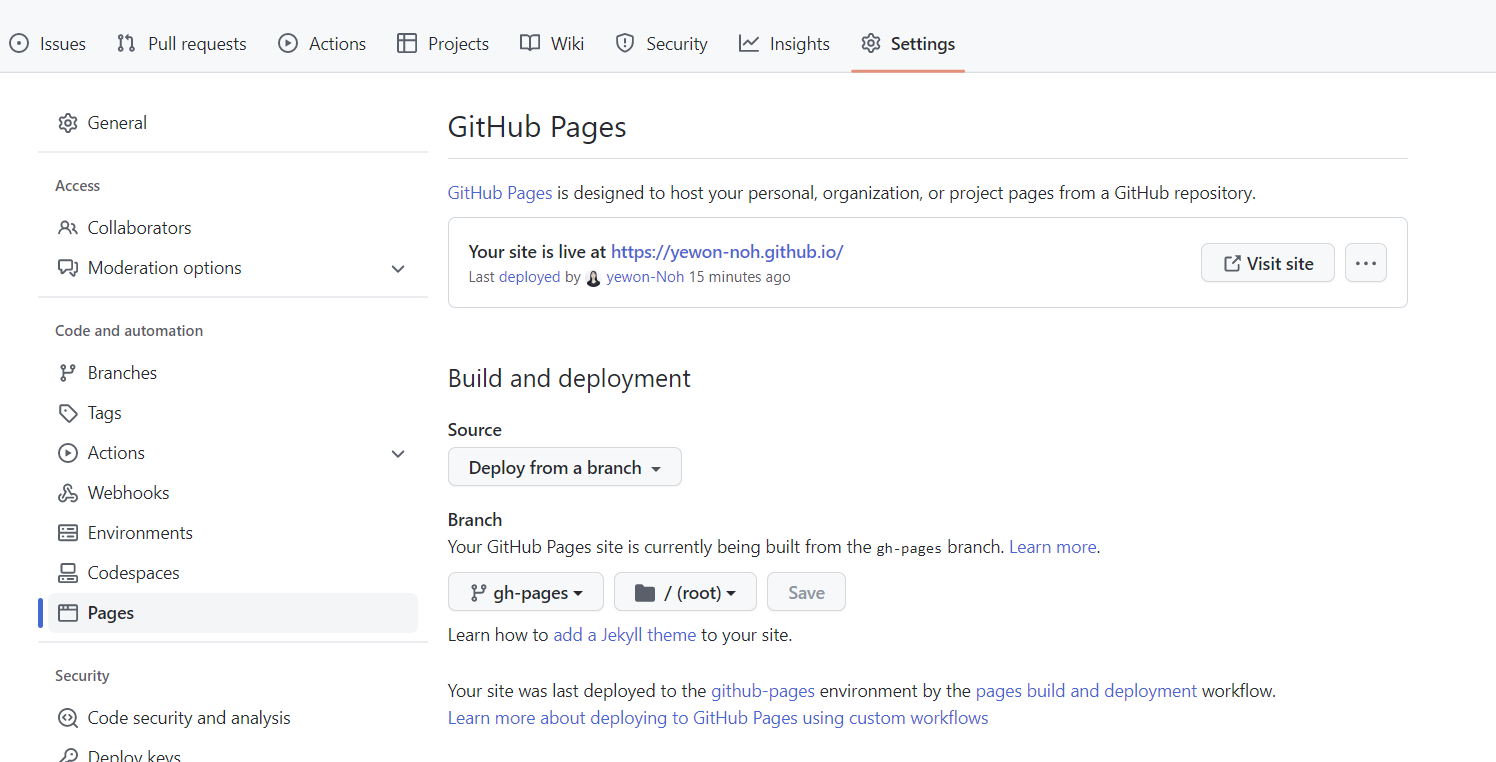
npm run deploy마지막으로 GitHub 페이지가 작동하려면 Repository Source Branch를 변경해야 한다.
GitHub의 Repository 설정에서 배포 할 Branch(여기서는 gh-pages)를 선택한다.
Google Analytics 연결하여 방문자 수 구하기
블로그를 시작하면 방문자 수를 확인하고 싶다.
이럴땐 구글에서 제공하는 Google Analytics를 이용하여 방문자 수를 구할 수 있다.
Gatsby에서 제공하는 플러그인 gatsby-plugin-google-gtag 을 설치해준다.
⚠️ gatsby-plugin-google-analytics도 있지만 더 이상 지원하지 않는다.
npm install gatsby-plugin-google-gtag
그 다음 gatsby-config.js 파일에 설정을 추가해준다.
module.exports = {
  plugins: [
    ...{
      resolve: `gatsby-plugin-google-gtag`,
      options: {
        // You can add multiple tracking ids and a pageview event will be fired for all of them.
        trackingIds: [
          "G-XXXXXXXXX", // Google Analytics / GA
        ],
      },
    },
  ],
};
여기서 GA-TRACKING_ID은 Google Analytics에서 설정한 스트림 측정 ID 값이다.
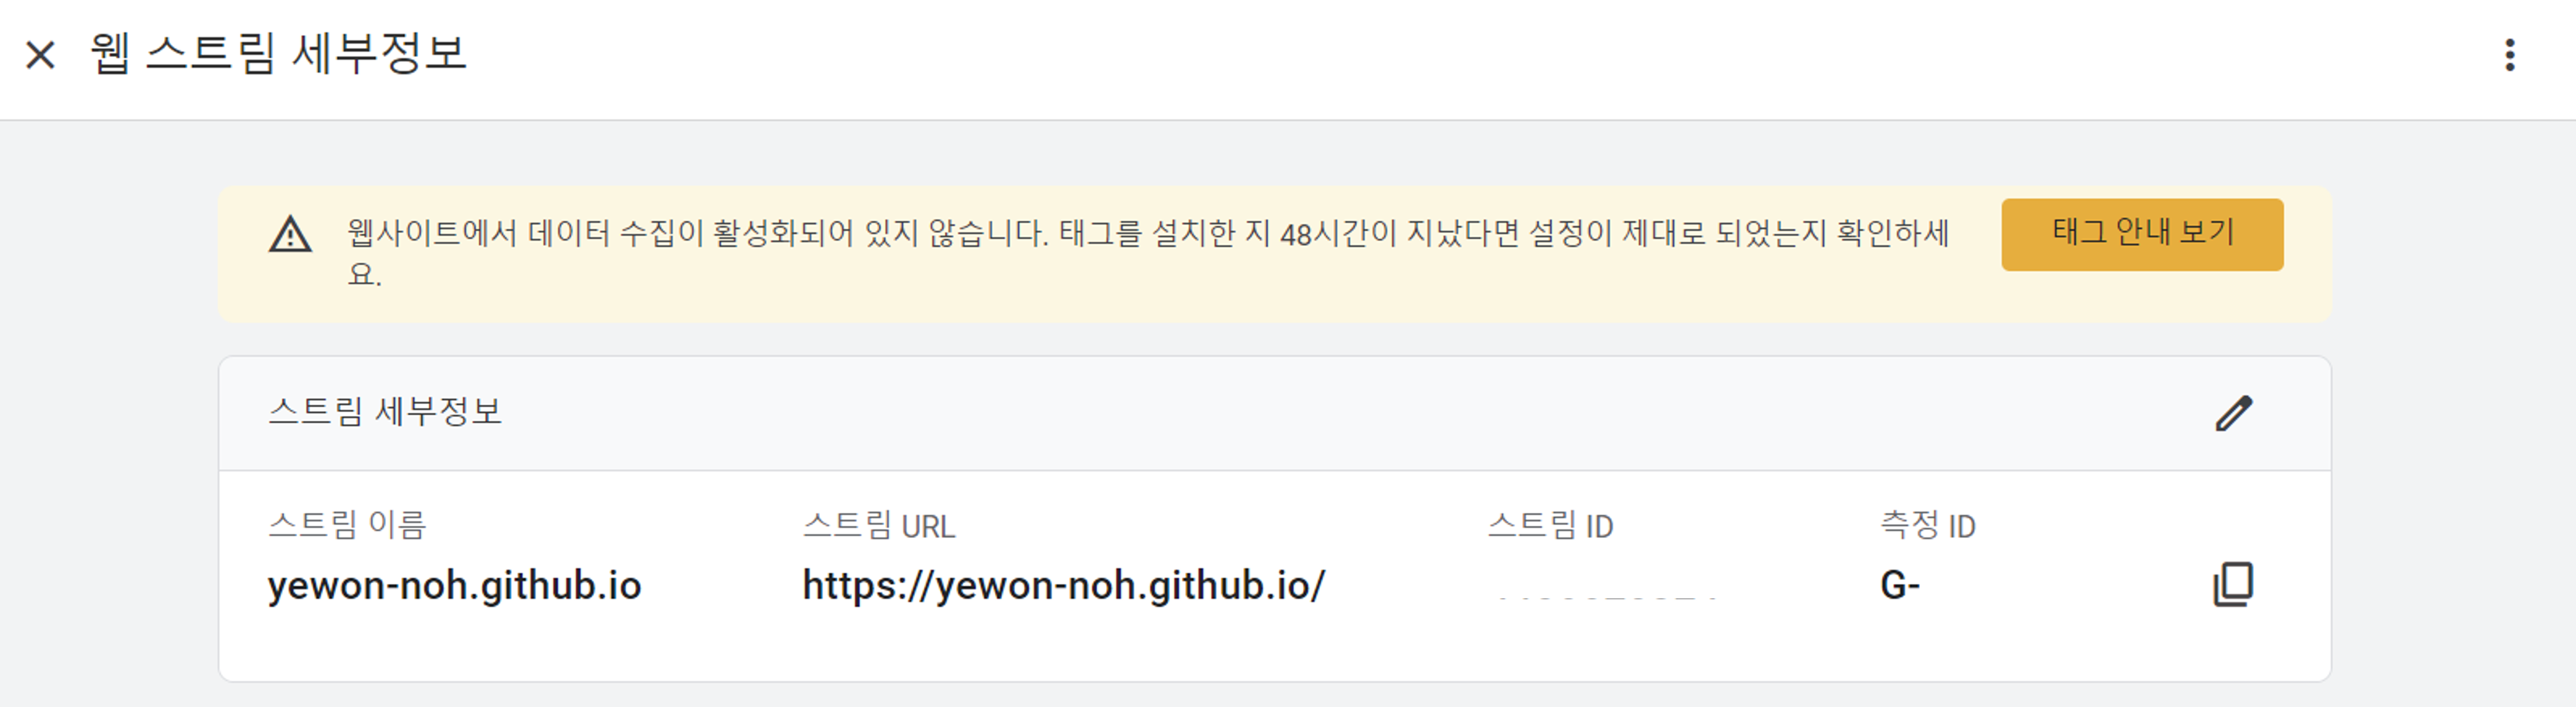
여기까지 설정이 끝나면 Google Analytics 홈에서 결과를 확인할 수 있다.
참고