
오늘은 Nestjs에서 파일처리하는법이랑 파일처리를 로컬에 말고 클라우드서비스에 저장하는법을 해볼예정이다
웹 애플리케이션에서 파일을 저장하는 방식은 크게 두 가지로 나뉜다.
1️⃣ 로컬 저장 → 파일을 서버 내부에 저장하는 방식
2️⃣ 클라우드 저장 → AWS S3 같은 외부 스토리지 서비스를 이용하는 방식
근데 처음 개발을 하면 로컬 저장이 익숙할 수밖에 없다.
왜냐면 그냥 uploads/ 폴더 하나 만들어서 거기다 넣어버리면 끝이니까.
근데 클라우드? 뭔가 귀찮고 어려울 것 같기도 하고, 설정도 많아 보이고…
그럼 도대체 왜 클라우드를 쓰는 걸까? 진짜 필요할까? 그래서 하나하나 따져보기로했다
왜 로컬이 아니라 클라우드에 저장해야 할까?
사실 작은 프로젝트에서는 로컬 저장이면 충분하다.
✅ 파일이 많아진다? → 서버 용량이 터진다.
✅ 여러 서버에서 파일을 공유해야 한다? → 파일이 한 서버에만 있으면 다른 서버에서 못 읽는다.
✅ 백업과 안정성이 필요하다? → 서버가 터져도 파일은 살아있어야 한다.
그래서 나는 바로 로컬로 파일을 저장하기보다는 AWS S3를 사용하기로생각이 들었다 비용적인 측면에서 많이 들어갈까 걱정을했지만 프리티어를 사용하면 비용이 많이 들어가진 않을거같아서 선택을했다
AWS S3란 뭘까??
AWS S3(Simple Storage Service)는 인터넷을 통해 데이터를 저장할 수 있는 클라우드 스토리지다.
쉽게 말하면 AWS가 제공하는 온라인 저장소인데, 그냥 파일을 저장하는 수준이 아니다.
💡 S3는 이런 점이 다르다!
1️⃣ 무한한 저장 공간 → 하드디스크처럼 용량 걱정 없이 확장 가능
2️⃣ 여러 서버에서 접근 가능 → 파일이 한 곳에 있어도 전 세계 어디서든 읽기 가능
3️⃣ CDN(CloudFront)과 연계 가능 → 글로벌 서비스에서도 빠르게 파일 제공
4️⃣ 백업 & 보안 강력 → 데이터가 여러 지역에 자동 복제돼서 안정적
결국, S3를 사용하면 서버의 디스크 용량을 신경 쓸 필요가 없어지고, 안정적으로 파일을 관리할 수 있다.
✅ S3는 언제 사용할까?
사실 로컬 저장소도 있긴 한데… S3가 필요한 순간이 있다.
| 상황 | 로컬 저장소 | AWS S3 |
|---|---|---|
| 파일이 많아짐 | 서버 용량 초과 | S3는 무제한 저장 |
| 여러 서버에서 공유 | 특정 서버에만 저장됨 | 어디서든 접근 가능 |
| 파일이 커짐 (예: 동영상, 이미지) | 서버 디스크 부담 | S3에 저장 후 스트리밍 |
| 글로벌 서비스 | 속도 문제 발생 | CDN과 연계 가능 |
즉, 한 서버에서만 쓰는 작은 프로젝트라면 로컬 저장도 괜찮지만,
규모가 커지면 S3 같은 클라우드 스토리지가 필수다.
버킷 생성하기
1) AWS Console > S3 > 버킷 > 버킷 만들기 클릭
- S3 접속 후 버킷 만들기 클릭
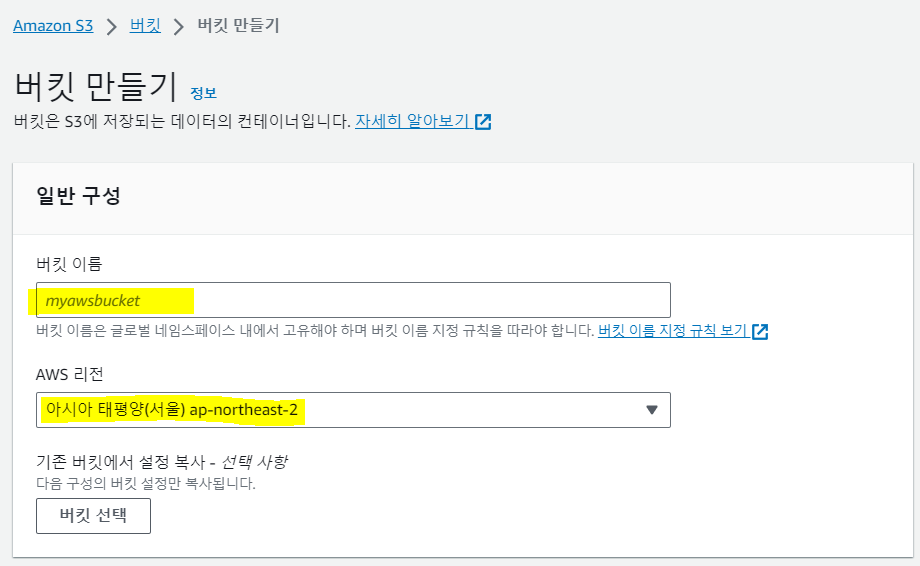
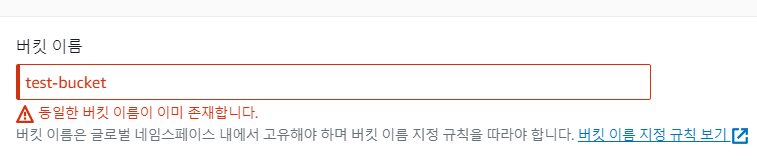
⛔ 버킷 이름은 중복설정 불가
🔽🔽🔽
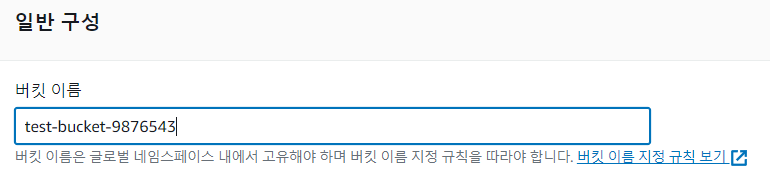

- 버킷 이름 : 원하는 이름으로 설정
- 리전: 서울 선택> 리전은 더 빠른 속도로 사용하기 위해 보통 버킷이 많이 사용될 지역을 선택해주면 된다.
2) 버킷 생성 정보의 객체 소유권 선택
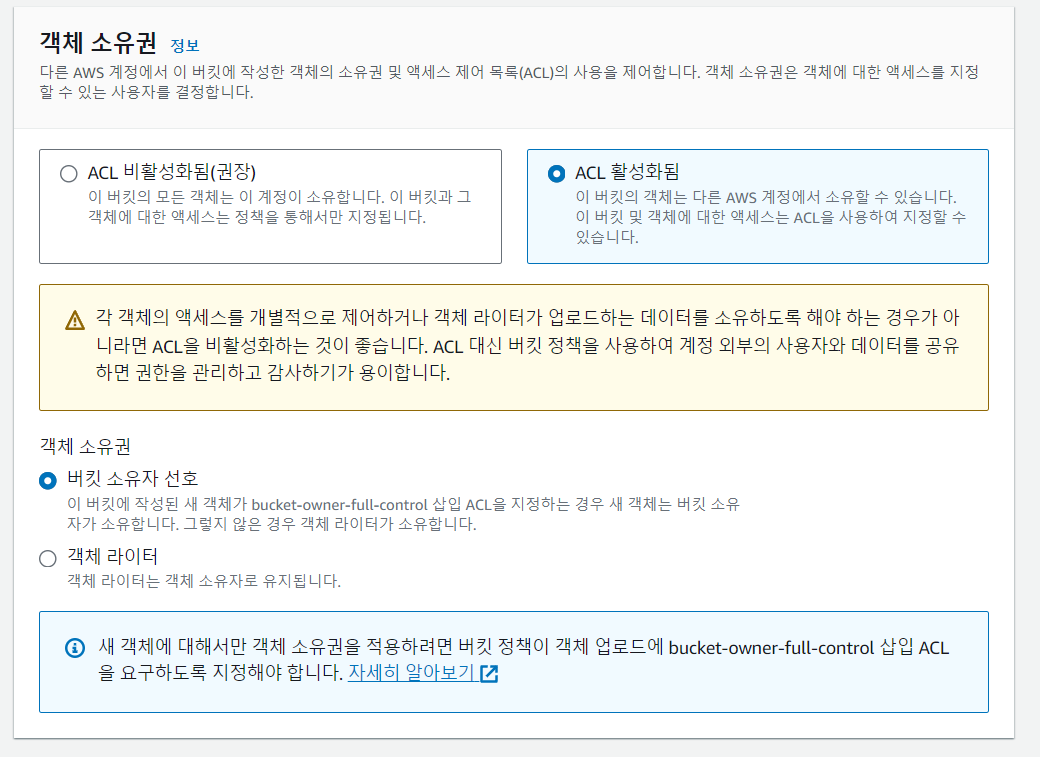
S3를 설정할 때 가장 일반적인 설정 방법을 선택했다.
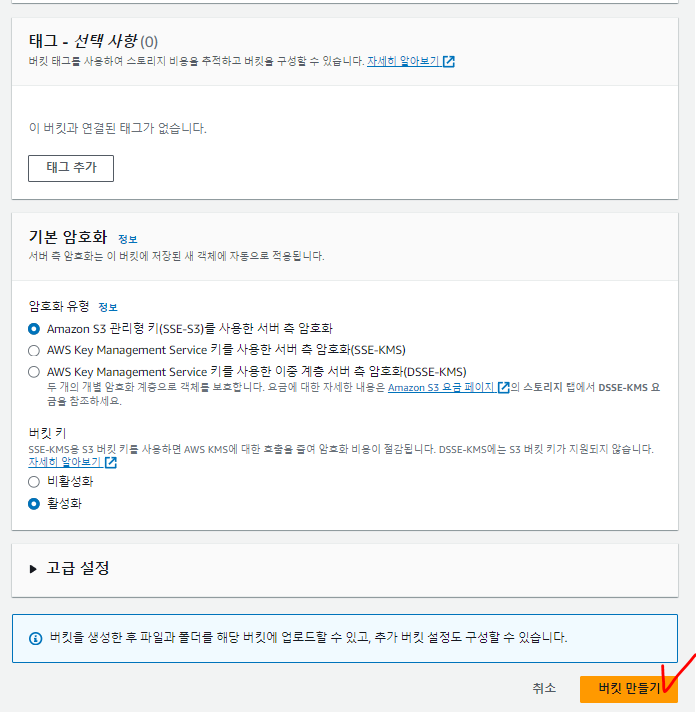
남은 설정은 이렇게 기본값으로 설정하고 버킷 만들기 를 클릭해서 S3 버킷을 생성하면 된다.
📌 NestJS에서 Multer를 이용한 AWS S3 파일 업로드
요구사항 분석
📍 기능 요구사항
- 사용자는 게시글을 작성할 때 이미지 파일을 업로드할 수 있어야 한다.
- 업로드된 파일은 AWS S3에 저장되고, 저장된 파일의 URL을 데이터베이스에 저장해야 한다.
- 파일을 업로드할 때는 Multer를 활용하여 요청을 처리한다.
- 파일을 업로드할 때 JWT 인증을 검증해야 한다.
📍 데이터 플로우 (파일 업로드 과정)
- 클라이언트가 게시글과 이미지를 함께 업로드한다. (
multipart/form-data) - NestJS의 컨트롤러에서 Multer 미들웨어가 요청을 가로채고 파일을 처리한다.
- Multer는 파일을 AWS S3에 업로드하고 URL을 반환한다.
- S3에 저장된 파일 URL을 데이터베이스에 저장한다.
- 업로드된 게시글과 이미지 정보를 응답으로 반환한다.
필요한 패키지 설치
NestJS에서 AWS S3에 파일을 업로드하려면 multer, multer-s3, aws-sdk 패키지가 필요하다.
다음 명령어를 실행하여 설치한다.
npm install aws-sdk multer multer-s3
npm install -D @types/multer
패키지 역할
aws-sdk→ AWS S3에 접근하는 SDKmulter→ Express 기반의 파일 업로드 미들웨어multer-s3→ Multer를 S3에 연결하여 파일을 직접 업로드@types/multer→ Multer의 타입 지원 (TypeScript용)
AWS S3 설정
AWS S3에 파일을 업로드하려면 IAM 사용자와 S3 버킷을 생성해야 한다.
1. AWS S3 버킷 생성
- AWS S3 콘솔에서 새 버킷 생성
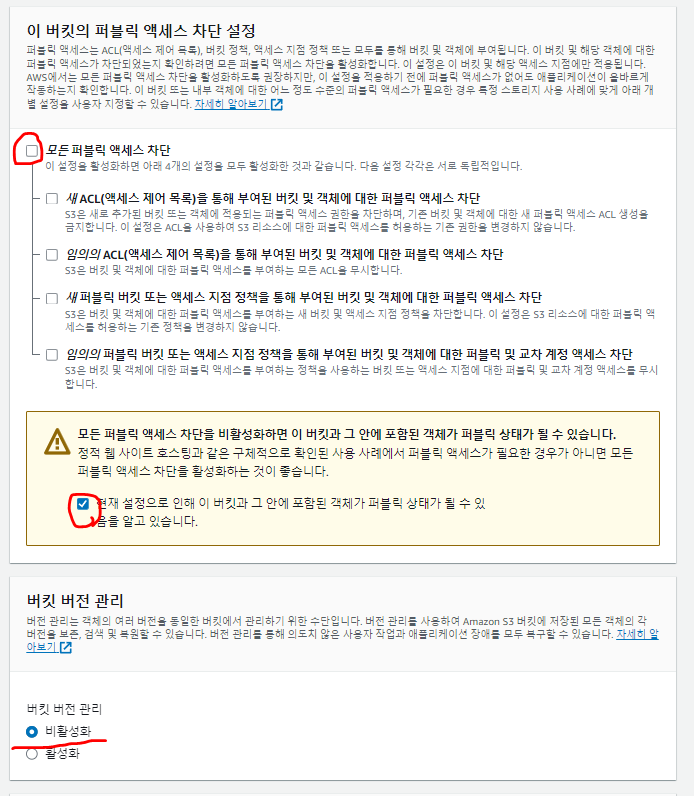
- 퍼블릭 접근 설정 (필요한 경우, CORS 설정 추가)
2. AWS IAM 사용자 생성 및 접근 키 발급
- AWS IAM 콘솔에서 새로운 사용자 생성
- S3 접근 권한 추가 (AmazonS3FullAccess 권한 부여)
- 액세스 키와 시크릿 키를 발급받아 프로젝트 환경 변수에 저장
3. .env 파일에 AWS 설정 추가
AWS_S3_ACCESS_KEY=ACCESS_KEY
AWS_S3_SECRET_KEY=SECRET_KEY
AWS_S3_REGION=ap-northeast-2
AWS_S3_BUCKET_NAME=bucket-name
컨트롤러에서 Multer를 사용하여 파일 업로드
이제 컨트롤러에서 Multer를 사용하여 파일 업로드 요청을 처리하자.
📌 src/content/content.controller.ts 파일을 수정한다.
import {
  Controller,
  Post,
  UploadedFiles,
  UseInterceptors,
  Body,
  Req,
  UseGuards,
} from '@nestjs/common';
import { FilesInterceptor } from '@nestjs/platform-express';
import { ApiBearerAuth, ApiBody, ApiConsumes, ApiOperation, ApiResponse } from '@nestjs/swagger';
import { CreateContentDto } from './dto/create-content.dto';
import { ContentsService } from './contents.service';
import { JwtAccessAuthGuard } from '../auth/guards/jwt-access-auth.guard';
import { RequestWithUserInterface } from '../auth/interfaces/request-with-user.interface';

@Controller('content')
export class ContentController {
  constructor(private readonly contentsService: ContentsService) {}

  @Post('/create')
  @ApiConsumes('multipart/form-data') // Swagger에서 multipart 지원
  @ApiBody({ type: CreateContentDto }) // 요청 Body 설명 추가
  @ApiOperation({
    summary: '게시글 작성',
    description: '글과 이미지를 포함한 게시글을 작성합니다.',
  })
  @ApiResponse({
    description: '게시글 생성 완료',
  })
  @ApiBearerAuth('access-token') // JWT 인증 추가
  @UseGuards(JwtAccessAuthGuard) // 인증된 사용자만 접근 가능
  @UseInterceptors(FilesInterceptor('files')) // Multer를 사용하여 파일 업로드 처리
  async createContent(
    @Req() req: RequestWithUserInterface,
    @Body() createContentDto: CreateContentDto, // 글 정보
    @UploadedFiles() files: Array<Express.Multer.File>, // 업로드된 파일들
  ) {
    console.log(createContentDto); // 콘솔에 요청 데이터 출력

    // 서비스 호출하여 게시글 및 파일 저장
    const newContent = await this.contentsService.contentCreate(
      createContentDto,
      req.user,
      files,
    );
    return newContent; // 생성된 게시글 반환
  }
}
AWS S3에 파일 업로드하는 함수
📌 uploadFileToS3() 함수
async uploadFileToS3(
  folder: string,
  file: Express.Multer.File,
): Promise<{ key: string; s3Object: AWS.S3.PutObjectOutput; contentType: string; }> {
  try {
    const key = `${folder}/${Date.now()}_${file.originalname}`.replace(/ /g, '');

    const s3Object = await this.awsS3.putObject({
      Bucket: this.S3_BUCKET_NAME,
      Key: key,
      Body: file.buffer,
      ACL: 'public-read',
      ContentType: file.mimetype,
    }).promise();

    return { key, s3Object, contentType: file.mimetype };
  } catch (error) {
    throw new BadRequestException(`File upload failed : ${error}`);
  }
}
📌 함수 설명
| 코드 | 설명 |
|---|---|
const key = ... | S3에 저장될 파일 이름을 content/timestamp_originalname 형태로 지정 |
this.awsS3.putObject({...}) | AWS S3에 파일을 업로드 |
ACL: 'public-read' | 업로드된 파일을 공개적으로 접근 가능하도록 설정 |
ContentType: file.mimetype | 원본 파일의 MIME 타입 유지 |
S3에서 파일 삭제하는 함수
📌 deleteS3Object() 함수
async deleteS3Object(key: string): Promise<void> {
  try {
    await this.awsS3.deleteObject({
      Bucket: this.S3_BUCKET_NAME,
      Key: key,
    }).promise();
  } catch (error) {
    throw new BadRequestException(`Failed to delete file : ${error}`);
  }
}
📌 함수 설명
| 코드 | 설명 |
|---|---|
deleteObject({...}).promise() | S3에서 특정 파일을 삭제 |
Key: key | 삭제할 파일의 경로 지정 |
throw new BadRequestException(...) | 삭제 실패 시 예외 발생 |
파일을 업로드하고 게시글을 저장하는 로직
📌 contentCreate() 함수
async contentCreate(createContentDto: CreateContentDto, user: User, files: Express.Multer.File[]) {
  try {
    const uploadedImageUrls = await Promise.all(
      files.map(async (file) => {
        const { key } = await this.uploadFileToS3('content', file);
        return this.getAwsS3FileUrl(key);
      }),
    );

    const newContent = await this.contentRepository.create({
      ...createContentDto,
      writer: user,
      img: uploadedImageUrls,
    });

    await this.contentRepository.save(newContent);
    return newContent;
  } catch (error) {
    throw new BadRequestException('Failed to create content');
  }
}
📌 함수 설명
| 코드 | 설명 |
|---|---|
uploadFileToS3() | 파일을 S3에 업로드 후 key 반환 |
getAwsS3FileUrl() | S3 파일 URL 생성 |
this.contentRepository.create() | 게시글 데이터 생성 |
this.contentRepository.save() | DB에 게시글 저장 |
결과
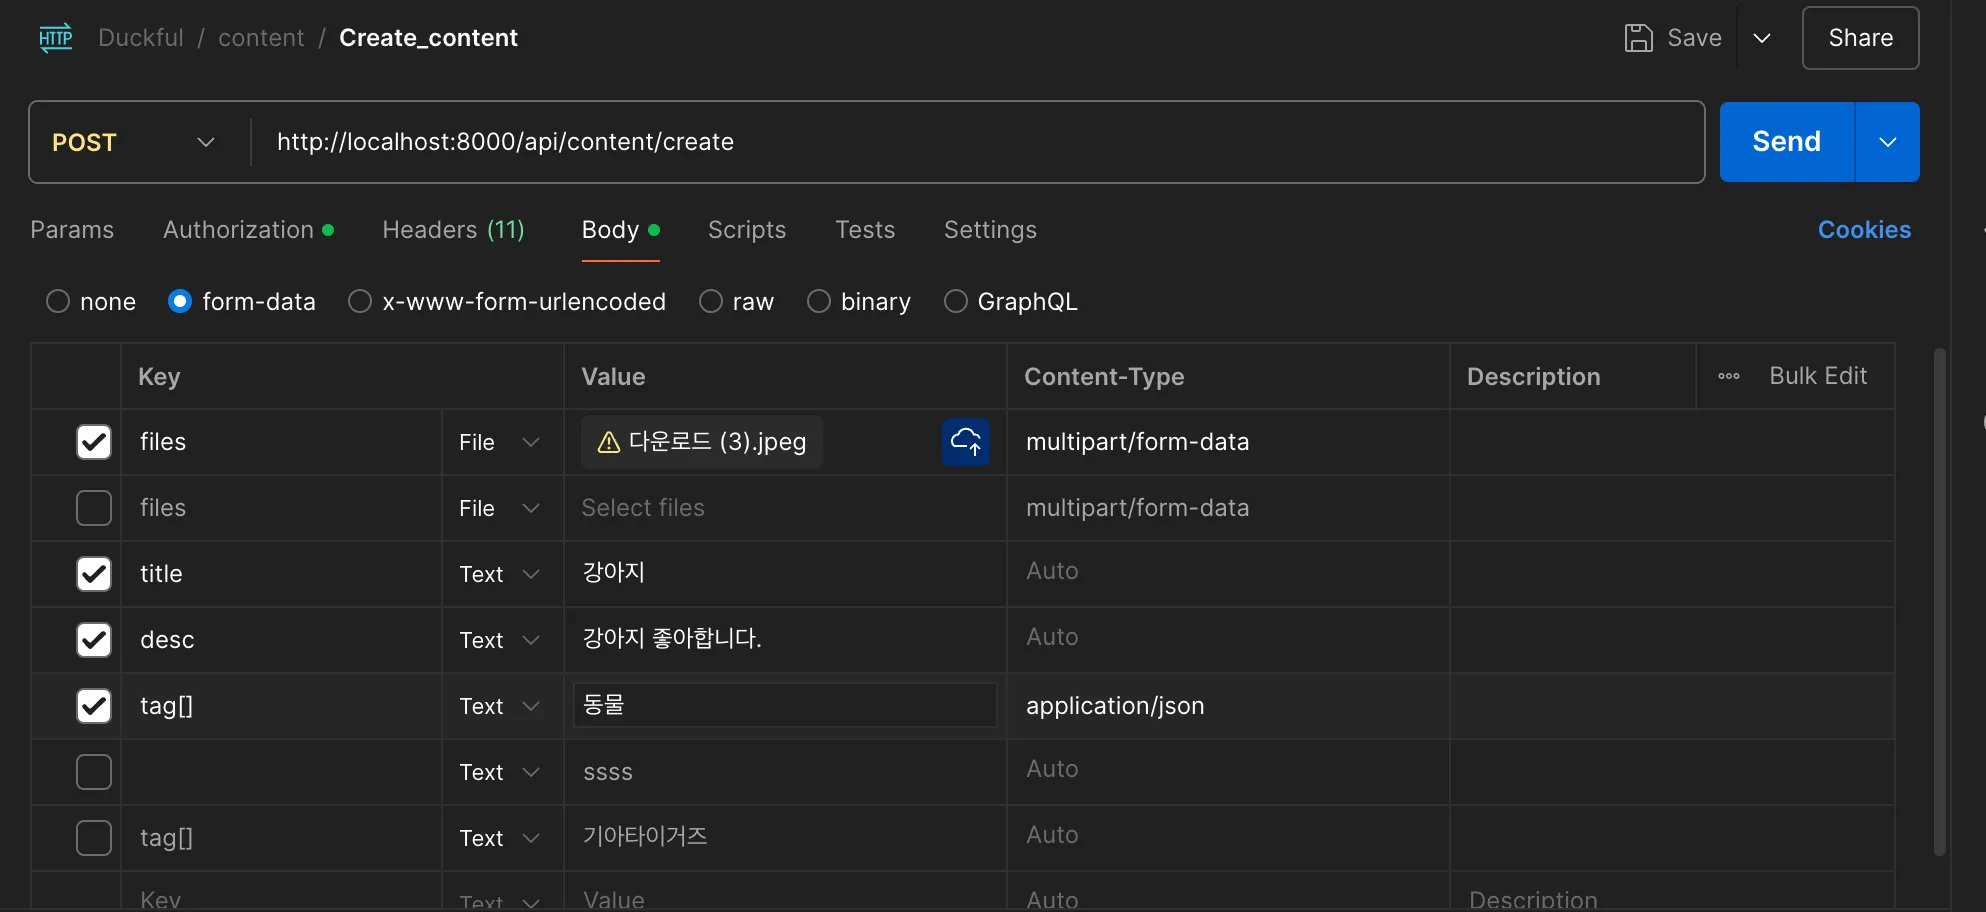
포스트맨 아래와같이 데이터를 입력하면
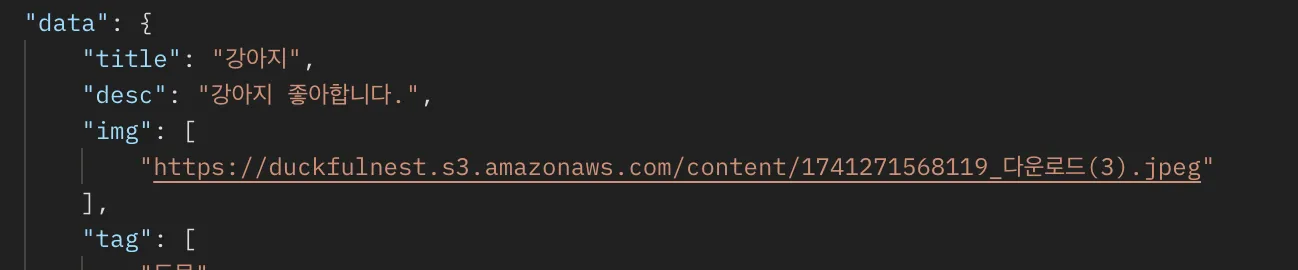
이미지값이 url로 잘저장이된다
버킷에도 잘 저장되는게 보인다!!