1. tab navigation 사용을 위해 npm install @react-navigation/bottom-tabs를 설치한다
2. 기본 화면 구성
import * as React from 'react';
import { Text, View } from 'react-native';
import { NavigationContainer } from '@react-navigation/native';
import { createBottomTabNavigator } from '@react-navigation/bottom-tabs';

function HomeScreen() {
  return (
    <View style={{ flex: 1, justifyContent: 'center', alignItems: 'center' }}>
      <Text>Home!</Text>
    </View>
  );
}

function SettingsScreen() {
  return (
    <View style={{ flex: 1, justifyContent: 'center', alignItems: 'center' }}>
      <Text>Settings!</Text>
    </View>
  );
}

const Tab = createBottomTabNavigator();

export default function App() {
  return (
    <NavigationContainer>
      <Tab.Navigator>
        <Tab.Screen name="Home" component={HomeScreen} />
        <Tab.Screen name="Settings" component={SettingsScreen} />
      </Tab.Navigator>
    </NavigationContainer>
  );
}
3. Customizing the appearance
스택 네비게이터를 Customizing 방법과 유사하다. 탭 네비게이터를 초기화 할 때 설정되는 특성과 옵션에서 화면별로 사용자 정의 할 수있는 특성이 있다.
export default function App() {
  return (
    <NavigationContainer>
      <Tab.Navigator
        screenOptions={({ route }) => ({
          tabBarIcon: ({ focused, color, size }) => {
            let iconName;

            if (route.name === 'Home') {
              iconName = focused
                ? 'ios-information-circle'
                : 'ios-information-circle-outline';
            } else if (route.name === 'Settings') {
              iconName = focused ? 'ios-list-box' : 'ios-list';
            }

            // You can return any component that you like here!
            return <Ionicons name={iconName} size={size} color={color} />;
          },
        })}
        tabBarOptions={{
          activeTintColor: 'tomato', // 탭 활성
          inactiveTintColor: 'gray', // 탭 비활성
        }}
      >
        <Tab.Screen name="Home" component={HomeScreen} />
        <Tab.Screen name="Settings" component={SettingsScreen} />
      </Tab.Navigator>
    </NavigationContainer>
  );
}-
tabBarIcontabBarIcon은bottom tab navigator에서 지원되는 옵션이다.optionsprops의 화면component에서 사용할 수 있지만,이 경우 편의를 위해 아이콘 구성을 중앙 집중화하기 위해Tab.Navigator의screenOptionsprops에 배치하는것이 좋다
-
tabBarIcontabBarIcon은focusedstate,color,sizeparams가 제공되는 기능이다.tabBarIcon에 전달되는color는focused state에 따라활성또는비활성색상입니다.size는tab bar에 필요한 아이콘의 크기이다.
-
tabBarOptions- 구성을 자세히 살펴보면
tabBarOptions및activeTintColor및inactiveTintColor가 표시된다. - 기본값은 iOS 플랫폼 기본값이지만 변경할 수 있다.
- 구성을 자세히 살펴보면
3. 탭에 뱃지 생성
import * as React from 'react';
import { Text, View } from 'react-native';
import { Ionicons } from '@expo/vector-icons';
import { NavigationContainer } from '@react-navigation/native';
import { createBottomTabNavigator } from '@react-navigation/bottom-tabs';

function IconWithBadge({ name, badgeCount, color, size }) { // 뱃지생성 순서 3)
  return (
    <View style={{ width: 24, height: 24, margin: 5 }}>
      <Ionicons name={name} size={size} color={color} />
      {badgeCount > 0 && (
        <View
          style={{
            // On React Native < 0.57 overflow outside of parent will not work on Android, see https://git.io/fhLJ8
            position: 'absolute',
            right: -6,
            top: -3,
            backgroundColor: 'red',
            borderRadius: 6,
            width: 12,
            height: 12,
            justifyContent: 'center',
            alignItems: 'center',
          }}
        >
          <Text style={{ color: 'white', fontSize: 10, fontWeight: 'bold' }}>
            {badgeCount}
          </Text>
        </View>
      )}
    </View>
  );
}

function HomeIconWithBadge(props) {
  // You should pass down the badgeCount in some other ways like React Context API, Redux, MobX or event emitters.
  return <IconWithBadge {...props} badgeCount={3} />; // 뱃지생성 순서 2)
}

function HomeScreen() {
  return (
    <View style={{ flex: 1, justifyContent: 'center', alignItems: 'center' }}>
      <Text>Home!</Text>
    </View>
  );
}

function SettingsScreen() {
  return (
    <View style={{ flex: 1, justifyContent: 'center', alignItems: 'center' }}>
      <Text>Settings!</Text>
    </View>
  );
}

const Tab = createBottomTabNavigator();

export default function App() {
  return (
    <NavigationContainer>
      <Tab.Navigator
        screenOptions={({ route }) => ({
          tabBarIcon: ({ focused, color, size }) => {
            if (route.name === 'Home') {
              return (
                <HomeIconWithBadge // 뱃지생성 순서 1)
                  name={
                    focused
                      ? 'ios-information-circle'
                      : 'ios-information-circle-outline'
                  }
                  size={size}
                  color={color}
                />
              );
            } else if (route.name === 'Settings') {
              return (
                <Ionicons
                  name={focused ? 'ios-list-box' : 'ios-list'}
                  size={size}
                  color={color}
                />
              );
            }
          },
        })}
        tabBarOptions={{
          activeTintColor: 'tomato',
          inactiveTintColor: 'gray',
        }}
      >
        <Tab.Screen name="Home" component={HomeScreen} />
        <Tab.Screen name="Settings" component={SettingsScreen} />
      </Tab.Navigator>
    </NavigationContainer>
  );
}
4. 각 탭의 stack navigator
- 일반적으로 탭은 하나의 화면만 표시하지 않는다. 예를 들어 Twitter 피드에서 트윗을 탭하면 해당 탭 내에서 모든 답글이 포함 된 새 화면이 나타난다.
- 각 탭 내에 별도의
navigations stacks이 있다고 생각할 수 있다. 이것이 바로React Navigation에서 모델링하는 방법이다
import * as React from 'react';
import { Button, Text, View } from 'react-native';
import { NavigationContainer } from '@react-navigation/native';
import { createStackNavigator } from '@react-navigation/stack';
import { createBottomTabNavigator } from '@react-navigation/bottom-tabs';

function DetailsScreen() {
  return (
    <View style={{ flex: 1, justifyContent: 'center', alignItems: 'center' }}>
      <Text>Details!</Text>
    </View>
  );
}

function HomeScreen({ navigation }) {
  return (
    <View style={{ flex: 1, justifyContent: 'center', alignItems: 'center' }}>
      <Text>Home screen</Text>
      <Button
        title="Go to Details"
        onPress={() => navigation.navigate('Details')}
      />
    </View>
  );
}

function SettingsScreen({ navigation }) {
  return (
    <View style={{ flex: 1, justifyContent: 'center', alignItems: 'center' }}>
      <Text>Settings screen</Text>
      <Button
        title="Go to Details"
        onPress={() => navigation.navigate('Details')}
      />
    </View>
  );
}

const HomeStack = createStackNavigator();

function HomeStackScreen() {
  return (
    <HomeStack.Navigator>
      <HomeStack.Screen name="Home" component={HomeScreen} />
      <HomeStack.Screen name="Details" component={DetailsScreen} />
    </HomeStack.Navigator>
  );
}
// 각 탭 내에 stack navigation이 존재한다!

const SettingsStack = createStackNavigator();

function SettingsStackScreen() {
  return (
    <SettingsStack.Navigator>
      <SettingsStack.Screen name="Settings" component={SettingsScreen} />
      <SettingsStack.Screen name="Details" component={DetailsScreen} />
    </SettingsStack.Navigator>
  );
}

const Tab = createBottomTabNavigator();

export default function App() {
  return (
    <NavigationContainer>
      <Tab.Navigator>
        <Tab.Screen name="Home" component={HomeStackScreen} />
        <Tab.Screen name="Settings" component={SettingsStackScreen} />
      </Tab.Navigator>
    </NavigationContainer>
  );
}
5. 특정 화면에서 탭 표시 줄 숨기기 - 방법1
5-1.Stack의 첫 번째 화면 안에 Tab Navigator를 중첩시키는 방법
import * as React from 'react';
import { Button, Text, View } from 'react-native';
import { NavigationContainer } from '@react-navigation/native';
import { createStackNavigator } from '@react-navigation/stack';
import { createBottomTabNavigator } from '@react-navigation/bottom-tabs';

const Stack = createStackNavigator();
const Tab = createBottomTabNavigator();

function DetailsScreen() {
  return (
    <View style={{ flex: 1, justifyContent: 'center', alignItems: 'center' }}>
      <Text>Details!</Text>
    </View>
  );
}

function SettingDetailsScreen() {
  return (
    <View style={{ flex: 1, justifyContent: 'center', alignItems: 'center' }}>
      <Text>SettingDetails!!!</Text>
    </View>
  );
}

function HomeScreen({ navigation }) {
  return (
    <View style={{ flex: 1, justifyContent: 'center', alignItems: 'center' }}>
      <Text>Home screen</Text>
      <Button
        title="Go to Details"
        onPress={() => navigation.navigate('Details')}
      />
    </View>
  );
}

function SettingsScreen({ navigation }) {
  return (
    <View style={{ flex: 1, justifyContent: 'center', alignItems: 'center' }}>
      <Text>Settings screen</Text>
      <Button
        title="Go to Details"
        onPress={() => navigation.navigate('SettingDetails')}
      />
    </View>
  );
}

function HomeStackScreen() {
  return (
    <Tab.Navigator>
      <Tab.Screen name="Home" component={HomeScreen} />
      <Tab.Screen name="Settings" component={SettingsScreen} />
    </Tab.Navigator>
  );
}

export default function App() {
  return (
    <NavigationContainer>
      <Stack.Navigator>
        <Stack.Screen name="Home" component={HomeStackScreen} />
        {/* stack의 첫번째 화면에 tab navigator를 중첩시킨다 */}
        <Stack.Screen name="Details" component={DetailsScreen} />
        <Stack.Screen name="SettingDetails" component={SettingDetailsScreen} />
      	{/* 페이지내에서 링크 이동이 되는(탭이 필요없는) 페이지도 여기에 적어줘야함 */}
      </Stack.Navigator>
    </NavigationContainer>
  );
}
위와같이 작성해줬더니 특정 페이지에서는 탭이 노출이 되지않았다! 그런데 문제점을 하나 발견했다..
5-2. [문제점 발견!!] 탭클릭시 header title이 탭에따라 유동적으로 바뀌지 않는 이유와 해결방법
검색을 해보니 ..!! react navigation에 방법이 나와있었다..ㅜㅜㅜ
- 🙄
header title에 반영이 되지 않아던 이유?App stack은직계 자식만 보기 때문에child 네비게이터를 보지 않는다
- 😇 해결방법
-route.state속성을 사용하여tab navigator의navigation state를 기반으로headerTitle옵션을 결정할 수 있다고한다.
5-2. 해결 방법
-
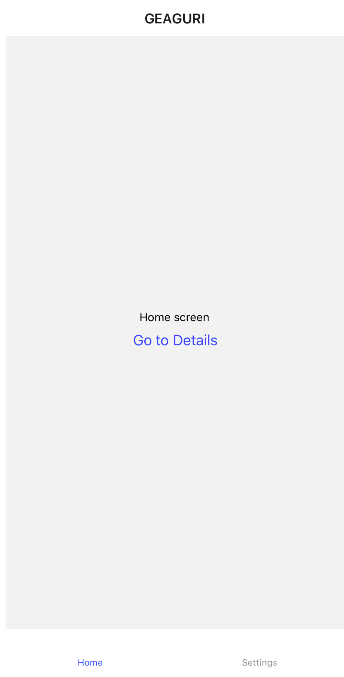
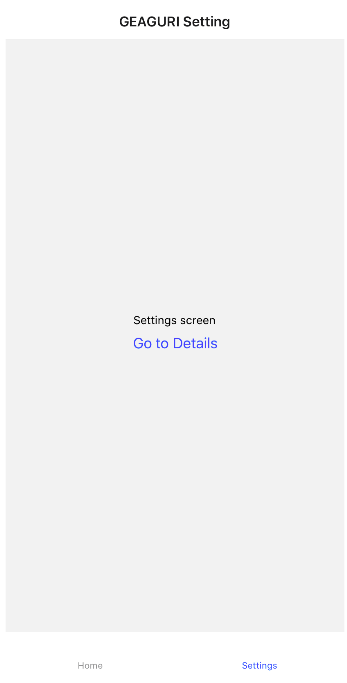
route.state에서 제목을 얻는 함수를 만든다function getHeaderTitle(route) { // tab navigator의 `route.state` state를 사용한다 const routeName = route.state ? route.state.routes[route.state.index].name // 현재 active된 route name을 tab navigator에서 가져온다 : route.params?.screen || 'Home'; switch (routeName) { case 'Home': return 'GEAGURI'; case 'Settings': return 'GEAGURI Setting'; } } -
navigation.setOptions사용해서headerTitle옵션값에 현재 활성화된route name을 가져와 넣어준다이 방법을 사용하면
route prop에child 네비게이터의 state속성이 포함된다 (이 경우 탭 네비게이터가 렌더링하게 된다.). 이 상태에서 현재 활성 route 이름의 값을 가져오고 헤더에 적절한 제목을 설정한다function HomeStackScreen({ navigation, route }) { React.useLayoutEffect(() => { navigation.setOptions({ headerTitle: getHeaderTitle(route) }); }, [navigation, route]); return ( <Tab.Navigator> <Tab.Screen name="Home" component={HomeScreen} /> <Tab.Screen name="Settings" component={SettingsScreen} /> </Tab.Navigator> ); }🤔 여기서 궁금한점!
useLayoutEffect와useEffect의 차이가 무엇일까?(구글링 해봄!!)- useEffect는 보통 화면이 랜더링 된 후 실행된다.(화면이 완전히 바뀌고 난 후 발생)
- useLayoutEffect는 화면의 리사이징 즉, 레이아웃에 변화를 감지하는 Effect이다(화면이 바뀌기 전 발생)
- 참고블로그
Tab.Screen에서optionsprop을 사용하는 방법도 있다.export default function App() { return ( <NavigationContainer> <Stack.Navigator> <Stack.Screen name="Home" component={HomeStackScreen} options={({ route }) => ({ // point!!!!!! headerTitle: getHeaderTitle(route), })} /> <Stack.Screen name="Details" component={DetailsScreen} /> <Stack.Screen name="SettingDetails" component={SettingDetailsScreen} /> </Stack.Navigator> </NavigationContainer> ); }
우아 된다..!! 우아우!!!
참고블로그
- Hiding tab bar in specific screens
- 하위 네비게이터(탭) 상태에 따라 상위 화면 옵션 설정 : Setting parent screen options based on child navigator's state
6. 특정 화면에서 탭 표시 줄 숨기기 - 방법2
방법1을 작성하고보니..
export default function App() {
  return (
    <NavigationContainer>
      <Stack.Navigator>
        <Stack.Screen name="Home" component={HomeStackScreen} />
        {/* stack의 첫번째 화면에 tab navigator를 중첩시킨다 */}
        <Stack.Screen name="Details" component={DetailsScreen} />
        <Stack.Screen name="SettingDetails" component={SettingDetailsScreen} />
      	{/* 만약 페이지 내에서 이동하는 페이지의 수가 많아진다면.. ??? */}
        <Stack.Screen name="SettingDetails" component={SettingDetailsScreen}
        <Stack.Screen name="SettingDetails" component={SettingDetailsScreen}
        <Stack.Screen name="SettingDetails" component={SettingDetailsScreen}
        <Stack.Screen name="SettingDetails" component={SettingDetailsScreen}
        {/* ..... */}
      </Stack.Navigator>
    </NavigationContainer>
  );
}
위와같이 페이지내에서 이동되는 페이지 수가 많아질 경우에는 줄이 너무 길어질거 같다... 그래서 다른방법을 찾아보았다.(Hiding tab bar in specific screens으로 검색해봄)
6-1. route.state.index,navigation.setOptions, tabBarVisible를 사용해 탭바 숨기기
route.state.index가 0일때는 첫페이지, 첫페이지는 탭바 필수route.state.index가 0 이상이면 첫페이지가 아니므로 탭바가 필요없음route.state && route.state.index > 0 ? navigation.setOptions({ tabBarVisible: false }) : navigation.setOptions({ tabBarVisible: true });
// App.js
import * as React from 'react';
import { NavigationContainer } from '@react-navigation/native';
import { createBottomTabNavigator } from '@react-navigation/bottom-tabs';
import HomeStackScreen from './Components/HomeStackScreen';
import SettingsStackScreen from './Components/SettingsStackScreen';
const Tab = createBottomTabNavigator();
export default function App() {
return (
<NavigationContainer>
<Tab.Navigator>
<Tab.Screen name="Home" component={HomeStackScreen} />
<Tab.Screen name="Settings" component={SettingsStackScreen} />
</Tab.Navigator>
</NavigationContainer>
);
}// HomeStackScreen.js
import React from 'react';
import { createStackNavigator } from '@react-navigation/stack';
import DetailsScreen from './DetailsScreen';
import HomeScreen from './HomeScreen';
const HomeStack = createStackNavigator();
function HomeStackScreen({ navigation, route }) {
console.log('route.state ? ', route.state && route.state);
console.log('route.state.index ? ', route.state && route.state.index);
route.state && route.state.index > 0
? navigation.setOptions({ tabBarVisible: false })
: navigation.setOptions({ tabBarVisible: true });
return (
<HomeStack.Navigator>
<HomeStack.Screen
name="Home"
component={HomeScreen}
options={{ title: 'GAGURI' }}
/>
<HomeStack.Screen name="Details" component={DetailsScreen} />
</HomeStack.Navigator>
);
}
// 각 탭 내에 stack navigation이 존재한다!
export default HomeStackScreen;// SettingsStackScreen.js
import React from 'react';
import { createStackNavigator } from '@react-navigation/stack';
import SettingsScreen from './SettingsScreen';
import DetailsScreen from './DetailsScreen';
const SettingsStack = createStackNavigator();
function SettingsStackScreen({ navigation, route }) {
console.log('route.state ???????? ', route.state && route.state);
console.log('route.state.index ? ', route.state && route.state.index);
route.state && route.state.index > 0
? navigation.setOptions({ tabBarVisible: false })
: navigation.setOptions({ tabBarVisible: true });
return (
<SettingsStack.Navigator>
<SettingsStack.Screen name="Settings" component={SettingsScreen} />
<SettingsStack.Screen name="Settings" component={DetailsScreen} />
</SettingsStack.Navigator>
);
}
export default SettingsStackScreen;6-2. route.state에는 어떤 값들이 들어있을까???
route.state.index에 어떻게해서 index 값이 담길수 있는지 궁금해서 아래와같이 콘솔을 찍어보았다
console.log('route.state ? ', route.state && route.state);
console.log('route.state.index ? ', route.state && route.state.index);
오.. route.state에 이런값들이 담겨서 route.state.index에 값이 담길수 있는거구나..
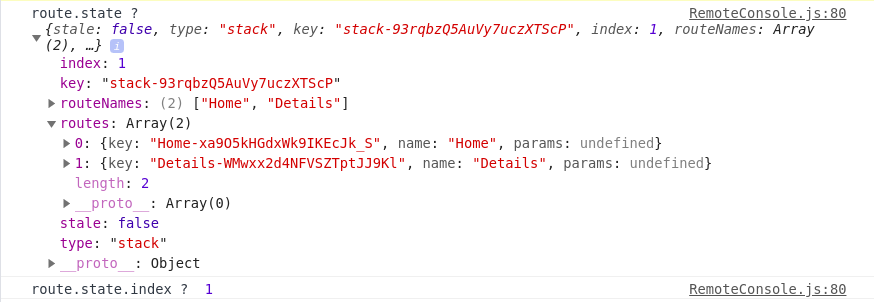
6-3. 화면이동을 통해 route.state에 값이 어떻게 변하는지 확인
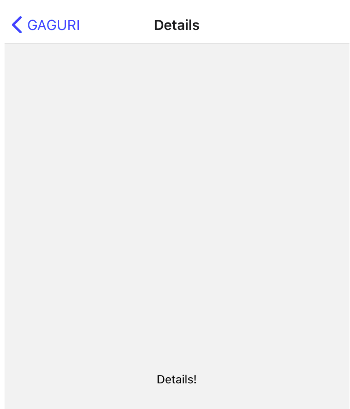
아래의 화면에서 Go to Detail 버튼을 클릭하고,
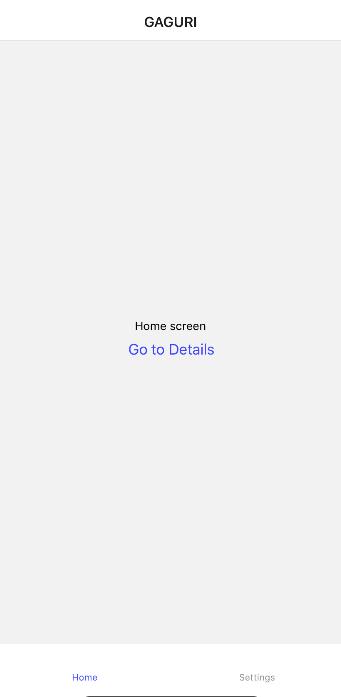
콘솔창을 확인하면 route.state.index의 값이 1이고,
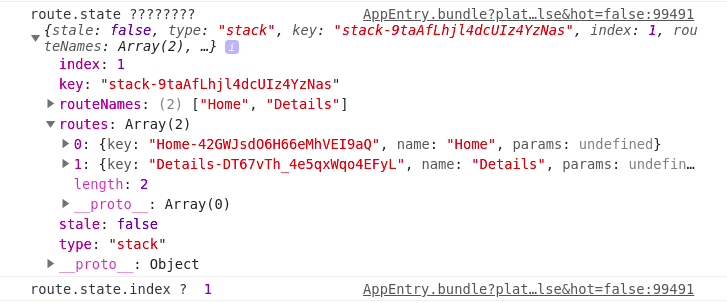
다시 뒤로가기를 클릭하고,
콘솔창을 확인하면 route.state.index의 값이 0이 된것을 확인할 수 있다

참고블로그 및 영상
- React Navigation how to hide tabbar from inside stack navigation
- React Native #24: React Navigation V5 (Hide Tabbar - Additional lesson 21, 22) - 2:09초 참고!!!!
Tab navigation 참고블로그