Java
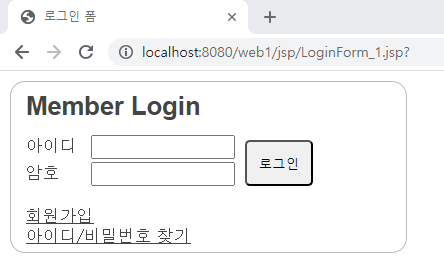
어제 마지막에 했던 로그인 폼 다시
로그인폼
<%@ page language="java" contentType="text/html; charset=UTF-8"
pageEncoding="UTF-8"%>
<!DOCTYPE html>
<html>
<head>
<meta charset="UTF-8">
<title>로그인 폼</title>
<!-- 서버로 데이터를 전송하는 태그(엘리먼트) form (jsp의 특성) -->
<style type="text/css">
*{ /*초기화*/
margin: 0;
padding: 0;
}
/* 리스트 스타일 타입을 없애기 */
ul {
list-style-type: none;
}
/* 바디 전체에 글꼴을 지정 브라우저의 파싱에 의해 맑은 고딕이 먼저 지정하고, 없으면 돋움을 지정*/
body{
font-family: "맑은고딕","돋움";
font-size :17px;
color : #444444;
}
/* 하나만 지정하는 경우 id로 지정하는 경우가 있음. */
#login_box{
width: 340px;
height: 160px;
border: solid 1px #bbbbbb;
border-radius: 15px;
margin: 10px 0 0 10px;
padding: 10px 0 0 15px;
}
h2 {
font-family: "Arial";
margin-bottom:14px;
}
/* 아이디가 login_box이고 그 하위 태그가 input인 경우 */
#login_box input{
width: 140px;
height:20px;
}
/*두개의 선택자 모두에게 똑같이 하고 싶을때 ,로 지정*/
#id_pass, #login_btn{
display: inline-block;
vertical-align: top;
}
/*id_pass라는 id 후손으로 span태그가 있을 때 지정*/
#id_pass span{
display: inline-block;
width: 60px;
}
#pass{
margin-top: 3px;
}
/* id가 login_btn이고 후손이 button이라는 태그가 있을 때 지정*/
#login_btn button{
margin-top: 5px;
margin-left: 5px;
padding: 12px;
border-radius: 5px;
}
#btns{
margin: 12px 0 0 0;
text-decoration: underline;
}
#btns li{
margin-left: 10px;
display: inline;
}
</style>
</head>
<body>
<form action="" method="get"> <!-- action = 서버에 들어가는 페이지 -->
<div id="login_box"> <!-- <div> = 영역을 지정할 때 쓴다, 블럭단위의 영역지정 -->
<h2>Member Login</h2>
<ul> <!-- 리스트로 아이디, 패스워드, 로그인 버튼 -->
<li id="id_pass">
<ul>
<li> <!-- 인라인 방식으로 아이디와 입력창-->
<span>아이디</span>
<input type="text"> <!-- ID 들어가는 버튼 -->
</li>
<li id="pass"> <!-- 인라인 방식으로 패스워드와 입력창 -->
<span>암호</span>
<input type="password"> <!-- password 들어가는 곳 -->
</li>
</ul>
</li>
<li id="login_btn">
<button>로그인</button> <!-- 로그인 하는 버튼 -->
</li>
</ul>
<ul id="btns"> <!-- 회원가입, 비밀번호 찾기 -->
<li>회원가입</li>
<li>아이디/비밀번호 찾기</li>
</ul>
</div>
<!-- Login box 만들었음 -->
</form>
</body>
</html>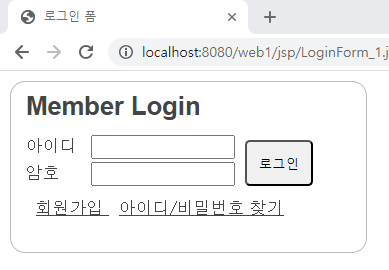 😃😃😃😃😃
😃😃😃😃😃
가입양식
<%@ page language="java" contentType="text/html; charset=UTF-8"
pageEncoding="UTF-8"%>
<!DOCTYPE html>
<html>
<head>
<meta charset="UTF-8">
<title>회원가입</title>
<style type="text/css">
*{margin: 0;
padding: 0;
}
ul{list-style-type: none;}
/* 초기화 */
h3{margin: 20px 0 0 50px;}
#joinForm {
width: 500px;
margin: 10px 0 0 50px;
font-family: "돋움";
font-size: 12px;
color: #444444;
padding-top: 5px;
padding-bottom: 10px;
border-top: solid 1px #cccccc;
border-bottom: solid 1px #cccccc;
}
.cols li {
display: inline-block;
margin-top: 5px;
}
.cols li.col1{
width: 100px;
text-align: right;
}
.cols li.col2{
width: 350px;
}
.cols li.col2 input.hp{
width: 40px;
}
#intro{
vertical-align: top;
}
</style>
</head>
<body>
<h3>가입 양식</h3>
<form action="" method="post">
<ul id="joinForm">
<li> <!-- 아이디 -->
<ul class="cols">
<li class="col1">아이디 : </li>
<li class="col2"><input type="text"></li>
</ul>
</li>
<li> <!-- 비밀번호 -->
<ul class="cols">
<li class="col1">비밀번호 : </li>
<li class="col2"><input type="password"></li>
</ul>
</li>
<li> <!-- 비밀번호 확인 -->
<ul class="cols">
<li class="col1">비밀번호 확인 : </li>
<li class="col2"><input type="password"></li>
</ul>
</li>
<li> <!-- 이름 -->
<ul class="cols">
<li class="col1">이름 : </li>
<li class="col2"><input type="text"></li>
</ul>
</li>
<li> <!-- 성별 -->
<ul class="cols">
<li class="col1">성별 : </li>
<li class="col2">
<input type="radio" name="sex" checked="checked">남성
<input type="radio" name="sex">여성
</li>
</ul>
</li>
<li> <!-- 휴대전화 -->
<ul class="cols">
<li class="col1">휴대전화 : </li>
<li class="col2">
<input type="text" class="hp">-
<input type="text" class="hp">-
<input type="text" class="hp">
</li>
</ul>
</li>
<li> <!-- 이메일 -->
<ul class="cols">
<li class="col1">이메일 : </li>
<li class="col2">
<input id="email1" type="text">@
<select id="email2">
<option>선택</option>
<option>naver.com</option>
<option>gmail.com</option>
<option>hanmail.net</option>
</select>
</li>
</ul>
</li>
<li> <!-- 취미 -->
<ul class="cols">
<li class="col1">취미 : </li>
<li class="col2">
<input type="checkbox" name="hobby1"> 음악감상
<input type="checkbox" name="hobby1"> 독서
<input type="checkbox" name="hobby1"> 오디오북듣기
</li>
</ul>
</li>
<li> <!-- 자기소개 -->
<ul class="cols">
<li class="col1" id="intro">자기소개 : </li>
<li class="col2">
<textarea rows="5" cols="35"></textarea>
</li>
</ul>
</li>
<li> <!-- 파일첨부 -->
<ul class="cols">
<li class="col1">파일첨부 : </li>
<li class="col2">
<input type="file">*2MB까지 가능
</li>
</ul>
</li>
</ul>
</form>
</body>
</html>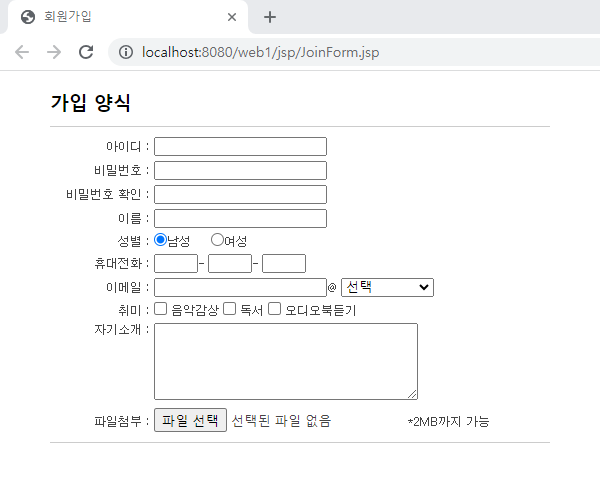 😃😃😃😃😃
😃😃😃😃😃
MySQL
SELECT...FROM
(Oracle 은 from이 필수이고 MySQL은 from은 생략 가능하다.)-다르다는 것을 알고 있으면 된다.
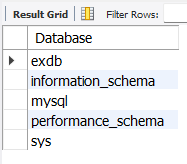
현재 서버에 어떤 DB가 있는지 보기
show databases;
데이터베이스에 있는 테이블 정보 조회
show table status;

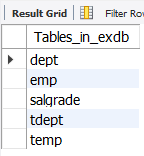
테이블 이름만 간단히 보기
show tables;
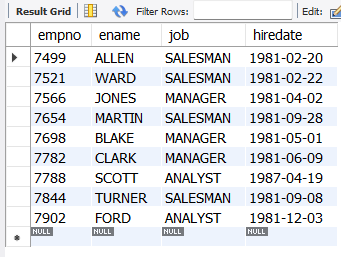
IN
- in 뒤에 오는 필드의 값이 포함되어 있는 것 모두
-- emp 테이블의 job이 MANAGER, ANALYST, SALESMAN가 해당되는 사람들 모두와
-- 정보 empno, ename, job, hiredate 출력
select empno, ename, job, hiredate
from emp
where job in('MANAGER', 'ANALYST', 'SALESMAN');
 😃
😃
-- temp 테이블에 사원명이 강감찬, 연흥부, 을지문덕의 모든 정보
select *
from temp
where emp_name in('강감찬', '연흥부', '지문덕');
 😃
😃
서브 쿼리
ex)
-- 부서명을 알고 싶을 때
select deptno
from emp
where ename='jones';
-> jones의 번호를 알아내고
select ename
from dept
where deptno = 20;
-> 알아낸 jones의 번호 '20'으로 ename을 찾는다.
-- 위 2가지 식을 같이 합쳐서 검색
select ename
from dept
where deptno = (select deptno from emp where ename='jones');
-- 20번 부서 사원의 job과 같은 job을 갖고 있는 직원 모두
select *
from emp
where job in
(select job from emp where deptno= 20)
and deptno <> 20;
 😃
😃
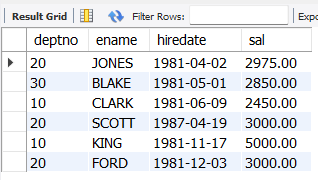
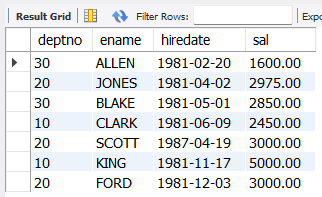
-- 전체 사원의 평균(avg) 임금보다 많은 사원의 사원번호, 이름, 입사일, 급여를 출력하라.
-- 서브 쿼리
select deptno, ename, hiredate, sal
from emp
where sal > (select avg(sal) from emp);
 😃😃
😃😃
-- 30번 부서의 평균보다 많이 받는 사원의 사원번호, 이름, 입사일, 급여를 출력하라.
select deptno, ename, hiredate, sal
from emp
where sal > (select avg(sal) from emp where deptno = 30);
 😃😃😃
😃😃😃
-- 10번 부서와 같은 일을 하는 사원의 사원번호, 이름, 급여를 급여가 많은 순으로 출력하라.
select deptno, ename, sal
from emp
where job in(select job from emp where deptno =10)
-- (and deptno != 10) 10번 부서를 제외한
order by sal desc;

-- temp 테이블에서 lev가 과장인 사람들의 부서명을 출력하시오.
-- 과장인 사람들의 부서 번호를 찾기
select DEPT_CODE
from temp
where lev = '과장';
-- 위 언어를 아래 in과 함께 넣는다.
select dept_name
from tdept
where dept_code in (select DEPT_CODE from temp where lev = '과장');
JOIN
- 식에서 알고싶은 정보가 2개 이상이라면 join
join 이라는 언어를 넣어 두개 이상의 테이블을 서로 묶어서 하나의 결과 집합으로 만들어 내는 것이다.
종류 :
- INNER JOIN(내부 조인)은 두 테이블을 조인할 때, 두 테이블에 모두 지정한 열의 데이터가 있어야 한다.
- OUTER JOIN(외부 조인)은 두 테이블을 조인할 때, 1개의 테이블에만 데이터가 있어도 결과가 나온다.
- CROSS JOIN(상호 조인)은 한쪽 테이블의 모든 행과 다른 쪽 테이블의 모든 행을 조인하는 기능이다.
※ 주의 : 테이블이 많다면 너무 커져서 안됨- SELF JOIN(자체 조인)은 자신이 자신과 조인한다는 의미로, 1개의 테이블을 사용한다.
하나의 테이블에서 또 다른 정보를 찾아보고 싶을 때
-- equi 조인 == inner join
select emp.*, dname, loc          /* dname, loc는 dept에 밖에 없어서 dept.을 안써줘도 된다. */
from emp,dept
where emp.deptno = dept.deptno;   /* equi 조인 = ~과 ~가 같은경우 */
                                  /* deptno는 두테이블에서 겹쳐서 select에서 dept.deptno를 지움 */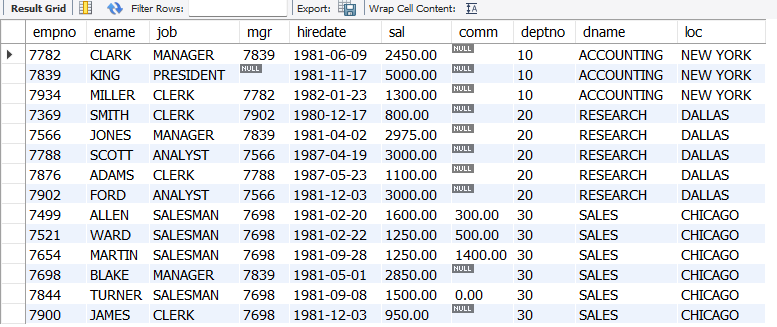
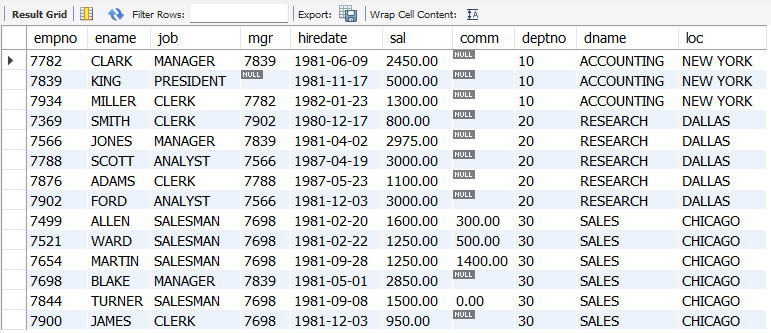
select emp.*, dname, loc
from emp
(inner join) dept
on emp.deptno = dept.deptno;
/ inner join 생략 가능/
Java
package ex6;
import java.util.Scanner;
public class Array01 {
public static void main(String[] args) {
// 스트링 배열 선언과 정의 (3개, 0,1,2)
String[] str = new String[3];
Scanner s = new Scanner(System.in);
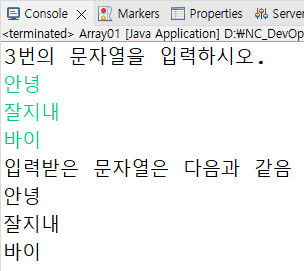
System.out.println("3번의 문자열을 입력하시오.");
// 0, 1, 2 배열에 입력 받아서 저장됨.
for(int i=0; i<3; i++) {
str[i]=s.nextLine();
}
System.out.println("입력받은 문자열은 다음과 같음");
// str[0], str[1], str[2] 로 차례대로 들어감.
for(String ss : str) {
// tap키를 눌러서 줄바꿈, 출력해라 라는 뜻이다.
System.out.println(ss+"\t");
}
}
}
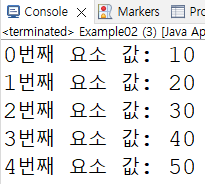
package ex6;

public class Example02 {

public static void main(String[] args) {

	// myArr이라는 int 형 배열이 선언되면서 각 방에 10~50까지를 저장하는 5개의 방이 생김
	// 선언함과 동시에 초기화하는 방법임.

	int [] myArr = {10, 20, 30, 40, 50};
	for(int i=0; i<5; i++) {
		System.out.println(i+"번째 요소 값: "+myArr[i]);
		}
	}
}
package ex6;

public class Arry02 {

public static void main(String[] args) {
	double[] scoreArr= {90, 70.5, 80, 79, 82.5, 50, 70, 90.2, 89.5, 89.7};
	double sum= 0.0;

	// 총합을 구하는 로직
	for(int i=0; i<scoreArr.length; i++)
		sum += scoreArr[i];

	// 평균을 구하고
	double avg = sum/scoreArr.length;

	// 합계 출력
	System.out.println("총 합: "+sum);

	// 평균 출력 포멧을 통해 출력
	System.out.format("평균 : %6.2f ", avg);
	System.out.println();
	System.out.printf("평균 : %6.3f ", avg);
	}
}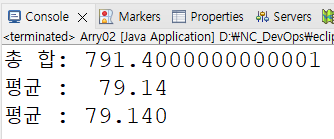
- %6.2f = 총 6자리를 찍는데 소수점 이하 2째 자리까지만 찍어라
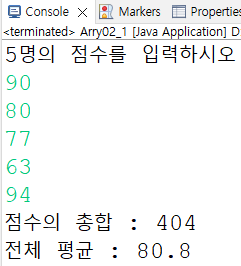
package ex6;
import java.util.Scanner;
public class Arry02_1 {

public static void main(String[] args) {

    // 5개의 점수(정수)를 입력 받아서 총점과 평균을 구하고 출력하시오
	int[] score = new int[5];
	Scanner s = new Scanner(System.in);

	int sum=0;
	double avg=0.0;

	System.out.println("5명의 점수를 입력하시오");
	for (int i=0; i<score.length; i++) {
		score[i] = s.nextInt();

		sum += score[i];
		}
		avg = sum/score.length;

		System.out.println("점수의 총합 : "+sum);
		System.out.println("전체 평균 : "+avg);
		}
} 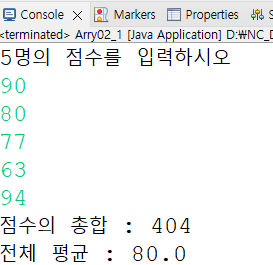
avg = (sum*1.0)/score.length; 로 하게 되면 실수로 만들어 주는거라 실수 값이 나온다.
2차원 배열
- 1차원 배열이 쌓여서 2차원 배열이 나온 것.
ex) 3층에 4칸짜리 방 생성- 다차원 배열은 1차원 배열과 매우 유사하지만, 행과 열이 여러개임
- 2차원 배열은 데이터가 행과 열에 저장되는 표 형식으로 데이터를 나타냄
ex) int[ ][ ] myArr = new int[3][4] 와 같이 표현한다.
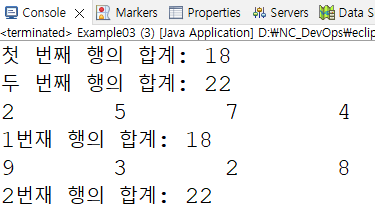
package ex6;

public class Example03 {

public static void main(String[] args) {
	int[][]myArr = new int[2][4];

	myArr[0][0] = 2;
	myArr[0][1] = 5;
	myArr[0][2] = 7;
	myArr[0][3] = 4;
	myArr[1][0] = 9;
	myArr[1][1] = 3;
	myArr[1][2] = 2;
	myArr[1][3] = 8;

	int sum1 = 0, sum2 = 0;
	for(int i=0; i<4; i++) {
	sum1 += myArr[0][i];
	}
	System.out.println("첫 번째 행의 합계: "+sum1);
	for(int i=0; i<4; i++) {
		sum2 += myArr[1][i];
	}
	System.out.println("두 번째 행의 합계: "+sum2);

    // for문을 줄 때 행이 변하는 반복
	// 행 하나에 열이 변하는 반복
	// 다중 for문으로 할 수 있음

	int sum=0;

	for(int i=0; i<2; i++) {

		sum = 0;
		for(int j=0; j<4; j++) {
			System.out.print(myArr[i][j]+"\t"); // "\t"=간격

			sum += myArr[i][j];
		}
		System.out.println(); // 줄 바뀔때 줄을 바꿔줌
		System.out.println((i+1)+"번재 행의 합계: "+sum);
		}
	}
}
j<myArr.length
j<myArr[i].length 라고 바꿔 쓸 수 있다.
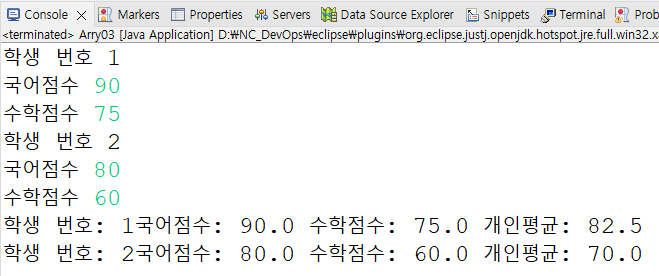
package ex6;
import java.util.Scanner;
public class Arry03 {

public static void main(String[] args) {
	double[][] marks = new double[2][3];
	Scanner s = new Scanner(System.in);

	for(int i=0; i<marks.length; i++) {
		System.out.println("학생 번호 "+(i+1));
		System.out.print("국어점수 ");
		marks[i][0]=s.nextDouble();

		System.out.print("수학점수 ");
		marks[i][1]=s.nextDouble();

		marks[i][2]=(marks[i][0]+marks[i][1])/2;
	}

	// 학생번호, 국어, 수학, 평균 출력 for문 하나만 있으면 됨
		for(int i=0; i<marks.length; i++) {
			System.out.print("학생 번호: "+(i+1));
			System.out.print("국어점수: "+marks[i][0]+" ");
			System.out.print("수학점수: "+marks[i][1]+" ");
			System.out.println("개인평균: "+marks[i][2]);
		}
	}
}