Java Script
Date 객체
날짜 계산하는 프로그램 만들기
과거의 날짜와 현재 날짜 사이에 시간이 얼마나 흘렀는지 계산할 때는 Date의 객체의 getTime()메소드를 사용 - 1970/01/01부터 특정한 날까지 시간을 밀리초 단위로 표시해준다.
그리고 나눈 결과값은 Math 객체의 round()메소드를 사용.
<!DOCTYPE html>
<html lang='ko'>
<head>
<meta charset="UTF-8">
<meta name="viewport" content="width=device-width, initial-scale=1.0">
<title>날짜 계산하는 프로그램 만들기</title>

<style type="text/css">

#container{margin: 50px auto;
           width: 300px;
           height: 300px;
           border-radius: 50%;
           border: 2px double #222;
           background-color: #d8f0fc;
           text-align: center;}

h1{margin-top: 80px;}

.accent{font-size: 1.8em;
        font-weight: bold;
        color: blue;}

</style>

<script type="text/javascript">
function loadf(){

  var now = new Date("2023-07-03");        // 오늘 날짜를 객체로 지정
  var firstDay = new Date("2023-07-01");  // 시작 날짜를 객체로 지정

  var toNow = now.getTime();               // 오늘까지 지난 시간(밀리 초)
  var toFirst = firstDay.getTime();        // 첫날까지 지난 시간(밀리 초)
  var passedTime = toNow - toFirst;       // 첫날부터 오늘까지 지난 시간(밀리 초)

  passedTime = Math.round(passedTime/(1000*60*60*24)); // 밀리초를 일수로 계산하고 반올림
  document.querySelector('#result').innerText = passedTime;
  }

</script>

</head>
<body onload="javascript:loadf();">
<div id="container">
  <h1>책 읽기</h1>
  <p><span id="result" class="accent"></span>일 연속으로 <br>책 읽기를 달성했군요.</p>
  <p>축하합니다.</p>
</div>
</body>
</html>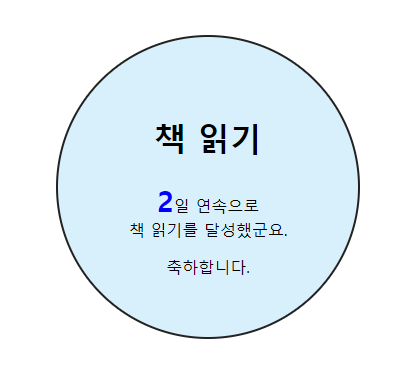
브라우저와 관련된 객체
자바스크립트를 이요하면 특정한 사이트로 이동하거나 새 탭을 여는 등 웹 브라우저와 관련된 여러 가지 효과를 만들 수 있다.
window 객체의 프로퍼티
window 객체는 웹 브라우저의 상태를 제어하며 자바스크립트의 최상위에 있어 자바스크립트의 모든 객체는 window객체 안에 포함되어 있다.
window 객체의 프로퍼티는 주로 웹 브라우저 창의 정보를 가져오거나 값을 바꿀 때 사용한다.
★웹 브라우저에 팝업 창 표시하기★
<!DOCTYPE html>
<html lang='ko'>
<head>
<meta charset="UTF-8">
<meta name="viewport" content="width=device-width, initial-scale=1.0">
<title>팝업 창 표시하기</title>

<script type="text/javascript">
function popupw(){
  window.open("notice.jsp","pop","width=500, height=400");
}
</script>

</head>
<body>

<p>문서를 열면 팝업 창이 표기됩니다.</p>
<div style="text-align: center;">
<button onclick="javascript:popupw();">팝업열기</button>
</div>

</body>
</html>
window.open("notice.jsp","pop","width=500, height=400");
오픈될때 열리는 파일명, 오픈하는 윈도우 이름, 오픈 윈도우의 옵션
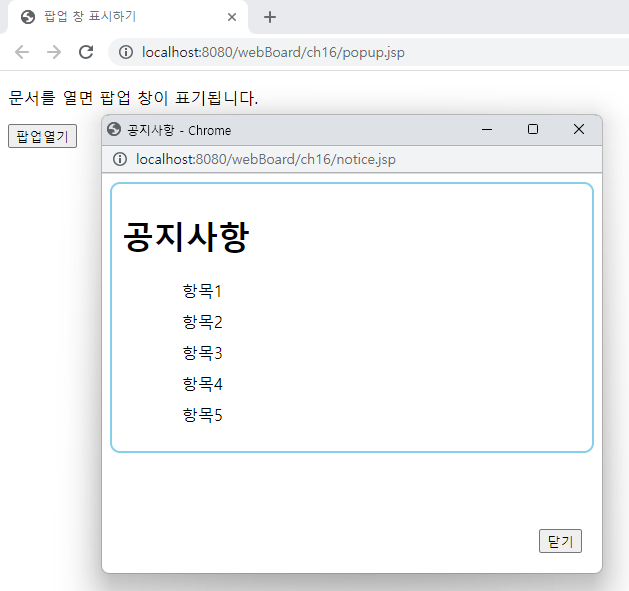
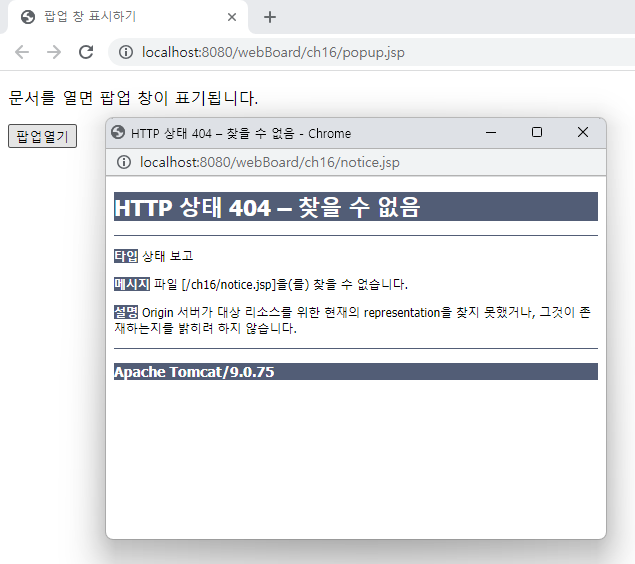 팝업 열기를 클릭하면 이와 같은 팝업창 생성
여기서 팝업창 꾸밈(notice.jsp)
<!DOCTYPE html>
<html>
<head>
<meta charset="UTF-8">
<title>공지사항</title>
<style type="text/css">

#content{border: 2px double skyblue;
         border-radius: 10px;
         padding: 10px;}

ul{margin-left: 15px;
   list-style-type: none;}

ul li{margin: 10px 5px;}

button{position: absolute;
       bottom: 20px;
       right: 20px;}

</style>
</head>
<body>
  <div id="content">
    <h1>공지사항</h1>
      <ul>
        <li>항목1</li>
        <li>항목2</li>
        <li>항목3</li>
        <li>항목4</li>
        <li>항목5</li>
      </ul>
        <button onclick="javascript:window.close();">닫기</button>
  </div>

</body>
</html>
팝업이 차단된 브라우저의 알림창 표시하기
<script type="text/javascript">
function popupw(){
	var newWin = window.open("notice.jsp","pop","width=500, height=400, left=100, top=200");

	if (newWin==null){ //팝업차단되어 있으면 알림창
		  alert("팝업이 차단되어 있습니다. 팝업 차단을 해제해 주세요.");
	  }
	newWin.moveBy(100,100);
}
</script>
위와 같이 수정.
navigator 객체
navigator객체에는 웹 브라우저 버전을 비롯해 플러그인 설치 정보나 온.오프라인 등의 여러 정보가 담겨있다.
userAgent
navigator 객체에서 가장 먼저 알아야 할 프로퍼티는 userAgent로 사용자 에이전트 문자열을 의미한다.
userAgent는 사용자의 웹 브라우저 정보를 서버에 보낼 때 사용한다.
location 객체
이름에서도 알 수 있듯이 브라우저의 주소 표시줄과 관련된다.
사이트 위치 고정하기
<!DOCTYPE html>
<html>
<head>
<meta name="viewport" content="width=device-width, initial-scale=1.0">
<title>사이트 위치 고정하기</title>

<style type="text/css">
#container{margin: 10px auto;
           width: 500px;}
</style>

<script type="text/javascript">

  function displyfunc(){
	 var display = document.querySelector("#display");
	 display.innerHTML="<p><b>location.href : </b>" + location.href + "</p>"
	 +"<p><b>location.host : </b>" + location.host + "</p>
	 +"<p><b>location.protocol : </b>" + location.protocol + "</p>";
  }

</script>
</head>
<body onload="javascript: displyfunc();">
  <div id="container"></div>
    <h2>location 객체</h2>
      <div id="display"></div>
      <button onclick="location.replace(
    		  'http://www.easyspub.com')")>이지스퍼브리싱 홈페이지로 이동 </button>
</body>
</html>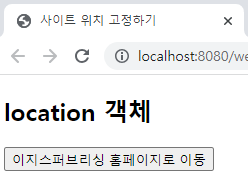
display.innerHTML - html코드로 써라
팝업 창에서 클릭한 내용을 메인 창에 나타내기
1. main.html파일 수정하기
<title>팝업창 열기</title>
</head>
<body>
  <p>문서를 열면 팝업창이 표시됩니다.</p>
    <script type="text/javascript">
      popWin = window.open("doit-event.jsp", "popup", "width=750, height=600);
      popWin.openner = self;  // popWin 객체를 만든 부모가 자신(self)이라고 알려줌
    </script>
popWin.openner = self; popWin의 오프너는 나(아빠)다. / 없어도 스스로 알고 있다.
2. doit-event.html파일 수정하기
<title>이벤트</title>

<script type="text/javascript">
  function loadURL(url){
//	  alert(url);
  window.opener.location=url; //부모창의 location에 url을넘겨줌 (오픈한 창의 주소를 바꿔라)
  window.close();
  }
</script>

<style type="text/css">
#container{width: 600px;
           margin: 10px auto;
           padding: 10px;
           text-align: center;}
</style>

</head>
<body>
  <div id="container">
    <img alt="" src="../images/doit.jpg">
    <p>
      <a href="doit_main.jsp"
      onclick="javascript:loadURL(this.href); return false;">자세히 보기</a>
    </p>
  </div>
</body>
and
<title>Do it!!</title>

<style type="text/css">

#container{width: 750px;
           margin: 0 auto;
           text-align: center;}

</style>
</head>
<body>
  <div id="container">
    <img alt="" src="http://www.easyspub.co.kr/upload/smarteditor/BOOK/2016/20160418190258778248.jpg">
  </div>
자세히 보기 클릭
sceen 객체
사용자의 화면의 크기나 정보를 알아낼 때 screen을 사용한다.
screen 객체로 화면의 너비와 높이 알아내기
<!DOCTYPE html>
<html lang='ko'>
<head>
<meta charset="UTF-8">
<meta name="viewport" content="width=device-width, initial-scale=1.0">
<meta http-equiv="X-UA-Compatible" content = "ie==edge">
<title>screen 객체로 화면의 너비와 높이 알아내기</title>
<style type="text/css">
#container{width: 400px;
margin: 10px auto;}
.display{margin-top: 10px;
padding: 10px;
border: 1px solid #222;
box-shadow: 1px 0 1px #ccc;}
p{font-size: 1em;}
</style>
</head>
<body>
<div id="container">
<h2>Screen 객체</h2>
<div class="display">
<script type="text/javascript">
document.write("<p><b>screen.availWidth : </b>" + screen.availWidth + "</p>");
document.write("<p><b>screen.availHeight : </b>" + screen.availHeight + "</p>");
document.write("<p><b>screen.width : </b>" + screen.width + "</p>");
document.write("<p><b>screen.height : </b>" + screen.height + "</p>");
</script>
</div>
</div>
</body>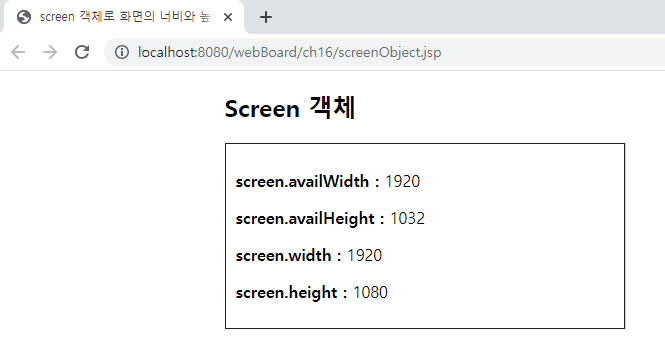 (사실 잘 사용 안함)
★웹과 jsp 프로그래밍 이해하기
- 인터넷과 웹의 개요
1) 인터넷
컴퓨터가 서로 연결되어 TCP/IP라는 통신 프로토콜을 이용하여 정보를 주고받는 전 세계의 컴퓨터 네트워크
2) 웹
인터넷에 연결된 컴퓨터들을 통해 사람들이 정보를 공유할 수 있는 정보 공간
월드 와이드 웹(world wide web)의 줄임말
- 웹의 동작 원리
1) 웹은 기본적으로 클라이언트/서버 방식으로 동작
- 정적 웹 페이지와 동적 웹 페이지
1) 정적 웹 페이지
컴퓨터에 저장된 텍스트 파일을 그대로 보는 것
HTML(HyperText Markup Language)
2) 동적 웹 페이지
저장된 내용을 다른 변수로 가공 처리하여 보는 것
PHP(Personal Home Page), ASP(Active Server Page), JSP
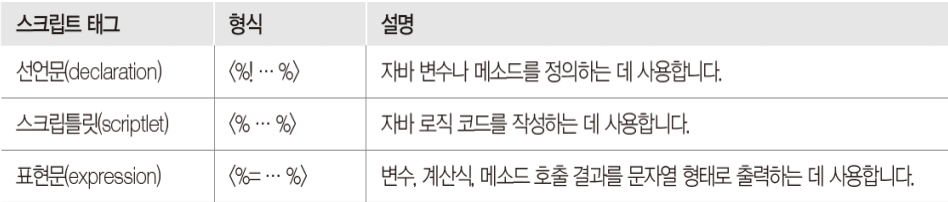
스크립트 태그
<%@ page language="java" contentType="text/html; charset=UTF-8"
    pageEncoding="UTF-8"%>

<%! // 선언문, 멤버 변수에 해당
	String s1="Hello";
    String s2="Hi";%>

<% //자바 코드 서비스 메소드에 들어감
    String ls1 = "Good!!";
    String ls2 = "Very";
%>

<!-- 출력용 -->
<%=  s1 %><br>
<%=  s2 %><br>
<%= ls1 %><br>
<%= ls2 %>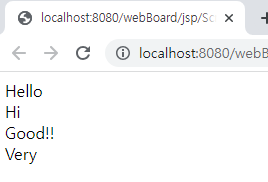
<% //자바 코드 서비스 메소드에 들어감
    String ls1 = "Good!!";
    String ls2 = "Very";
    out.print("hello");%>
out.print("hello"); 이것도 같이 출력이 된다.
<%@ page language="java" contentType="text/html; charset=UTF-8"
    pageEncoding="UTF-8"%>
<!DOCTYPE html>
<html>
<head>
<meta charset="UTF-8">
<title>Scripting Tag</title>
</head>
<body>
  <h2>Scripting Tag</h2>

    <%! int count =3; //전역변수
    // 디폴트 멤버 메소드
    String makeItLower(String data){
    	return data.toLowerCase();
    }%>

      <% // jspService()메소드에 포함
        for(int i =1; i<=count; i++){
          out.println("Java server Page"+i+"<br>");
          }%>

      <%= makeItLower("Hello World") %> <!-- 소문자로 변경 out.println(출력할 내용); -->

</body>
</html>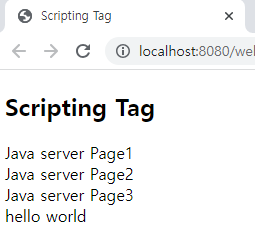
<title>PageCount1</title>
</head>
<%! int count = 0; %> <!-- count선언 후 0으로 초기화 -->
<body>

<h2>Page count is: </h2>
  <% out.print(++count);
     // 숫자가 1씩 증가%>

</body>
</html>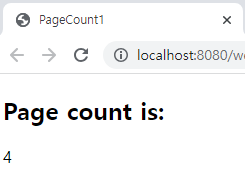
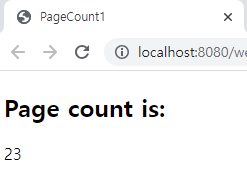 새로고침 할 때마다 숫자가 올라감
<title>전역 메소드</title>
</head>
<body>
Page Count is:

<%-- 스크립틀릿 태그 --%>

<% out.print(myMethod(0)); %>   <!-- 전역 메소드 myMethod()호출 -->

<%! public int myMethod(int count){
	return ++count;}%>                <!-- 전역 메소드 myMethod()설정 -->

</body>
</html>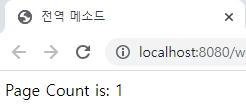
선언문 태그의 기능과 사용법
<title>declatation01</title>
</head>
<body>

<%! int data = 50; %>

<% out.println("Value of the variabe is: " + data); %>

</body>
</html>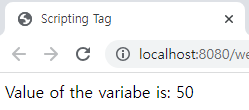
<title>declatation02</title>
</head>
<body>

<%! int sum(int a, int b){
	return a +b;}%>

<% out.println("2 + 3 = " + sum(2,3)); %>

</body>
</html>
<title>declatation03</title>
</head>
<body>

<%! String makeItLower(String data){
    return data.toLowerCase();}%>

<% out.println(makeItLower("Hello World")); %>

</body>
</html>
소문자
소문자
<title>scriptlet01</title>
</head>
<body>

<% int a = 2;
   int b = 3;
   int sum = a + b;
   out.println("2+3= " + sum); %>

</body>
</html>
<title>scriptlet02</title>
</head>
<body>

<% for (int i = 0; i<= 10; i++){
	if(i%2 == 0)
		out.println(i + "<br>");
	} %>

</body>
</html>
<title>expression01</title>
</head>
<body>

<p>
  Today's date:
  <%= new java.util.Date() %>
</p>

</body>
</html>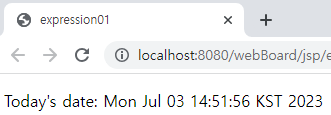
<title>expression02</title>
</head>
<body>

<% int a = 10;
   int b = 20;
   int c = 30;
   %>

<%= a + b + c %>

</body>
</html>
디렉티브 태그의 개요
중 import
<title>Directives Tag</title>
</head>
<body>

<%@ page import = "java.util.Date" %>
   Today is <%= new Date() %>

</body>
</html>
<%@ %>
<title>Directive Tag</title>
</head>
<body>

<!-- 일부러 오류 낼거임 -->
<% String str = null;
   out.println(str.toString());%>

</body>
</html>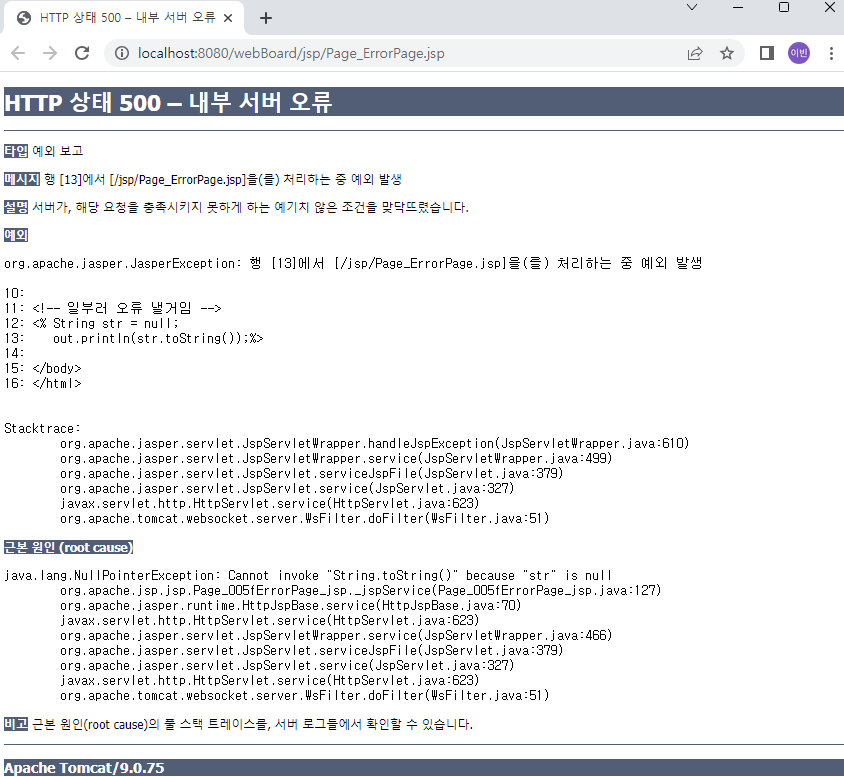
<%@ page language="java" contentType="text/html; charset=UTF-8"
    pageEncoding="UTF-8"%>

 <%@ page errorPage = "ISErrorPage.jsp" %> <%-- 에러가 나면 여기 페이지로 가라  --%>

<!DOCTYPE html>
<html>
<head>
<meta charset="UTF-8">
<title>Directive Tag</title>
</head>
<body>

<!-- 일부러 오류 낼거임 -->
<% String str = null;
   out.println(str.toString());%>

</body>
</html>
_____________________________________________________________________________
<%@ page import="java.io.PrintWriter" %>
<%@ page language="java" contentType="text/html; charset=UTF-8"
    pageEncoding="UTF-8"%>
<%@ page isErrorPage='true' %> <!-- 해당 디렉티브로 인해서 현재 페이지는 에러내장객체 exception이라는 개체를 쓸 수 있다. -->
<!DOCTYPE html>
<html>
<head>
<meta charset="UTF-8">
<title>Directives Tag</title>
</head>
<body>
<h3>에러가 발생했습니다.</h3>
<h4>exception 내장객체 변수</h4>

<!-- jsp 가 갖고 있는 만들어진 객체를 내장객체 -->
<!-- out, exception, session, request, response등 -->
<% exception.printStackTrace(new PrintWriter(out)); %>

</body>
</html>
<%@ page errorPage = "ISErrorPage.jsp" %> <%-- 에러가 나면 여기 페이지로 가라 --%>
<%@ page import="java.io.PrintWriter" %>
<%@ page language="java" contentType="text/html; charset=UTF-8"
    pageEncoding="UTF-8"%>
<%@ page isErrorPage='true' %>
<!-- 해당 디렉티브로 인해서 현재 페이지는 에러내장객체 exception이라는 개체를 쓸 수 있다. -->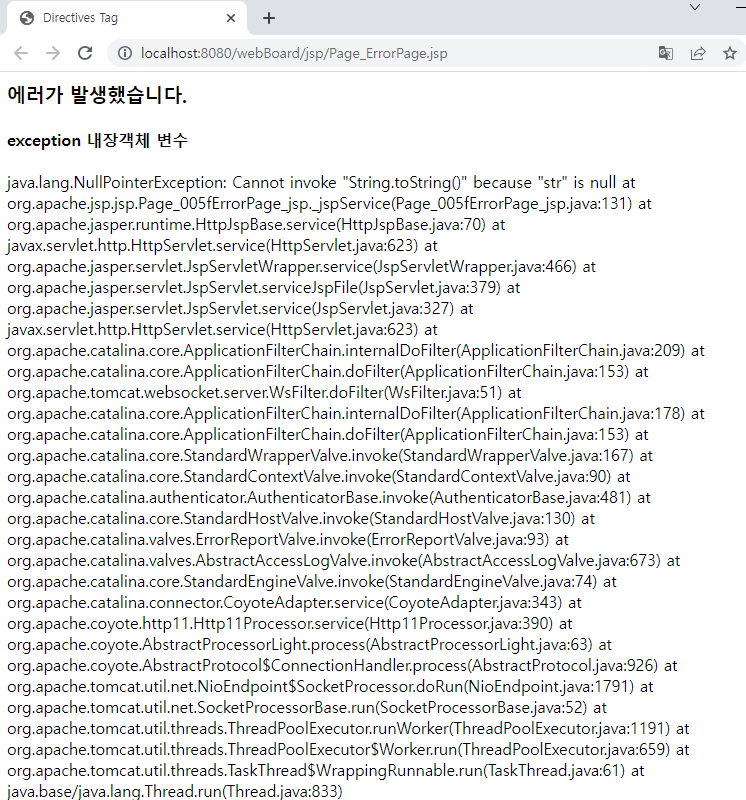
<%@ page language="java" contentType="text/html; charset=UTF-8"
pageEncoding="UTF-8"%>
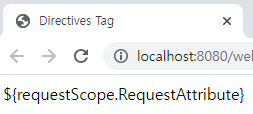
<%@ page isELIgnored="true" %>
<!DOCTYPE html>
<html>
<head>
<meta charset="UTF-8">
<title>Directives Tag</title>
</head>
<body>
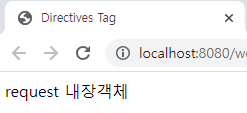
<% request.setAttribute("RequestAttribute", "request 내장객체");%>
<!-- el 표기로 출력하기 -->
${requestScope.RequestAttribute}
</body>
</html><%@ page isELIgnored="true" %> true이면
<%@ page isELIgnored="true" %> false이면
$ { 이 두개가 같이 붙어 있는 것을 EL이라고 한다.
Java
파일처리
파일 처리를 위해 프로그램을 시작하기 위한 모든 메소드가
import java.io.*패키지에 있다.
※stream - 자바에서 입출력 즉, 어느 한쪽에서 다른 쪽으로 데이터를 전달하려면 두 대상을 연결하고 데이터를 전송할 수 있는 것이다.
입출력 스트림
데이터를 운반하는 데 사용되는 연결 통로인 스트림은 단방향으로만 통신할 수 있으므로 입력과 출력을 동시에 처리할 수 없다.
파일 처리 과정
- File 크래스로 파일 열기(생성하기)
File 클래스를 이용하여 특정 경로에 저장된 파일을 연다.(즉, file 클래스의 생성자에 특정 경로의 파일명을 지정하고 File클래스의 객체를 생성한다.
그리고 특정 겨로의 파일명이 생성되었는지를 createNewFile()메소드로 확인한다.
- 입출력 스트림 클래스로 파일 읽기/쓰기
입출력 스트림 클래스의 생성자로 객체를 생성하며, 생성된 객체를 통해 읽기 작업은 read() 메소드로, 쓰기 작업은 write() 메소드로 수행한다.
- 파일 읽기/쓰기 종료하기(닫기)
입추력 스트림 클래스로 생성된 객체를 통해 close()메소드로 파일 읽기 또는 쓰기 작업을 닫는다.
파일 생성
package ex12;

import java.io.File;
import java.io.IOException;

public class Example01 {

	public static void main(String[] args) {
		File fileObj = new File("example01.txt");
		try {
			boolean success = fileObj.createNewFile();
			  if(success) {
				  System.out.println("파일 생성 성공");
			  }
			  else {
				  System.out.println("파일 생성 실패");
			  }
		}
			  catch(IOException e) {
				  System.out.println(e);
			  }
		}
	}
createNewFile();메소드는 입출력 오류시 IOException(Unhandled exception type IOException)이 발생하므로 반드시 예외 처리를 위한 try~catch문과 함께 사용해야 한다.
package ex12;

import java.io.File;

public class FileHandling01 {

    // 파일로 인식해서 생성, 디렉토리도 가능
	public static void main(String[] args) {

		File finfo = new File("src\\ex12\\Example01.java");

		if(finfo.exists()) {
			System.out.println("파일의 이름: " + finfo.getName());
			System.out.println("파일의 경로: " + finfo.getAbsolutePath());
			System.out.println("파일의 쓰기가 가능한가?: " + finfo.canWrite());

			System.out.println("파일의 읽기가 가능한가?: " + finfo.canRead());

			System.out.println("파일의 크기: " + finfo.length());
		}
		else {
			System.out.println("존재하는 파일이 아닙니다.");
		}
	}
}
파일쓰기
파일 쓰기에서는 바이트 출력 스트림 유형과 문자 출력 스트림 유형이 있다.
바이트 출력 스트림유혀은 응용 프로그램에서 출력 장치로 바이트 데이터를 전송하는 방법이고, 문자 출력 스트림 유형은 응용 프로그램에서 추력 장치로 문자 데이터를 전송하는 방법이다.
FileOutputStream()클래스는 파일에 데이터를 쓰는 데 사용되는 출력 스트림으로, 파일에 기본값을 쓰는경우 사용한다.
문자 지향 데이터의 경우FileOutputStream()보다 문자 스트림 유형인
FileWriter()클래스 이용.
package ex12;

import java.io.File;
import java.io.FileOutputStream;
import java.io.IOException;

public class Example02 {

	public static void main(String[] args) {
		String str = "Hello! Java Programming";
		File f;
		FileOutputStream fos = null; // 반드시 클로즈 해줘야 함

		try {
			f= new File("src\\ex12\\example02.txt");
			if(!f.exists()) { // 없으면 참이 됨
				f.createNewFile();
			}
			// 스트림 방식의 출력 파일 생성 그래서 출려고 바이트 스트림을 출력
			fos = new FileOutputStream(f);

			// str은 문자열이고, 그것을 바이트 형태로 가져오기
			byte[] b=str.getBytes();
			fos.write(b);
			System.out.println("파일쓰기 성공");
		}
		catch (Exception e) {
			System.out.println(e.getMessage());
		}
		finally {
			try {
			fos.close();
		}
		catch (IOException e) {}
		}
	}
}
package ex12;

import java.io.File;
import java.io.FileOutputStream;
import java.io.IOException;

public class FileHandling02 {
	public static void main(String[] args) {
		// ""안에 있는 것은 파일이야라고 한 것
		File file = new File("src\\ex12\\gugudan.txt");
		// 출력용 파일(바이트스트림)을 선언
		FileOutputStream fos = null;
		try {
			// file 객체가 없으면 생성
			if(!file.exists())
				file.createNewFile();
			//그 file이라는 애를 출력용으로 만들어라.
			fos = new FileOutputStream(file);

		for(int x=2; x<=9; x++) {
			for(int y=1; y<=9; y++) {
				String str = x+"X"+y+"="+(x*y)+"\n";
				// 문자열을 바이트로 변경해서 배열에 저장
				byte[]b = str.getBytes();
				//바이트 배열을 파일에 출력
				fos.write(b);
			}
		}
		System.out.println("파일 쓰기 성공");
		}
		catch(Exception e) {
			e.getMessage();
		}
		finally {
			if(fos!=null) { //fos가 null이 아니면 생성 되었다는 것임
				try {
					fos.close(); // 열린 객체를 닫아라
				}
				catch (IOException e) {}
			}
		}
	}
}
문자 출력 스트림 유형
Writer 클래스는 문자 스트림에 쓰기 위한 추상 클래스이다.
FileWriter클래스는 문자 데이터를 파일에 쓰는 데 사용되며, FileOutPutStream클래스와 달리 문자열을 직접 쓰는 방법을 제공하므로 문자열을 바이트 배열로 변환할 필요가 없다.
package ex12;

import java.io.File;
import java.io.FileWriter;
import java.io.IOException;

public class Example03 {

	public static void main(String[] args) {
		FileWriter myWr = null;
		try {
			File f = new File("src\\ex12\\Example03.txt");
			if(!f.exists())
				f.createNewFile();
			myWr = new FileWriter(f);
			myWr.write("Helo!!\n");
			myWr.write("Java Programming");
			System.out.println("파일쓰기 성공");
		}
		catch (Exception e) {
			System.out.println(e.getMessage());
		}
		finally {
			if(myWr != null) {
				try {
					myWr.close();
				} catch (IOException e) {}
			}
		}
	}
}
키보드로 입력된 값을 파일에 저장하기
package ex12;
import java.io.File;
import java.io.FileOutputStream;
import java.io.FileWriter;
import java.io.IOException;
import java.util.Scanner;
public class FileHandling03 {
private static FileWriter fw;
public static void main(String[] args) {
File file = new File("src\\ex12\\member.txt");
fw = null;
try {
if(!file.exists())
file.createNewFile();
fw = new FileWriter(file);
Scanner input = new Scanner(System.in);
boolean quit = false;
while (!quit) {
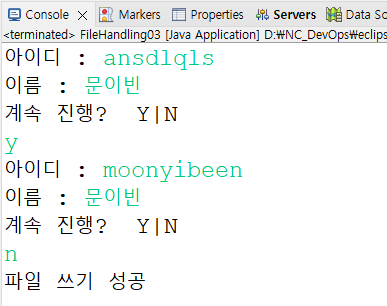
System.out.print("아이디 : ");
String userID = input.next();
fw.write("아이디 : " + userID + " ");
System.out.print("이름 : ");
String userName = input.next();
fw.write("아이디 : " + userName + "\n");
System.out.println("계속 진행? Y|N");
input = new Scanner(System.in);
String str = input.nextLine();
if (str.toUpperCase().equals("N"))
quit = true;
}
fw.close();
System.out.println("파일 쓰기 성공");
}
catch(Exception e) {
e.getMessage();
}
}
}
파일읽기
파일 읽기에는 바이트 입력 스트림 유형과 문자 입력 스트림 유형이 있다.
바이트 - 입력 장치에서 응용 프로그램으로 바이트 데이터를 전송하는 방법
문자 - 입력 장치에서 응용 프로그램으로 문자 데이터를 전송하는 방법
FileInputStream클래스는 파일에서 이미지 데이터, 오디오, 동영상 등의 바이트 지향 데이터(원시 바이트 스트림)을 읽어오는 데 사용되는 입력 스트림이다.
단, 문자 스트림을 읽을 때는 문자 스트림 유형인 FileReader 클래스를 사용하는 것이 좋다.
package ex12;

import java.io.File;
import java.io.FileInputStream;
import java.io.IOException;

public class Example04 {

	public static void main(String[] args) {
		FileInputStream fis = null;
		try {
			File file = new File("src\\ex12\\Example04.txt");
			if(!file.exists())
				file.createNewFile();

			// file을 입력용으로 생성해라(오픈해라)
		    fis = new FileInputStream(file);
			int i = 0;

			while ((i=fis.read())!= -1) { // 끝이면 -1
				System.out.print((char)i); // 문자로 바꿔서 출력
			}
			System.out.println("\n파일 읽기 성공");
		    }
		    catch(Exception e) {
		    	System.out.println(e);
		    }
		    finally {
		    	if(fis != null)
		    		try {
		    			fis.close();
		    		}
		    	    catch (IOException e) {}
		    }
	}
}