prompt (" " , default값)
<script type="text/javascript">
var user_id = prompt("아이디를 입력하세요.", "hong");
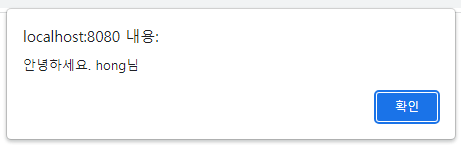
if(user_id != ""){ //user_id 가 비어있나요?
alert("안녕하세요. " + user_id + "님");
if(confirm("정말 로그아웃 하시겠습니까?")){
alert("로그아웃");
}else{
alert("로그아웃 취소");
}
}
</script>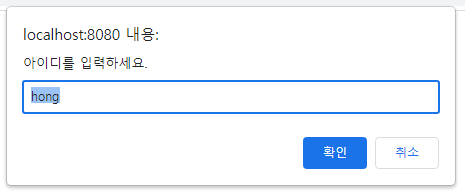

<input type="button" value="결과보기"/>
결과보기 버튼을 클릭하면 printResult 함수를 불러와라
<body>
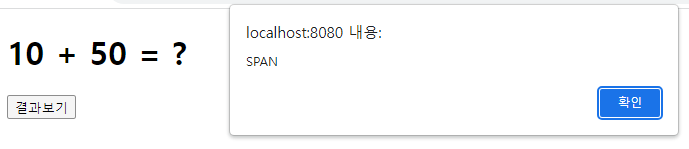
<h1>10 + 50 = <span id="question">?</span></h1>
<input type="button" value="결과보기" onclick="printResult()"/>
<script type="text/javascript">
function sum(x, y){
return x+y;
}
function printResult() {
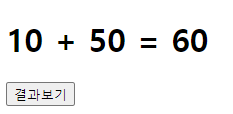
var result = sum(10, 50);
var myTag = document.getElementById("question");
// span 태그 얻어오기 => DOM(document object model)
// body 안에 question이라는 아이디를 가진 태그를 꺼내와라
// alert(myTag.tagName);
// 돔 문법
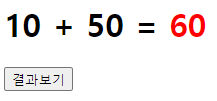
// myTag.innerText = "<font color = 'red'>" + result + "</font>";
myTag.innerHTML = "<font color = 'red'>" + result + "</font>";
}
</script>
</body>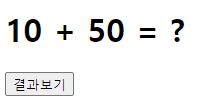
myTag.innerText = "<font color = 'red'>" + result + "</font>";

myTag.innerHTML = "<font color = 'red'>" + result + "</font>";
이벤트 처리
- 특정한 상황이 발생했을 때, 사용자가 정의하는 특정한 동작(함수)들을 호출되도록 하는 것.
- Javascript를 사용하는 이유는
<body>안의 어떠한 태그를 사용자의 이벤트에 반응하도록 제어하기 위함이다.
(1) 이벤트 종류
1. onBlur - 문서나 윈도우, 프레임세트, 폼 요소에서 현재 입력 포커스가 사라질 때
2. onClick - 링크, 이미지맵 영역, 폼 요소가 클릭되었을 때
3. onFocus - 문서나 윈도우, 프레임세트, 폼 요소에서 현재 입력 포커스가 놓였을 때
4. onLoad - 이미지, 문서, 프레임이 로드될 때
5. onMouseOver - 태그의 요소 위로 마우스 커서가 들어갈 때
6. onMouseOut - 태그의 요소 위에서 마우스 커서가 빠져나갈 때
(2) 제어대상 지정
- 태그의 id로 제어할 특정 태그를 지정한다.
document.getElementById("아이디") 로 자바스크립트로 태그를 가져온다.
<body>
<h1 onmouseover="showResult()" onmouseout="hideResult()" style="border: 1px solid red;">
	10 + 50 = <span id="question">?</span>
</h1>
	<p>결과를 보시려면 수식 위에 마우를 올리세요.</p>


<script type="text/javascript">
function sum(x, y){
	return x+y;
}
// 마우스를 올리면 showResult함수 호출 => 결과 합 보이기
function showResult(){
	var result = sum (10,50);

	var myTag = document.getElementById("question");
	myTag.innerText = result;
}

// 마우스를 내리면 hideResult함수 호출 => 다시 ? 보이기
function hideResult(){
	document.getElementById("question").innerText = "?";
}

</script>
</body>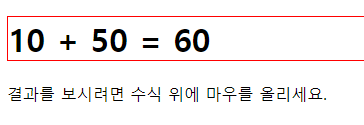
수행되는 순서
<title>Insert title here</title>
<script type="text/javascript">
function insertQuestion(num){
alert(num);
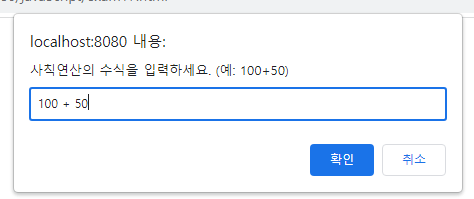
var str = prompt("사칙연산의 수식을 입력하세요. (예: 100+50)", "");
var answer = eval(str); //입력받은 문자열을 수식으로 전환
var result = "<font color = 'red'>" + str + " = " + answer + "</font>";
document.getElementById("question").innerHTML = result;
}
</script>
</head>
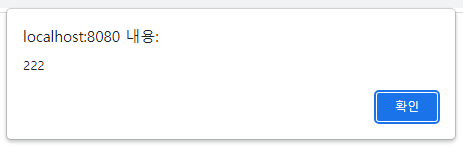
<body onload="insertQuestion(222)">
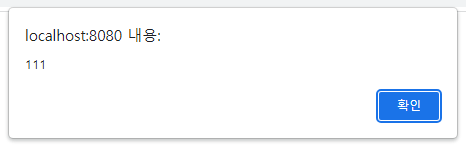
<script>
insertQuestion(111);
</script>
<h1 id="question"></h1>
</body><body>
: 바디태그를 다 돌고나서 자바스크립에서 insertQuestion(222) 함수를 불러와라
error -> 물처럼 흘러 밑으로 쭉 읽어 내려가가는데 그런데 <body>태그안에 <h1>에 도달하기 전
document.getElementById("question").innerHTML = result;을 실행 하기 때문이다.

<script type="text/javascript">
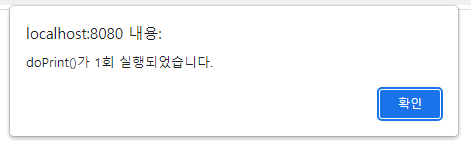
function doPrint(num){
var msg = "doPrint()가 " + num + "회 실행되었습니다.";
alert(msg);
document.getElementById("myid").innerText = msg;
}
doPrint(1); // 호출
</script>
</head>
<body>
<script>
doPrint(2);
</script>
<h1 id="myid">안녕하세요.</h1>
<script>
doPrint(3);
</script>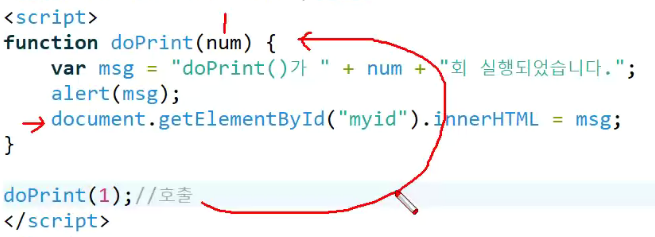


처음의 myid 에만 먹힌다. 중복id는 인식 못함
모든것에 적용 시키려면 class 속성을 부여해주어야 한다.
<style type="text/css">
#myid{
	background: #ff0;
	font-size: 20px;
	font-weight: bold;
	color: #00f;
}
</style>
</head>
<body>
<h1 id="myid">안녕하세요.</h1>
<h1 id="myid">자바스크립트 입니다.</h1>
<h1 id="myid">강의 참 재미있죠?</h1>
<a href="#" onclick="doPrint()">자바스크립트 함수 호출하기</a>

<script>
function doPrint() {
	document.getElementById("myid").innerHTML="스크립트가 실행되었습니다.";
}
</script>

</body>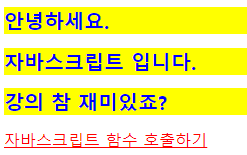

객체 (JavaScript도 class 와 비슷한 형식이 존재)
-
변수와 함수의 집합
-
Javascript는 Prototype 기반의 객체지향언어이다.
객체를 원형(prototype) 형태로 생성하고, 그 안에 기능을 위한 변수나 함수를 추가하는 방법으로 그룹화 하는 개념객체는 자주 사용하게 될 기능들을 묶어서 외부의 스크립트 파일로 분리해 내는 용도로 주로 사용한다.
이렇게 만든 스크립트 파일은 여러개의 HTML파일에 의해서 참조하여 재사용할 수 있다.
calc.js file
-------------
// 빈 객체 선언
var calc = {} // = Calc calc = new Calc();

// 멤버변수 추가 (=필드)
calc.x = 0; // = int x=0;
calc.y = 0;

// 멤버 함수 (=메소드)
calc.setValue = function(x, y){
	this.x = x;
	this.y = y;
}

calc.plus = function(){
	return this.x + this.y;
}

calc.minus = function(){
	return this.x - this.y;
}

calc.result = function(){
	var value1 = this.plus();
	var value2 = this.minus();

	document.write("<p>덧셈 = " + value1 + "</p>");
	document.write("<p>뺄셈 = " + value2 + "</p>");
}

---------------------------------------------------------
<body>

<script src="calc.js"></script>

<script>
document.write("<h3>calc</h3>");
calc.setValue(25,36);

document.write("덧셈 = " + calc.plus() + "<br>")
document.write("뺄셈 = " + calc.minus() + "<br>")
document.write();

calc.result();
</script>
</body>
배열
<script>

// 배열 생성
// var myArray1 = new Array("홍길동", "자바스크립트", "학생"); //내장 객체 (0,1,2)
var myArray1 = ["홍길동", "자바스크립트", "학생"]; // 자바랑 비슷함

document.write(myArray1[0] + "<br>");
document.write(myArray1[1] + "<br>");
document.write(myArray1[2] + "<br>");
document.write("<hr>");

myArray1[0] = "HongGilDong"
myArray1[1] = "JavaScript"
myArray1[2] = "Student"
document.write(myArray1[0] + "<br>");
document.write(myArray1[1] + "<br>");
document.write(myArray1[2] + "<br>");
document.write("<hr>");

// 빈 배열 생성
// var myArrat2 = new Array(); // 자바는 반드시 방의 갯수를 정해주어야 함. 이부분은 자바와 다름
var myArray2 = [];

for(var i=0; i<10; i++){
	myArray2[i] = i + 1;
}

document.write("배열 길이 : " + myArray2.length + "<br>");
for(var i=0; i<myArray2.length; i++){
	document.write(myArray2[i] + " ");
}
</script>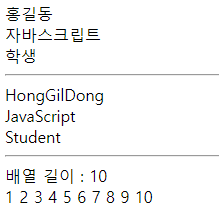
</head>
<body onload="starTime()">
<h1 id="timer">현재시간을 보여줍니다.</h1>

<script>
function starTime() {
	printTime(); // 초가 바뀔 때 마다 새로고침을 해줘야 현재 시간을 볼 수 있음.

	// 1초 마다 printTime() 호출하기!
	setInterval(printTime, 1000) //printTime->()쓰면안됨, 1/1000초
}
function printTime(){
	var days = ["일","월","화","수","목","금","토"];
	var today = new Date();

	var yy = today.getFullYear(); 	// 년
	var mm = today.getMonth() + 1;	// 월
	var dd = today.getDate(); 		// 일
	var i  = today.getDay(); 		// 요일(0 ~ 6)
	var day = days[i];

	var hh = today.getHours(); 		//시
	var mi = today.getMinutes(); 	//분
	var ss = today.getSeconds(); 	//초

	var result = yy + "-" + mm + "-" + dd + "요일 " + hh + ":" + mi + ":" + ss;
	document.getElementById("timer").innerHTML = result;
}
</script>
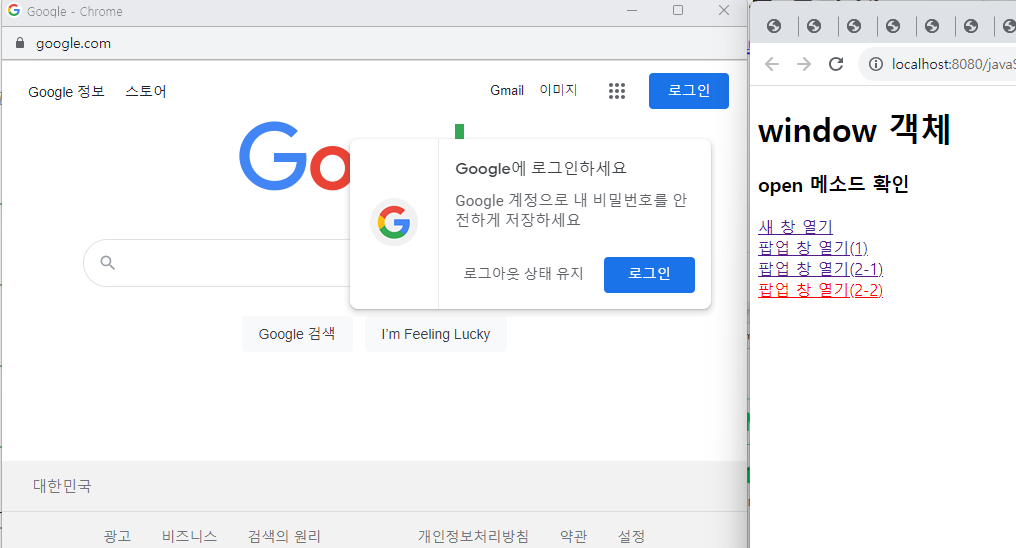
window 객체
open 메소드 확인
1번 - a태그에서 onclick 이 있을 경우에는 onclick를 먼저 수행하고 href로 이동하는 액션을 취한다.
<a href="http://www.naver.com">TEST1</a>
2번 - onclick에서 return false가 있을 경우 href로 이동하는 액션을 취하지 않게 된다.
<a href="http://www.naver.com">TEST2</a>
3번 - a태그에서 onclick 이 있을 경우에는 onclick를 먼저 수행하고 href로 이동하는 액션을 취하는데
href="#"로 호출 함수를 숨겨버렸기 때문에 페이지가 이동하지 않게 된다.
갈 곳을 잃어버린 브라우저는 페이지의 상단으로 이동해버린다.
<a href="#">TEST1</
<body>
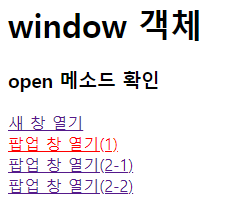
<h1>window 객체</h1>
<h3>open 메소드 확인</h3>
<div>
<a href="#" onclick="open1(); return false">새 창 열기</a>
<br>
<a href="#" onclick="open2(); return false">팝업 창 열기(1)</a>
<br>
<a href="#" onclick="open3('http://www.naver.com'); return false">팝업 창 열기(2-1)</a>
<br>
<a href="#" onclick="open4('http://www.google.com'); return false">팝업 창 열기(2-2)</a>
</div>
<script type="text/javascript">
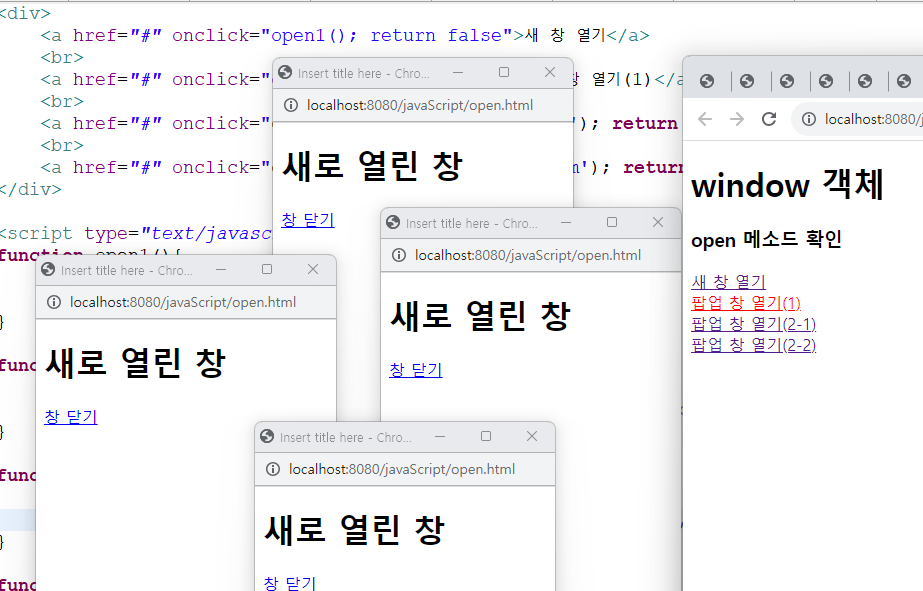
function open1(){
//새창이 열린다.
window.open("open.html");
}
function open2(){
// 클릭할 때마다 새로운 팝업창이 계속 열린다.
window.open("open.html","", "width=300, height=500, scrollbars=no, toolbar=no, menubar=no, status=no, location=no");
}
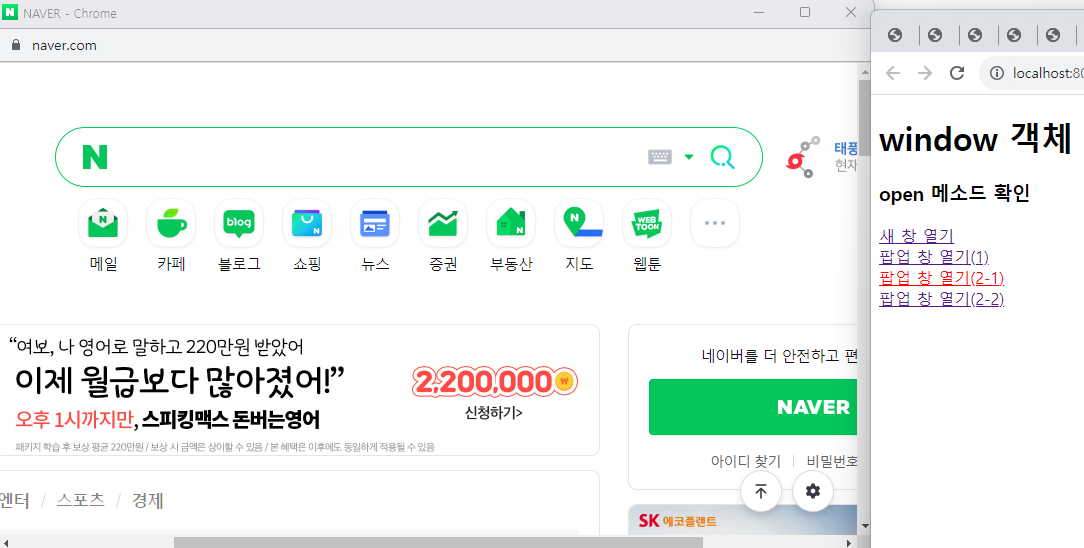
function open3(url){
// 한번 생성된 팝업창을 재사용 -> 계속 열리지 않음.
window.open(url,"myWindow", "width=300, height=500, scrollbars=no, toolbar=no, menubar=no, status=no, location=no");
}
function open4(url){
// 클릭할 때마다 새로운 팝업창이 계속 열린다.
window.open(url,"", "width=300, height=500, scrollbars=no, toolbar=no, menubar=no, status=no, location=no");
}
</script>
</body>
--------------------------------
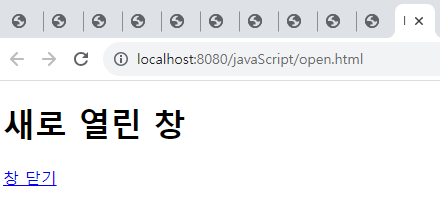
open.html file
<body>
<h1>새로 열린 창</h1>
<div>
<a href="#" onclick="window.close(); return false;">창 닫기</a>
</div>
</body>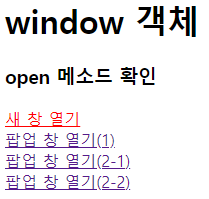

<a href="#">팝업 창 열기(1)</a>
function open2(){
	// 클릭할 때마다 새로운 팝업창이 계속 열린다.
	window.open("open.html","", "width=300, height=500,
    			 scrollbars=no, toolbar=no, menubar=no, status=no, location=no");
}
<a href="#">팝업 창 열기(2-1)</a>
function open3(url){
	// 한번 생성된 팝업창을 재사용 -> 계속 열리지 않음.
	window.open(url,"myWindow", "width=300, height=500,
    			scrollbars=no, toolbar=no, menubar=no, status=no, location=no");
}
<a href="#">팝업 창 열기(2-2)</a>
function open4(url){
	// 한번 생성된 팝업창을 재사용 -> 계속 열리지 않음.
	window.open(url,"myWindow", "width=300, height=500,
    			scrollbars=no, toolbar=no, menubar=no, status=no, location=no");
}</head>
<body onload="autoNo()">
<p>
고객님의 인증번호는 <strong id="auth">00000</strong>입니다.
</p>
<input type="button" value="인증번호 새로 받기" onclick="refresh()"/>
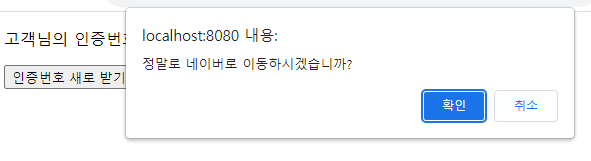
<input type="button" value="네이버로 이동하기" onclick="goNaver()"/>
<script>
function random(x,y){
return Math.floor(Math.random() * (y-x+1) + x); // 난수 발생 x~y 사이의
}
function autoNo(){
var value = "";
for(i=1; i<=5; i++){
value += random(0,9);
// value = value + randm(0,9) => 문자열로 var value ="" 로 바꿔주어 수를 더하지 않는다.
}// for
document.getElementById("auth").innerText = value;
}
function refresh(){
location.reload();
// 새로고침 (F5) 처럼 현재의 리소스를 다시 불러온다
}
function goNaver(){
if(confirm("정말로 네이버로 이동하시겠습니까?"))
location.href="https://www.naver.com";
}
</script>
</body>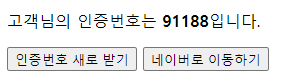
history.forward()
- 브라우저가 세션에 저장된 앞 페이지로 이동시켜준다
- 다음 페이지가 없으면 아무것도 하지 않는다.
- history.back(), history.go(-1)

<body>
<h1>History 객체1</h1>
<a href="examHistory.html">페이지 이동</a><br>
<a href="#" onclick="history.back(); return false;">앞 페이지로 이동</a>

</body>
------------------------
examHistory.html file

<body>
<h1>History 객체2</h1>
<a href="#" onclick="history.back(); return false;">이전 페이지로 이동</a>
</body>

jQuery
- 전 세계에서 가장 많이 사용되는 JavaScript 라이브러리
- HTML 요소 제어
=> HTML 요소를 손쉽게 획득하고 제어할 수 있다. - 손쉬운 이벤트 처리
=> 단 한번의 이벤트 정의로 크로스 브라우징 해결 - 요소의 탐색과 생성
=> DOM 요소를 제어하기 위한 간결한 기능 제공 - Ajax 통신처리
=> 페이지 이동이 없는 비동기 데이터 통신
- jQuery 특징
- 크로스 브라우징
=> 한 번의 코딩으로 거의 모든 브라우저에게 적용된다. - 간결한 문법
=> HTML 태그 (element)를 제어하거나 이벤트를 처리하는 부분 등 Javascript의 전반에 걸쳐서
구문이 짧아지기 때문에 개발 효율성이 높아진다. - 익숙한 구문
=> CSS에서 사용하던 속성과 값을 그대로 Javascript 구문에 적용할 수 있어서
document 내장 객체가 제공하는 기능을 쉽게 사용할 수 있다. - 다양한 플러그인
=> jQuery를 기반으로 하는 수많은 플러그인들이 무료로 배포되고 있기 때문에,
갤러리, 메뉴 등의 구현에 대한 작업이 많이 단축된다.
- jQuery 개발 환경
- jQuery 라이브러리
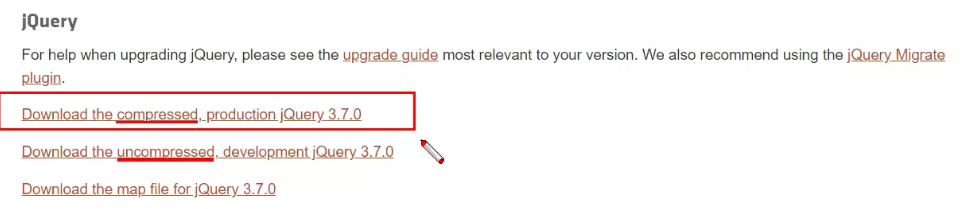
- 사이트 : https://www.jquery.com
- jQuery 참조하기
① js 파일을 다운 받아서 사용
<script type="text/javascript" src="js/jquery-3.7.0.min.js"></script>
② http://code.jquery.com의 CDN 서비스를 사용
<script type="text/javascript" src="http://code.jquery.com/jquery-3.7.0.min.js"></script>
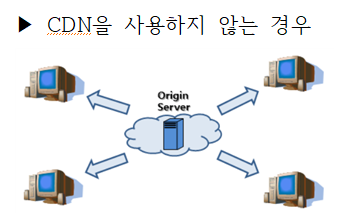
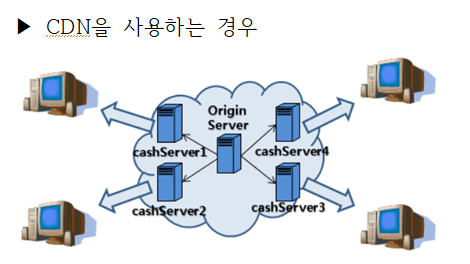
CDN(Contents Delivery Network) 이란?
- 지리, 물리적으로 떨어져 있는 사용자에게 컨텐츠를 더 빠르게 제공할 수 있는 기술
- 느린 응답속도 / 다운로딩 타임 을 극복하기 위한 기술
jQuery
jQuery: The Write Less, Do More, JavaScript Library
화면을 이동하지 않고 즉각즉각 반응 -> 네이버 지도 같은
자주 쓰는 코드를 library(*.js)로 제공하는 것을 jQuery
jquery.com에서 받아오기
마우스 우클릭 저장
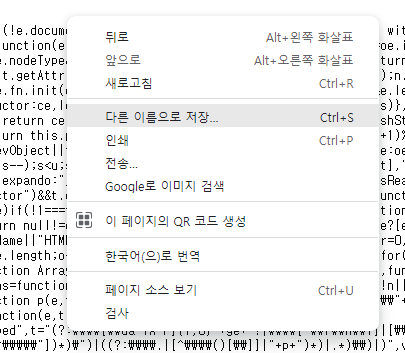
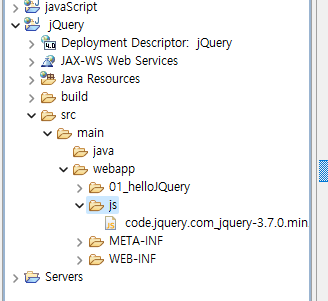
폴더를 생성하여 복붙
<body>
<h1 id="hello"></h1>

<script src="../js/jquery-3.7.0.min.js"></script>
<script type="text/javascript"><!-- 순서 중요 -->
function hello(){
	var h1 = document.getElementById('hello')
	alert(h1.tagName);

	h1.innerHTML = 'Hello jQuery';
	h1.innertext = 'Hello jQuery';
}

//window.onload = function(){
//	hello();
//}
// 자바 스크립트로 부름

//javascript의 onload이벤트와 같은 효과
jQuery(hello);

</script>
</body>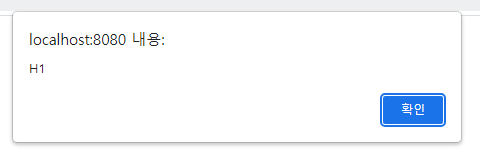
$( )
jQuery에서 제공하는 객체
$(#'?') = document.getElementById('?')
h1.html('Hello jQuery') = h1.innerHTML = 'Hello jQuery'
- 그냥 이름이 $인 함수 그 자체이다. $ 함수를 호출하는 것이다.
- jQuery 라이브러리 내부를 보면 window.jQuery = window.$ = jQuery 로 동일한 코드이다.
<body>
<h1 id="hello"></h1>

<script type="text/javascript" src="http://code.jquery.com/jquery-3.7.0.min.js"></script>
<script>
function hello($){
	var h1 = $('#hello')

	h1.html('Hello jQuery') // = h1.innerHTML = 'Hello jQuery' 로 바뀐거임
	h1.text('Hello jQuery')
}

jQuery(hello);
</script>
</body>
점 점 간추림
<body>
<h1 id="hello"></h1>

<script type="text/javascript" src="http://code.jquery.com/jquery-3.7.0.min.js"></script>
<script>
jQuery(function($){
var h1 = $('#hello')

	h1.html('Hello jQuery')
	h1.text('Hello jQuery')
});
</script>

</body>
<body>
<h1 id="hello"></h1>
<p id="text">안녕하세요 제이쿼리!</p>

<script type="text/javascript" src="http://code.jquery.com/jquery-3.7.0.min.js"></script>
<script>
$(function(){

var h1 = $('#hello')
	h1.css('color', 'red')
	h1.html('Hello jQuery');

	alert($('#text').text()) // id=text에서 문자열 가져오세요

});
</script>

CSS 셀렉터
jQuery에서 제어할 대상에 접근하는 방법
- jQuery는 제어할 요소를 획득하기 위해서 $() 함수안에 대상을 의미하는 CSS 셀렉터를 파라미터로 전달한다.
예) var mytag = $("h1"); // h1 태그 객체 획득하기
예) var mytag = $(".hello"); // "hello" 라는 class 속성값을 갖는 요소의 객체 획득하기
예) var mytag = $("#hello"); // "hello" 라는 id 속성값을 갖는 요소의 객체 획득하기
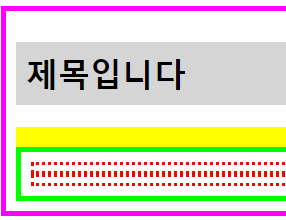
<style type="text/css">
div#container {
   width: auto;
   border: 5px solid #ff00ff;
   padding: 10px;
}
div#container > h1#title {
   background-color: #d5d5d5;
   padding: 10px;
}
div#container div.box {
   padding: 10px;
   background-color: #ffff00;
   font: 20px '굴림';
}
div#container > ul {
   list-style: none;
   padding: 10px;
   margin: 0px;
   width: auto;
   border: 5px solid #00ff00;
}
/* div#container > ul > li:first-child, div#container > ul > li:last-child { */
div#container  li:first-child, div#container  li:last-child {
   border: 3px dotted red;
   padding: 3px 10px;
}
pre {
   font: 14px/130% 'Courier New';
   background: #eee;
   padding: 10px 20px;
   margin: 10px auto;
   border: 1px solid #555;
   border-radius: 20px;
}
</style>


</head>
<body>
<div id="container">
	<h1 id="title"></h1>
	<div class="box"></div>
	<ul>
		<li></li>
		<li></li>
		<li></li>
		<li></li>
		<li></li>
	</ul>
</div>
<p></p>
<pre></pre>
<pre name="source"></pre>

<script type="text/javascript" src="http://code.jquery.com/jquery-3.7.0.min.js"></script>
<script>
$(function(){ // window.onload랑 똑같은 역할 = 바로 실행하라
	$('#title').text('두번째 제목');
// =$('#title').html('두번째 제목');
// =$('h1[id="title"]').text('두번째 제목');
// =$('h1[id="title"]').html('두번째 제목'); h1 태그가 많을 수도 있으니까 속성명을 써주어서 지명해줌.

});
</script>
</body>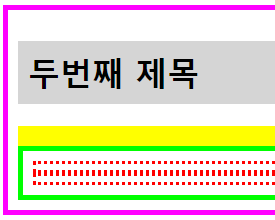
$(function(){ // window.onload랑 똑같은 역할 = 바로 실행하라
	$('#title').text('두번째 제목');
// =$('#title').html('두번째 제목');
// =$('h1[id="title"]').text('두번째 제목');
// =$('h1[id="title"]').html('두번째 제목'); h1 태그가 많을 수도 있으니까 속성명을 써주어서 지명해줌.
	$('#container > h1#title').html('제목입니다');
값을 덮어버림
<body>
<div id="container">
	<h1 id="title"></h1>
	<div class="box"></div>
	<ul>
		<li></li>
		<li></li>
		<li></li>
		<li></li>
		<li></li>
	</ul>
</div>
<p></p>
<pre></pre>
<pre name="source"></pre>

<script type="text/javascript" src="http://code.jquery.com/jquery-3.7.0.min.js"></script>
<script>
$(function(){ // window.onload랑 똑같은 역할 = 바로 실행하라
	$('#title').text('두번째 제목');
// =$('#title').html('두번째 제목');
// =$('h1[id="title"]').text('두번째 제목');
// =$('h1[id="title"]').html('두번째 제목'); h1 태그가 많을 수도 있으니까 속성명을 써주어서 지명해줌.
	$('div#container > h1#title').html('제목입니다');
	$('div#container > div.box').html('안녕하세요')
	$('ul > li').html('목록입니다.')
	$('ul > li:eq(1)').html('jQuery 고유의 방식도 있습니다.') // :eq) li 첫번째를 변경하라 0,1,2,3,4
	$('p, pre').html('다중요소 선택')
	$('pre[name="source"]').html('CSS2의 선택자') 		// 지명하여 덮어 씌움
	$('ul > li:first-child').html('First-Child') 	// 지명하여 덮어 씌움
	$('ul > li:last-child').html('Last-Child')		// 지명하여 덮어 씌움
});
</script>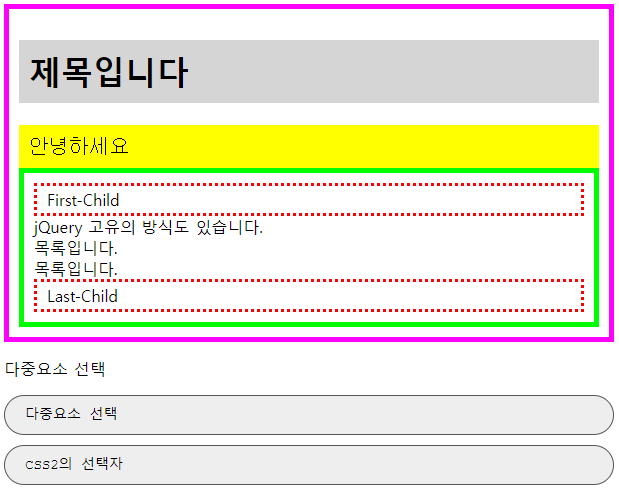
<title>Insert title here</title>
<link rel="stylesheet" href="../css/event.css">
<style type="text/css">
div#juminnoDiv{
	font-size: 8pt;
	color: red;
	font-weight: bold;
	border: none;
}
</style>
</head>
<body>
<h1>회원가입</h1>
<form name="form1" id="join" action="">
	<div id="input">
		<h3>아이디</h3>
		<input type="text" name="user_id">

		<h3>비밀번호</h3>
		<input type="password" name="user_pw">

		<h3>주민번호</h3>
		<input type="password" name="juminno">
		<div id="juminnoDiv"></div>

		<h3>성별</h3>
		<label><input type="radio" name="gender" value="남자">남자</label>
		<label><input type="radio" name="gender" value="여자">여자</label>

		<h3>이메일</h3>
		<input type="email" name="email">

		<h3>URL</h3>
		<input type="url" name="url">

		<h3>핸드폰</h3>
		<input type="tel" name="phone">

		<h3>취미</h3>
		<label><input type="checkbox" name="hobby" value="축구">축구</label>
		<label><input type="checkbox" name="hobby" value="농구">농구</label>
		<label><input type="checkbox" name="hobby" value="야구">야구</label>

		<h3>직업</h3>
		<select name="job">
			<option>--------선택하세요--------</option>
			<option value="프로그래머">프로그래머</option>
			<option value="퍼블리셔">퍼블리셔</option>
			<option value="디자이너">디자이너</option>
			<option value="기획">기획</option>
		</select>

		<input type="submit" value="회원가입" class="myButton"> // submit 하면 action 이 나와야함 form 안에 준비 되어있음.
		<input type="reset" value="다시작성" class="myButton"> // 처음인 상태로 초기화
	</div>
</form>


<script type="text/javascript" src="http://code.jquery.com/jquery-3.7.0.min.js"></script>
<script src="../js/member.js"></script>
</body>
js 파일
$(function(){
	$('#join').submit(function(){
		$('#juminnoDiv').empty(); // 주민 번호를 입려하면 빨간글씨 사라짐

		var user_id = $('input[name="user_id"]').val();
		if(!user_id){
			alert("아이디를 입력하세요.");
			$('input[name=user_id]').focus();
			return false;
		}

		var user_pw = $('input[name="user_pw"]').val();
		if(!user_pw){
			alert("비밀번호를 입력하세요.");
			$('input[name=user_pw]').focus();
			return false;
		}

		var juminno = $('input[name="juminno"]').val();
		if(!juminno){
			$('#juminnoDiv').text('주민번호를 입력하세요');
			$('input[name=juminno]').focus();
			return false;
		}

		if(!$('input[name="gender"').is(':checked')){
			alert("성별을 입력하세요.");

			// radio는 배열로 받는다.
			// 현재문서에서 form의 이름이 와야함
			// document.form1.gender[1].checked = true;
			// $('input[name="gender"]:eq(1)').attr('checked', true);
			   $('input[name="gender"]:eq(1)').prop('checked', true);

			return false;
		}

		var email = $('input[name="email"]').val();
		if(!email){
			alert("이메일을 입력하세요.");
			$('input[name=email]').focus();
			return false;
		}

		var url = $('input[name="url"]').val();
		if(!url){
			alert("URL를 입력하세요.");
			$('input[name=url]').focus();
			return false;
		}

		var phone = $('input[name="phone"]').val();
		if(!phone){
			alert("핸드폰 번호를 입력하세요.");
			$('input[name=phone]').focus();
			return false;
		}

		if (!$('input[name="hobby"]').is(':checked')){
			alert("취미를 입력하세요.");
			$('input[name="hobby"]:eq(0)').attr('checked', true);

			return false;
		}

		if($('select[name="job"] > option:selected').index() < 1){
			alert("직업을 선택하세요.");
			$('select[name="job"] > option.eq(1)').attr('selected',true);
			return false;
		}

		return false;//action으로 타고 가는 것을 막음
	});
});

글 잘 보고 갑니다! 꾸준히 올리시는게 멋지십니다 :)