웹 스크래핑 및 데이터 시각화 - Selenium & Seaborn & Matplotlib & Wordcloud
브라우저 자동화하기, Selenium
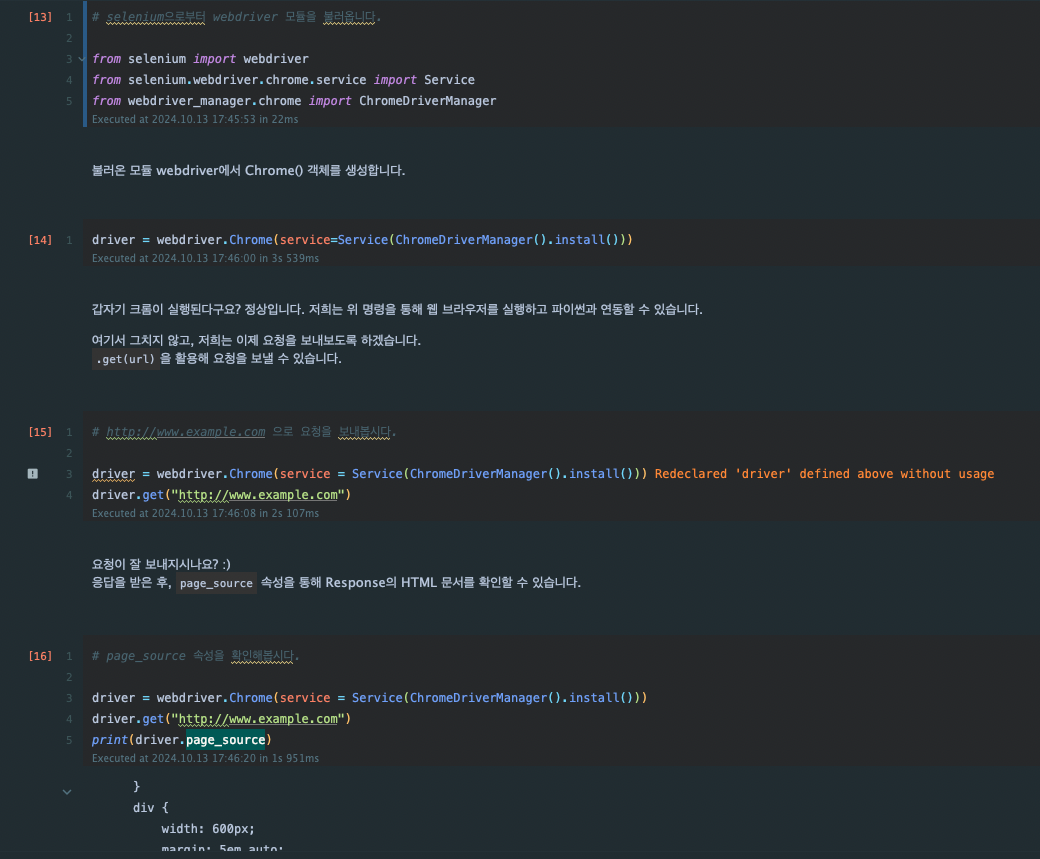
with as를 사용하면 close() 함수가 따로 존재하지 않더라도 with as 구문을 빠져나가면 자동으로 close() 함수를 호출하여 파일은 닫는다.
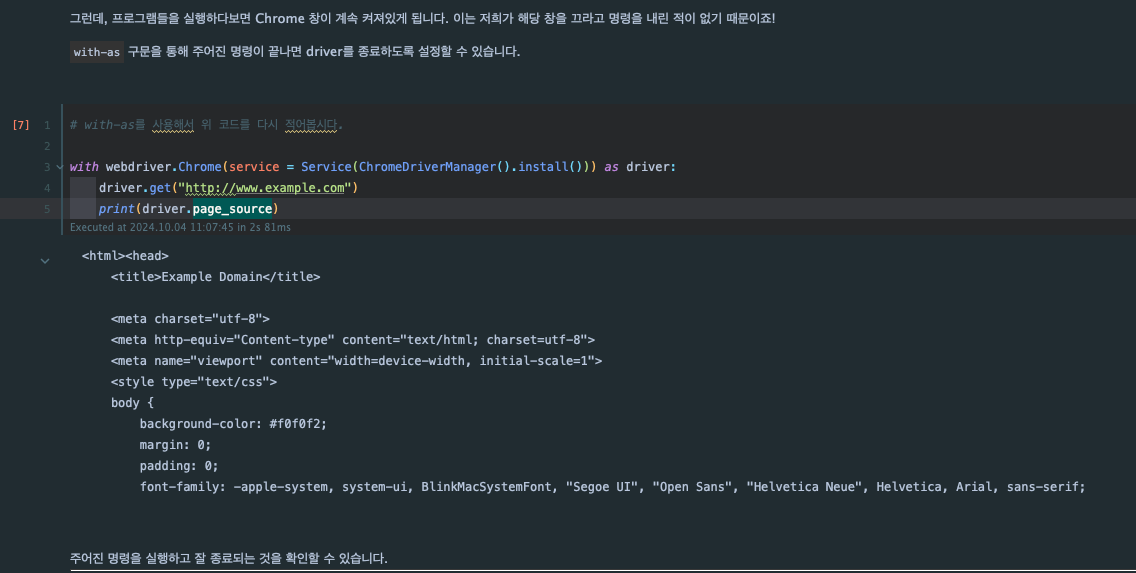
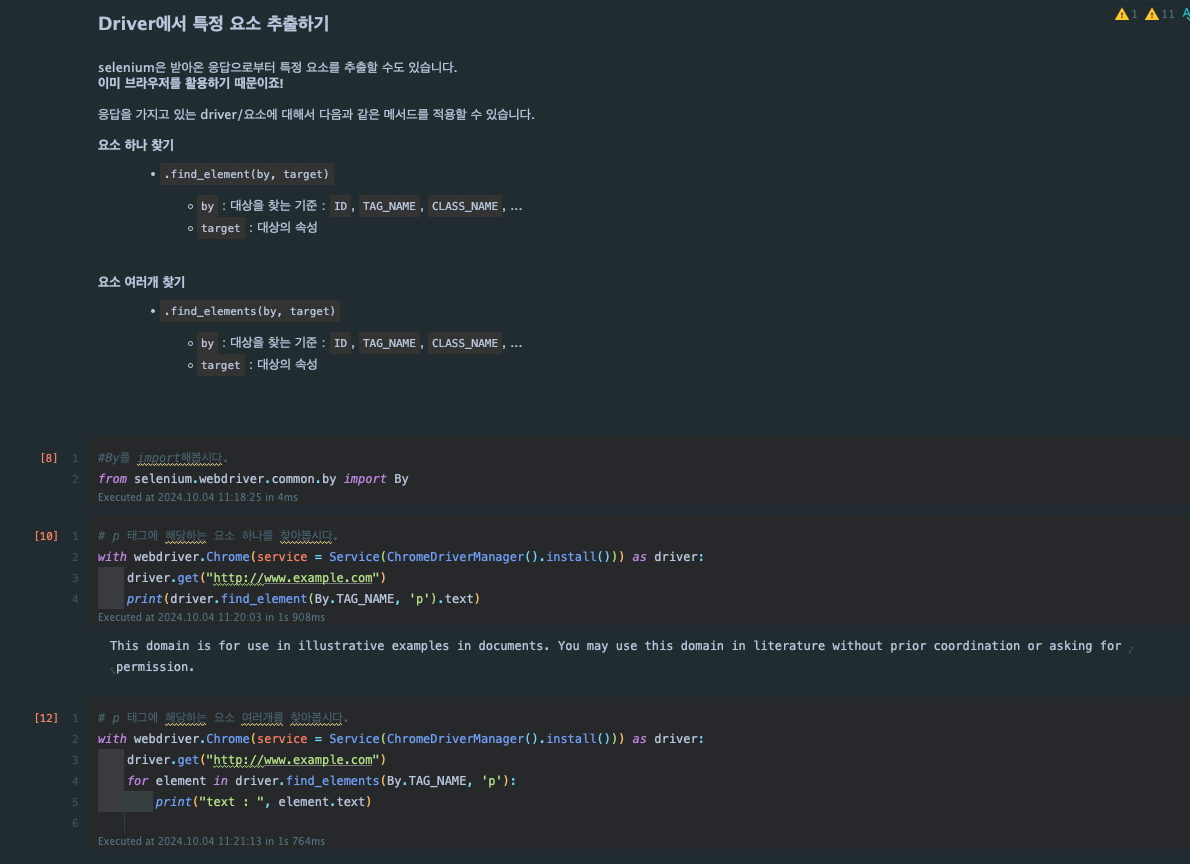
Wait and Call
Implicit / Explicit Wait
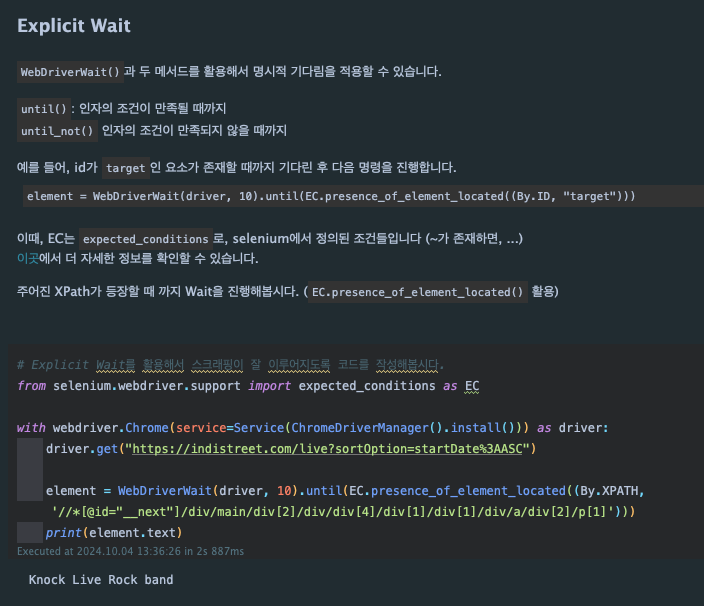
Selenium은 동적 웹 사이트에 대한 지원을 진행하기 위해 명시적 기다림(Explicit Wait) 과 암묵적 기다림(Implicit Wait) 을 지원
Selenium은 동적 웹 사이트에 대한 지원을 진행하기 위해 명시적 기다림(Explicit Wait) 과 암묵적 기다림(Implicit Wait) 을 지원합니다.
Explicit Wait: 다 로딩이 될 때까지 지정한 시간 동안 기다림 (e.g. 다 로딩이 될 때까지 5초동안 기다려!)
Implicit Wait: 특정 요소에 대한 제약을 통한 기다림 (e.g. 이 태그를 가져올 수 있을 때까지 기다려!)
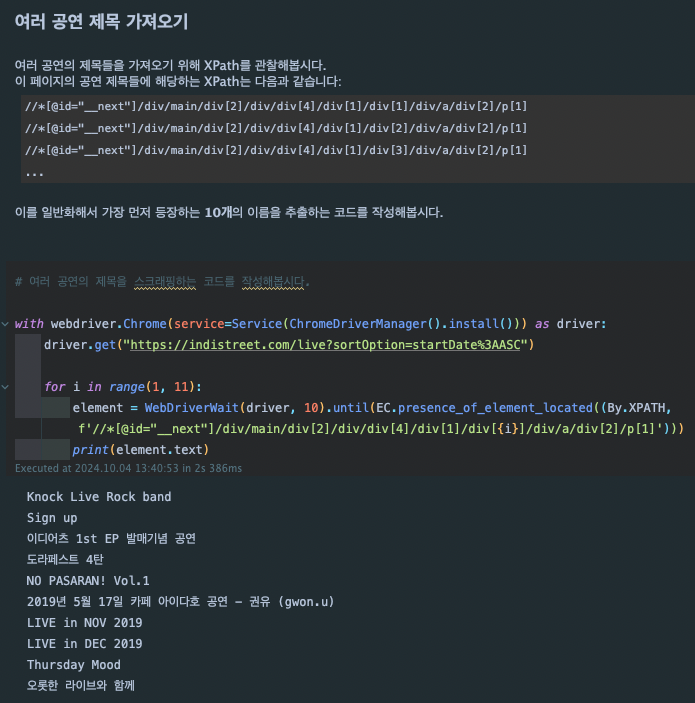
XPath는 XML, HTML 문서 등의 요소의 위치를 경로로 표현하는 것을 의미. class name이 random한 것들ㄹ ㅗ이루어진 경우가 있는데, 이러할 때 위치를 활용한 방법이다.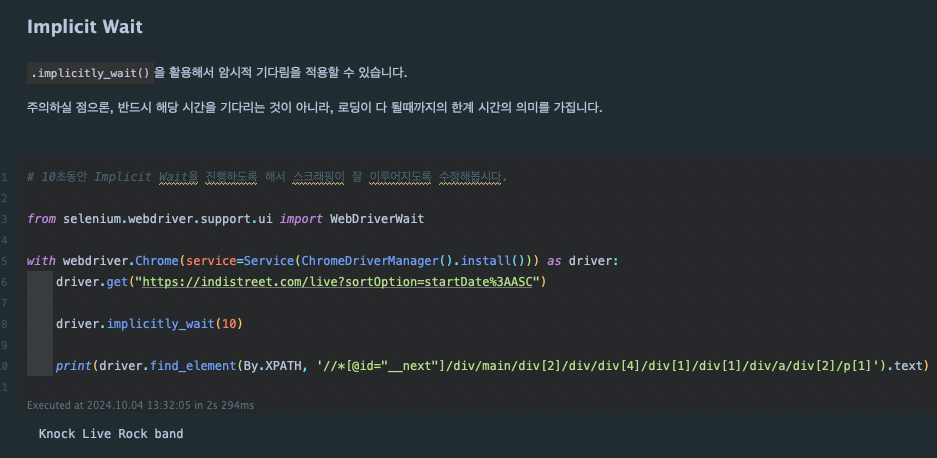
마우스 이벤트 처리
로그인을 한 뒤 스크래핑을 하는 이유 ?
로그인을 해야만 스크래핑이 가능한 경우가 있을 수 있으므로 그렇기에 마우스와 키보드 이벤트 처리 방법을 알아야한다.
from selenium import webdriver
from selenium.webdriver import ActionChains
from selenium.webdriver.chrome.service import Service
from selenium.webdriver.common.by import By
from webdriver_manager.chrome import ChromeDriverManager

# 주어진 웹사이트를 누른 후, 우리가 원하는 버튼 요소를 찾은 후 마우스 이벤트를 실행시켜봅시다.

driver = webdriver.Chrome(service=Service(ChromeDriverManager().install()))
driver.get("https://hashcode.co.kr/")
driver.implicitly_wait(0.5)

button = driver.find_element(By.XPATH, "/html/body/div[1]/header/section/div/div/div/a[1]")
ActionChains(driver).click(button).perform()
키보드 이벤트 처리
# 스크래핑에 필요한 라이브러리를 불러와봅시다.

from selenium import webdriver
from selenium.webdriver import ActionChains
from webdriver_manager.chrome import ChromeDriverManager
from selenium.webdriver.common.actions.action_builder import ActionBuilder
from selenium.webdriver import Keys, ActionChains
from selenium.webdriver.chrome.service import Service
from selenium.webdriver.common.by import By

# driver를 이용해 해당 사이트에 요청을 보내봅시다.
import time

driver = webdriver.Chrome(service=Service(ChromeDriverManager().install()))
driver.get("https://hashcode.co.kr")
time.sleep(1)

# 내비게이션 바에서 "로그인" 버튼을 찾아 눌러봅시다.
button = driver.find_element(By.XPATH, "/html/body/div[1]/header/section/div/div/div/a[1]")
ActionChains(driver).click(button).perform()
time.sleep(1)
# "아이디" input 요소에 여러분의 아이디를 입력합니다. (속성에 ID가 없어서 CALSS 기준으로 찾았음.)
id_input = driver.find_element(By.CLASS_NAME, "FymRFM681OjzOdzor5nk")
ActionChains(driver).send_keys_to_element(id_input, "아이디").perform()
time.sleep(1)
# "패스워드" input 요소에 여러분의 비밀번호를 입력합니다.
pw_input = driver.find_elements(By.CLASS_NAME, "FymRFM681OjzOdzor5nk")[1] #두번째 요소는 패스워드임
ActionChains(driver).send_keys_to_element(pw_input, "패스워드").perform()
time.sleep(1)
# "로그인" 버튼을 눌러서 로그인을 완료합니다.
login_button = driver.find_element(By.CLASS_NAME, "ayxkplSwAOlzWhl7UloQ.IQmH8pxs6MpeDFpLSMPh.Gosd7zfsHAxk1MOYSkL1")
ActionChains(driver).click(login_button).perform()
time.sleep(1)
시각화 라이브러리, Seaborn
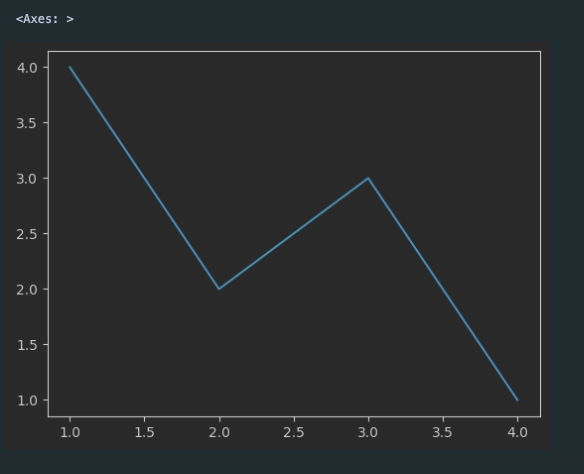
꺾은선 그래프
import seaborn as sns


# 값 x=[1, 3, 2, 4]
# 값 y=[0.7,0.2,0.1,0.05]

sns.lineplot(x=[1, 3, 2, 4], y=[4, 3, 2, 1])
막대 그래프
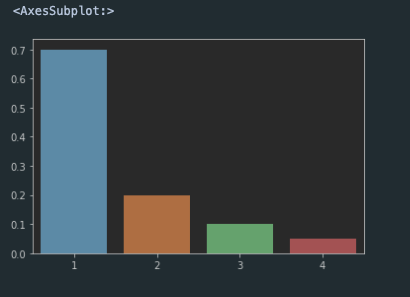
# Barplot을 직접 그려봅시다
# 범주 x=[1,2,3,4]
# 값 y=[0.7,0.2,0.1,0.05]

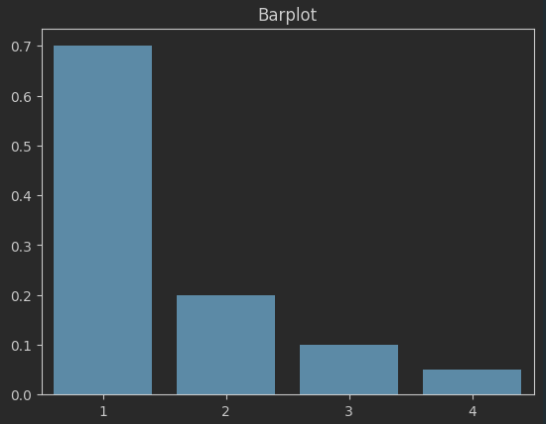
sns.barplot(x=[1,2,3,4],y=[0.7,0.2,0.1,0.05])
Plot의 속성
'seaborn'은 파이썬의 시각화 라이브러리 'matplotlib'을 기반으로 만들어졌습니다.
'matplotlib.pyplot'의 속성을 변경해서 그래프에 다양한 요소를 변경/추가할 수 있습니다.
# matplotlib.pyplot을 불러와봅시다.

import matplotlib.pyplot as plt

# 제목을 추가해봅시다.

sns.barplot(x=[1,2,3,4],y=[0.7,0.2,0.1,0.05])
plt.title("Barplot")

plt.show()
ylim
# lineplot에서 ylim을 0~10으로 제한해봅시다.

sns.lineplot(x=[1, 3, 2, 4], y=[4, 3, 2, 1])
plt.ylim(0,10)
plt.show()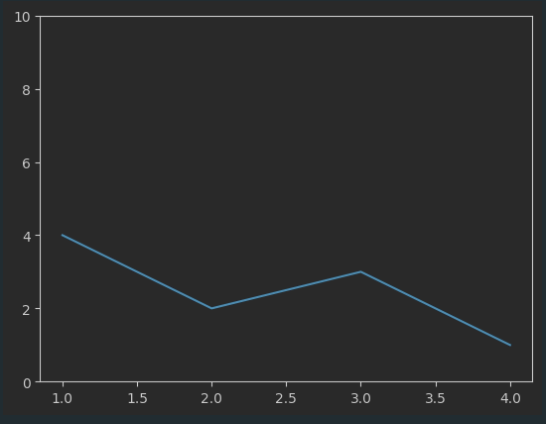
figure
# 크기를 (20, 10)으로 지정해봅시다.
sns.lineplot(x=[1, 3, 2, 4], y=[4, 3, 2, 1])
plt.figure(figsize=(20,10))

plt.show()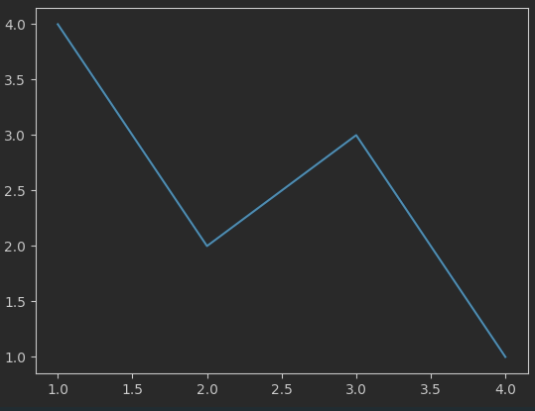
스크래핑 결과 시각화하기 I
# 스크래핑에 필요한 라이브러리를 불러와봅시다.

from selenium import webdriver
from selenium.webdriver import ActionChains
from webdriver_manager.chrome import ChromeDriverManager
from selenium.webdriver.common.actions.action_builder import ActionBuilder
from selenium.webdriver import Keys, ActionChains
from selenium.webdriver.chrome.service import Service
from selenium.webdriver.common.by import By
# driver를 이용해 기상청 날씨 데이터를 가져와봅시다.
driver = webdriver.Chrome(service = Service(ChromeDriverManager().install()))
driver.get("https://www.weather.go.kr/w/weather/forecast/short-term.do")
driver.implicitly_wait(5)
temps = driver.find_element(By.ID, "my-tchart").text
temps_list = [int(i) for i in temps.replace('℃','').split("\n")]
print(temps_list)
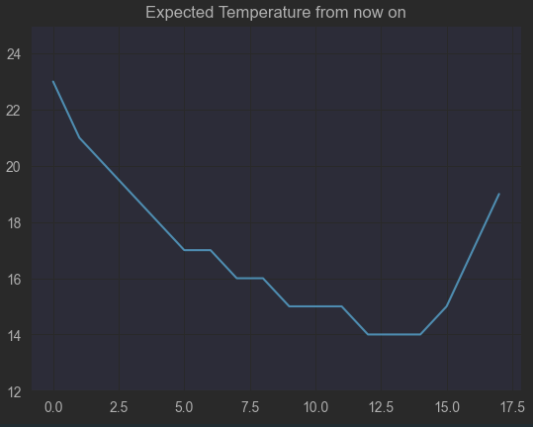
[23, 21, 20, 19, 18, 17, 17, 16, 16, 15, 15, 15, 14, 14, 14, 15, 17, 19]
seaborn을 이용하여 시각화
# 받아온 데이터를 통해 꺾은선 그래프를 그려봅시다.
# x = Elapsed Time(0~len(temperatures)
# y = temperatures
import seaborn as sns
import matplotlib.pyplot as plt

plt.ylim(min(temps_list) -2 , max(temps_list) + 2)
plt.title("Expected Temperature from now on")
sns.lineplot(
    x = [i for i in range(len(temps_list))],
    y = temps_list
)

plt.show()
스크래핑 결과 시각화하기 II
# 필요한 라이브러리를 불러온 후, 요청을 진행해봅시다.
# 질문의 빈도를 체크하는 dict를 만든 후, 빈도를 체크해봅시다.
frequency = {}
import requests
from bs4 import BeautifulSoup
# 응답을 바탕으로 BeautifulSoup. 객체를 생성해봅시다.

for i in range(1,11):
    res = requests.get(f"https://hashcode.co.kr/?page={i}", headers=user_agent)
    soup = BeautifulSoup(res.text, "html.parser")

#1. ul 태그 모두 찾기
#2. 1번 안에 있는 li 태그의 text를 추출

    ul_tags = soup.find_all("ul", "question-tags")
    for ul in ul_tags:
        li_tags = ul.find_all("li")
        for li in li_tags:
            if li.text.strip() not in frequency:
                frequency[li.text.strip()] = 1
            else:
                frequency[li.text.strip()] += 1
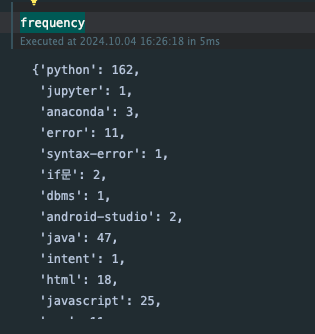
# Counter를 사용해 가장 빈도가 높은 value들을 추출합니다.
from collections import Counter

counter = Counter(frequency)

counter.most_common(10)
결과
[('python', 162),
('java', 47),
('c', 43),
('javascript', 25),
('c++', 25),
('html', 18),
('coding-test', 15),
('pandas', 15),
('error', 11),
('css', 11)]
seaborn, matplotlib, pyplot 이용 시각화
# Seaborn을 이용해 이를 Barplot으로 그립니다.
import seaborn as sns
x = [elem[0] for elem in counter.most_common(10)]
y = [elem[1] for elem in counter.most_common(10)]

sns.barplot(x=x, y=y)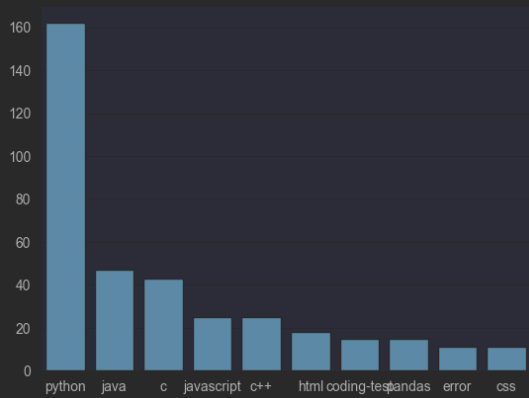
# figure, xlabel, ylabel, title을 적절하게 설정해서 시각화를 완성해봅시다.

import matplotlib.pyplot as plt

plt.figure(figsize=(15, 10))

plt.title("Frequency of Hashcode Question Tags")
plt.xlabel("Tag")
plt.ylabel("Frequency")

sns.barplot(x=x, y=y)

plt.show()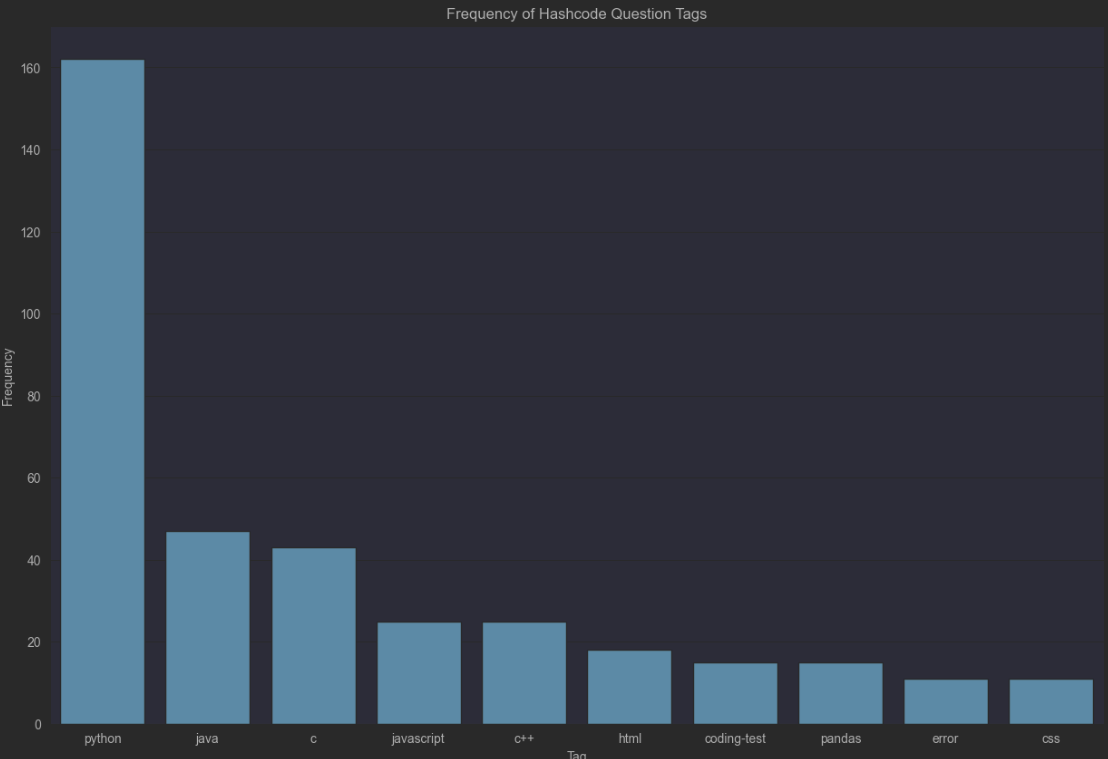
WordCloud
# 텍스트 구름을 그리기 위해 필요한 라이브러리를 불러와봅시다.

# 시각화에 쓰이는 라이브러리
import matplotlib.pyplot as plt
from wordcloud import WordCloud

# 횟수를 기반으로 딕셔너리 생성
from collections import Counter

# 문장에서 명사를 추출하는 형태소 분석 라이브러리
from konlpy.tag import Hannanum

# 워드클라우드를 만드는 데 사용할 애국가 가사입니다.

national_anthem = """
동해물과 백두산이 마르고 닳도록
하느님이 보우하사 우리나라 만세
무궁화 삼천리 화려 강산
대한 사람 대한으로 길이 보전하세
남산 위에 저 소나무 철갑을 두른 듯
바람 서리 불변함은 우리 기상일세
무궁화 삼천리 화려 강산
대한 사람 대한으로 길이 보전하세
가을 하늘 공활한데 높고 구름 없이
밝은 달은 우리 가슴 일편단심일세
무궁화 삼천리 화려 강산
대한 사람 대한으로 길이 보전하세
이 기상과 이 맘으로 충성을 다하여
괴로우나 즐거우나 나라 사랑하세
무궁화 삼천리 화려 강산
대한 사람 대한으로 길이 보전하세
"""

# WordCloud를 이용해 텍스트 구름을 만들어봅시다.

wordCloud = WordCloud(
    font_path = '/System/Library/Fonts/Supplemental/AppleGothic.ttf',
    background_color = 'white',
    width=1000,
    height=1000
)

img = wordCloud.generate_from_frequencies(counter)
plt.imshow(img)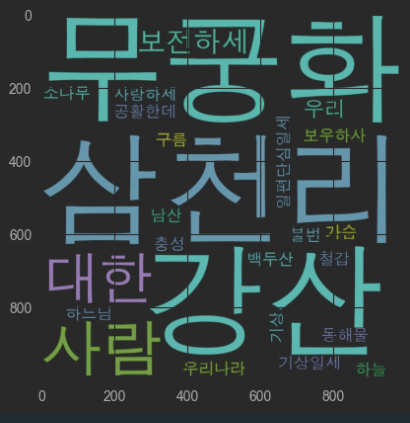
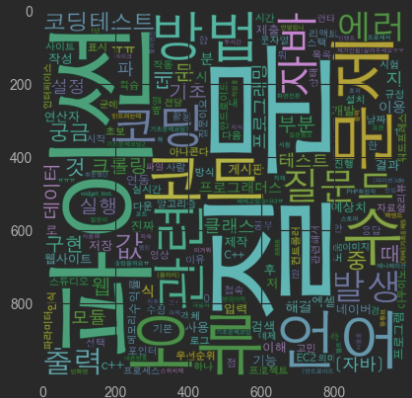
programmers Q & A 페이지 제목들로 워드클라우드 만들기
user_agent = {"User-Agent": "Mozilla/5.0 (Macintosh; Intel Mac OS X 10_15_4) AppleWebKit/537.36 (KHTML, like Gecko) Chrome/83.0.4103.97 Safari/537.36"}

# Pagination이 되어있는 질문 리스트의 제목을 모두 가져와 리스트 questions에 저장해봅시다.
# https://hashcode.co.kr/?page={i}
# 과도한 요청을 방지하기 위해 0.5초마다 요청을 보내봅시다.

import requests
import time
from bs4 import BeautifulSoup

questions = []

for i in range(1, 6):
    res = requests.get(f"https://hashcode.co.kr/?page={i}", headers=user_agent)
    soup = BeautifulSoup(res.text, "html.parser")
    parsed_datas = soup.find_all("li", {"class": "question-list-item"})
    for data in parsed_datas:
        questions.append(data.h4.text.strip())
    time.sleep(1)
# 텍스트 구름을 그리기 위해 필요한 라이브러리를 불러와봅시다.

# 시각화에 쓰이는 라이브러리
import matplotlib.pyplot as plt
from wordcloud import WordCloud

# 횟수를 기반으로 딕셔너리 생성
from collections import Counter

# 문장에서 명사를 추출하는 형태소 분석 라이브러리
from konlpy.tag import Hannanum

# Hannanum 객체를 생성한 후, .nouns()를 통해 명사를 추출합니다.
words = []
hannanum = Hannanum()

for question in questions:
    nouns = hannanum.nouns(question) #1번 반복할 때 나온 명사들
    words += nouns #누적해서 나오는 명사들

print(len(words))

# counter를 이용해 각 단어의 개수를 세줍니다.

counter = Counter(words)


# WordCloud를 이용해 텍스트 구름을 만들어봅시다.

wordcloud = WordCloud(
    font_path = '/System/Library/Fonts/Supplemental/AppleGothic.ttf',
    background_color = "white",
    width = 1000,
    height = 1000
)
img = wordcloud.generate_from_frequencies(counter)
plt.imshow(img)
implicitly_wait 과 time.sleep의 차이
implicitly_wait(10)은 10초를 기다리되, 그 이전에 웹을 load하면 바로 다음으로 넘어간다.
time.sleep(10)은 그냥 10초 기다린다.
그래서 implicitly_wait을 사용할 수 있는 경우라면 시간적 측면으로 time.sleep보다 implicitly_wait을 지향
