airflow 설치
- -생략 -
- CentOS7 환경에서 설치
- airflow 폴더 구조
airflow
├── airflow.cfg          <- airflow 환경설정 파일
├── airflow.db           <- 데이터베이스(SQLite->MySQL)파일
├── dags                 <- DAG들을 저장하는 디렉토리
│   └── my_first_dag.py  <- DAG 정의 파이썬 파일
├── logs                 <- 로그파일을 저장하는 디렉토리
출처 : https://m.blog.naver.com/PostView.naver?isHttpsRedirect=true&blogId=wideeyed&logNo=221565240108
- 이런식으로 들어있는걸 확인할 수 있다 !
sudo yum install tree
tree- L 2폴더 level 2depth 까지 설정
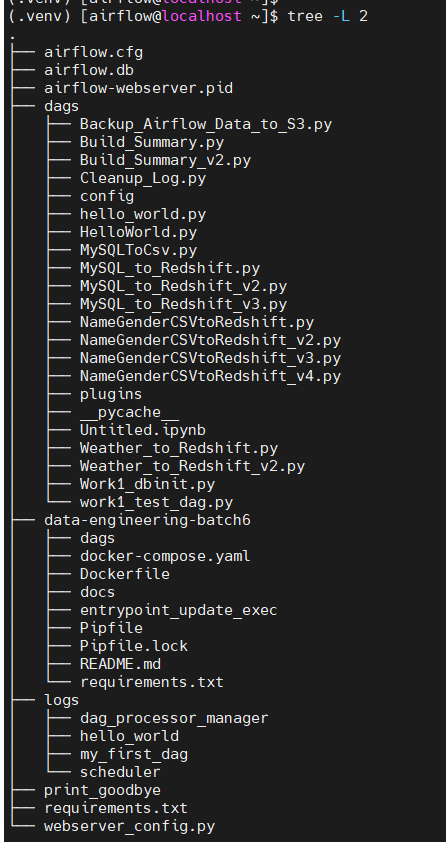
- airflow.cfg 파일에 dags, logs 폴더가 지정됨
vi airflwo.cfg/dags_folder/base_log_folder


airflow 접속
sudo su airflow
source .venv/bin/activate
airflow webserver -p 8080
airflow 명령어
-
동작중인 프로세스 확인
ps -ef | grep airflow -
airflow 버전 확인
airflow version -
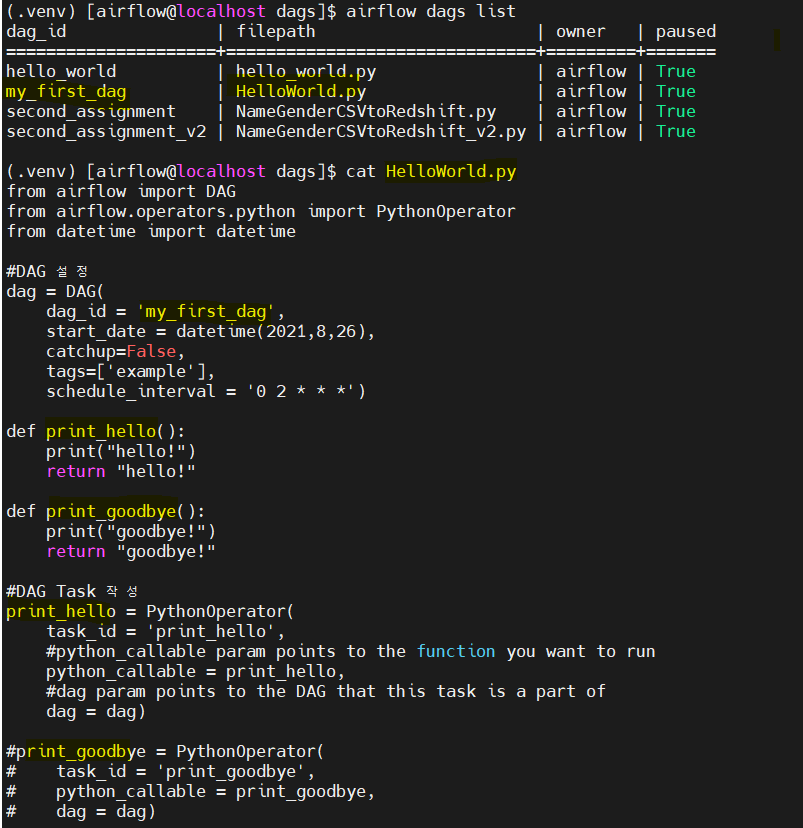
등록된 DAG 목록 조회
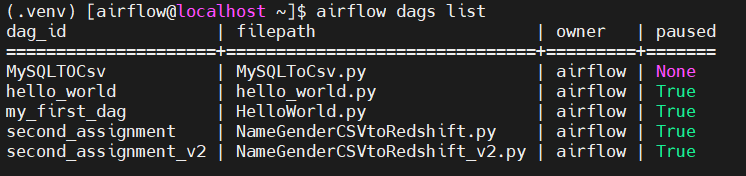
airflow dags list

DAG 생성 및 실행 예시
- AIRFLOW_HOME/dag 경로에 .py 파일 생성 -> airflow가 update함
- HelloWorld.py
from airflow import DAG
from airflow.operators.python import PythonOperator
from datetime import datetime

#DAG 설정
dag = DAG(
    dag_id = 'my_first_dag',
    start_date = datetime(2021,8,26),
    catchup=False,
    tags=['example'],
    schedule_interval = '0 2 * * *')

def print_hello():
    print("hello!")
    return "hello!"

def print_goodbye():
    print("goodbye!")
    return "goodbye!"

#DAG Task 작성
print_hello = PythonOperator(
    task_id = 'print_hello',
    #python_callable param points to the function you want to run
    python_callable = print_hello,
    #dag param points to the DAG that this task is a part of
    dag = dag)

#print_goodbye = PythonOperator(
#    task_id = 'print_goodbye',
#    python_callable = print_goodbye,
#    dag = dag)

#Assign the order of the tasks in our DAG
#print_hello >> print_goodbye
print_hello- 코드 검증
cd dags && python HelloWorld.py(오류가 안나면 됨)
- 오류 예시 (오류가 있는 파일로 진행)

- 정상 실행

- dag 목록 확인
airflow dags list
- dag_id = dag에서 설정하는 dag_id
- filepath = .py 파일명
-
DAG의 TASK 조회
dag의 task를 조회할 때 dag의 이름으로 조회해야 한다.
airflow tasks list my_first_dag
print_hello 한 가지 task만 조회됨

airflow tasks list my_first_dag --tree트리 형태로 확인

-
task 1개만 실행
airflow test dag_id task_id execution_date
airflow test my_first_dag print_hello 2022-01-29T14:00:00 -
airflow scheduler 실행
airflow scheduler & -
web server 실행
airflow webserver -p 8080 &
번외 - 오류1
webserver를 실행하다 The webserver is already running under PID 1690. 이런 오류를 만나면
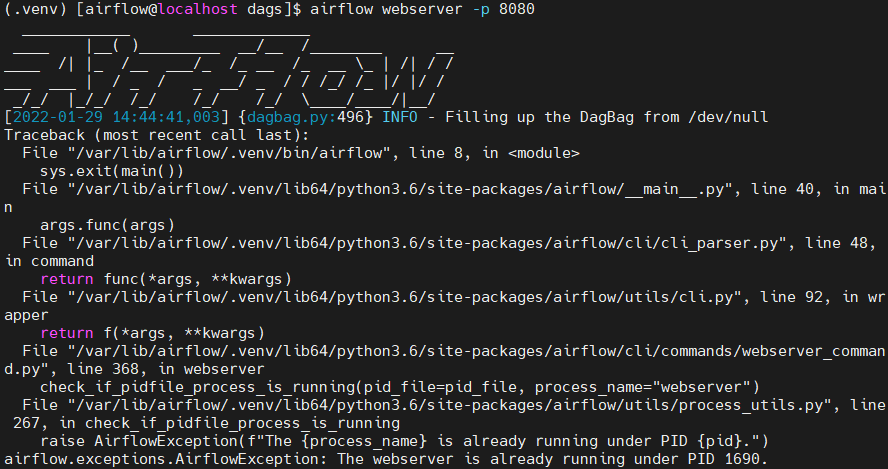
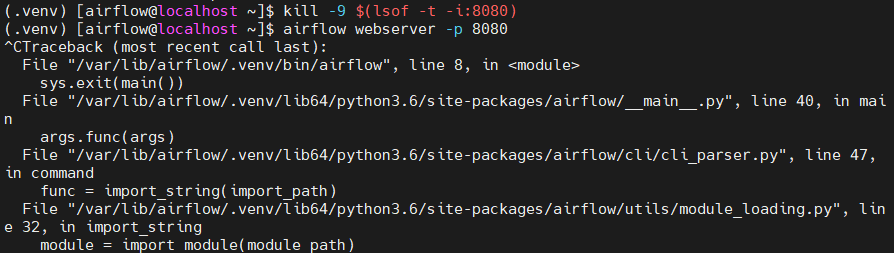
원인은 airflow가 아직 종료되지 않은 것이다.따라서 아래 명령어로 pid를 죽이면 된다.
1. kill -9 $(lsof -t -i:8080)
 출처 : https://zzsza.github.io/data/2018/01/04/airflow-1/
이렇게 해서 해결 안된다면
2. killall 명령어 사용 위해 root에서 yum install psmisc 입력
-> killall -9 airflow airflow와 관련된 PID 모두 삭제
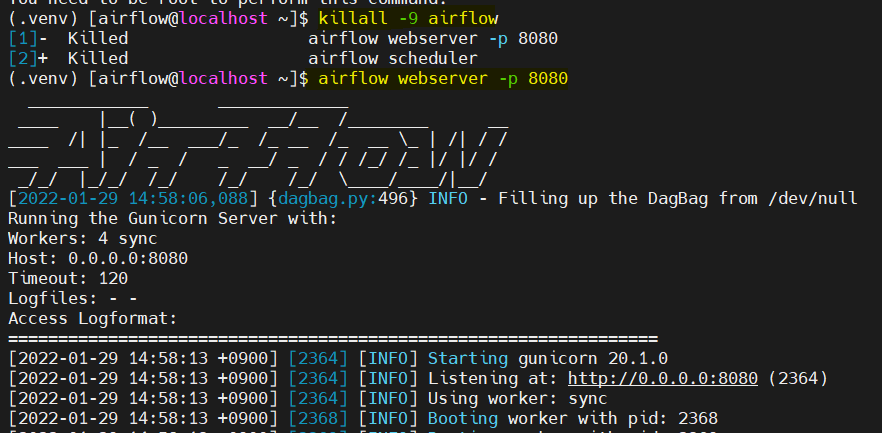 출처 : https://stackoverflow.com/questions/66015150/ubuntu-error-already-running-on-pid-14733
번외 - DAG가 webserver에 보이지 않을 경우
상황 : DAG를 생성하고 한참 뒤에도 dag가 websever에 올라가지 않음
문제 원인 : Scheduler가 올라오지 않아서 발생
해결 : Scheduler를 실행 airflow scheduler -D
Airlfow 실습 1
- aws mysql 연결
- query 날린 후 데이터 받아오기
- pandas, file I/O를 이용하여 파일로 전환
-
dags 폴더에 등록 MySQLToCSV.py 파일 생성

-
.py 코드 실행
cd dags && python MySQLToCsv.py
-
등록된 dag 목록 확인
dag list
-
airflow 실행
참고 :
[Airflow 소개 및 실습 ]
https://m.blog.naver.com/PostView.naver?isHttpsRedirect=true&blogId=wideeyed&logNo=221565240108
https://zzsza.github.io/data/2018/01/04/airflow-1/