프록시 패턴
프록시란?
다음 그림처럼 직접 서버에 요청하는 것이 아니라 어떤 대리자를 통해 간접적으로 서버에 요청하는 방법을 프록시 패턴이라고 한다.
대리자를 영어로 프록시(Proxy)라고 한다.
또한 프록시는 대리자를 중첩시켜 여러개의 체인 형태로 만들 수 있다.
프록시의 역할
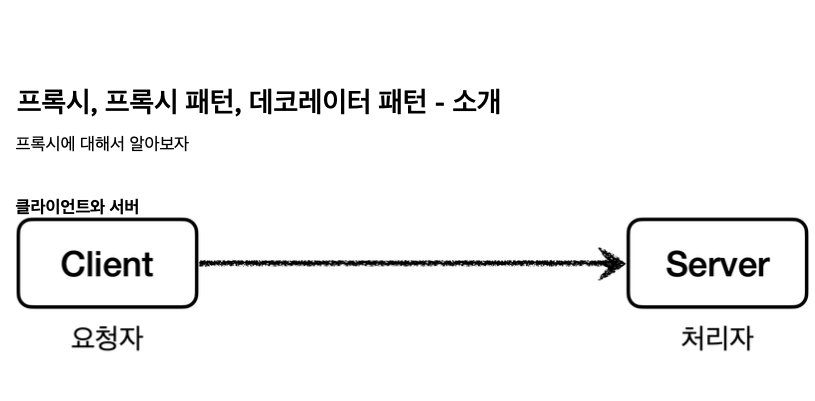
객체에서 프록시가 되려면, 클라이언트는 서버에게 요청한 것인지, 프록시에게 요청을 한 것인지 조차 몰라야 한다.
서버와 프록시는 같은 인터페이스를 사용해야하고, 클라이언트가 사용하는 서버 객체를 프록시 객체로 변경해도 클라이언트 코드를 변경하지 않고 동작할 수 있어야 한다.
프록시의 주요 기능
프록시 객체가 중간에 있으면 크게 접근 제어와 부가 기능 추가를 수행할 수 있다.
- 접근 제어
- 권한에 따른 접근 차단 캐싱
- 지연 로딩
- 부가 기능 추가
- 원래 서버가 제공하는 기능에 더해서 부가 기능을 수행한다.
- 예) 요청 값이나, 응답 값을 중간에 변형한다.
- 예) 실행 시간을 측정해서 추가 로그를 남긴다.
프록시를 예제 - 캐시 프록시 도입
다음 그림과 같이 프록시 패턴을 도입
Subject
package hello.proxy.pureproxy.proxy.code;

public interface Subject {
    String operation();
}Subject인터페이스는 단순히operation()메서드 하나만 가지고 있다.
RealSubject
package hello.proxy.pureproxy.proxy.code;

import lombok.extern.slf4j.Slf4j;

@Slf4j
public class RealSubject implements Subject{
    @Override
    public String operation() {
        log.info("실제 객체 호출");
        sleep(1000);
        return "data";
    }
    private void sleep(int millis){
        try {
            Thread.sleep(millis);
        } catch (InterruptedException e) {
            e.printStackTrace();
        }
    }
}Subject인터페이스를 구현- 실행 로직을 예시로 생성했다.
CacheProxy
package hello.proxy.pureproxy.proxy.code;

import lombok.extern.slf4j.Slf4j;

@Slf4j
public class CacheProxy implements Subject{
    private Subject target;
    private String cacheValue;

    public CacheProxy(Subject target) {
        this.target = target;
    }

    @Override
    public String operation() {
        log.info("프록시 호출");
        if (cacheValue==null){
            cacheValue = target.operation();
        }
        return cacheValue;
    }
}- 프록시도
Subject인터페이스를 구현 private Subject target: 클라이언트가 프록시를 호출하면 프록시가 최종적으로 실제 객체를 호출operation(): 구현한 코드를 보면cacheValue에 값이 없으면 실제 객체(target)를 호출
ProxyPatternClient
package hello.proxy.pureproxy.proxy.code;

public class ProxyPatternClient {
    private Subject subject;

    public ProxyPatternClient(Subject subject) {
        this.subject = subject;
    }
    public void execute(){
        subject.operation();
    }
}Subject인터페이스에 의존execute()를 실행하면subject.operation()를 호출
ProxyPatternTest
package hello.proxy.pureproxy.proxy;

import hello.proxy.pureproxy.proxy.code.CacheProxy;
import hello.proxy.pureproxy.proxy.code.ProxyPatternClient;
import hello.proxy.pureproxy.proxy.code.RealSubject;
import org.junit.jupiter.api.Test;

public class ProxyPatternTest {
    @Test
    void noProxyTest(){
        RealSubject realSubject = new RealSubject();
        ProxyPatternClient client = new ProxyPatternClient(realSubject);

        client.execute();
        client.execute();
        client.execute();

    }
    @Test
    void cacheProxyTest(){
        RealSubject realSubject = new RealSubject();
        CacheProxy cacheProxy = new CacheProxy(realSubject);
        ProxyPatternClient client = new ProxyPatternClient(cacheProxy);

        client.execute();
        client.execute();
        client.execute();
    }
}- noProxyTest에서는 프록시를 적용하지 않았기 때문에 execute()를 실행하면 1초씩 (총 3초) 실행 로직을 진행한다.
- cacheProxyTest는 cacheProxy를 적용해 execute()를 실행하면 처음 실행 1초만 실행하고 캐쉬 값을 사용해 즉시 반환한다.
- 이처럼 클라이언트 코드의 변경 없이 자유롭게 프록시를 넣고 뺄 수 있다. 실제 클라이언트 입장에서는 프록시 객체가 주입되었는지, 실제 객체가 주입되었는지 알지 못한다.
데코레이터 패턴
데코레이터란?
말 그래로 꾸며주는(추가하는) 기능이다. 프록시 패턴과 유사하게 사용이 가능하다.
데코레이터 패턴 - 적용
데코레이터에 메시지 꾸며주기 기능 , 실행 시간 측정 기능을 추가해 보자
Component
package hello.proxy.pureproxy.decorator.code;

public interface Component {
    String operation();
}Component인터페이스는 단순히String operation()메서드를 가진다.
RealComponent
package hello.proxy.pureproxy.decorator.code;

import lombok.extern.slf4j.Slf4j;

@Slf4j
public class RealComponent implements Component{
    @Override
    public String operation() {
        log.info("RealComponent 실행");
        return "data";
    }
}- RealComponent
는Component` 인터페이스를 구현 - operation()
: 단순히 로그를 남기고"data"` 문자를 반환
MessageDecorator
package hello.proxy.pureproxy.decorator.code;

import lombok.extern.slf4j.Slf4j;

@Slf4j
public class MessageDecorator implements Component{
    private Component component;

    public MessageDecorator(Component component) {
        this.component = component;
    }

    @Override
    public String operation() {
        log.info("message Decorator 실행");
        String result = component.operation();
        String decoResult = "**"+result+"**";
        log.info("MessageDecorator 꾸미기 적용 전={}, 적용 후 ={}", result, decoResult);

        return decoResult;
    }
}- 프록시가 호출해야 하는 대상을
component에 저장 operation()을 호출하면 프록시와 연결된 대상을 호출
TimeDecorator
package hello.proxy.pureproxy.decorator.code;

import lombok.extern.slf4j.Slf4j;

@Slf4j
public class TimeDecorator implements Component{
    private Component component;

    public TimeDecorator(Component component) {
        this.component = component;
    }

    @Override
    public String operation() {
        log.info("TimeDecorator 실행");
        long startTime = System.currentTimeMillis();
        String result = component.operation();

        long endTime = System.currentTimeMillis();
        long resultTime = endTime - startTime;
        log.info("TimeDecorator 종료 resultTime={}ms", resultTime);
        return result;
    }
}- TimeDecorator` 는 실행 시간을 측정하는 부가 기능을 제공
DecoratorPatternClient
package hello.proxy.pureproxy.decorator.code;

import lombok.extern.slf4j.Slf4j;

@Slf4j
public class DecoratorPatternClient {
    private Component component;

    public DecoratorPatternClient(Component component) {
        this.component = component;
    }
    public void execute() {
        String result = component.operation();
        log.info("result={}", result);
    }
}- 클라이언트 코드는 단순히
Component인터페이스를 의존
DecoratorPatternTest
package hello.proxy.pureproxy.decorator;
import hello.proxy.pureproxy.decorator.code.*;
import org.junit.jupiter.api.Test;

public class DecoratorPatternTest {
    @Test
    void noDecorator(){
        RealComponent realComponent = new RealComponent();
        DecoratorPatternClient client = new DecoratorPatternClient(realComponent);
        client.execute();
    }
    @Test
    void decorator(){
        Component realComponent = new RealComponent();
        Component messageDecorator = new MessageDecorator(realComponent);
        DecoratorPatternClient client = new DecoratorPatternClient(messageDecorator);
        client.execute();
    }
    @Test
    void TimeDecorator(){
        Component realComponent = new RealComponent();
        Component messageDecorator = new MessageDecorator(realComponent);
        Component timeDecorator = new TimeDecorator(messageDecorator);
        DecoratorPatternClient client = new DecoratorPatternClient(timeDecorator);
        client.execute();
    }
}
TimeDecorator 테스트는 다음과 같은 의존관계를 설정했다.
GOF 데코레이터 패턴
프록시 패턴 VS 데코레이터 패턴
여기까지 진행하면 몇가지 의문이 들 것이다.
Decorator라는 추상 클래스를 만들어야 데코레이터 패턴일까?- 프록시 패턴과 데코레이터 패턴은 그 모양이 거의 비슷한 것 같은데?
의도(intent)
사실 프록시 패턴과 데코레이터 패턴은 그 모양이 거의 같고, 상황에 따라 정말 똑같을 때도 있다. 그러면 둘을 어떻게 구분하는 것일까?
디자인 패턴에서 중요한 것은 해당 패턴의 겉모양이 아니라 그 패턴을 만든 의도가 더 중요하다. 따라서 의도에 따라 패 턴을 구분한다.
- 프록시 패턴의 의도: 다른 개체에 대한 접근을 제어하기 위해 대리자를 제공
- 데코레이터 패턴의 의도: 객체에 추가 책임(기능)을 동적으로 추가하고, 기능 확장을 위한 유연한 대안 제공
정리
프록시를 사용하고 해당 프록시가 접근 제어가 목적이라면 프록시 패턴이고, 새로운 기능을 추가하는 것이 목적이라면 데코레이터 패턴이 된다.