1. Basic
- var:변수, let:상수
- 스위프트의 특징: 타입세이프티
var test:String = "test" // 타입은 대문자- 처음 선언 해준 타입으로 변수 타입이 지정됨
- ++은 swift에서 사용하지 않는다
- 문자열 보간법
var score = 85
var str = "Your score was \(score)"- 범위 연산자
1...5
1..<5 // 5를 제외- “,”를 OR 처럼 사용
2. Structure
Array
💡 outOfRange Index를 콜할 경우 크래시가 남//선언
var todo:[String]=["a","b"]
//값 추가
todo.append("c")
todo += ["c"]
todo += ["c","d"]
//subscript문법
let firstTodo = todo[0]
//값 변경
todo[4] = "d"
//값 삽입
todo.insert("f",at:2)//추가할 값,인덱스 /삽입시 값이 하나씩 밀림
//값 삭제
todo.remove(at:2)//인덱스 /값이 하나씩 앞으로 당겨짐
//값 갯수 확인
todo.countDictionary
- 순서가 상관없음
//선언
var dic:[String:String] = [
	"A":"a",
	"B":"b",
	"C":"c",
	]
//결과 :
//(key "B",value "b")
//(key "A",value "a")
//(key "C",value "c")

//값 읽기
var tmp = dic["A"]
//값 변경
dic["A"]="b"
dic.updateValue("b",forKey:"A")
//값 삭제
dic["A"]=nil
dic.removeValue(forKey:"A")// 키가 사라지면 딕셔너리 벨류도 사라짐
Set
3.Control Flow
- if 조건, while 조건 이런 식으로 조건에 괄호가 안 붙음
for item in items {}
for item in 1...10 {} // 열번 실행

//repeat-while loop
//(while 뒤에 쓰는거랑 비슷하게 조건 1회 실행 후 while 진행)
var counter = 1
repeat{
	...
}while counter<1- switch if 차이
//if
if a || b {...} else if c {...}

//switch
switch val {
	case a,b: ...
	case c: ...
	default : ...
}

//범위 연산자 사용
switch val {
	case -20..<0: ...
	case 0..<10: ...
	case 10..<20: ...
	default : ...
}- swift에서 switch 문은 default가 필수
부울(논리)연산을 할 때 앞 연산자의 결과에 따라 뒤 연산자의 실행여부가 결정되는 방식. 앞에 필터링이 더 큰 값을 넣으면 후에 오는 연산의 피로도가 낮아짐
4. Function
//선언
func a(width:Int)->Int{ //리턴값
 var area:Int = a;
 return area
}
//호출
a(width:7)

//내부 파라미터, 외부 파라미터
func sayHello(to person:String, from company:String)-> String{
	return "Hello to \(person) from\(company)"
}

sayHello(to:"yk",from:"google")

//기본값
func sayHello(to person:String, from company:String = "google")-> String{...}

//복수 값 리턴
func fn()->(name: String, count: Int){
	var a = "hi"
	var b = 100
	return (a,b) //튜플로 리턴
}
let result = fn()
result.name = "hi"// result.0
result.count = 100//result.1
5. Class && Structure
- 차이점 : 복사 개체의 원본 영향 여부
- Struct : Value Type / Class : Reference Type
- Struct : 복사 개체들은 원본과 별개인 새로운 개체이기 때문에 복사 개체의 값을 변형해도 원본 개체의 값에는 영향이 없음
- Class : 복사 개체들은 원본 개체를 가르키는 서로 다른 이름이기 때문에 복사 개체를 변형시키켠 원본 값도 변함
//property의 종류
//stored property : 값 저장
struct Point{
	var x = 0.0
	var y = 0.0
}
struct Size{
	var width = 0.0
	var height = 0.0
}
//computed property : 매번 새로운 값 계산 (저장 X)
struct Rect{
	var origin = Point()
	var size = Size()
	var center:Point {
		get{ // computed property
			let centerX = origin.x + (size.width/2)
			let centerY = origin.y + (size.height/2)
			return Point(x:centerX,y:centerY)
		}
		set(newCenter){ // computed property
			origin.x = newCenter.x - (size.width/2)
			origin.y = newCenter.y - (size.height/2)
		}
	}
}
var square = Rect(origin:Point(x:0.0,y:0.0),size:Size(width:10,height:10))
let initialCenter = squear.center
square.center = Point(x:15,0,y:15,0)

//type property : 타입 연관 (인스턴스 귀속 X) -> 상수값
class A {
	static var a = "a"
	static var fn:Int{return 10}
}
A.a
A.fn //인스턴스명이 아니라 타입이름으로 접근
Property Observer
class StepCounter {
	var totalSteps:Int = 0 {
		willSet(newVal){
			print("\(newVal)이 값이 a에 들어갈 예정입니다.")
		}
		didSet{
				if totalSteps > oldValue { //oldValue : 자동 생성되는 이전값 = 여기서는 0
				print("이만큼 걸었습니다: \(totalSteps - oldValue)")
			}
		}
	}
}
let counter = StepCounter()
counter.totalSteps = 200
Methods
- 특정 타입과 연관된 함수
class Counter {
	var count = 0
	function increment(){
		count += 1
	}
	function increment(by amount :Int){
		count += amount
	}
	function reset(){
		count = 0
	}
}
//self property : my property
struct Point{
	var x = 0.0
	var y = 0.0
	func isToRightOf(x:Double)->Bool{
		return self.x > x // 우측 x는 파라미터 x, 좌측은 Point.x
	}
}

//type methods
class A {
	static func a(){...}
}
A.a()
Inheritance
- Superclass (부모) → SubClass (자식)
- Overriding : 부모로부터 상속 받은 것을 변형
class Vehicle {
	var currentSpeed = 0.0
	var description:String {//computed property
		return "Traveling at \(currentSpped) mile per hour"
	}

	func makeNoise(){
	}
}
class bicycle : Vehicle{
	var gear = 1
	override func makeNoise(){ //overriding
		print("따르릉")
	}
	override var description:String{ //property overriding
		//get set 써도 되고 안 쓸 때는 그냥 바로 return 해줄 수도 있음
			return super.description + "는 따릉이 기어 \(gear)" //super = 부모 property
	}
}
bicycle.currentSpeed
bicycle.description
bicycle.gear
Initialization
class Tmp {
	var a:Int
	init(){ //인스턴스 선언시 호출되는 함수
		a = 0
	}
	init(val:Int){ //여러개 선언 가능
		a = val
	}
	init(_ tmp:Int{
		a = tmp
	}
}

~~Tmp(tmp:50)~~ //tmp 값이 중복됨 ->"_ " 사용
Tmp(50)
Optional
확정 타입이 아닌 경우 Swfit에서는 대부분 optional 타입이기 때문에 nil 여부 체크 과정이 필수적이다
let a = "1"
let b = Int(a)
if b != nil {
	//unwrapping : 옵셔널 벗겨내기
	print("success: \(b!)") //nil이 아님을 확인했으면 변수 뒤에 느낌표 추가해서 unwrap
}

//Optional Binding : Unwrapping 과정을 구문화
if let c = b,
	 let d = Int("4"), // 복수 체크 가능
	 d > c && d < 100 // 조건절 추가 가능
{
	print("success: \(c)")
}else{
	print("fail")
}

//Optional Chaining ***
//계산식 중간에 하나라도 ?가 있으면 optional chaining이 생김
class Person{
	var residence : Residence?
}
class Residence{
	var numberOfRooms = 1
}
let john = Person()
john.residence = Residence() //이 구절이 없으면 "Unableled..."출력
~~let roomCount = john.residence!.numberOfRooms~~ //error
let roomCount = john.residence?.numberOfRooms{ //optional binding
	print("John's residence has \(roomCount) rooms")
}else{
	print("Unabled to retrieve the number of rooms")
}
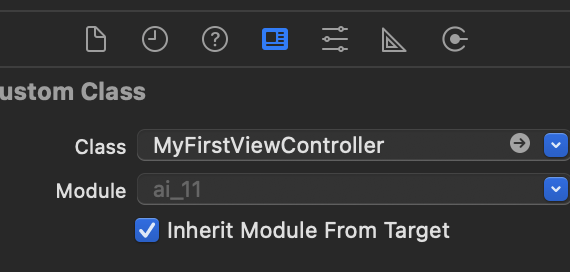
Xcode
Connecting UI with code
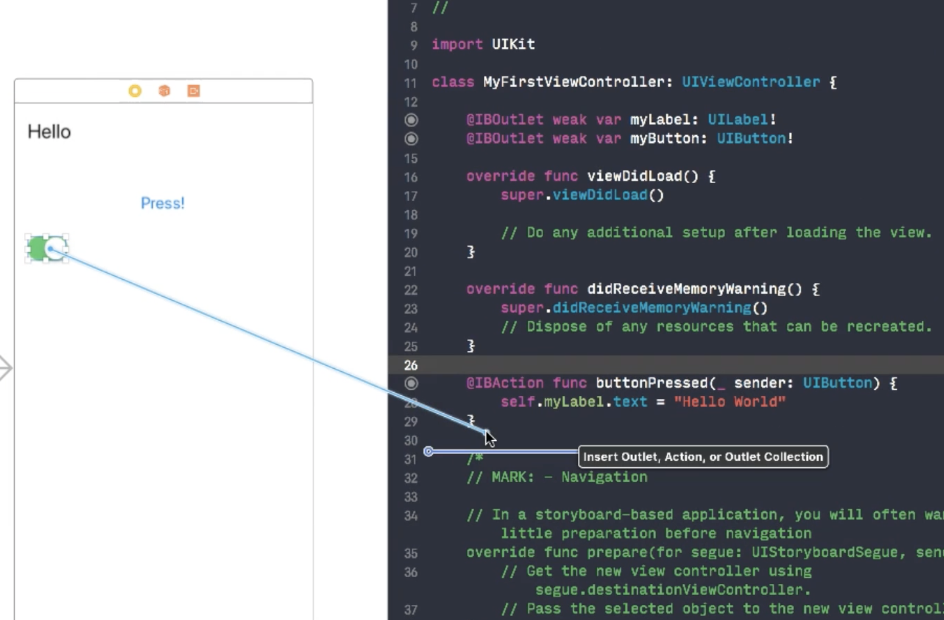
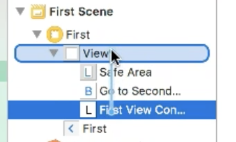
storyboad와 해당 코드 연결 방법!
- 해당하는 storyboard의 viewController 설정에서 custom ViewController을 연결
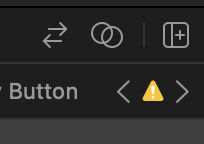
- 우측 상단에서 Assistant 켜주기 (shortcut: control + option + command + enter)
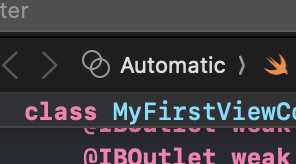
- Automatic 으로 연결된 코드창이 뜬다면 성공
- ctrl + drag
- IBOutlet : 변수, IBAction : 함수
Documentation
help → developer Documentation : import 하면 사용 가능
AutoLayout

ctrl drag 로 view에서 auto layout 잡아줌
잡힌 constant value는 여기서 수정 가능
- leading space, vertical center 같은 것도 여기서 조정
- 상대 위치 설정하기 위해서는 기준점이 되는 오브젝트로 드래그
Protocol
java의 interface 나 ts의 custom type 같은거
protocol Test {
	var test : Int{get set}
	func testFunc()
}
class SuperClass { // 상속
}
//사용
class A : Test {
	...
}
//상속과 함께 사용
class A : SuperClass, Test { // 복수일 경우 첫번째 자리는 무조건 상속, 나머지는 protocol (상속은 1개)
	...
}
UITableView로 보는 예시

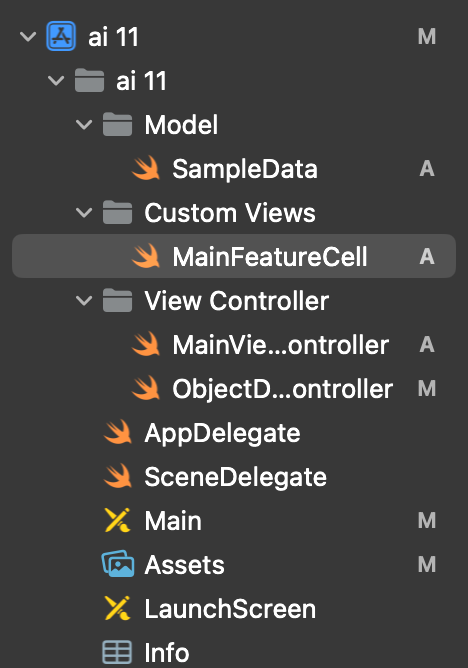
import UIKit

// 사용하고자 하는 프로토콜을 추가 해줌
class MainViewController: UIViewController, UITableViewDataSource, UITableViewDelegate {
    @IBOutlet weak var tableView: UITableView!

    let sampleData = SampleData()
    override func viewDidLoad() {
        super.viewDidLoad()

        //dataSource, delegate을 self로 지정
        self.tableView.tableFooterView = UIView(frame: .zero)
        self.tableView.dataSource = self
        self.tableView.delegate = self

        // Do any additional setup after loading the view.
    }
    //using large title when view appear
    override func viewWillAppear(_ animated: Bool) {
        super.viewWillAppear(animated)
        self.navigationController?.navigationBar.prefersLargeTitles = true
    }
    //no using large title when view disappear
    override func viewWillDisappear(_ animated: Bool) {
        super.viewWillDisappear(animated)
        self.navigationController?.navigationBar.prefersLargeTitles = false
    }
    func tableView(_ tableView: UITableView, numberOfRowsInSection section: Int) -> Int {
        return self.sampleData.samples.count
    }
    func tableView(_ tableView: UITableView, cellForRowAt indexPath: IndexPath) -> UITableViewCell {
        let cell = tableView.dequeueReusableCell(withIdentifier:"mainFeatureCell", for: indexPath) as! MainFeatureCell

        let sample = self.sampleData.samples[indexPath.row]
        cell.titleLabel.text = sample.title
        cell.descriptionLabel.text = sample.description
        cell.featuredImageView.image = UIImage(named: sample.image)

        return cell
    }
    func tableView(_ tableView: UITableView, didSelectRowAt indexPath: IndexPath) {
        //default selection 해제
        tableView.deselectRow(at: indexPath, animated: true)
        switch indexPath.row {
        case 0:self.performSegue(withIdentifier: "photoObjectDetection", sender: nil)
        case 1:self.performSegue(withIdentifier: "realTimeObjectDetection", sender: nil)
        case 2:self.performSegue(withIdentifier: "facialAnalysis", sender: nil)
        default:
            return
        }
    }
}
