이번에 node express와 swagger를 이용해 api서버와 docs를 만들어야할 일이 생겼다.
좀 찾아보니 npm에 swagger라는 라이브러리를 많이들 사용하는 것 같았다. 테스트겸 설치 후 docs를 읽으려보니, 마지막 업데이트가 5년 전이었다... 심지어 1.0도 아니고 0.7.5 버전에다가 OpenAPI 2.0 기준으로 사용되고 있던 라이브러리라 썩 마음에 들지 않았고, 구글링을 해보았다. 2달 전인 2020년 9월 1일에 작성된 최신 블로그가 있길래 들어가보았다. 좀 마음에 드는 내용을 찾은 것 같아 공유해보고자 한다.
출처: https://blog.logrocket.com/documenting-your-express-api-with-swagger/
Swagger 설치 및 적용
테스트를 위해 express application을 하나 생성한다. 의존성 패키지도 설치해준다.
express expressapp
npm i
npm i swagger-ui-express swagger-jsdoc위의 명령을 이용해 swagger-ui-express와 swagger-jsdoc을 설치한다.
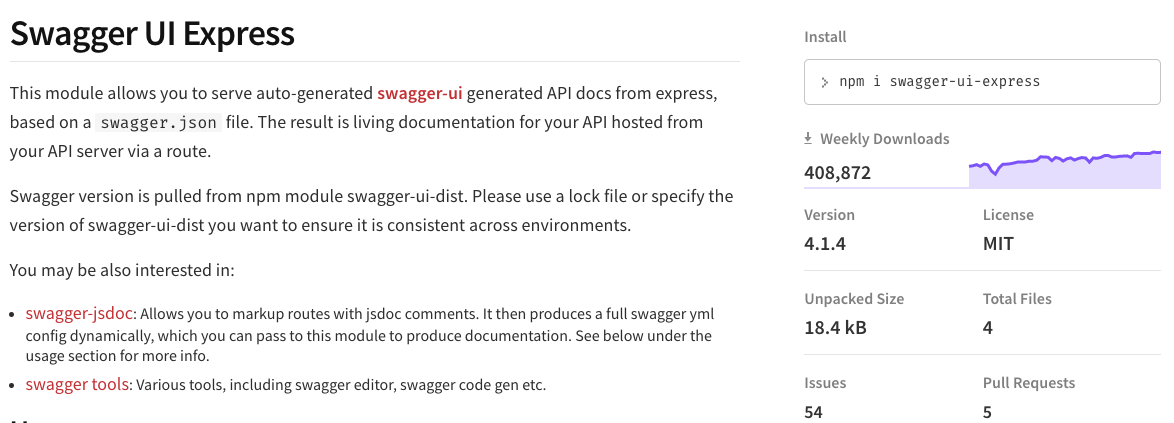
swagger-ui-express는 swagger-ui를 express에 쉽게 적용시킬 수 있도록 해주는 라이브러리이다. 꾸준히 많은 다운로드를 보여주며, 비교적 최근까지도 업데이트를 하는 것으로 보아 믿을만한 것 같다.
swagger-jsdoc은 OpenAPI 형식으로 관리하기 용이하도록 해주는 라이브러리인듯 하다.
마찬가지로 꾸준한 다운로드를 보여주고 관리를 해주는 것 같다.

설치가 잘 되었다면 app.js 상단에 아래와 같이 module들을 import 시켜준다.
var bodyParser = require("body-parser");
var swaggerJsdoc = require("swagger-jsdoc");
var swaggerUi = require("swagger-ui-express");
const options = {
definition: {
openapi: "3.0.0",
info: {
title: "LogRocket Express API with Swagger",
version: "0.1.0",
description:
"This is a simple CRUD API application made with Express and documented with Swagger",
license: {
name: "MIT",
url: "https://spdx.org/licenses/MIT.html",
},
contact: {
name: "LogRocket",
url: "https://logrocket.com",
email: "info@email.com",
},
},
servers: [
{
url: "http://localhost:3000/books",
},
],
},
apis: ["./routes/books.js"],
};
const specs = swaggerJsdoc(options);
app.use("/api-docs",
swaggerUi.serve,
swaggerUi.setup(specs)
);그리고 위의 코드를 app이 listen하기 전 부분에 넣어준다. default로 생성된 url 라우팅 부분 즈음에 넣어주면 될 것 같다.
app.js
var createError = require('http-errors');
var express = require('express');
var path = require('path');
var cookieParser = require('cookie-parser');
var logger = require('morgan');

var indexRouter = require('./routes/index');
var usersRouter = require('./routes/users');

// ----------------------- 추가한 부분 1 ---------------------------
var bodyParser = require("body-parser");
var swaggerJsdoc = require("swagger-jsdoc");
var swaggerUi = require("swagger-ui-express");
// --------------------------------------------------------------


var app = express();

// view engine setup
app.set('views', path.join(__dirname, 'views'));
app.set('view engine', 'jade');

app.use(logger('dev'));
app.use(express.json());
app.use(express.urlencoded({ extended: false }));
app.use(cookieParser());
app.use(express.static(path.join(__dirname, 'public')));

// ----------------------- 추가한 부분 2 ---------------------------
const options = {
  definition: {
    openapi: "3.0.0",
    info: {
      title: "Meditator's Node Express API with Swagger",
      version: "0.1.0",
      description:
        "This is a simple CRUD API application made with Express and documented with Swagger",
      license: {
        name: "MIT",
        url: "https://spdx.org/licenses/MIT.html",
      },
      contact: {
        name: "Meditator",
        url: "https://velog.io/@yongh8445",
        email: "yonghoon95@gmail.com",
      },
    },
    servers: [
      {
        url: "http://localhost:3000/books",
      },
    ],
  },
  apis: ["./routes/books.js"],
};

const specs = swaggerJsdoc(options);
// --------------------------------------------------------------


app.use('/', indexRouter);
app.use('/users', usersRouter);


// ----------------------- 추가한 부분 3 ---------------------------
app.use("/api-docs",
  swaggerUi.serve,
  swaggerUi.setup(specs)
);
// --------------------------------------------------------------


// catch 404 and forward to error handler
app.use(function(req, res, next) {
  next(createError(404));
});

// error handler
app.use(function(err, req, res, next) {
  // set locals, only providing error in development
  res.locals.message = err.message;
  res.locals.error = req.app.get('env') === 'development' ? err : {};

  // render the error page
  res.status(err.status || 500);
  res.render('error');
});


module.exports = app;
혹시나 pm2가 설치되어있지않다면 npm을 이용해 설치한다.
위의 코드까지 작성하고 pm2를 이용해 실행해보자.
pm2 start bin/www --name test --watch

설치하고 첫 창까지 띄웠으니 반은 왔다. 나이쓰~
API 작성
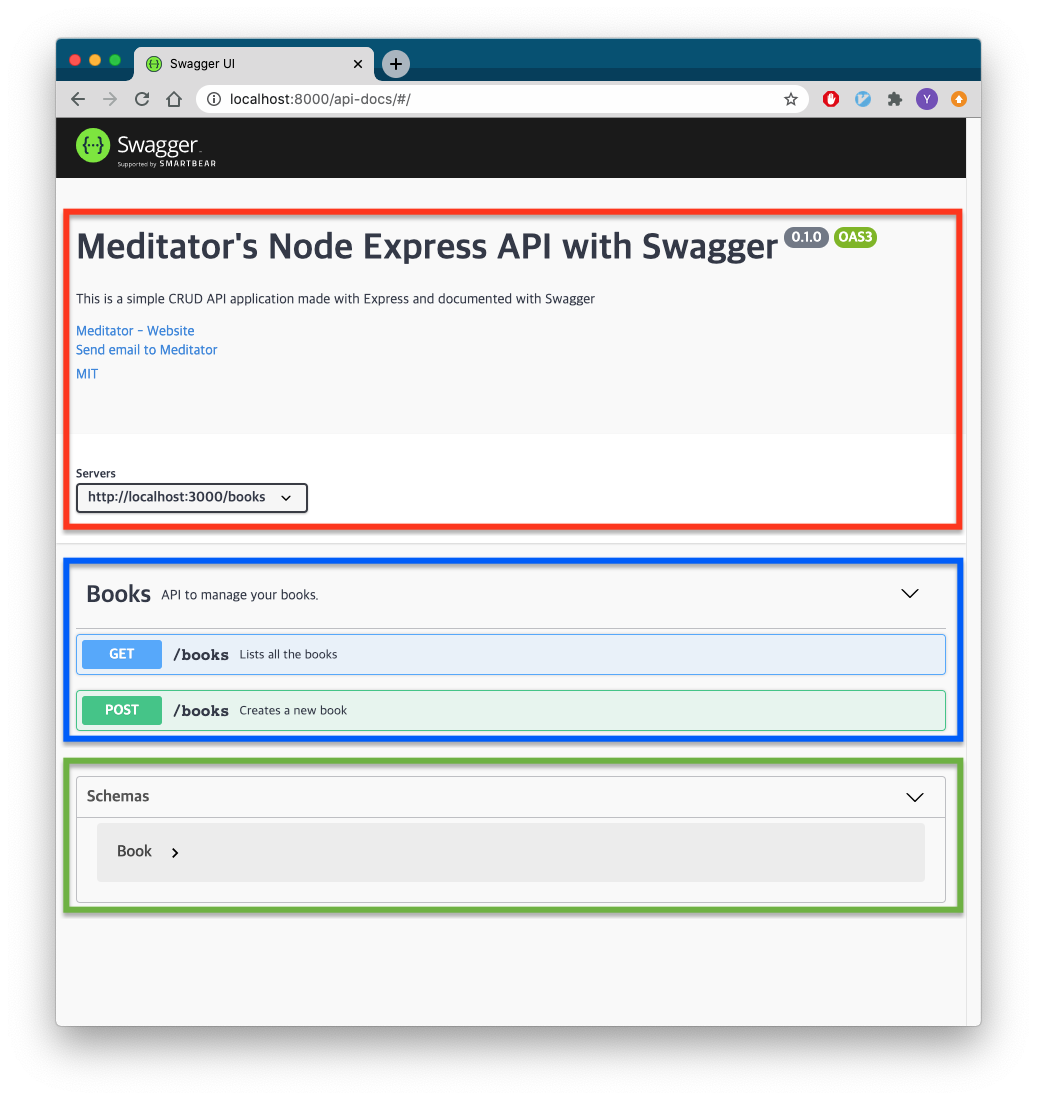
간단히 문서를 작성하면 위와 같은 창이 완성된다.
빨간 박스 부분은 앞전에 app.js에 추가한 부분이고, 파란 박스 부분과 초록 박스 부분을 아래쪽에 나누어 표시해두었다. YAML 타입 문서로 작성할 수 있고 주석 내에 작성하되, 맨 뒤에 '@swagger'로 표기 후 작성하면 된다.
초록 박스 부분 (Schemas)
/**
* @swagger
*     components:
*         schemas:
*             Book:
*                 type: object
*                 required:
*                     - title
*                     - author
*                     - finished
*                 properties:
*                     id:
*                         type: integer
*                         description: The auto-generated id of the book.
*                     title:
*                         type: string
*                         description: The title of your book.
*                     author:
*                         type: string
*                         description: Who wrote the book?
*                     finished:
*                         type: boolean
*                         description: Have you finished reading it?
*                     createdAt:
*                         type: string
*                         format: date
*                         description: The date of the record creation.
*                     example:
*                         title: The Pragmatic Programmer
*                         author: Andy Hunt / Dave Thomas
*                         finished: true
*/
파란 박스 부분 (API)
/**
*  @swagger
*  tags:
*    name: Books
*    description: API to manage your books.
*/
/**
*  @swagger
*  paths:
*   /books:
*     get:
*       summary: Lists all the books
*       tags: [Books]
*       responses:
*         "200":
*           description: The list of books.
*           content:
*             application/json:
*               schema:
*                 $ref: '#/components/schemas/Book'
*     post:
*       summary: Creates a new book
*       tags: [Books]
*       requestBody:
*         required: true
*         content:
*           application/json:
*             schema:
*               $ref: '#/components/schemas/Book'
*       responses:
*         "200":
*           description: The created book.
*           content:
*             application/json:
*               schema:
*                 $ref: '#/components/schemas/Book'
*/
GET POST 이외에 UPDATE, DELETE 등의 메소드나 기타 다른 파라미터는 OpenAPI 3.0 Document와 YAML Document 등을 참고하면 쉽게 작성할 수 있다.
기타
API 개수가 너무 많은 경우, 검색할 수 있도록 옵션을 제공한다.
app.use("/api-docs",
  swaggerUi.serve,
  swaggerUi.setup(specs, { explorer: true })
);
위처럼 setup 함수 인자에 explorer 옵션을 true로 설정해주면 된다.

마무리
Node와 쪼끔 더 친해진 것 같다. 더 친해져야한다.