Virtual Machine Make
> install
[root@station14 ~]# yum -y install qemu-kvm libvirt virt-manager virt-viewer libvirt-daemon-kvm
Loaded plugins: fastestmirror, langpacks
base | 3.6 kB 00:00:00
classRPMs | 2.5 kB 00:00:00
errataRPMs | 2.5 kB 00:00:00
mysql-connectors-community | 2.6 kB 00:00:14
http://repo.mysql.com/yum/mysql-tools-community/el/7/x86_64/repodata/repomd.xml: [Errno 12] Timeout on http://repo.mysql.com/yum/mysql-tools-community/el/7/x86_64/repodata/repomd.xml: (28, 'Operation too slow. Less than 1000 bytes/sec transferred the last 30 seconds')
Trying other mirror.
mysql-tools-community | 2.6 kB 00:00:00
mysql80-community | 2.6 kB 00:00:00
Loading mirror speeds from cached hostfile
Resolving Dependencies
--> Running transaction check
---> Package libvirt.x86_64 0:2.0.0-10.el7_3.9 will be installed
--> Processing Dependency: libvirt-daemon-driver-storage = 2.0.0-10.el7_3.9 for package: libvirt-2.0.0-10.el7_3.9.x86_64
...
...
...
Complete!
> 디스크 공간 확인
[root@station14 ~]# df -h
Filesystem Size Used Avail Use% Mounted on
/dev/mapper/vg0-root 8.0G 4.0G 4.1G 50% /
devtmpfs 7.8G 0 7.8G 0% /dev
tmpfs 7.8G 56M 7.8G 1% /dev/shm
tmpfs 7.8G 8.7M 7.8G 1% /run
tmpfs 7.8G 0 7.8G 0% /sys/fs/cgroup
/dev/sda1 494M 151M 344M 31% /boot
/dev/mapper/vg0-tmp 1014M 34M 981M 4% /tmp
/dev/mapper/vg0-var 2.0G 237M 1.8G 12% /var
tmpfs 1.6G 8.0K 1.6G 1% /run/user/0
server1:/export/netinstall 931G 14G 917G 2% /net/server1/export/netinstall
server1:/export/courserepos 931G 14G 917G 2% /net/server1/export/courserepos
[root@station14 ~]# lsblk
NAME MAJ:MIN RM SIZE RO TYPE MOUNTPOINT
sda 8:0 0 931.5G 0 disk
├─sda1 8:1 0 500M 0 part /boot
└─sda2 8:2 0 34.2G 0 part
├─vg0-root 253:0 0 8G 0 lvm /
├─vg0-swap 253:1 0 512M 0 lvm [SWAP]
├─vg0-tmp 253:2 0 1G 0 lvm /tmp
└─vg0-var 253:3 0 2G 0 lvm /var
sr0 11:0 1 1024M 0 rom
> fdisk로 disk에 적용
[root@station14 ~]# fdisk /dev/sda
The device presents a logical sector size that is smaller than
the physical sector size. Aligning to a physical sector (or optimal
I/O) size boundary is recommended, or performance may be impacted.
Welcome to fdisk (util-linux 2.23.2).
Changes will remain in memory only, until you decide to write them.
Be careful before using the write command.
Command (m for help): n
Partition type:
p primary (2 primary, 0 extended, 2 free)
e extended
Select (default p): p
Partition number (3,4, default 3): 3
First sector (72706048-1953525167, default 72706048):
Using default value 72706048
Last sector, +sectors or +size{K,M,G} (72706048-1953525167, default 1953525167): +100G
Partition 3 of type Linux and of size 100 GiB is set
Command (m for help): p
Disk /dev/sda: 1000.2 GB, 1000204886016 bytes, 1953525168 sectors
Units = sectors of 1 * 512 = 512 bytes
Sector size (logical/physical): 512 bytes / 4096 bytes
I/O size (minimum/optimal): 4096 bytes / 4096 bytes
Disk label type: dos
Disk identifier: 0x0008166c
Device Boot Start End Blocks Id System
/dev/sda1 * 2048 1026047 512000 83 Linux
/dev/sda2 1026048 72706047 35840000 8e Linux LVM
/dev/sda3 72706048 282421247 104857600 83 Linux
Command (m for help): w
The partition table has been altered!
Calling ioctl() to re-read partition table.
WARNING: Re-reading the partition table failed with error 16: Device or resource busy.
The kernel still uses the old table. The new table will be used at
the next reboot or after you run partprobe(8) or kpartx(8)
Syncing disks.
> lsblk로 확인
[root@station14 ~]# lsblk
NAME MAJ:MIN RM SIZE RO TYPE MOUNTPOINT
sda 8:0 0 931.5G 0 disk
├─sda1 8:1 0 500M 0 part /boot
└─sda2 8:2 0 34.2G 0 part
├─vg0-root 253:0 0 8G 0 lvm /
├─vg0-swap 253:1 0 512M 0 lvm [SWAP]
├─vg0-tmp 253:2 0 1G 0 lvm /tmp
└─vg0-var 253:3 0 2G 0 lvm /var
sr0 11:0 1 1024M 0 rom
> partprobe후 파티션한 데이터가 반영되어 보임
[root@station14 ~]# partprobe /dev/sda
[root@station14 ~]# lsblk
NAME MAJ:MIN RM SIZE RO TYPE MOUNTPOINT
sda 8:0 0 931.5G 0 disk
├─sda1 8:1 0 500M 0 part /boot
├─sda2 8:2 0 34.2G 0 part
│ ├─vg0-root 253:0 0 8G 0 lvm /
│ ├─vg0-swap 253:1 0 512M 0 lvm [SWAP]
│ ├─vg0-tmp 253:2 0 1G 0 lvm /tmp
│ └─vg0-var 253:3 0 2G 0 lvm /var
└─sda3 8:3 0 100G 0 part --this one!!
sr0 11:0 1 1024M 0 rom
> 세번째 파티션을 xfs로 format
[root@station14 ~]# mkfs -t xfs /dev/sda3
meta-data=/dev/sda3 isize=512 agcount=4, agsize=6553600 blks
= sectsz=4096 attr=2, projid32bit=1
= crc=1 finobt=0, sparse=0
data = bsize=4096 blocks=26214400, imaxpct=25
= sunit=0 swidth=0 blks
naming =version 2 bsize=4096 ascii-ci=0 ftype=1
log =internal log bsize=4096 blocks=12800, version=2
= sectsz=4096 sunit=1 blks, lazy-count=1
realtime =none extsz=4096 blocks=0, rtextents=0
> 특정 디렉토리와 연결해주기 위한 mount 필요
[root@station14 ~]# vi /etc/fstab
--vi /etc/fstab 파일 가장 밑에 아래와 같이 입력 추가!
/dev/sda3 /var/lib/libvirt/images xfs defaults 0 0
> mount -a(자동으로)
[root@station14 ~]# mount -a
> df- h 로 디스크 영역 확인
[root@station14 ~]# df -h
Filesystem Size Used Avail Use% Mounted on
/dev/mapper/vg0-root 8.0G 4.0G 4.1G 50% /
devtmpfs 7.8G 0 7.8G 0% /dev
tmpfs 7.8G 40M 7.8G 1% /dev/shm
tmpfs 7.8G 8.7M 7.8G 1% /run
tmpfs 7.8G 0 7.8G 0% /sys/fs/cgroup
/dev/sda1 494M 151M 344M 31% /boot
/dev/mapper/vg0-tmp 1014M 34M 981M 4% /tmp
/dev/mapper/vg0-var 2.0G 237M 1.8G 12% /var
tmpfs 1.6G 8.0K 1.6G 1% /run/user/0
server1:/export/netinstall 931G 14G 917G 2% /net/server1/export/netinstall
server1:/export/courserepos 931G 14G 917G 2% /net/server1/export/courserepos
/dev/sda3 100G 33M 100G 1% /var/lib/libvirt/images
> 재부팅필요 ( qemu-kvm 커널 모듈이기 때문에)
[root@station14 ~]# reboot
> 재부팅 후 kvm 보임
[root@station14 ~]# lsmod | grep kvm
kvm_intel 170181 0
kvm 554609 1 kvm_intel
irqbypass 13503 1 kvm
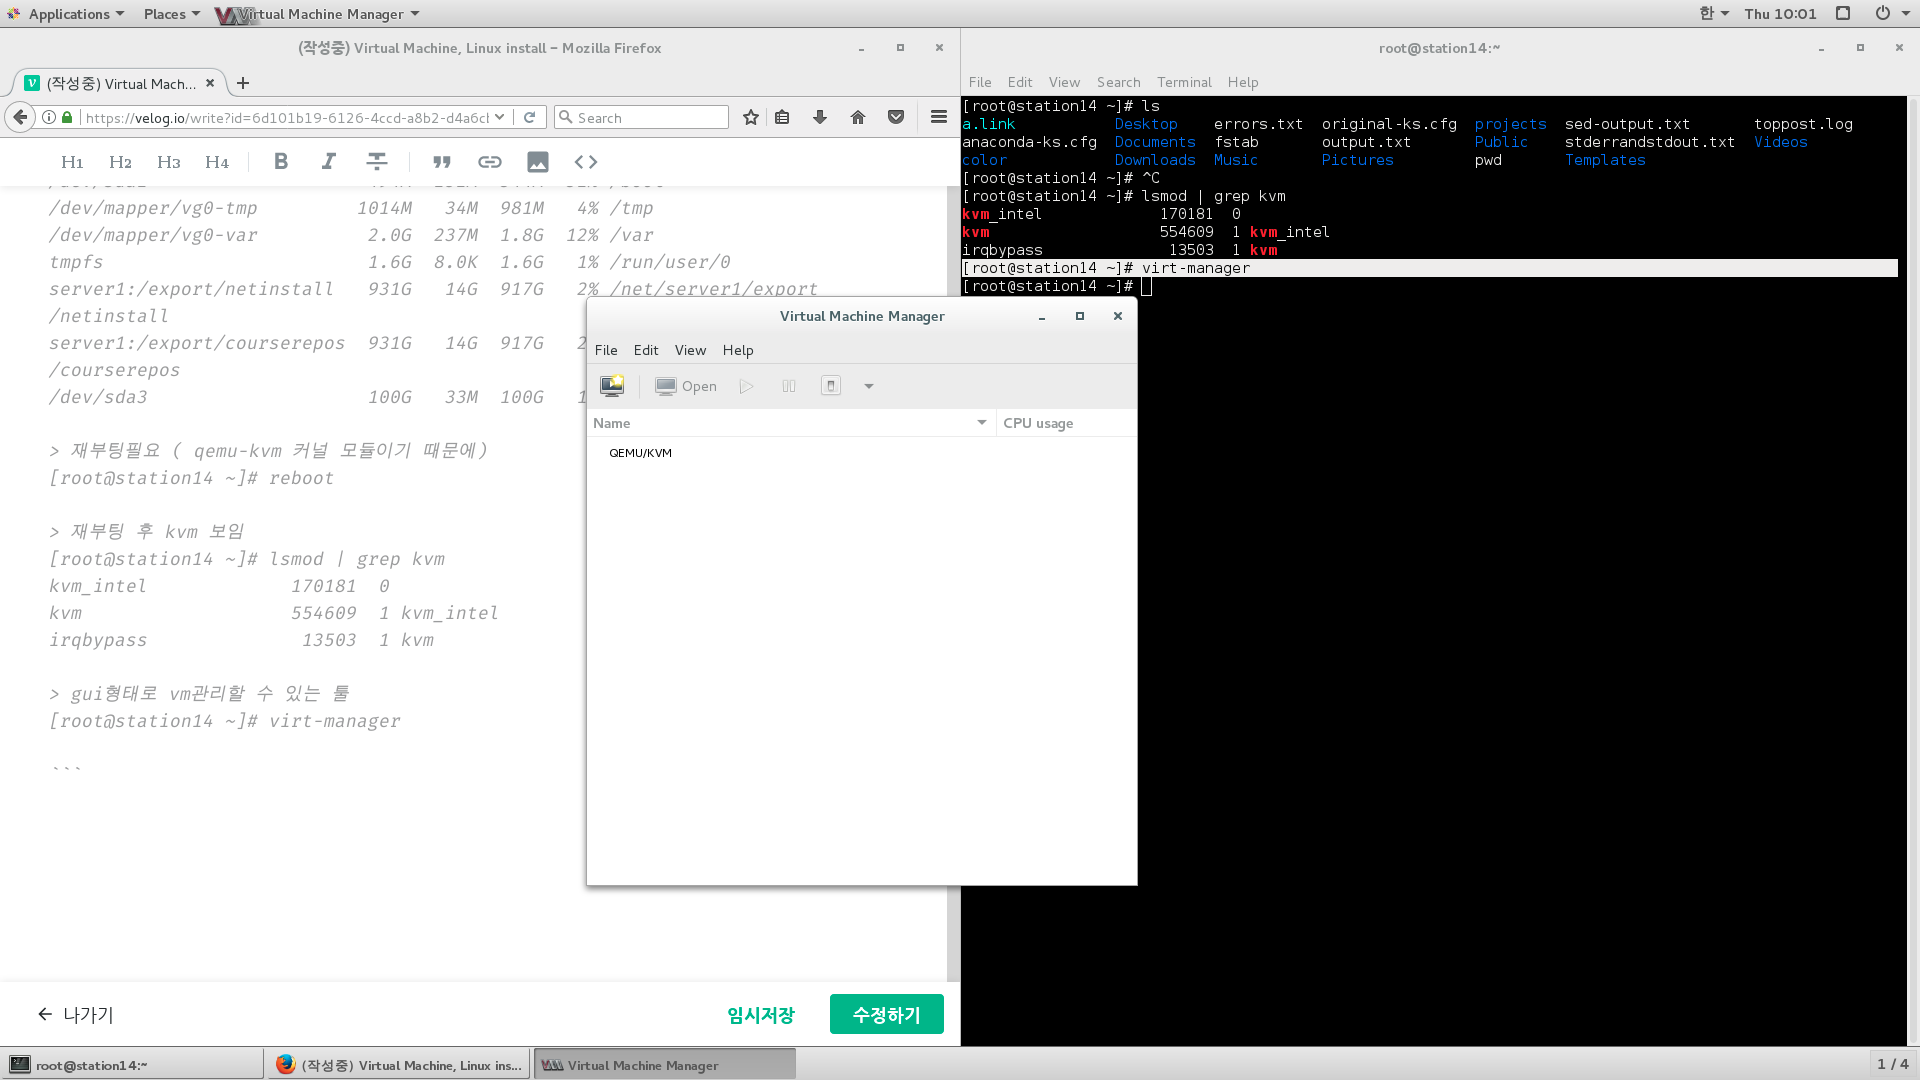
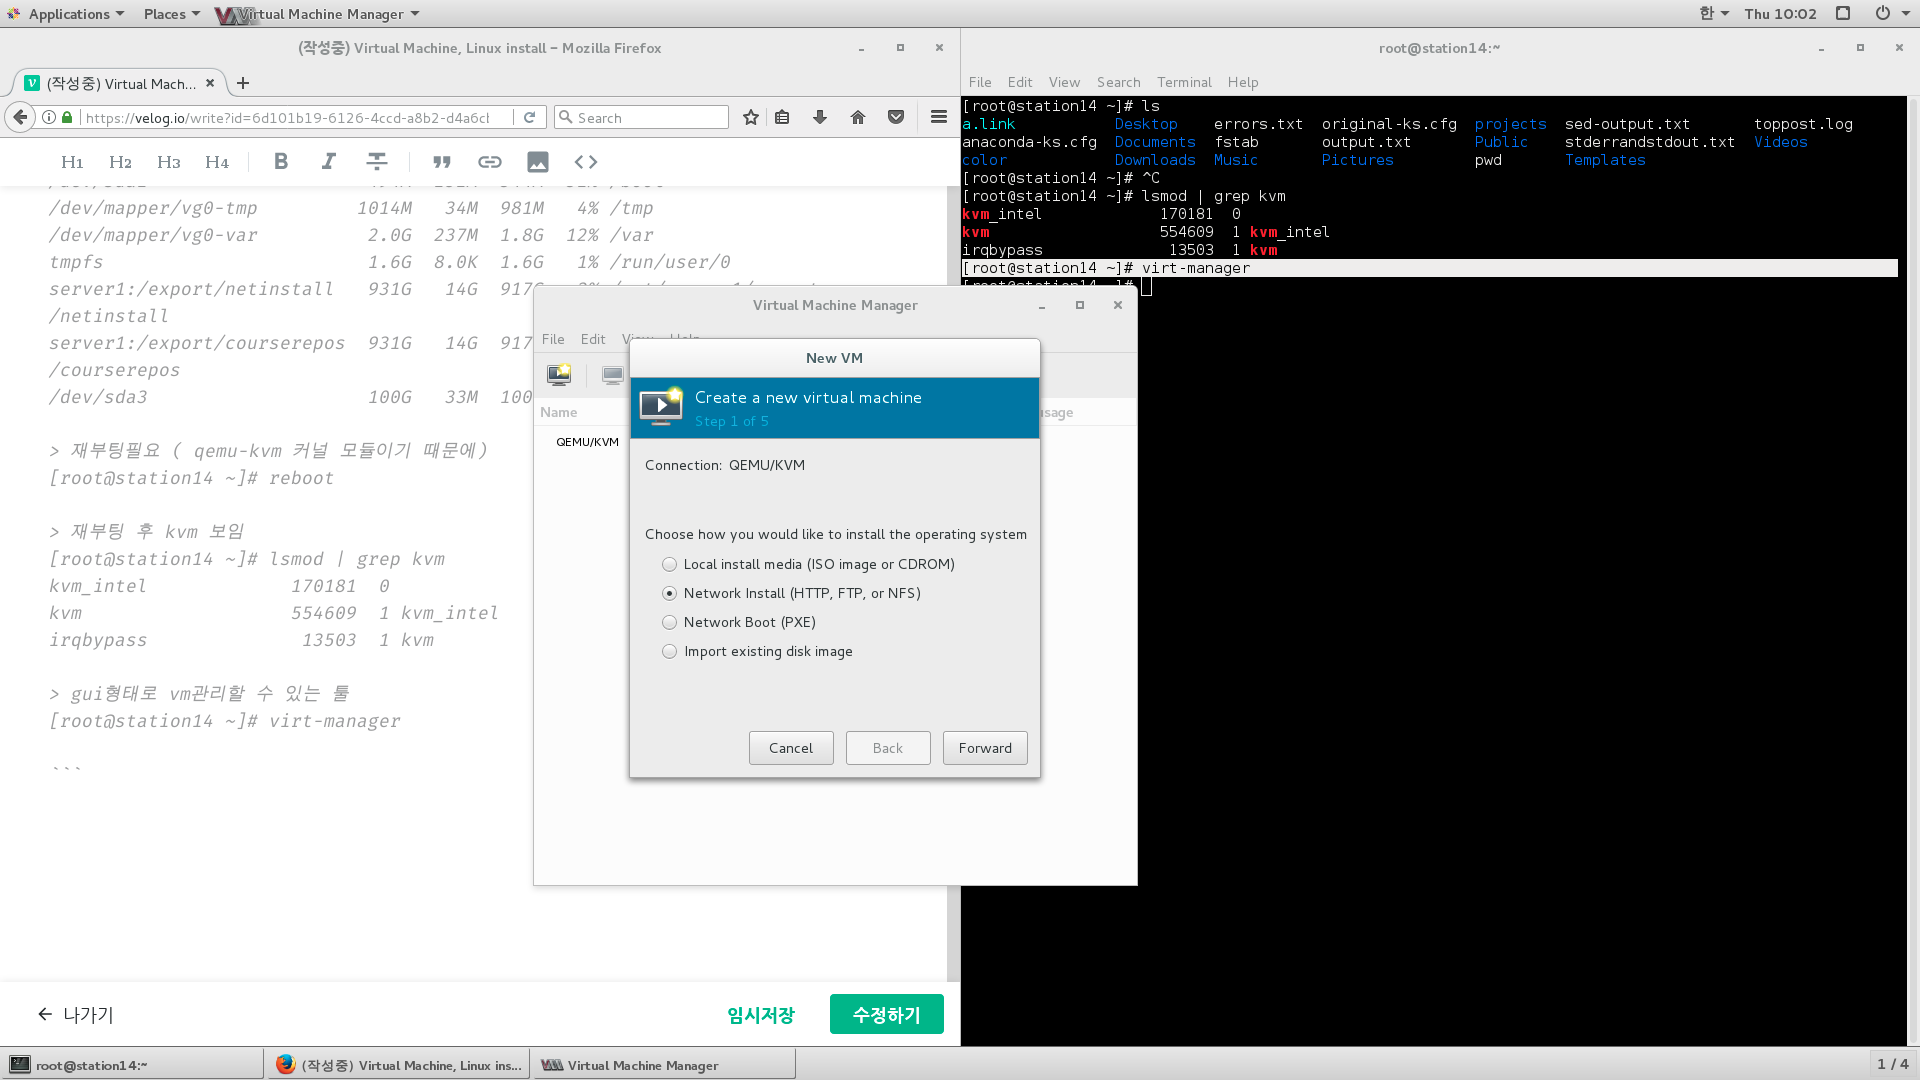
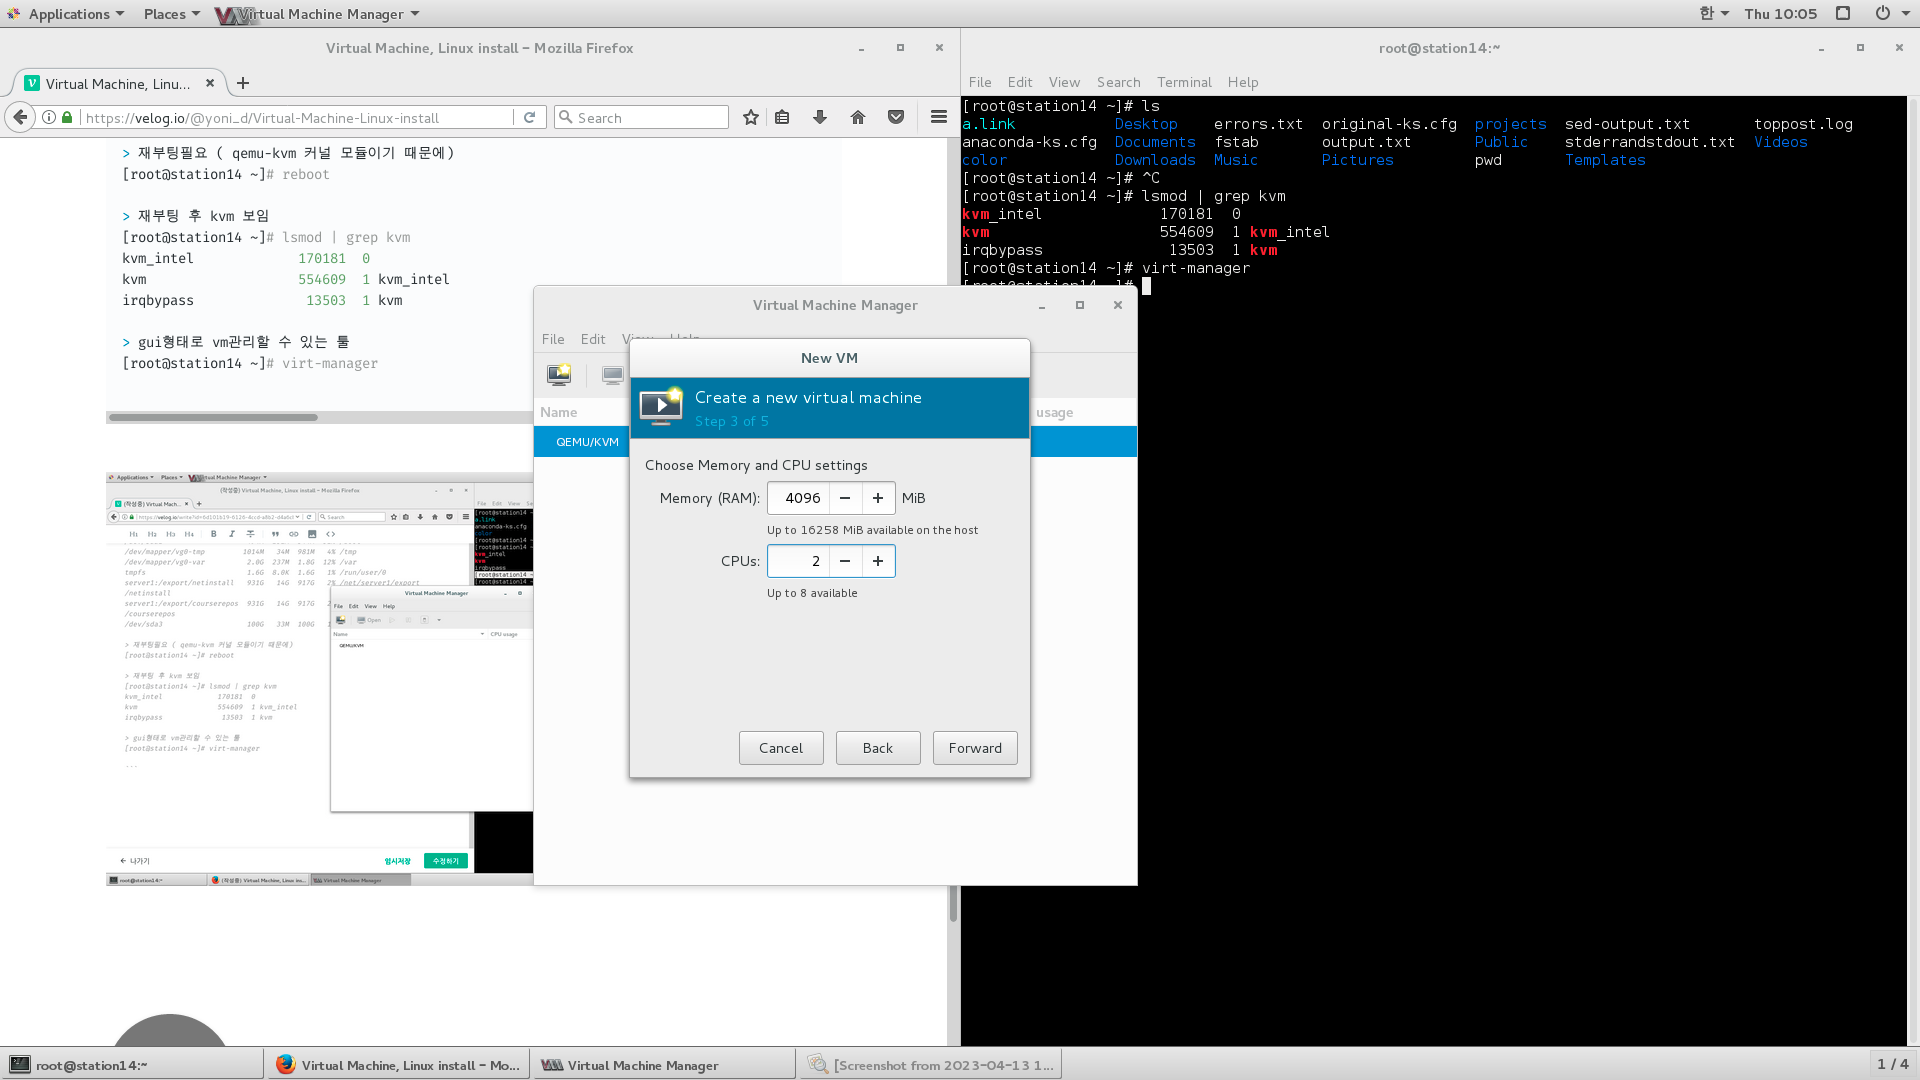
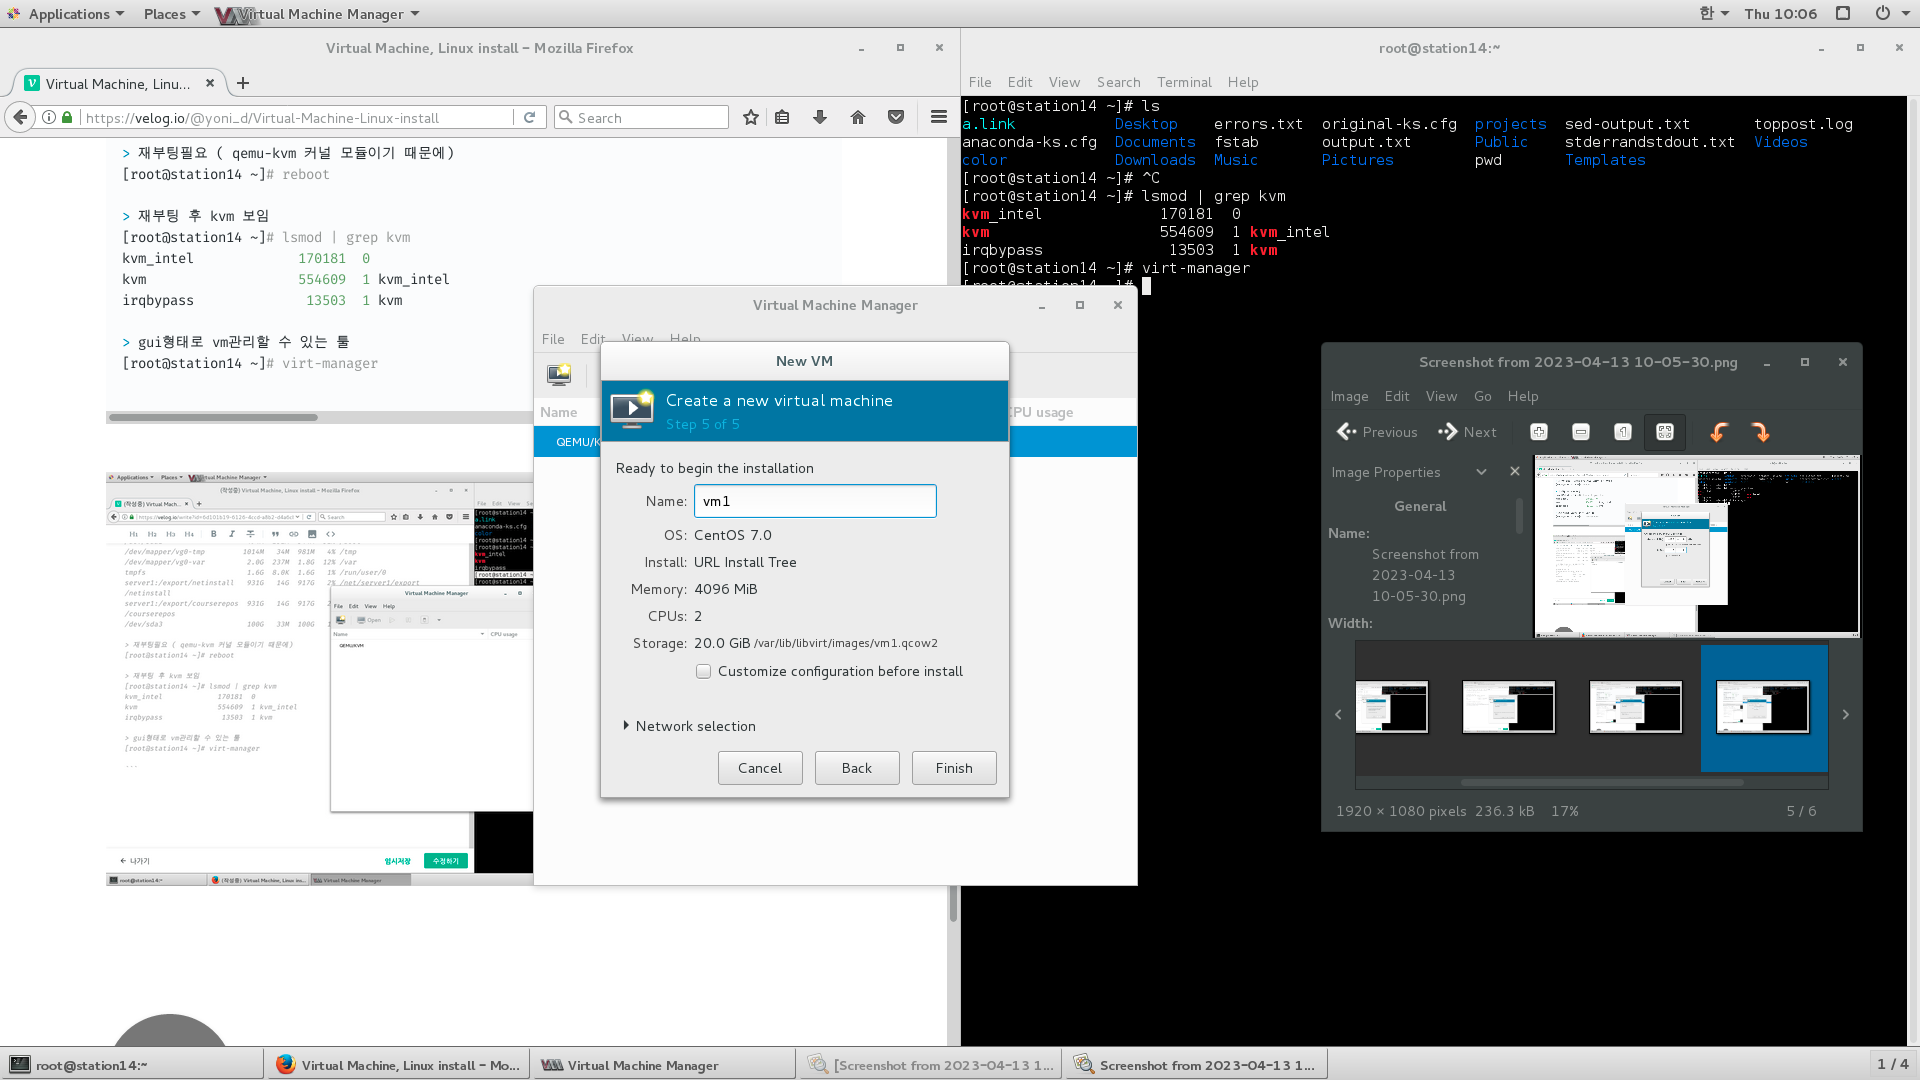
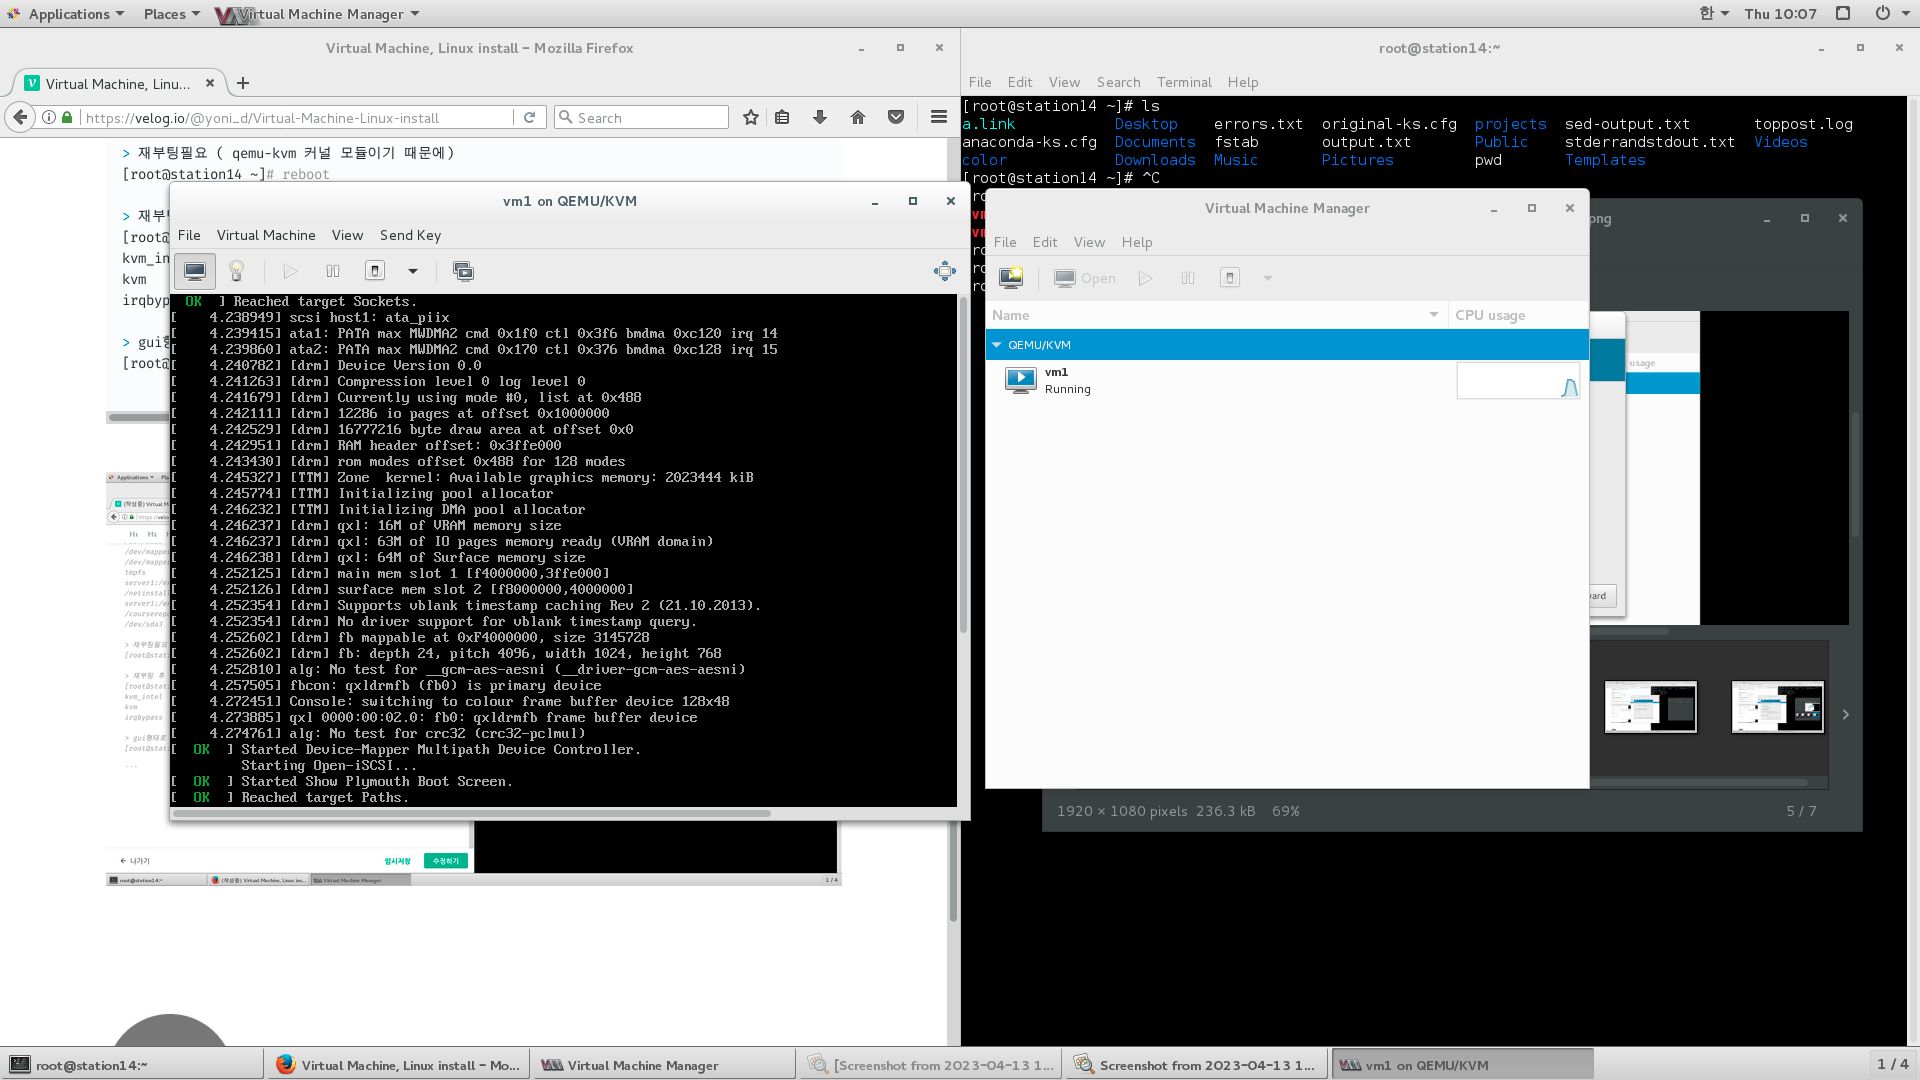
> gui형태로 vm관리할 수 있는 툴
[root@station14 ~]# virt-manager
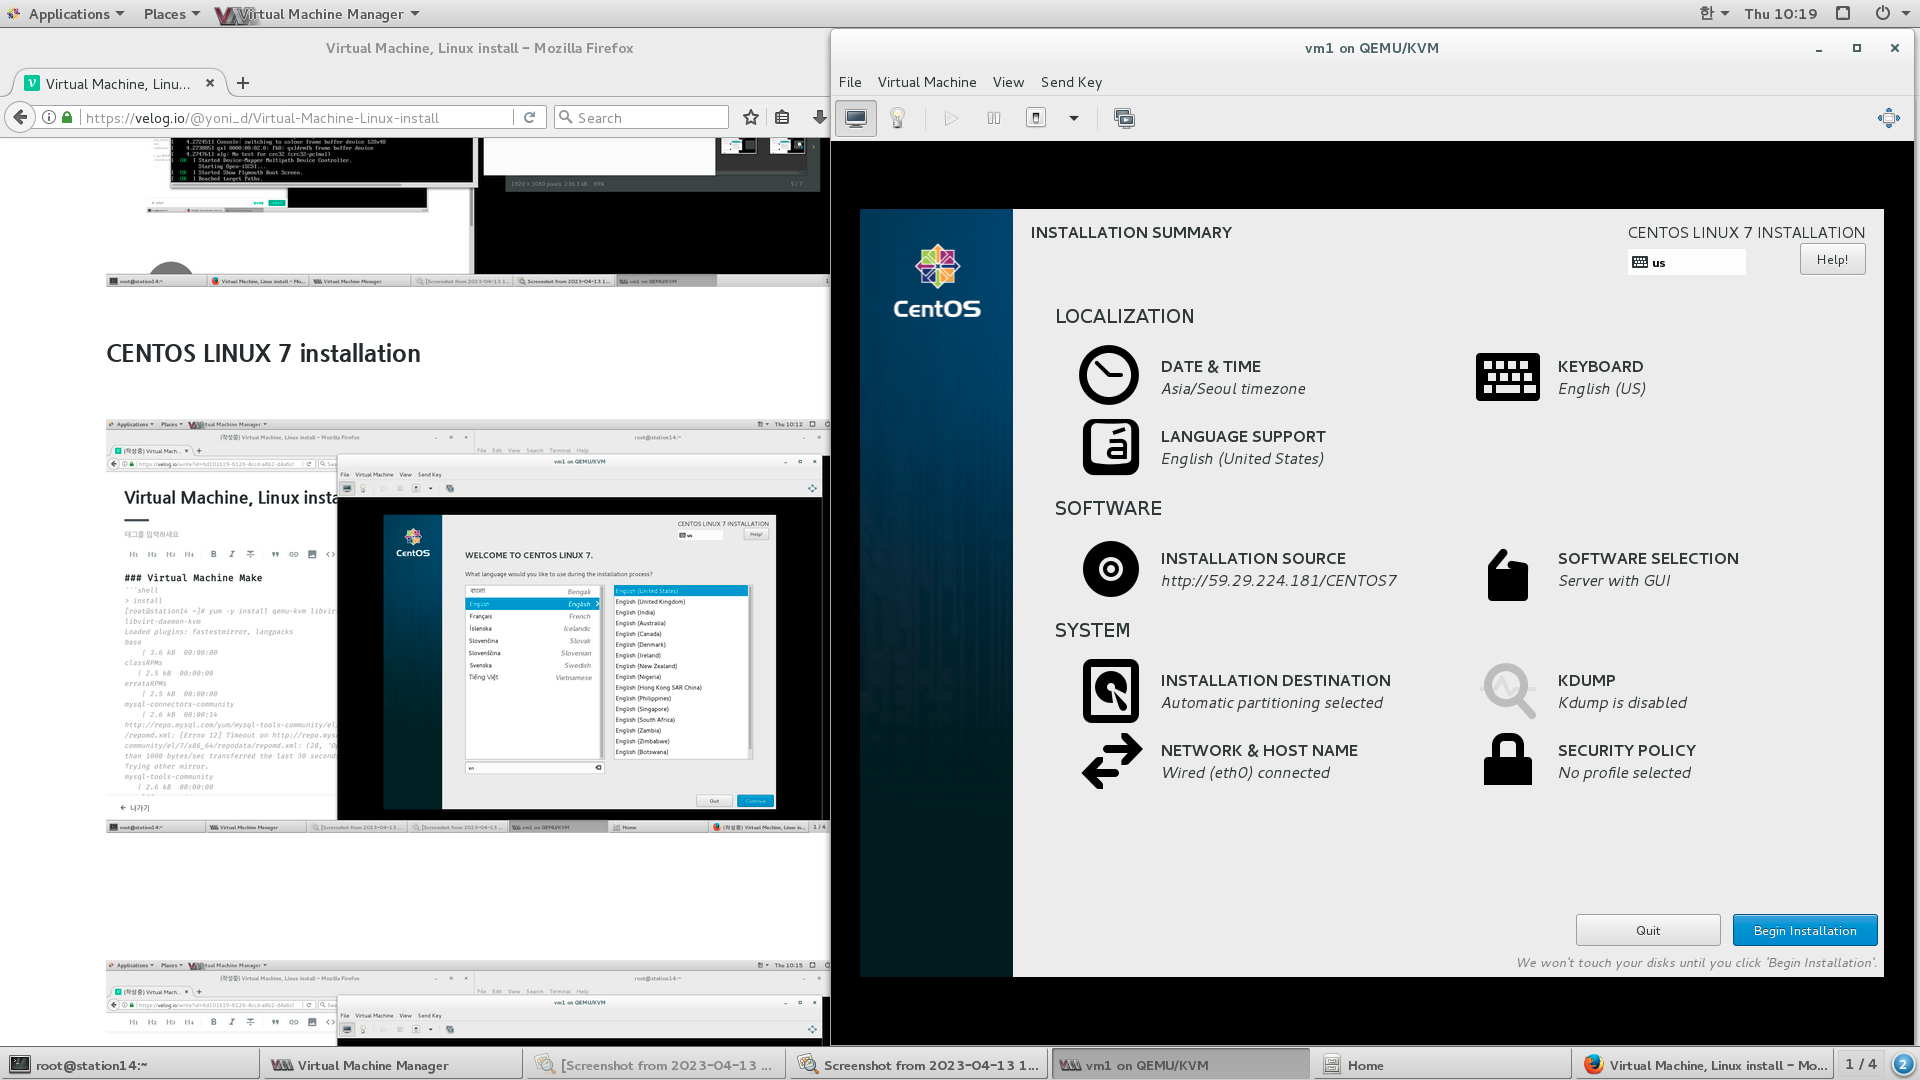
virt-manager

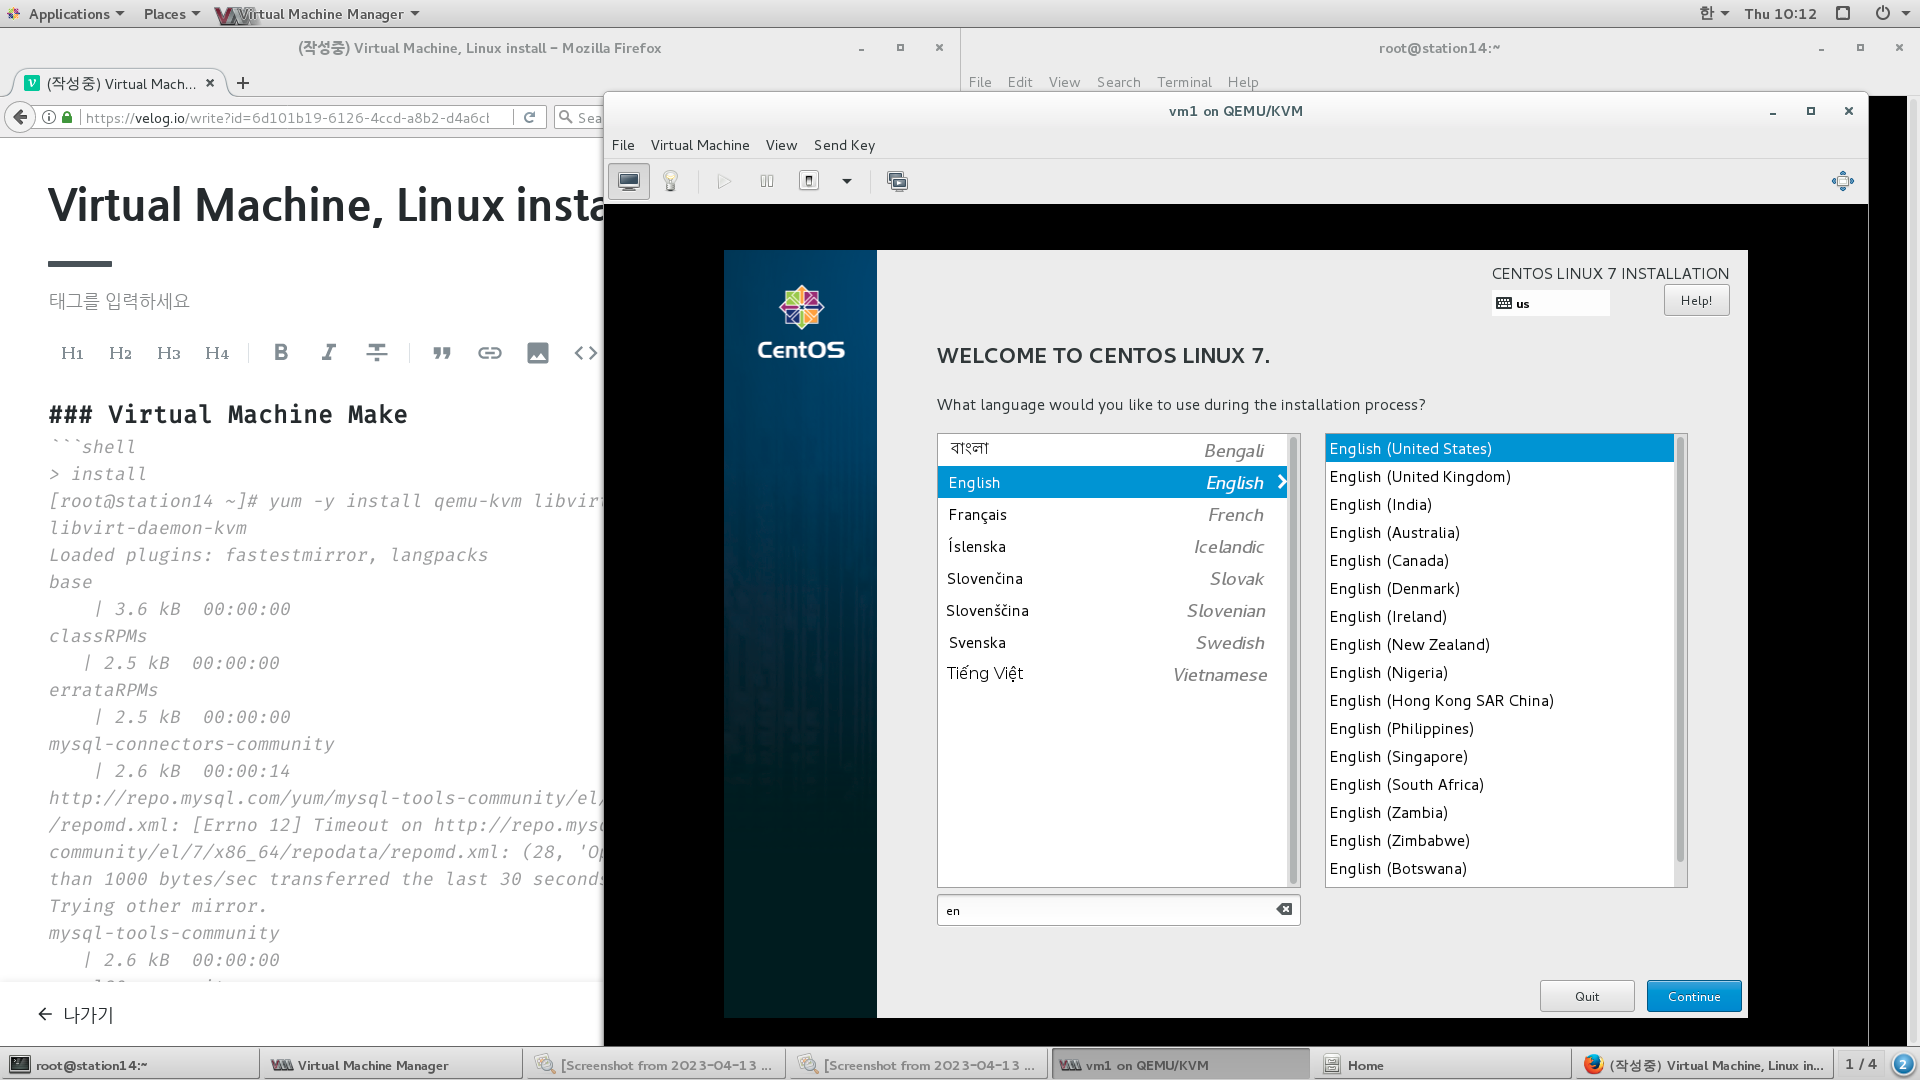
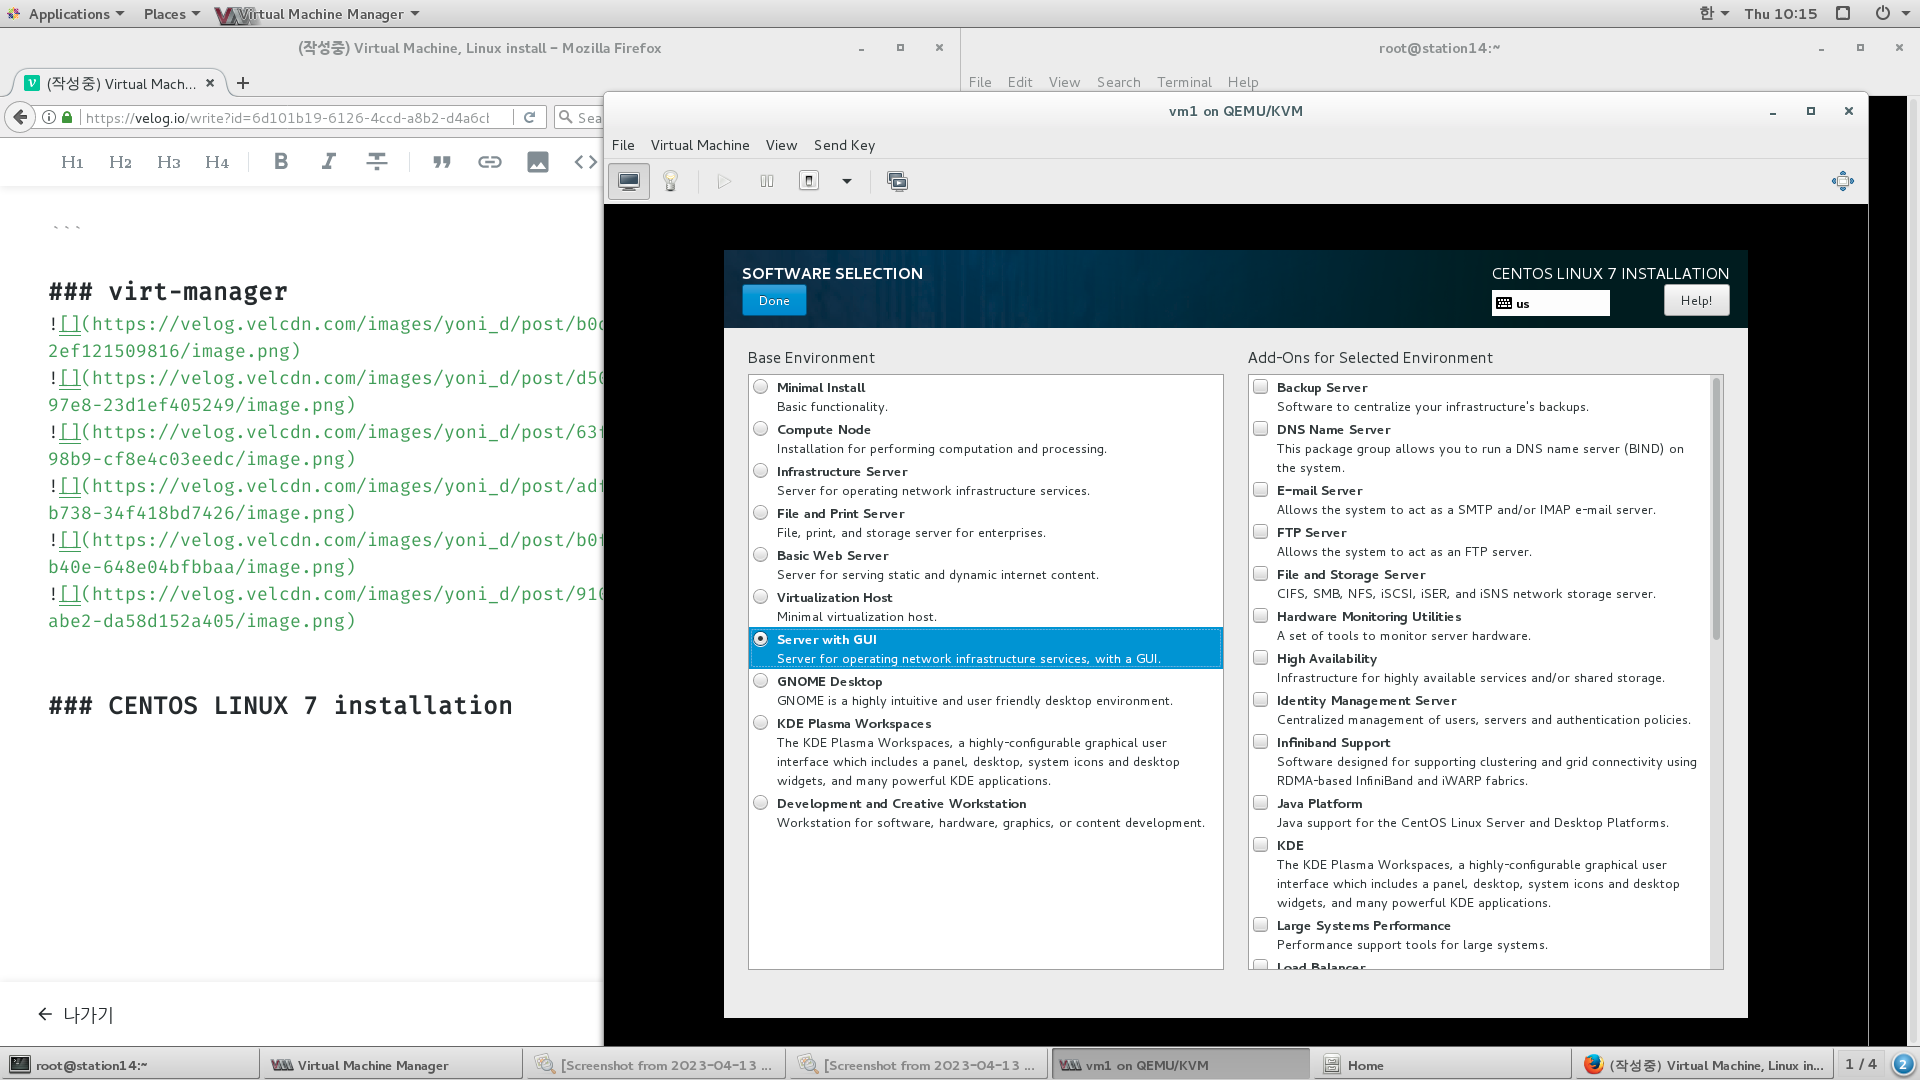
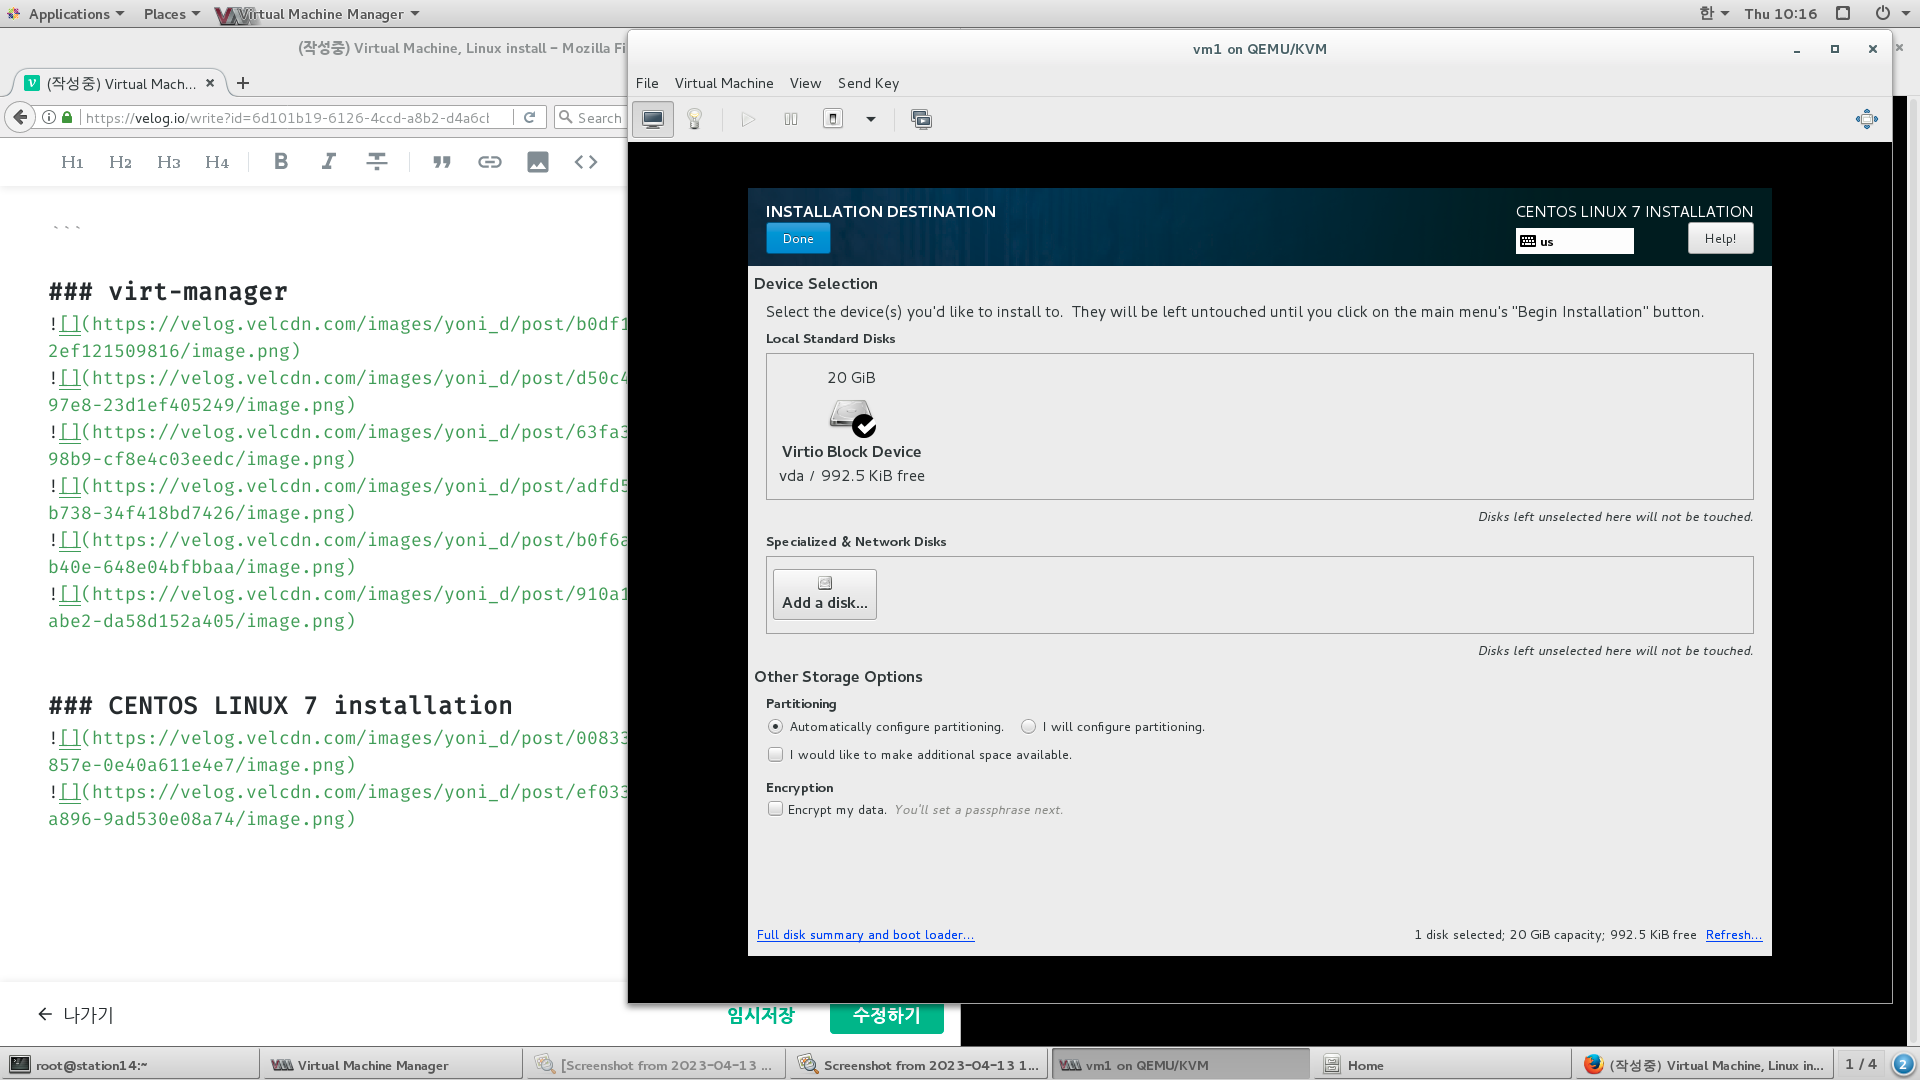
CENTOS LINUX 7 installation
SecureShell
원격접속 telnet(systemV) , rlogin(BSD), ssh-> 보안강화(암호문)
파일전송 ftp(systemV) , rcp(BSD), sftp/scp-> 보안강화(암호문)
보안강화(암호문): 공개키 - 암호화, 개인키 - 복호화
OpenSSH
> .pub가 있는건 공개키, 없는건 개인키
암호화 알고리즘에 따라 여러가지 키쌍이 존재
[root@station14 ~]# ls -l /etc/ssh
total 292
-rw-r--r--. 1 root root     242153 Apr 12  2017 moduli
-rw-r--r--. 1 root root       2208 Apr 12  2017 ssh_config
-rw-------. 1 root root       4361 Apr 12  2017 sshd_config
-rw-r-----. 1 root ssh_keys    668 Apr  8 05:41 ssh_host_dsa_key
-rw-r--r--. 1 root root        590 Apr  8 05:41 ssh_host_dsa_key.pub
-rw-r-----. 1 root ssh_keys    227 Apr  8 05:41 ssh_host_ecdsa_key
-rw-r--r--. 1 root root        162 Apr  8 05:41 ssh_host_ecdsa_key.pub
-rw-r-----. 1 root ssh_keys    387 Apr  8 05:41 ssh_host_ed25519_key
-rw-r--r--. 1 root root         82 Apr  8 05:41 ssh_host_ed25519_key.pub
-rw-r-----. 1 root ssh_keys    965 Apr  8 05:41 ssh_host_key
-rw-r--r--. 1 root root        630 Apr  8 05:41 ssh_host_key.pub
-rw-r-----. 1 root ssh_keys   1675 Apr  8 05:41 ssh_host_rsa_key
-rw-r--r--. 1 root root        382 Apr  8 05:41 ssh_host_rsa_key.pub
You have new mail in /var/spool/mail/root
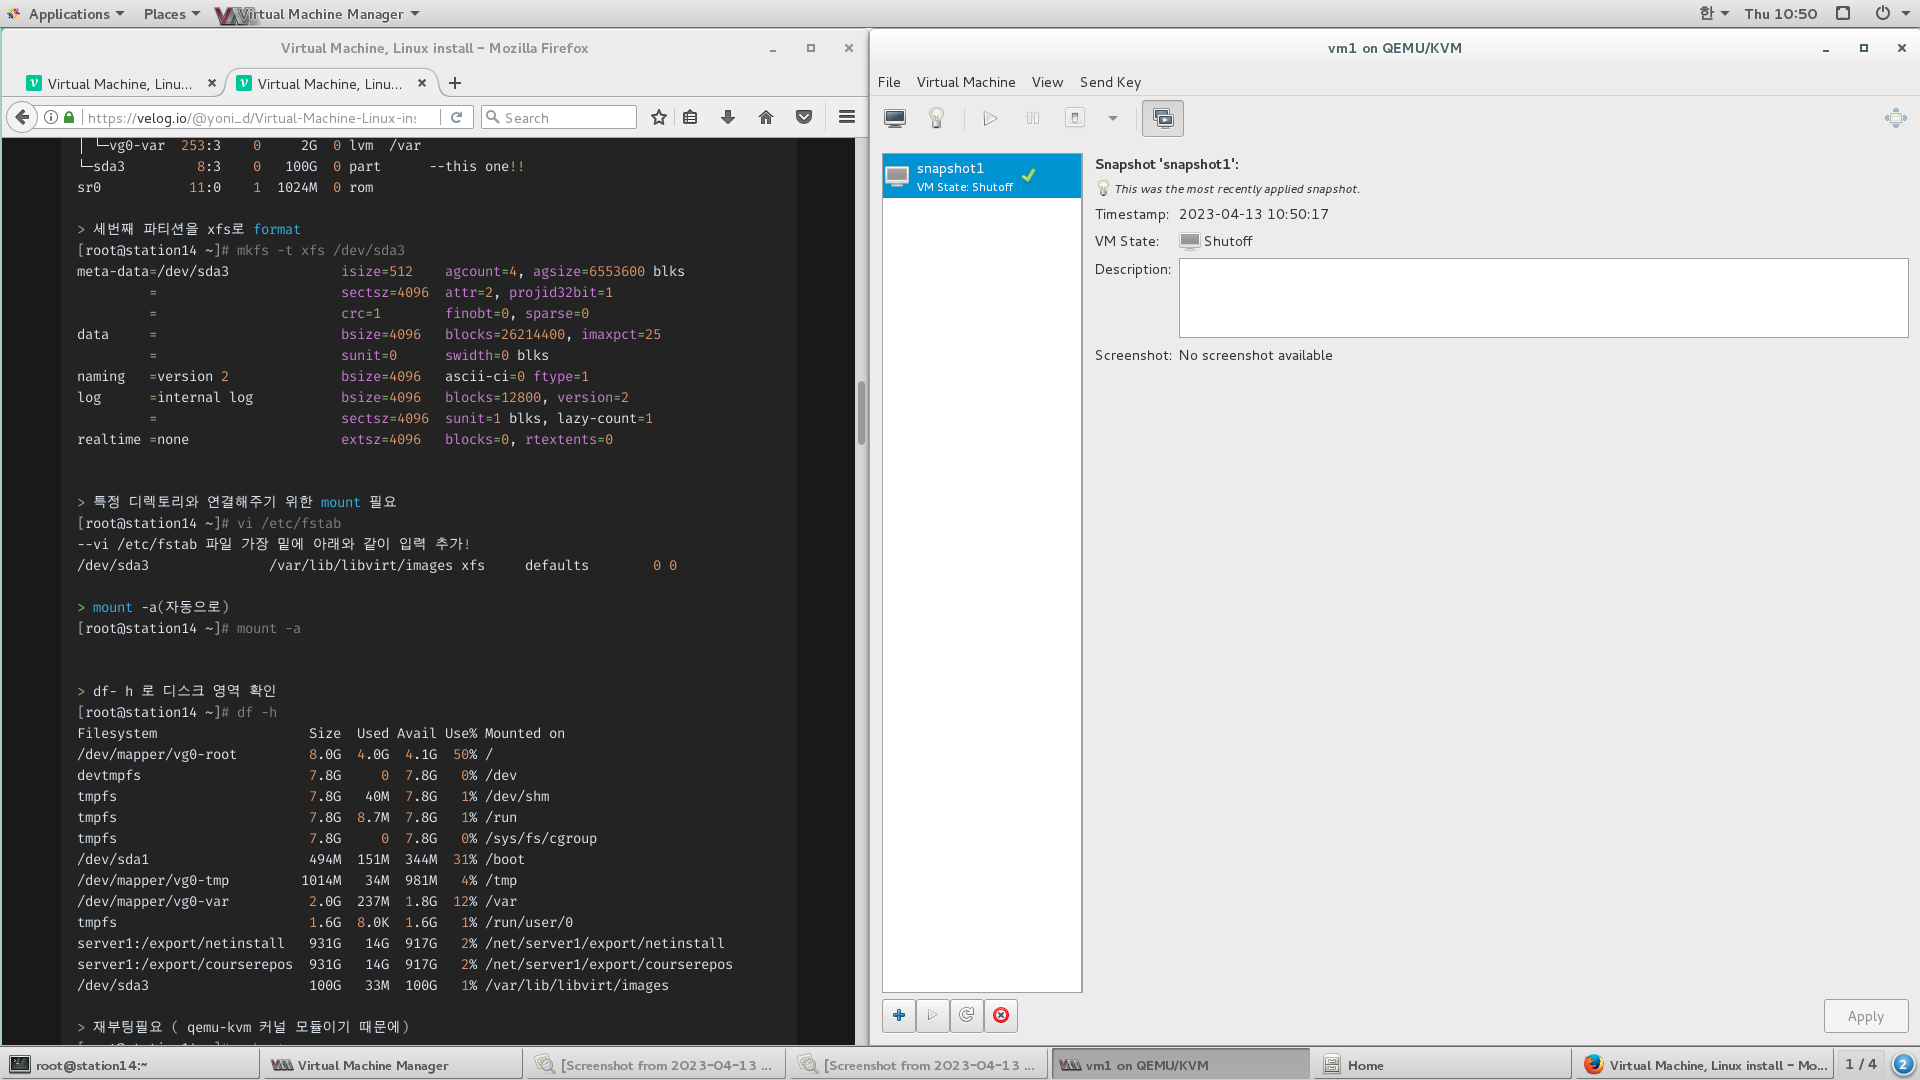
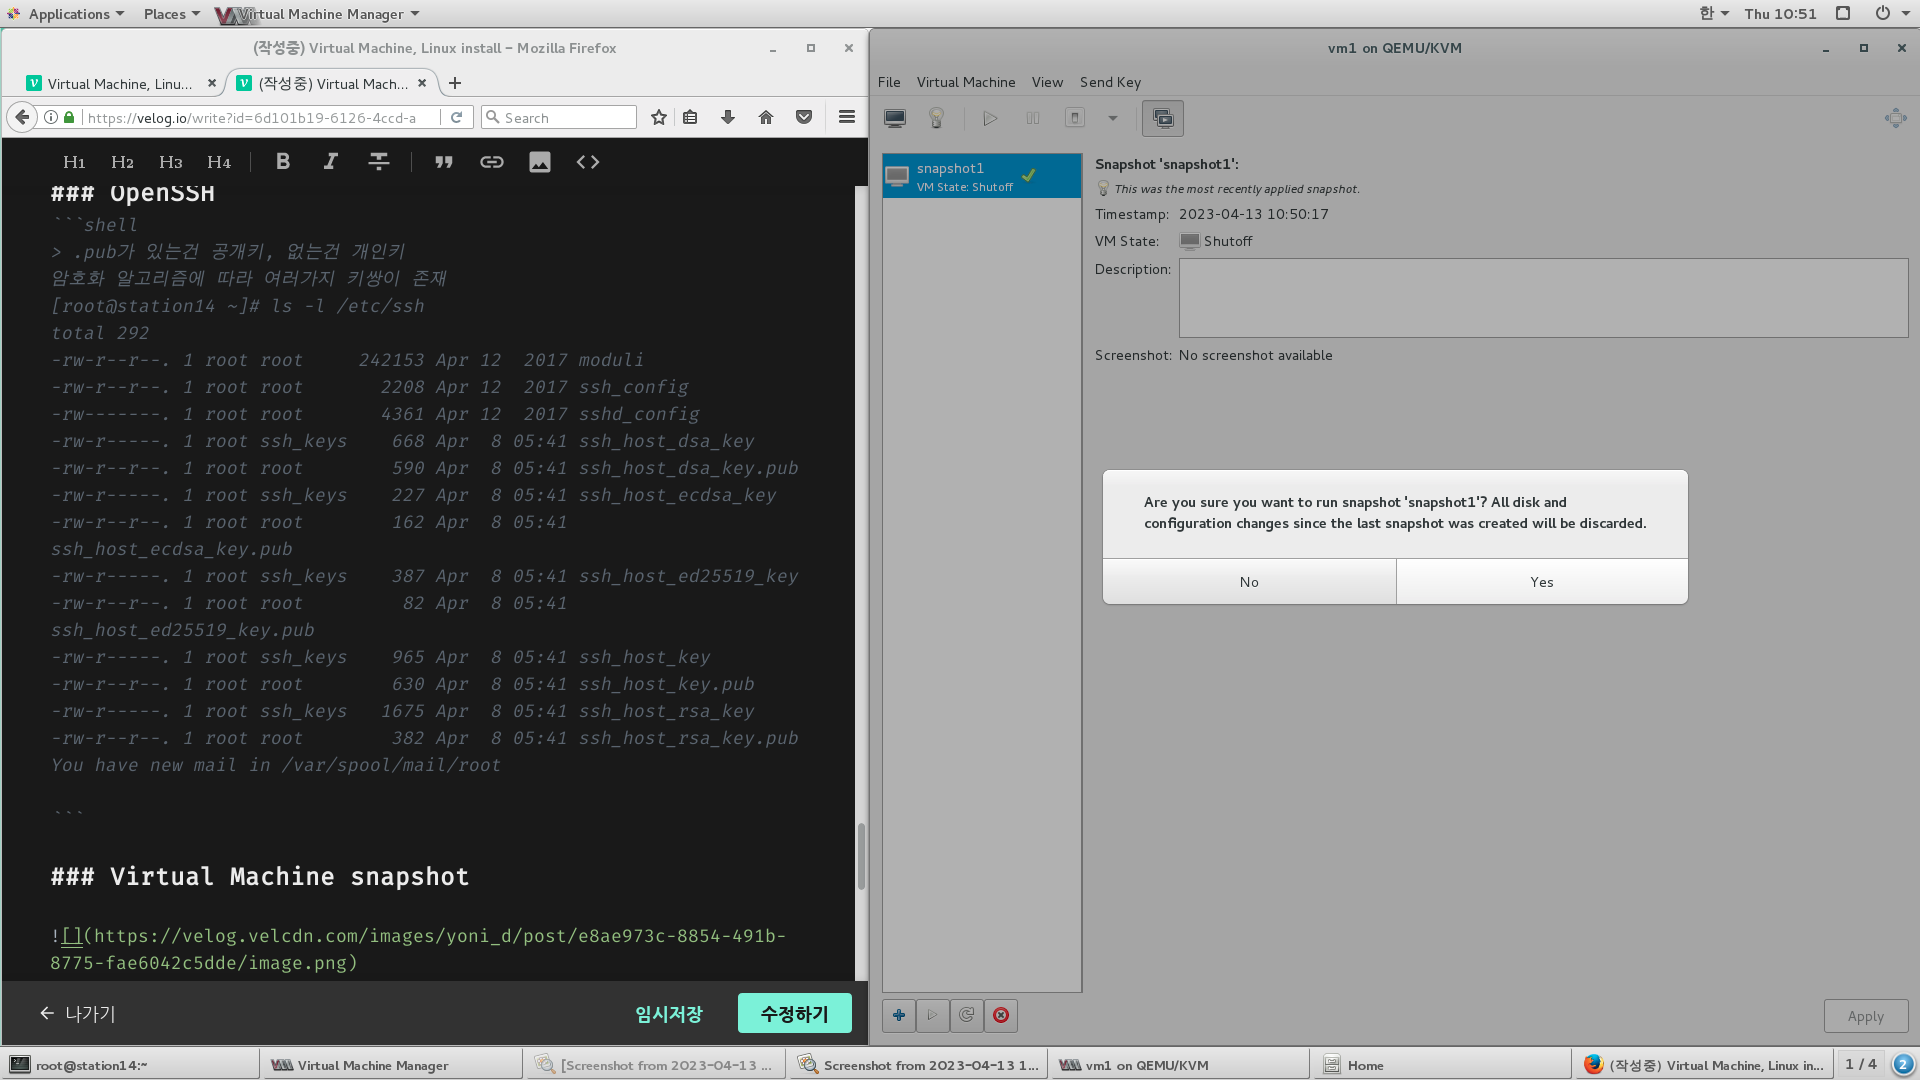
Virtual Machine snapshot
VM shutdown 후,dual monitor 아이콘 클릭을 통해 snapshot
virtual Machine 문제가 생기면 snapshot 선택 후, 왼쪽 하단 play 버튼 클릭
전구 버튼을 통해 다시 실행
in virtual Machine Terminal
vi /etc/ssh/sshd_config
#PermitRootLogin yes -- root 에 ssh로 접속 가능 여부 (보안 취약!주석 해제 후 no로 바꾸기)
[root@localhost ~]# vi /etc/ssh/sshd_config
     46 # Authentication:
     47
     48 LoginGraceTime 10m
     49 PermitRootLogin no
     50 #StrictModes yes
     51 MaxAuthTries 2
     52 #MaxSessions 10

    137 Banner /etc/issue
    138 AllowUsers aaa , yoni


[root@localhost ~]# vi /etc/issue
[root@localhost ~]# systemctl restart sshd
[root@localhost ~]# useradd aaa
pa[root@localhost ~]# passwd aaa
Changing password for user aaa.
New password: bbb
BAD PASSWORD: The password is a palindrome
Retype new password:
passwd: all authentication tokens updated successfully.
[root@localhost ~]# ifconfig eth0
eth0: flags=4163<UP,BROADCAST,RUNNING,MULTICAST>  mtu 1500
        inet 192.168.122.253  netmask 255.255.255.0  broadcast 192.168.122.255
        inet6 fe80::5054:ff:fe10:511b  prefixlen 64  scopeid 0x20<link>
        ether 52:54:00:10:51:1b  txqueuelen 1000  (Ethernet)
        RX packets 643  bytes 37393 (36.5 KiB)
        RX errors 0  dropped 5  overruns 0  frame 0
        TX packets 146  bytes 13863 (13.5 KiB)
        TX errors 0  dropped 0 overruns 0  carrier 0  collisions 0

> root 접속은 막아두어서 접속 안됨
[root@localhost ~]# ssh root@192.168.122.253
The authenticity of host '192.168.122.253 (192.168.122.253)' can't be established.
ECDSA key fingerprint is d3:2b:d4:c6:8a:41:dd:d3:ea:00:87:33:f7:69:94:4e.
Are you sure you want to continue connecting (yes/no)? yes
Warning: Permanently added '192.168.122.253' (ECDSA) to the list of known hosts.
Warning

root@192.168.122.253's password:
Permission denied, please try again.
root@192.168.122.253's password:
Received disconnect from 192.168.122.253: 2: Too many authentication failures for root


> 일반 유저 aaa, yoni는 접속 됨
[root@localhost ~]# ssh aaa@192.168.122.253
Welcome

aaa@192.168.122.253's password: bbb
Last login: Thu Apr 13 11:17:13 2023 from 192.168.122.253
[aaa@localhost ~]$ exit
logout
Connection to 192.168.122.253 closed.

[root@localhost ~]# ssh yoni@192.168.122.253
Welcome

yoni@192.168.122.253's password: kabang
Last login: Thu Apr 13 11:17:06 2023 from 192.168.122.253
[yoni@localhost ~]$


> sftp
[root@localhost ~]# sftp yoni@192.168.122.253
Welcome

yoni@192.168.122.253's password:
Connected to 192.168.122.253.
sftp> pwd
Remote working directory: /home/yoni
sftp> put /etc/fstab	-- 파일 업로드
Uploading /etc/fstab to /home/yoni/fstab
/etc/fstab                                                                    100%  465     0.5KB/s   00:00
sftp> ls
fstab
sftp> cd /etc
sftp> get yum.conf   	--접속했을 당시 디렉토리로 다운로드
Fetching /etc/yum.conf to yum.conf
/etc/yum.conf                                                                 100%  970     1.0KB/s   00:00
sftp> quit				-- 접속 끊음


> yum.conf 다운한거 확인
[root@localhost ~]# ll
total 12
-rw-------. 1 root root 1672 Apr 13 10:43 anaconda-ks.cfg
drwxr-xr-x. 2 root root    6 Apr 13 10:46 Desktop
drwxr-xr-x. 2 root root    6 Apr 13 10:46 Documents
drwxr-xr-x. 2 root root    6 Apr 13 10:46 Downloads
-rw-r--r--. 1 root root 1720 Apr 13 10:46 initial-setup-ks.cfg
drwxr-xr-x. 2 root root    6 Apr 13 10:46 Music
drwxr-xr-x. 2 root root    6 Apr 13 10:46 Pictures
drwxr-xr-x. 2 root root    6 Apr 13 10:46 Public
drwxr-xr-x. 2 root root    6 Apr 13 10:46 Templates
drwxr-xr-x. 2 root root    6 Apr 13 10:46 Videos
-rw-r--r--. 1 root root  970 Apr 13 11:21 yum.conf --This one!!!
ssh-keygen 설정
[root@localhost .ssh]# ssh-keygen
Generating public/private rsa key pair.
Enter file in which to save the key (/root/.ssh/id_rsa):
Enter passphrase (empty for no passphrase):
Enter same passphrase again:
Your identification has been saved in /root/.ssh/id_rsa.
Your public key has been saved in /root/.ssh/id_rsa.pub.
The key fingerprint is:
56:47:e4:0f:45:ec:d4:3d:84:8a:84:49:de:b4:12:34 root@localhost.localdomain
The key's randomart image is:
+--[ RSA 2048]----+
|      oEo. .oo=o.|
|      .o=..o oo.o|
|       o.oo =o  .|
|        .o o o.  |
|        S     .  |
|       .         |
|                 |
|                 |
|                 |
+-----------------+
[root@localhost .ssh]# ll
total 12
-rw-------. 1 root root 1675 Apr 13 11:55 id_rsa
-rw-r--r--. 1 root root  408 Apr 13 11:55 id_rsa.pub
-rw-r--r--. 1 root root  177 Apr 13 11:10 known_hosts

> Virtual Machine의 yoni 계정에 ssh 접속 key설정
[root@localhost .ssh]# ssh-copy-id yoni@192.168.122.253
/usr/bin/ssh-copy-id: INFO: attempting to log in with the new key(s), to filter out any that are already installed
/usr/bin/ssh-copy-id: INFO: 1 key(s) remain to be installed -- if you are prompted now it is to install the new keys
Welcome

yoni@192.168.122.253's password:

Number of key(s) added: 1

Now try logging into the machine, with:   "ssh 'yoni@192.168.122.253'"
and check to make sure that only the key(s) you wanted were added.

[root@localhost .ssh]# ssh yoni@192.168.122.253
Welcome

Last failed login: Thu Apr 13 11:56:01 KST 2023 from 192.168.122.253 on ssh:notty
There was 1 failed login attempt since the last successful login.
Last login: Thu Apr 13 11:19:32 2023 from 192.168.122.253
[yoni@localhost ~]$ ls -ld .ssh/
drwx------. 2 yoni yoni 29 Apr 13 11:56 .ssh/
[yoni@localhost ~]$ cd .ssh/
[yoni@localhost .ssh]$ ll
total 4
-rw-------. 1 yoni yoni 408 Apr 13 11:56 authorized_keys
aaa 일반 계정에서 vm의 yoni계정으로 ssh 접속 설정
> key 생성
[aaa@localhost .ssh]$ ssh-keygen
Generating public/private rsa key pair.
Enter file in which to save the key (/home/aaa/.ssh/id_rsa):
Enter passphrase (empty for no passphrase):
Enter same passphrase again:
Your identification has been saved in /home/aaa/.ssh/id_rsa.
Your public key has been saved in /home/aaa/.ssh/id_rsa.pub.
The key fingerprint is:
36:17:52:b3:25:bd:6e:dd:b8:ba:12:e7:0e:ad:1f:df aaa@localhost.localdomain
The key's randomart image is:
+--[ RSA 2048]----+
|          +..    |
|         . =.    |
|        . o  .   |
|         . ..    |
|        S .. . o |
|       . o..+ o .|
|          .=o  . |
|          .o.o.. |
|          .+=o. E|
+-----------------+


> vm의 yoni계정에 ssh 등록
[aaa@localhost .ssh]$ ssh-copy-id yoni@192.168.122.253
/usr/bin/ssh-copy-id: INFO: attempting to log in with the new key(s), to filter out any that are already installed
/usr/bin/ssh-copy-id: INFO: 1 key(s) remain to be installed -- if you are prompted now it is to install the new keys
Welcome

yoni@192.168.122.253's password:

Number of key(s) added: 1

Now try logging into the machine, with:   "ssh 'yoni@192.168.122.253'"
and check to make sure that only the key(s) you wanted were added.


> ssh 로 vm의 yoni 계정 접속
[aaa@localhost .ssh]$ ssh yoni@192.168.122.253
Welcome

Enter passphrase for key '/home/aaa/.ssh/id_rsa':  --비번 적으라고 함
Last failed login: Thu Apr 13 13:47:41 KST 2023 from 192.168.122.253 on ssh:notty
There were 2 failed login attempts since the last successful login.
Last login: Thu Apr 13 12:23:18 2023 from 192.168.122.253
[yoni@localhost ~]$ exit
logout
Connection to 192.168.122.253 closed함

> ssh-agent를 통해 passphrase 비밀번호를 자동 등록해보자.
[aaa@localhost .ssh]$ eval `ssh-agent`
Agent pid 6458
[aaa@localhost .ssh]$ ssh-add ~/.ssh/id_rsa
Enter passphrase for /home/aaa/.ssh/id_rsa:
Identity added: /home/aaa/.ssh/id_rsa (/home/aaa/.ssh/id_rsa)

> 자동 로그인 됨 (비밀번호 생략)
[aaa@localhost .ssh]$ ssh yoni@192.168.122.253
Welcome

Last login: Thu Apr 13 13:48:40 2023 from 192.168.122.253
[yoni@localhost ~]$

study log