CreateView로 회원가입 구현하기
views.py 수정
views.py에 이걸 추가해주겠다.
from django.contrib.auth.forms import UserCreationForm
from django.contrib.auth.models import User
from django.urls import reverse, reverse_lazy
from django.views.generic import CreateView

class accountCreateView(CreateView):
    model = User
    form_class = UserCreationForm
    success_url = reverse_lazy('accountapp:helloworld')
    # 함수와 클래스가 파이썬에서 불러와지는 방식의 차이 때문에 클래스에서는 reverse_lazy를 써야 함. 기능은 똑같음
    template_name = 'accountapp/create.html'
accountCreateView 클래스를 만들어주었다.
class accountCreateView(CreateView)
=> 클래스에서 인자는 부모클래스, 베이스클래스를 의미한다.
다시 말해 괄호 안의 객체를 상속한다는 문법이다.
그러니 이는 accountCreateView라는 객체를 CreateView를 상속하여 만들겠다는 의미라고 보면 된다.
mosel = User
=> 어떤 모델을 만들지 지정한다. 여기선 User로 정했다.
form_class = UserCreationForm
=> 폼(검증/렌더링 규칙) UserCreationForm은 Django내장 폼으로 username, password1, password2를 다루고, 비밀번호 해시 저장까지 알아서 하는 옵션이다.
success_url = reverse_lazy('accountapp:helloworld')
=> 생성 성공했으면 리다이렉트할 위치. 강의에서는 reverse_lazy를 사용하는 이유를 설명하지 않고, 그냥 파이썬에서 불러와지는 방식의 차이 때문에 클래스형 뷰에서는 reverse_lazy를 사용해야 한다고만 이야기했다. 조금 더 자세히 설명하자면...
클래스 속성은 모듈 로딩 시점에 평가되는데, 그 때 URLconf가 아직 로드되지 않았을 수 있기 때문에 지연 평가 버전인 reverse_lazy를 사용하는 것이라고 한다. 그래서 함수형 뷰처럼 실행시점이면 reverse를 써도 된다는 것.
template_name = 'accountapp/create.html
=> 렌더링(화면에 띄울)할 템플릿 경로.
이 클래스는 모델 인스턴스 하나를 새로 만드는 제네릭 클래스 기반의 뷰(CBV)이다. GET account:create 는 빈 폼을 렌더링한다. 컨텍스트에 form을 넣어서 template_name을 그려준다. template_name에 create.html을 넣어두었으니 이걸 그려준다.
POST account:create 요청에서는 유효성을 검사한다. 유효하면 form.save()로 객체를 생성해서 success_url로 리다이렉트한다. 실패면 같은 템플릿에 에러 포함해서 다시 렌더.
쉽게 말해서 FBV(Function Base View)였다면 아래와 같은 흐름이 자동화되었다고 보면 된다.
 if request.method == "POST":
    form = UserCreationForm(request.POST)
    if form.is_valid():
        form.save()
        return redirect("accountapp:helloworld")
else:
    form = UserCreationForm()
return render(request, "accountapp/create.html", {"form": form})
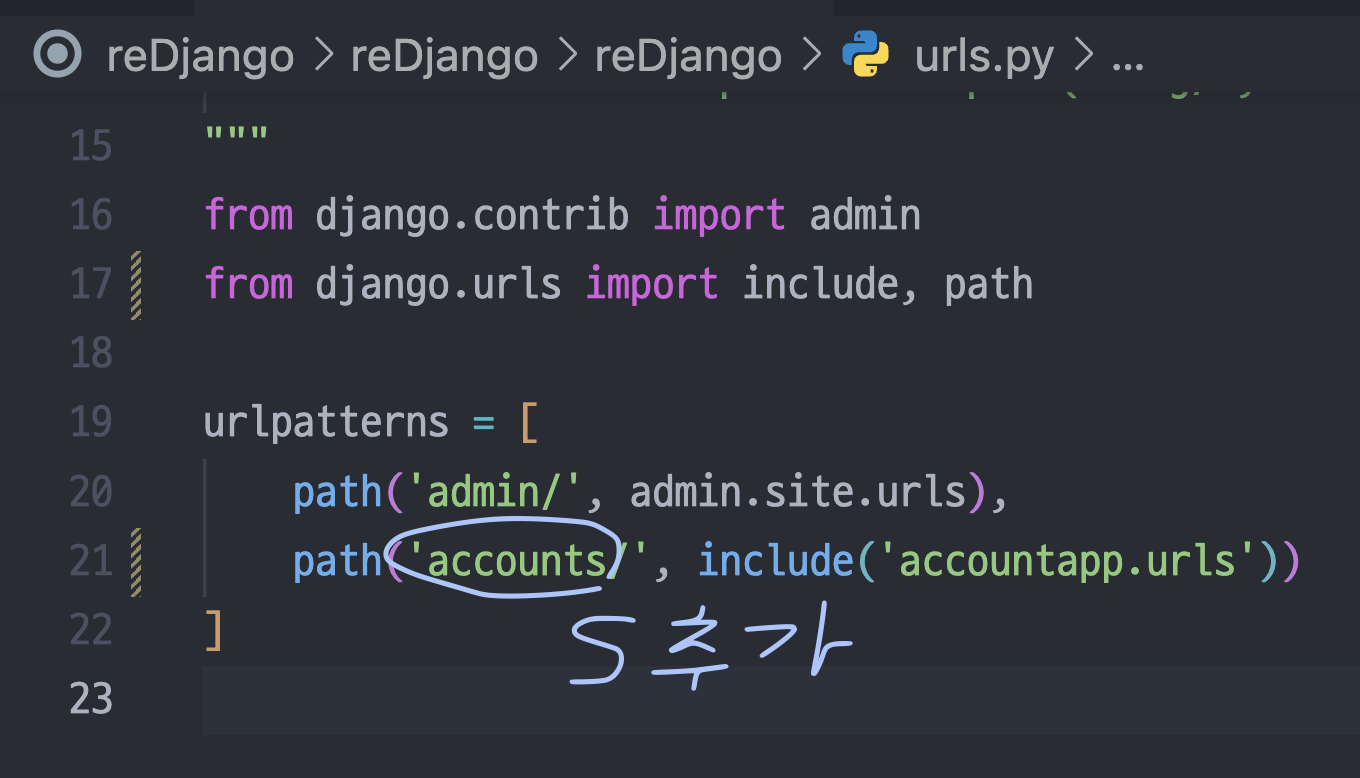
urls.py 수정
urls.py에는 이걸 추가해줬다.
urlpatterns = [
    path('helloworld/', helloworld, name='helloworld'),
    path('create/', accountCreateView.as_view(),name='create'),
]
helloworld 말고 create쪽도 추가해준다. 앞으로는 계속 'accountapp:create' 이런식으로 redirect 해주면 된다.
helloworld와 다르게 accountCreateView에 .as_view()가 붙는 이유?
함수형 뷰는 그대로 넘기면 되지만, 클래스 기반 뷰는 클래스일 뿐이라 바로 호출할 수가 없다. 그래서 클래스 메서드 View.as_view()가 그 클래스를 받아서 요청이 올 때마다 인스턴스를 만들고 적절한 메서드로 위임하는 함수를 만들어서 반환한다.
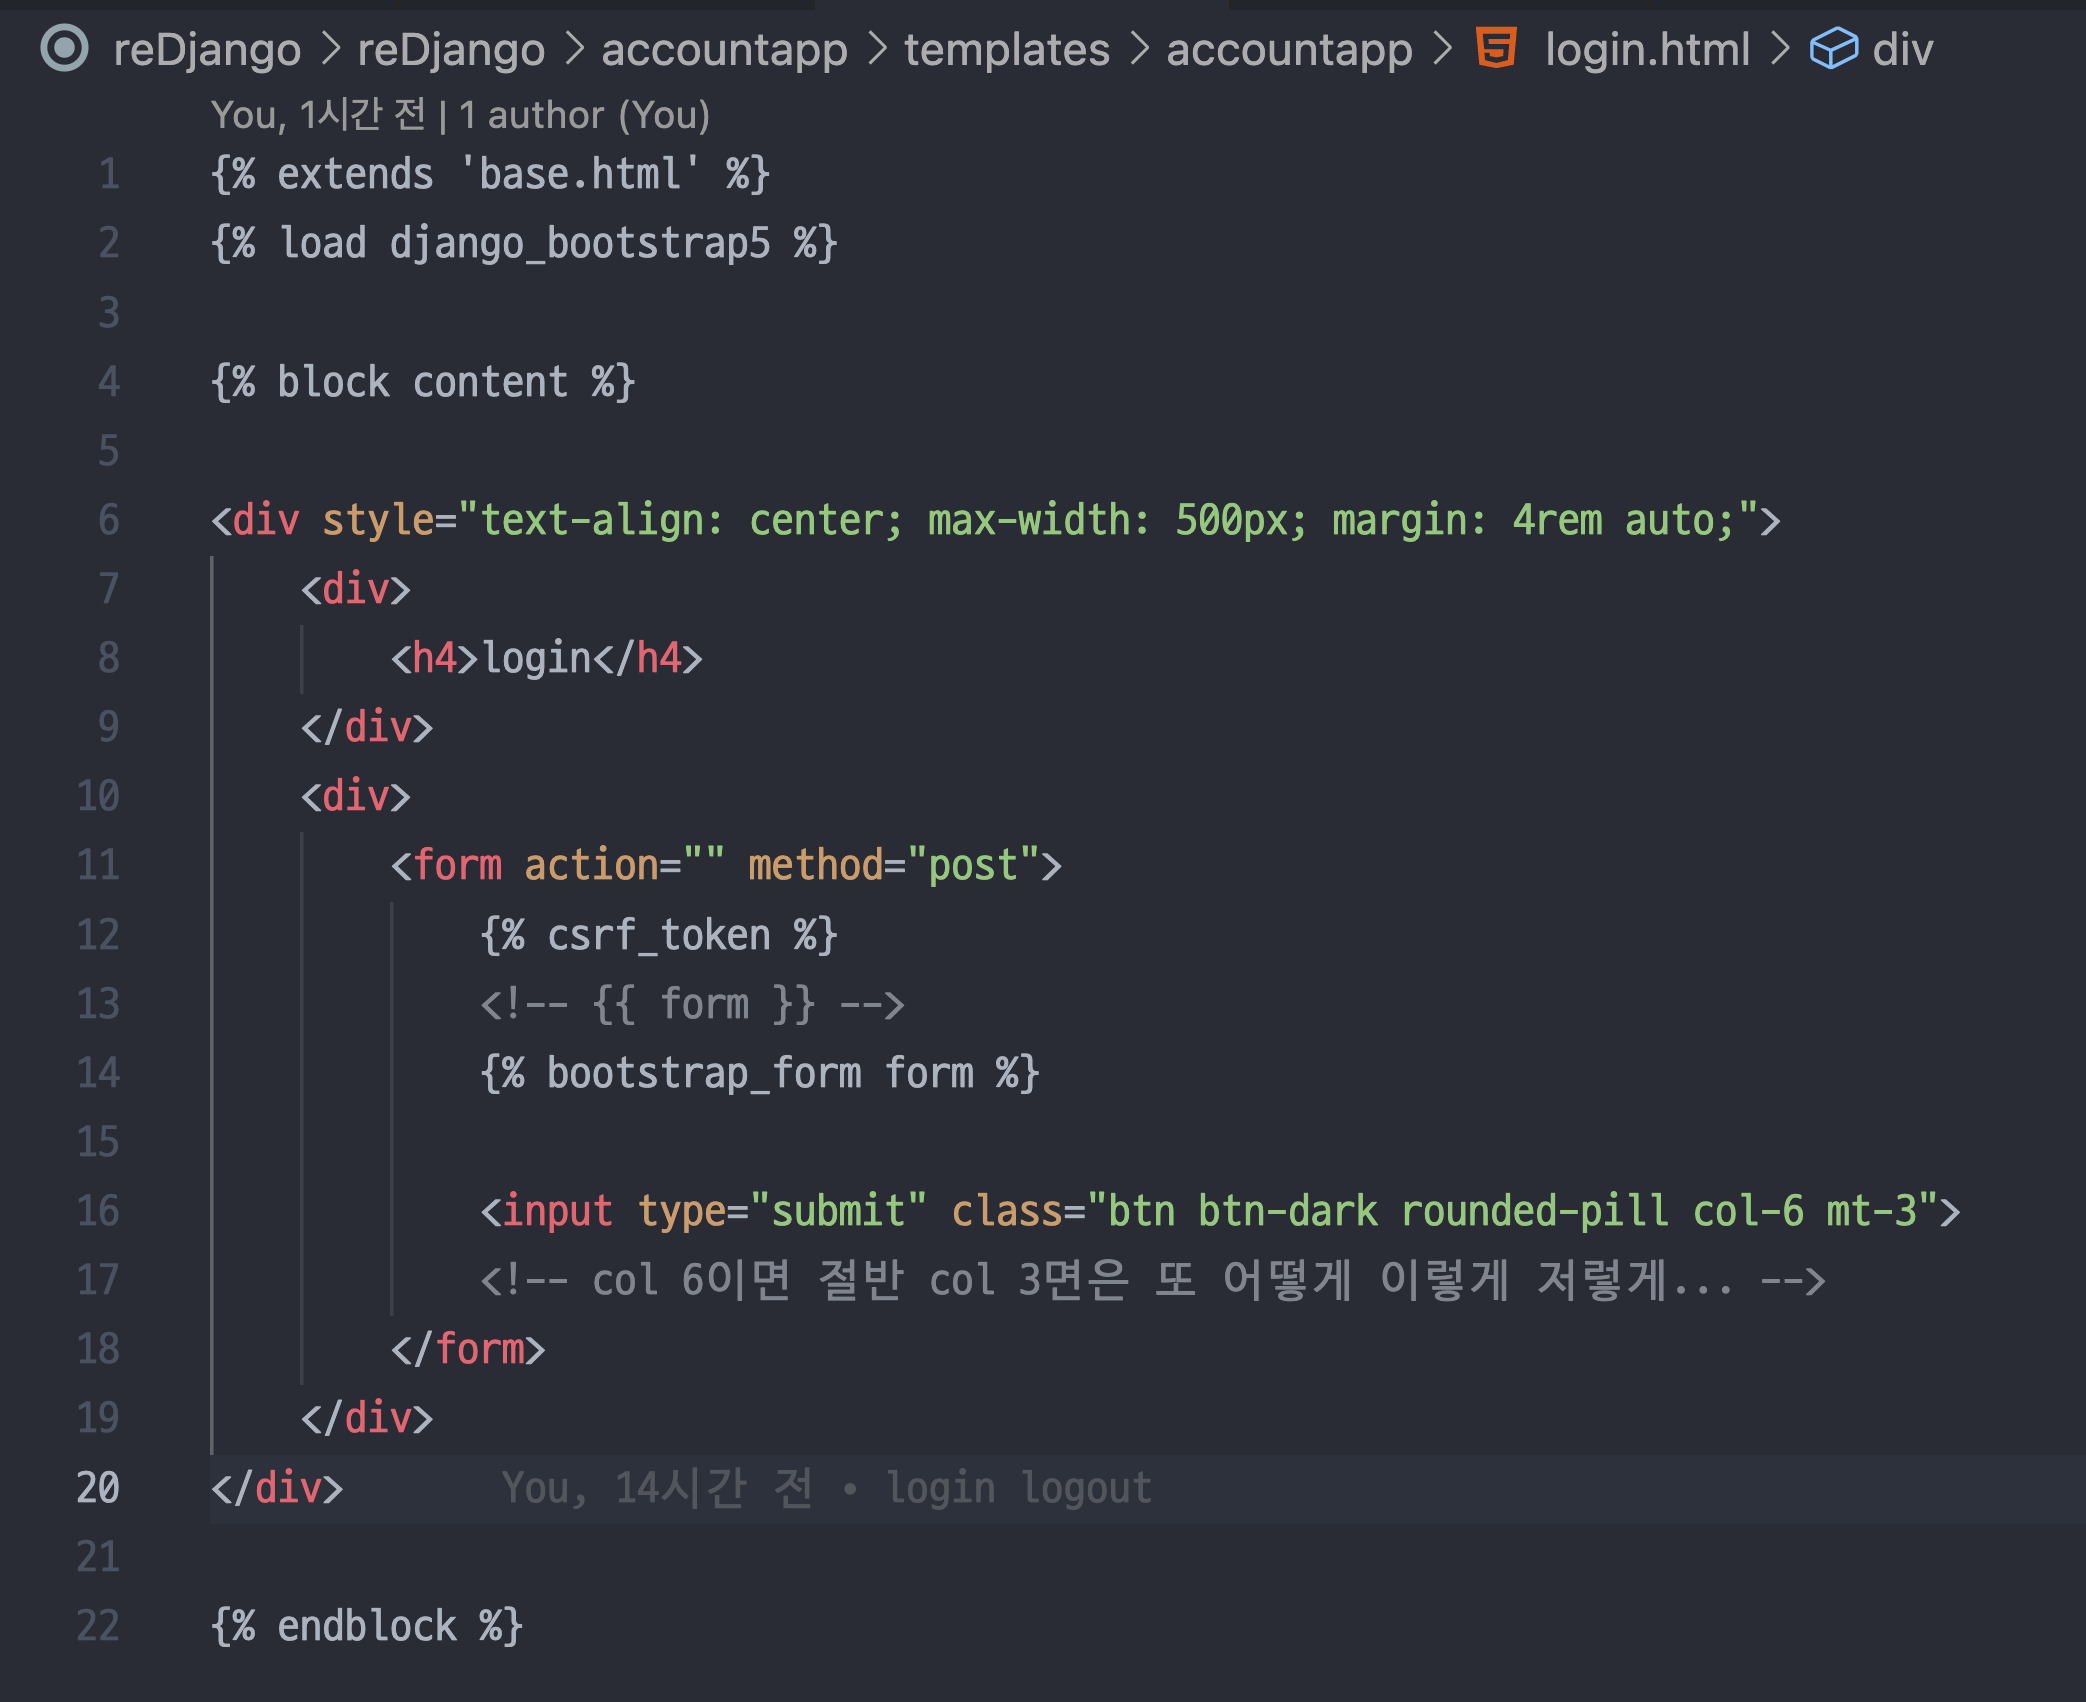
create.html 생성
accountapp에서 templates 모으는 곳에 create.html 만들어준다.
{% extends 'base.html' %}

{% block content %}

    <div style="text-align: center;">
        <form action="{% url 'accountapp:create' %}" method="post">
            {% csrf_token %}
            {{ form }}
            <input type="submit" class="btn-primary">
        </form>
    </div>

{% endblock %}
base.html을 가져오고 form태그만 좀 변경해주자.
{{form}} 은 뷰에서 넘긴 django form 인스턴스를 템플릿에서 그대로 출력하는 문법을 의미한다. 출력될 때 내부적으로 str(form)이 호출되며 기본적으로는 form.as_table()을 사용해 table 형태의 HTML을 만들어낸다.
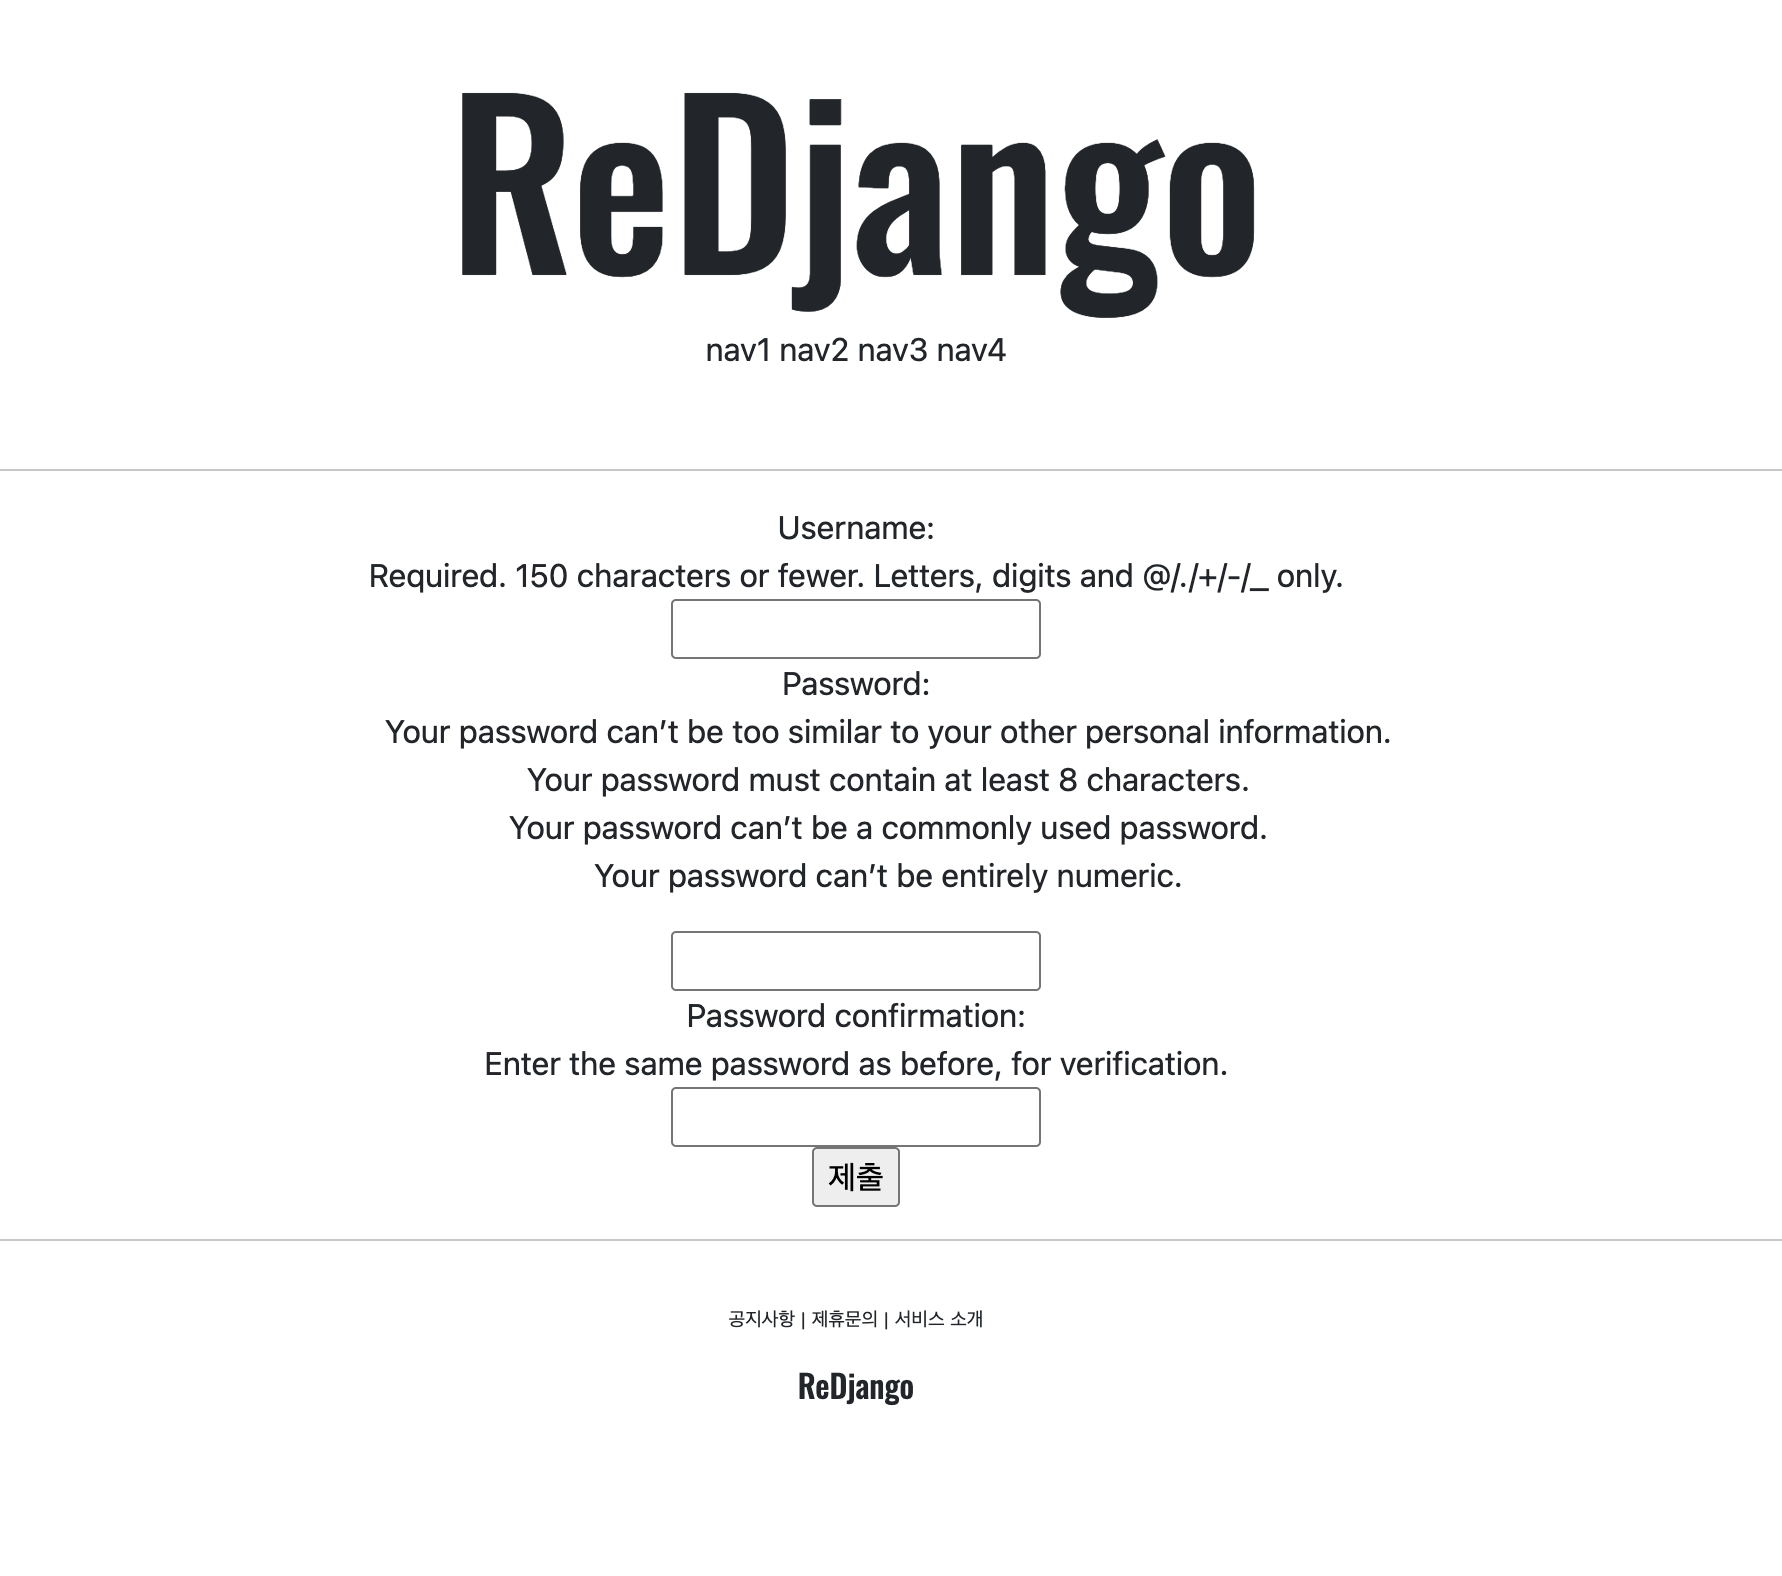
정 꾸미기 귀찮을 때 유용해보인다 ㅋㅋ 오히려 개발자스러워보이기도 하고.
테이블 형태가 아니고 다른 형태를 쓰고 싶으면
{{ form.as_p }} {{ form.as_ul }} 처럼 쓸 수도 있다.
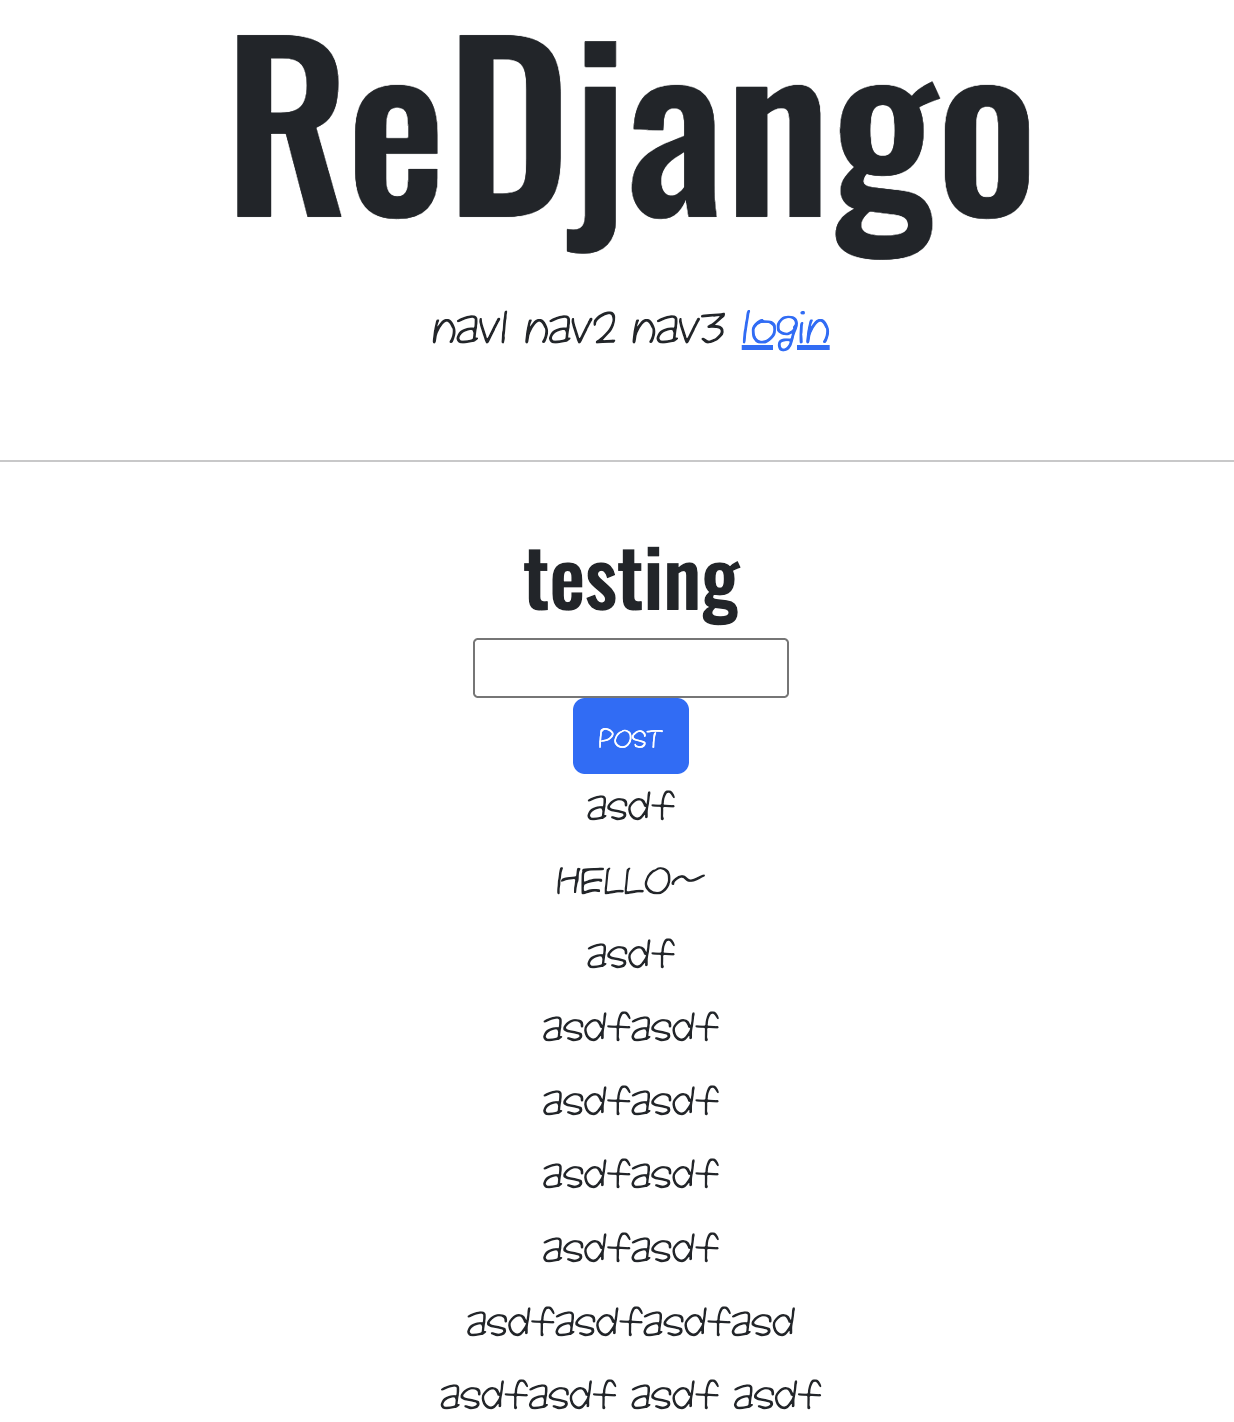
로그인/로그아웃 구현하기
이번에는 view에도 안하고 urls.py에서 바로 만들어보자.
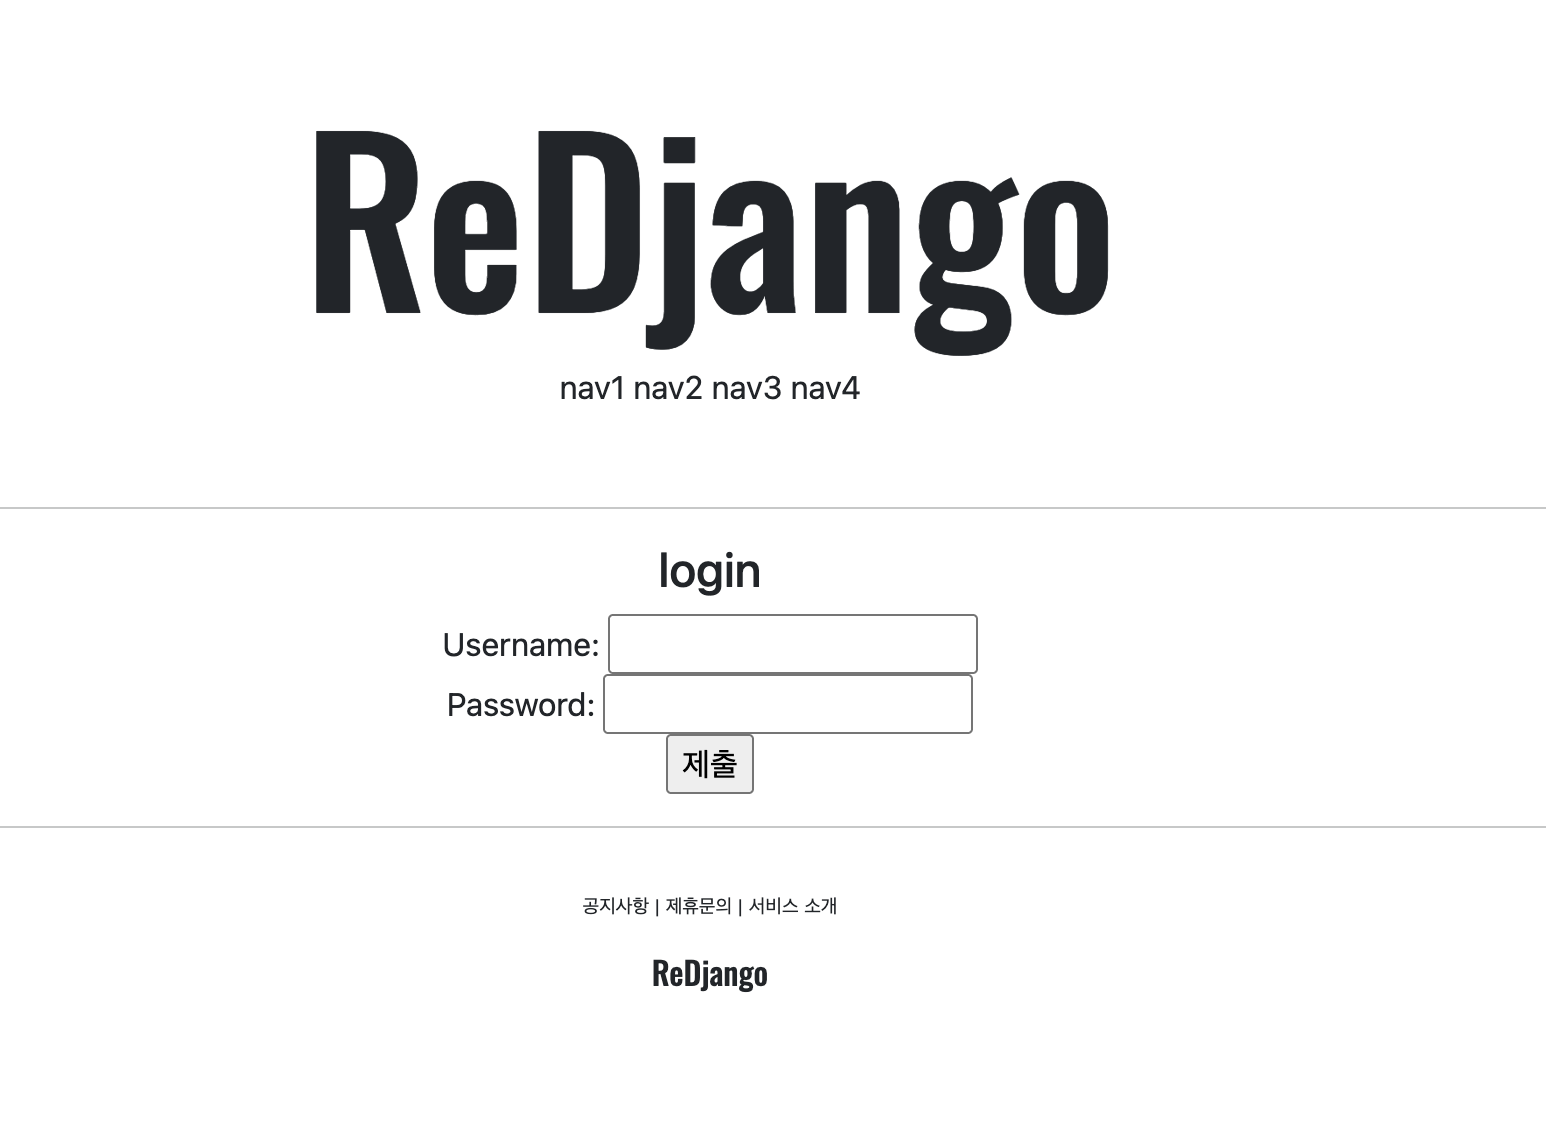
urls.py
from django.contrib.auth.views import LoginView, LogoutView
urlpatterns = [
    path('helloworld/', helloworld, name='helloworld'),
    path('login/', LoginView.as_view(template_name = 'accountapp/login.html'), name='login'),
    path('logout/', LogoutView.as_view(), name='logout'),
    path('create/', accountCreateView.as_view(),name='create'),
]
login logout 두 줄 추가되었다.
as_view()의 인자는 view에서 정했더라도 덮어쓰는 용도다. 매우 편리하고 유용하다. 우리는 views.py에서 바꿔준게 없이 바로 import해서 사용하고 있기 때문에 html만 덮어써준 것이다.
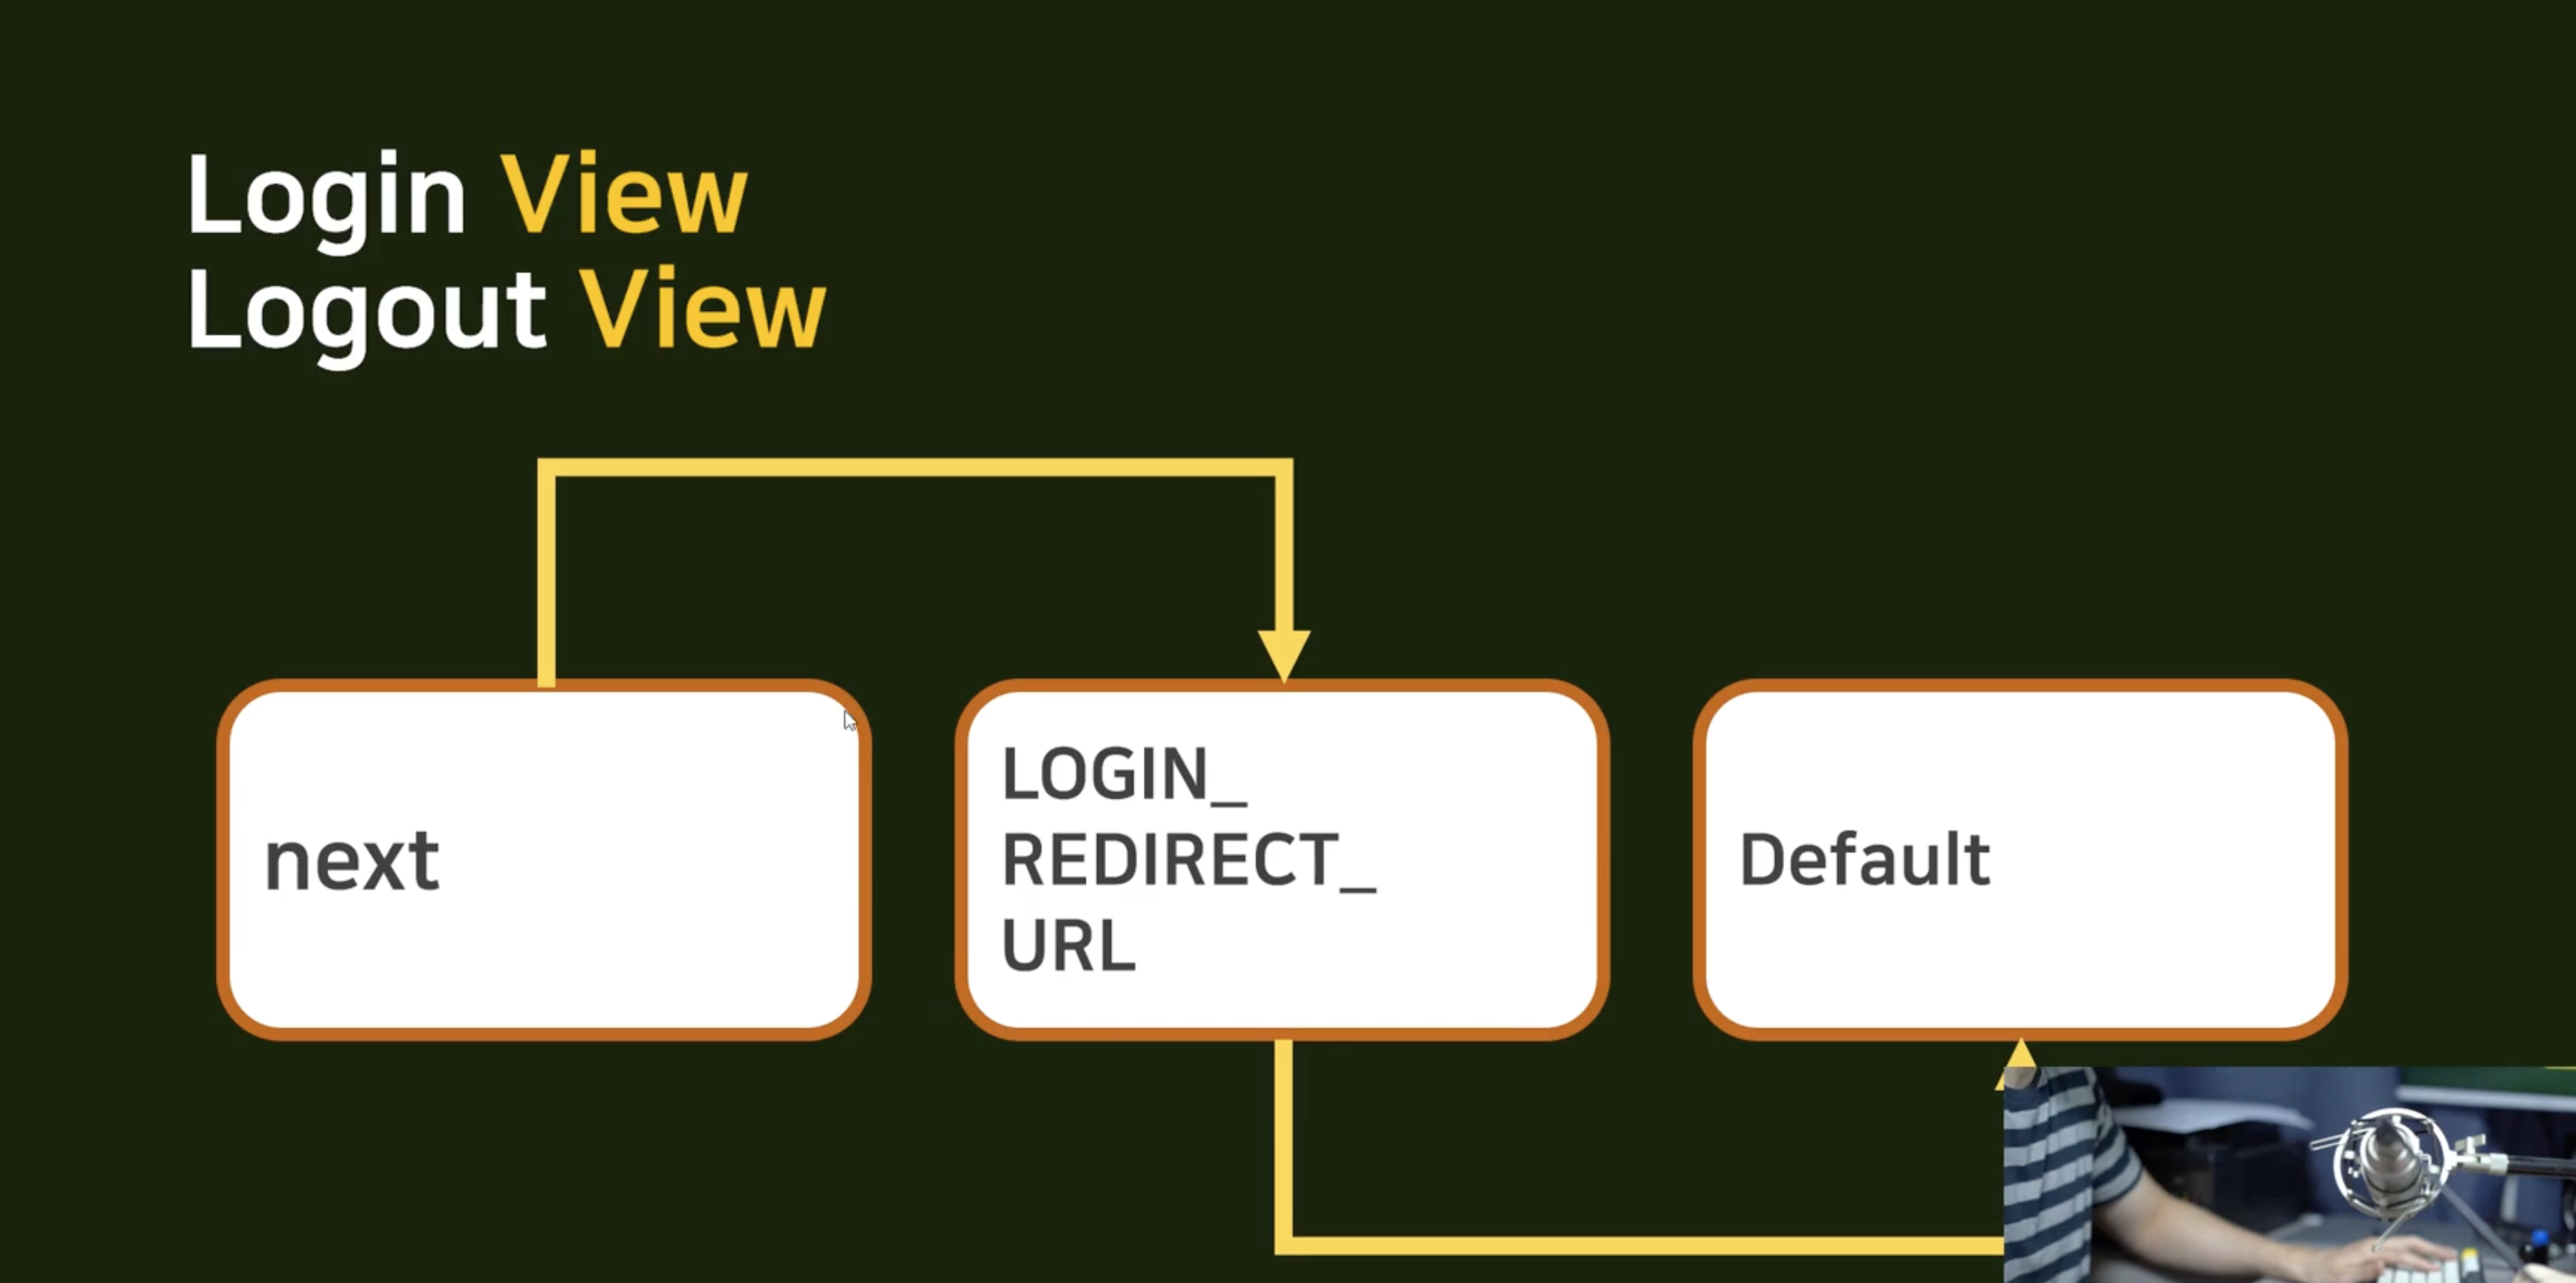
근데 로그인하고나면... 어딘가로 가야 합니다.
header.html
header.html에 가서 스팬태그 중 하나를 앵커태그로 바꿔서 로그인 혹은 로그아웃 버튼으로 만들어 줍니다.
 {% if not user.is_authenticated %}
        <a href="{% url 'accountapp:login' %}?next={{ request.path }}">
            <span>login</span>
        </a>
        {% else %}
        <a href="{% url 'accountapp:login' %}?next={{ request.path }}">
            <span>logout</span>
        </a>
{% endif %}
이게 next 설정한거고, LOGIN_REDIRECT_URL 도 설정해야 함.
settings.py
LOGIN_REDIRECT_URL = reverse_lazy('accountapp:helloworld')
LOGOUT_REDIRECT_URL = reverse_lazy('accountapp:helloworld')
요거 두줄만 달아주면 된다.
logout 에러 발생 : get금지
LogoutView는 POST요청만 받고, GET요청은 받지 않아서 로그아웃 시 405에러가 발생한다. 따라서 적어도 로그아웃은 앵커태그로 구현하면 안되고, form태그로 post요청을 구현해야 한다.
header.html
{% if user.is_authenticated %}
            <form action="{% url 'accountapp:logout' %}" method="post" style="display:inline">
            {% csrf_token %}
            <input type="hidden" name="next" value="{{ request.path }}">
            <button type="submit" class="btn btn-link p-0 m-0 align-baseline">logout</button>
            </form>
        {% else %}
            <a href="{% url 'accountapp:login' %}?next={{ request.path }}">login</a>
        {% endif %}
Bootstrap 적용
강의에는 bootstrap4를 썼는데 5가 나왔으니 5를 쓰자.
https://pypi.org/project/django-bootstrap5/
이 링크에서 하라는 대로 하면 적용이 됩니다.
bootstrap5 설치
pip install django-bootstrap5
settings.py app에 추가
INSTALLED_APPS = [
    'django.contrib.admin',
    'django.contrib.auth',
    'django.contrib.contenttypes',
    'django.contrib.sessions',
    'django.contrib.messages',
    'django.contrib.staticfiles',
    "django_bootstrap5",
    'accountapp',
]
html에 템플릿으로 적용
{% bootstrap_form form %} 처럼 작성이 가능하다.
font 바꾸기
font 다운로드
나눔글꼴로 base.html의 body에 해당하는 부분 기본글꼴을 바꿔주자.
원하는 글꼴을 다운로드 받는다.
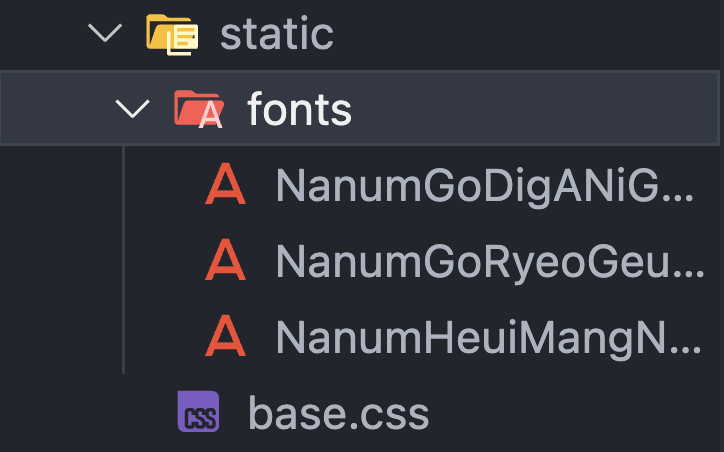
static 아래 fonts 폴더 만들기
뒤에 static 아래 fonts 폴더를 만든다.
그 안에 넣어주면 된다.
head.html에 추가
{% load static %}
    <style>
        @font-face{
            font-family: 'NanumGoDigANiGoGoDing';
            src: url("{% static 'fonts/NanumGoDigANiGoGoDing.ttf' %}") format('truetype');
            /* font-weight: 400; */
            /* font-style: normal; */
            /* font-display: swap; */
        }


        @font-face {
            font-family: 'NanumHeuiMangNuRi';
            src: url("{% static 'fonts/NanumHeuiMangNuRi.ttf' %}") format("truetype");
        }
    </style>
base.html에 적용
<body style="font-family: 'NanumGoDigANiGoGoDing';">
DetailView 써서 profile 구현하기
views.py에 accountDetailView 클래스 만들기
class accountDetailView(DetailView):
    model = User
    context_object_name = 'target_user'
    template_name = 'accountapp/detail.html'
detail.html 만들기
accountapp -> templates -> accountapp 안에 detail.html 만들기.
{% extends 'base.html' %}

{% block content %}
<div>
    <div style="text-align: center; max-width: 500px; margin: 4rem auto;">
        <p>
            {{ target_user.date_joined }}
        </p>
        <h2>
            {{ target_user.username }}
        </h2>
    </div>
</div>
{% endblock %}
거의 다 똑같다.
urls.py에 detail도 만들기
from accountapp.views import accountCreateView, accountDetailView, helloworld
urlpatterns = [
    path('detail/<int:pk>', accountDetailView.as_view(),name='detail'),
]
각 유저마다 고유한 마이페이지가 있어야 할테니, 고유값을 넘겨받는다는 점이 포인트이다.
header.html에 Mypage만들기.
login 상태일 때, 그러니까 authenticated 되어 있을 때만 header nav bar에 Mypage가 뜨도록 만들어주자.
<div style="font-size: 1.7rem; margin-top: 1rem;">
        <span>nav1</span>
        <span>nav2</span>
        <span>nav3</span>
        {% if user.is_authenticated %}
            <a href="{% url 'accountapp:detail' pk=user.pk %}">
                <span>MyPage</span>
            </a>
            <form action="{% url 'accountapp:logout' %}" method="post" style="display:inline">
            {% csrf_token %}
            <input type="hidden" name="next" value="{{ request.path }}">
            <button type="submit" class="btn btn-link p-0 m-0 align-baseline">logout</button>
            </form>
        {% else %}
            <a href="{% url 'accountapp:login' %}?next={{ request.path }}">login</a>
        {% endif %}

    </div>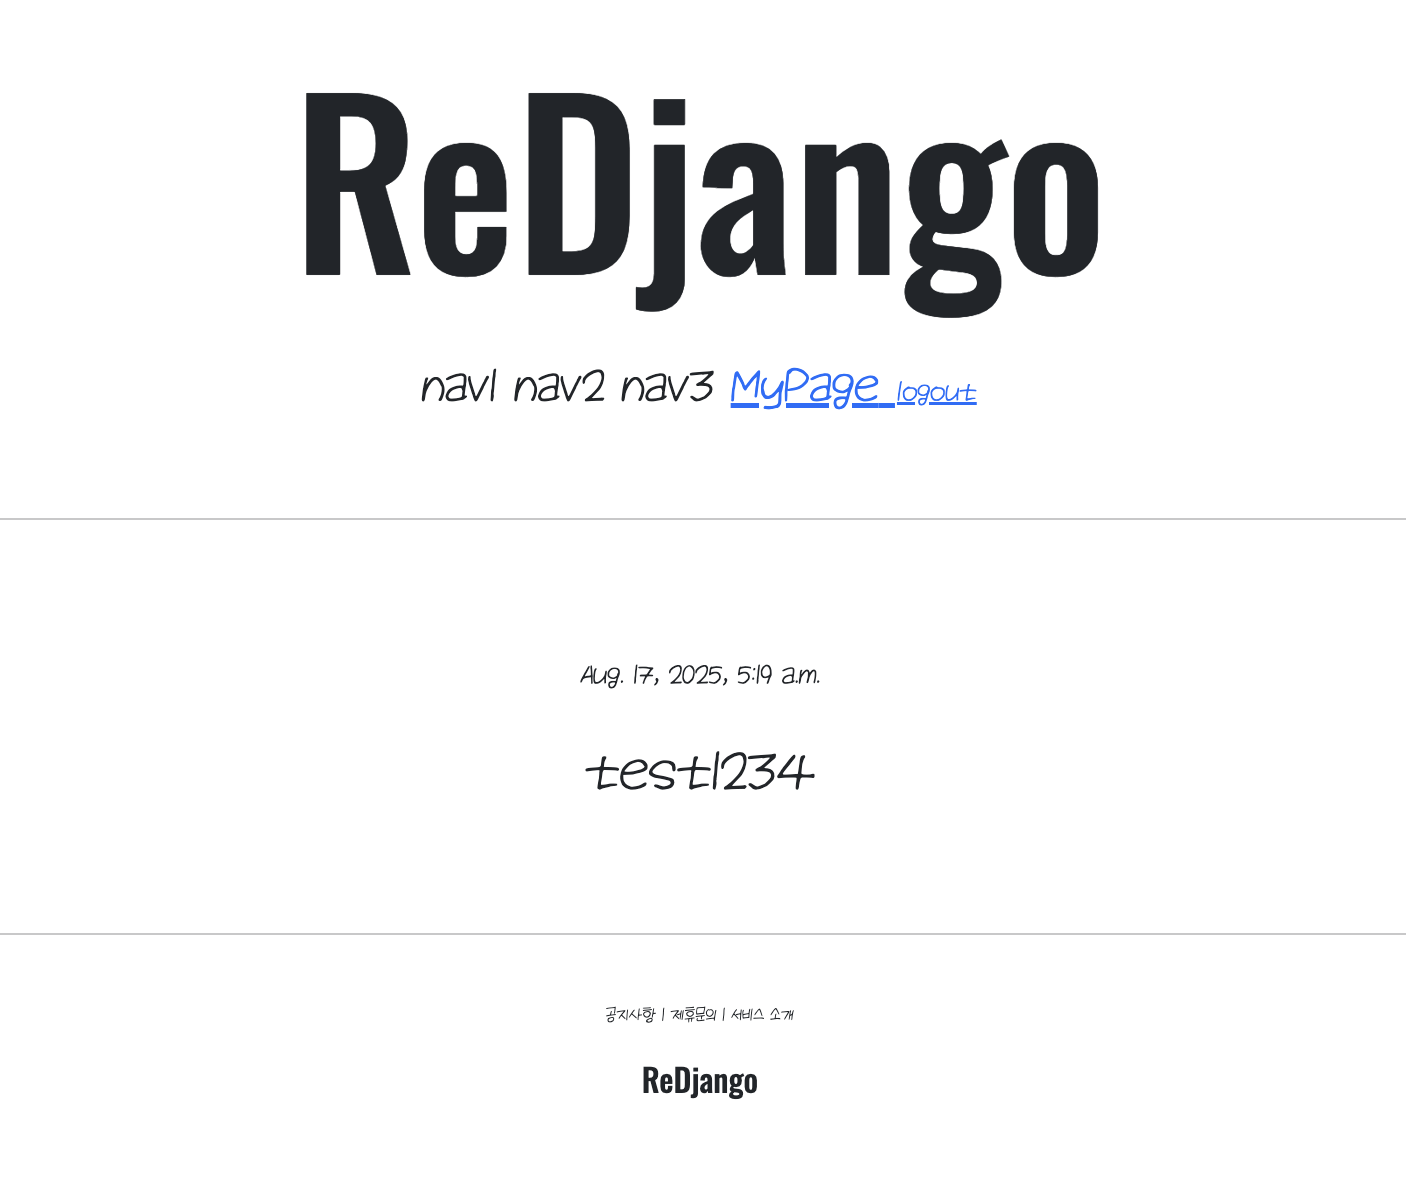
Update 만들기
views.py에 UpdateView
class accountUpdateView(UpdateView):
    model = User
    form_class = UserCreationForm
    success_url = reverse_lazy('accountapp:helloworld')
    # 함수와 클래스가 파이썬에서 불러와지는 방식의 차이 때문에 클래스에서는 reverse_lazy를 써야 함. 기능은 똑같음
    template_name = 'accountapp/update.html'
update.html 만들기
{% extends 'base.html' %}
{% load django_bootstrap5 %}
{% block content %}
<div style="text-align: center; max-width: 500px; margin: 4rem auto;">
<div class="mb-4">
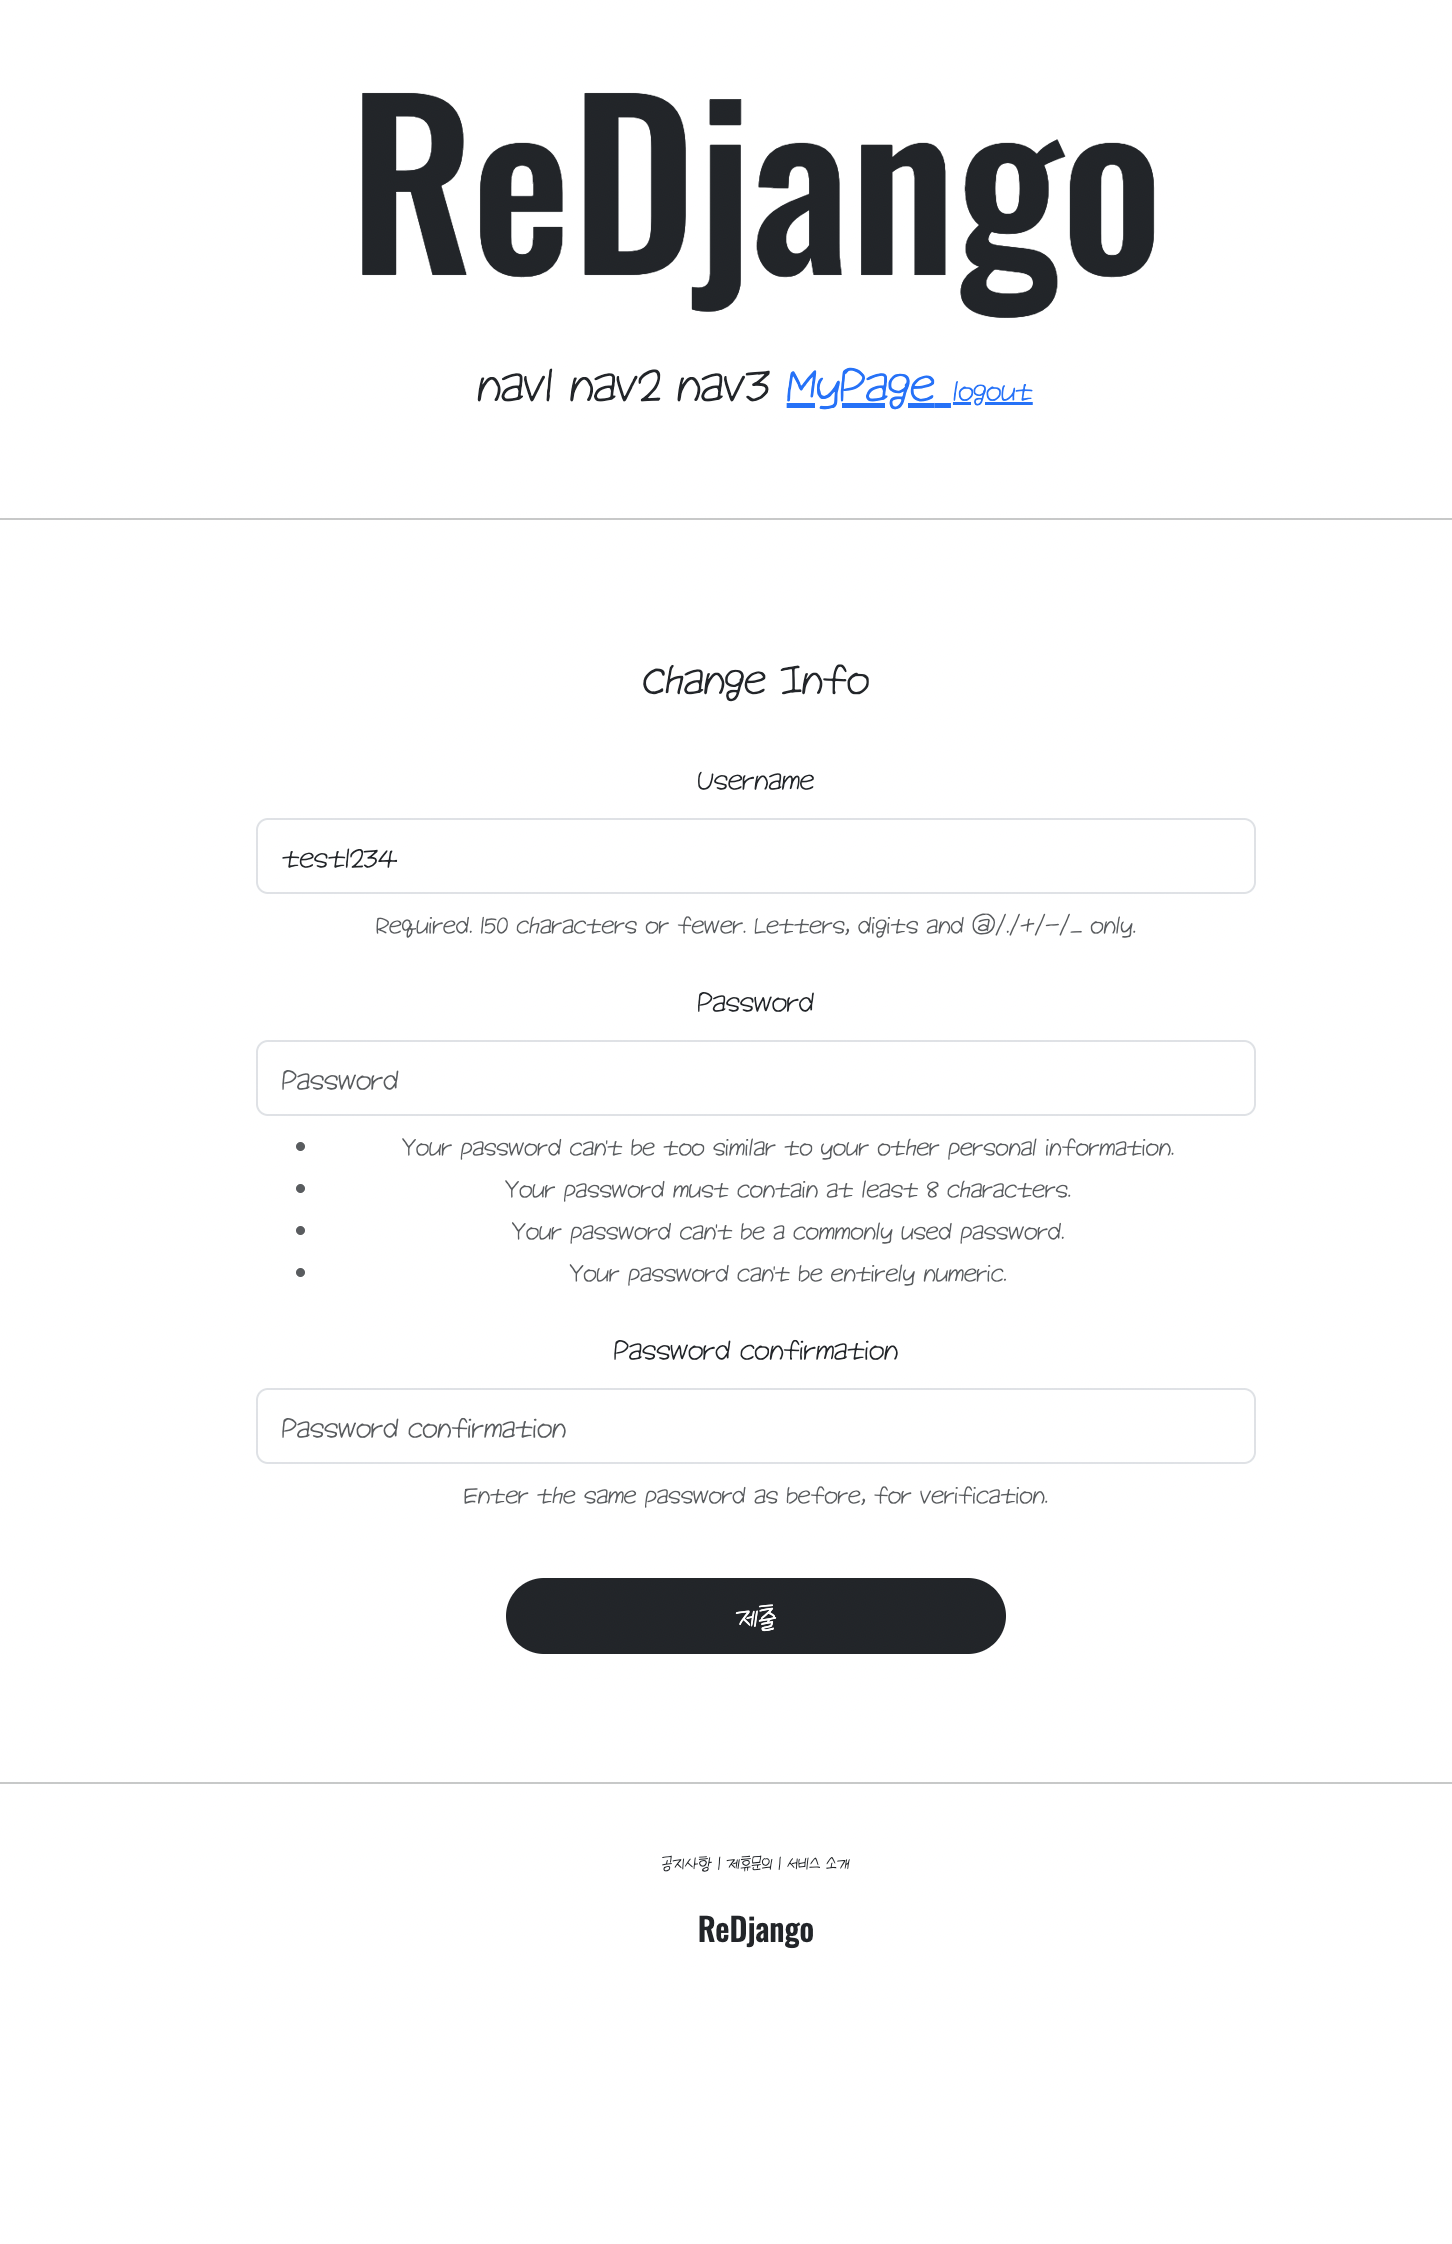
<h4>Change Info</h4>
</div>
<form action="{% url 'accountapp:update' pk=user.pk %}" method="post">
{% csrf_token %}
{% bootstrap_form form %}
<input type="submit" class="btn btn-dark rounded-pill col-6 mt-3">
</form>
</div>
{% endblock %}urls.py에 update추가
urlpatterns = [
    path('update/<int:pk>', accountUpdateView.as_view(),name='update'),
]
detail.html에 change info 버튼만들기
기본적으로 접속한 유저의 정보를 변경할 수 있도록 해야 하기 때문에 그것을 검증하는 과정이 중요하다. 따라서 같을 때만 change info 버튼이 나타나도록 구현하는 것이 중요하다.
{% extends 'base.html' %}

{% block content %}
<div>
    <div style="text-align: center; max-width: 500px; margin: 4rem auto;">
        <p>
            {{ target_user.date_joined }}
        </p>
        <h2>
            {{ target_user.username }}
        </h2>

        {% if target_user == user %}
        <a href="{% url 'accountapp:update' pk=user.pk %}">
            <p>
                change Info
            </p>
        </a>
        {% endif %}
    </div>
</div>
{% endblock %}
이런 식으로 target_user == user 인지를 검증하는 부분이 가장 중요하다.
id는 변경 못하게 비활성화
forms.py 만들기
from django.contrib.auth.forms import UserCreationForm

class accountUpdateForm(UserCreationForm):
    def __init__(self, *args, **kwargs):
        super().__init__(*args,**kwargs)
        # 초기화 이후에 딱 username 필드만 변경해주는겁니다.
        self.fields['username'].disabled = True
UserCreationForm을 아주 약간만 커스터마이징 해줍니다.
폼이 생성될 때 제일 먼저 실행되는 초기화 메서드가 init. 인자들은 폼 생성 시에 넘어오는 다양한 인자들을 그대로 받기 위한 파이썬 문법이다. 이제 부모 클래스 쪽 초기화를 모두 실행해준 다음에 self.fields를 만져서 disabled를 true로 바꾼다고 생각하면 편하다.
Delete 구현하기
views.py에 클래스 추가
class accountDeleteView(DeleteView):
    model = User
    success_url = reverse_lazy('accountapp:login')
    template_name = 'accountapp/delete.html'
urls.py에 라우팅
delete.html 만들기
{% extends 'base.html' %}
{% load django_bootstrap5 %}

{% block content %}

    <div style="text-align: center; max-width: 500px; margin: 4rem auto">
        <div class="mb-4">
            <h4>Quit</h4>
        </div>
        <form action="{% url 'accountapp:delete' pk=user.pk %}" method="post">
            {% csrf_token %}
            <input type="submit" class="btn btn-dark rounded-pill col-6 mt-3">
        </form>
    </div>

{% endblock %}
detail.html에 quit버튼 추가
<a href="{% url 'accountapp:delete' pk=user.pk %}">
            <p>
                Quit
            </p>
        </a>
버그수정
views.py에서 target_user 추가
detailview에만 있던 context_object_name = 'target_user' 를 updateview와 deleteview에도 넣어준다.
delete html에도 수정
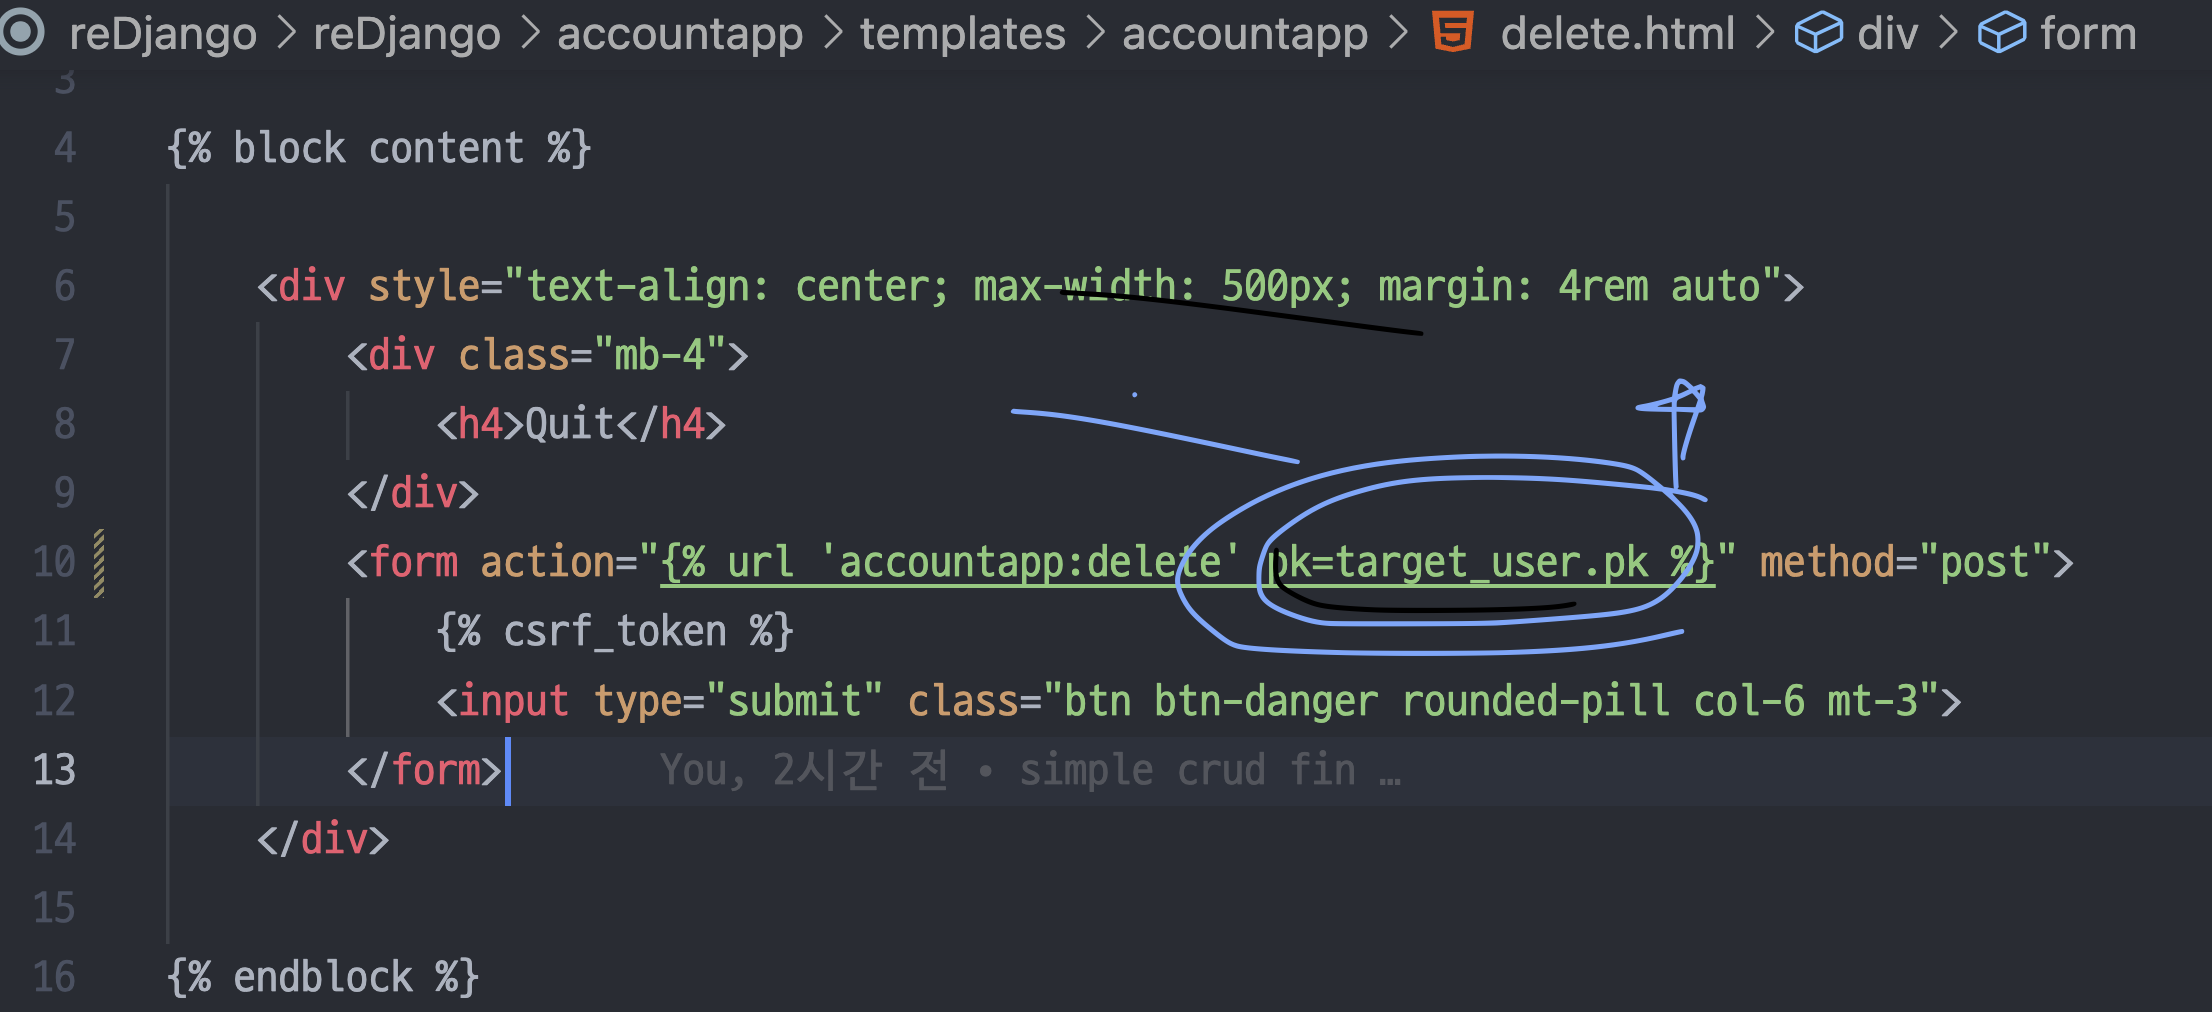
update html도 수정
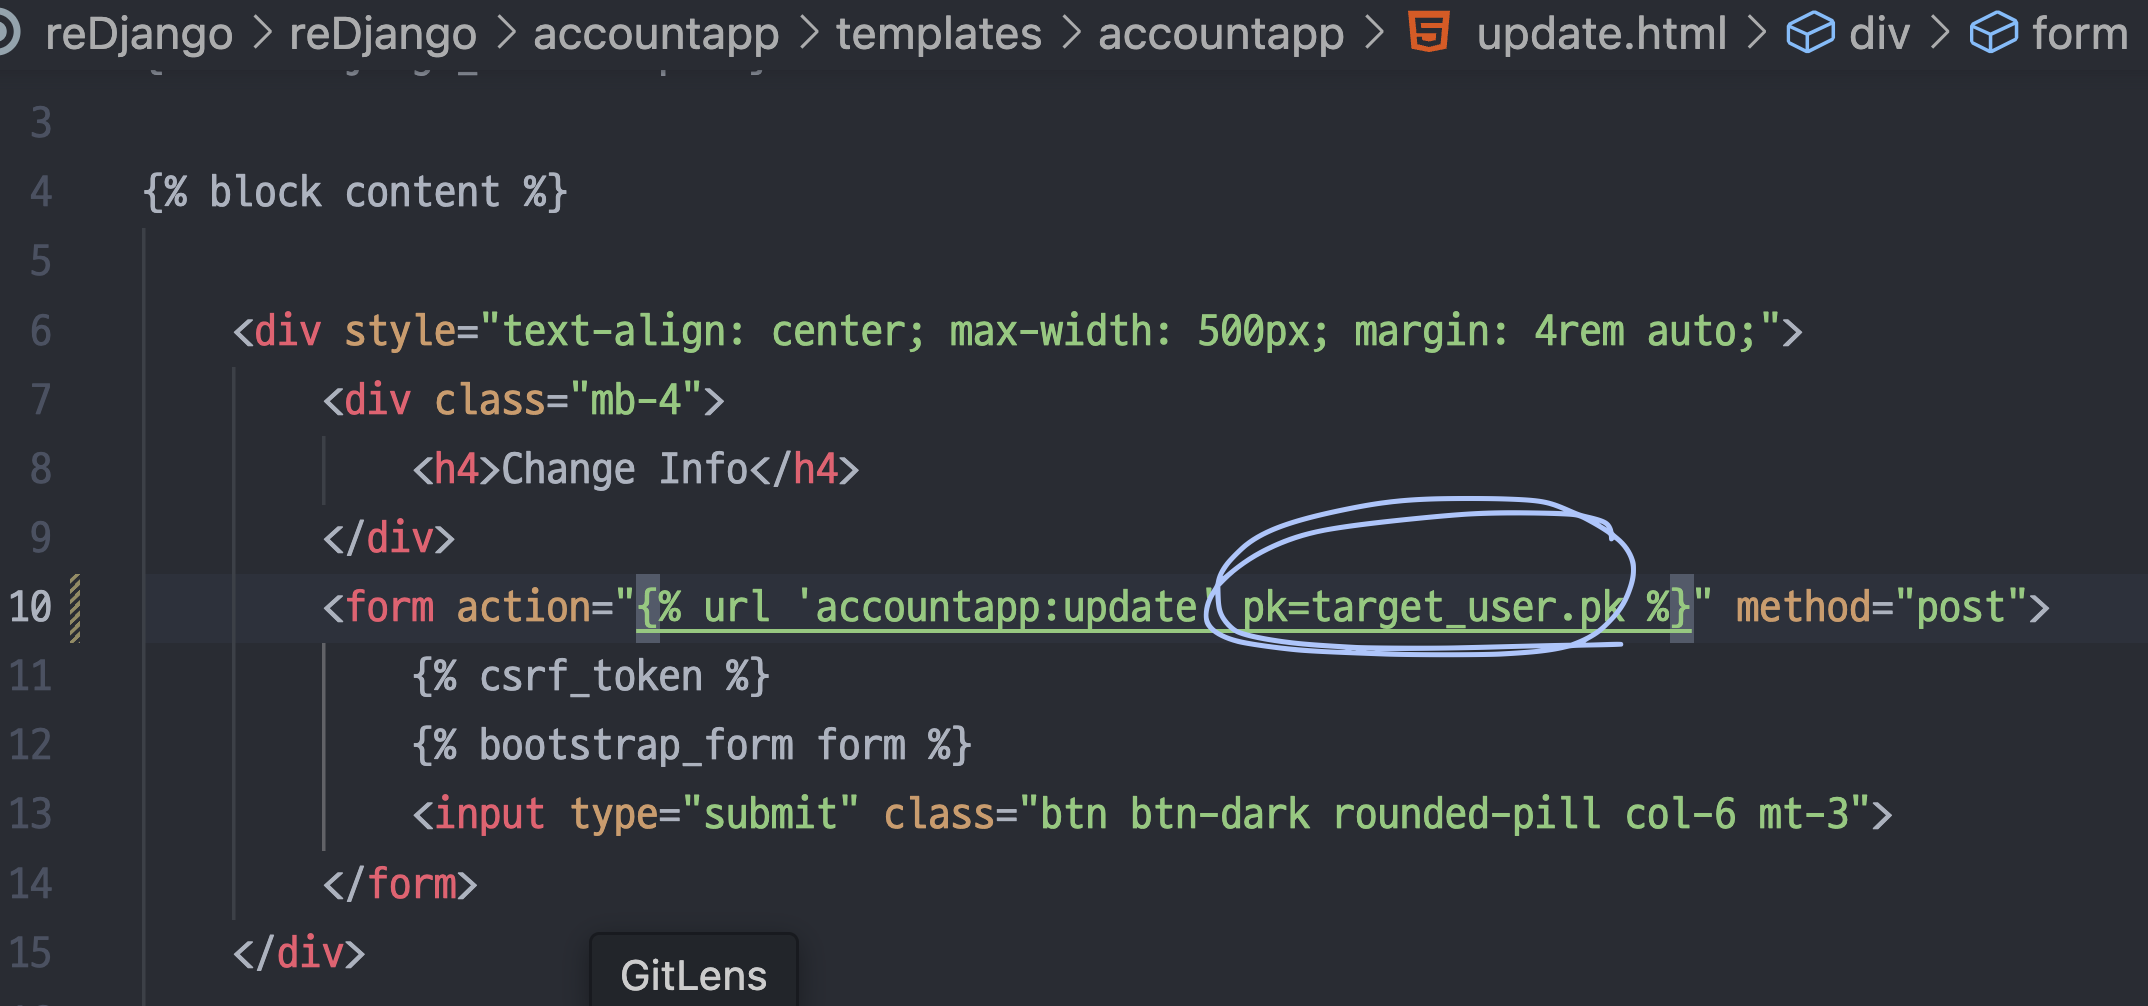
큰 urls.py 수정