지난 번 작성했던 git & github 게시글는 나만의 프로젝트를 업로드하는 방법이였다.
이번 게시글은 팀 프로젝트를 위한 방법이다. CRA setting 부터 스텝바이스텝으로 정리해보고자 한다🤓
1. CRA 초기 세팅
1) CRA 설치
npx create-react-app project-name- 원하는 디렉토리로 이동 후, CRA 설치
2) React Router 설치
- `npm install react-router-dom --save``
3) Sass 설치
- `npm install node-sass@4.14.1 --save``
4) .eslintcache 파일 .gitignore에 추가
2. 폴더 및 파일 구성
src 폴더 내 폴더
- Images(CRA 업데이트로 public이 아닌 src 폴더 내 위치) : 가능한 페이지별로 폴더 만들어 관리
- Pages : 해당 페이지에서만 사용되는 컴포넌트라면 페이지 폴더 하위에 해당 컴포넌트 폴더 생성하여 관리
- (common) Components : 모든 페이지에서 사용되는 컴포넌트 관리(ex. header, nav, footer 등)
- Styles : reset.scss / common.scss(모든 페이지에서 공통적으로 적용되는 css 속성) 파일 생성
- Routes.js : import는 순서에 맞춰 배치
import React from 'react';
import {
	BrowserRouter as Router,
    Switch
    Route,
} from 'react-router-dom';

import Component-name from 'Component-url';

class Routes extends React.Component {
	render() {
		return (
		<Router>
			<Switch>
             <Route exact path="/" component={Component-name} />
            </Switch>
        </Router>
        )
  }
}

export default Routes;r
public 폴더 내 폴더
- data : 추후 mock data를 만들어 불러올 때 사용
3. github repo 연동 및 push
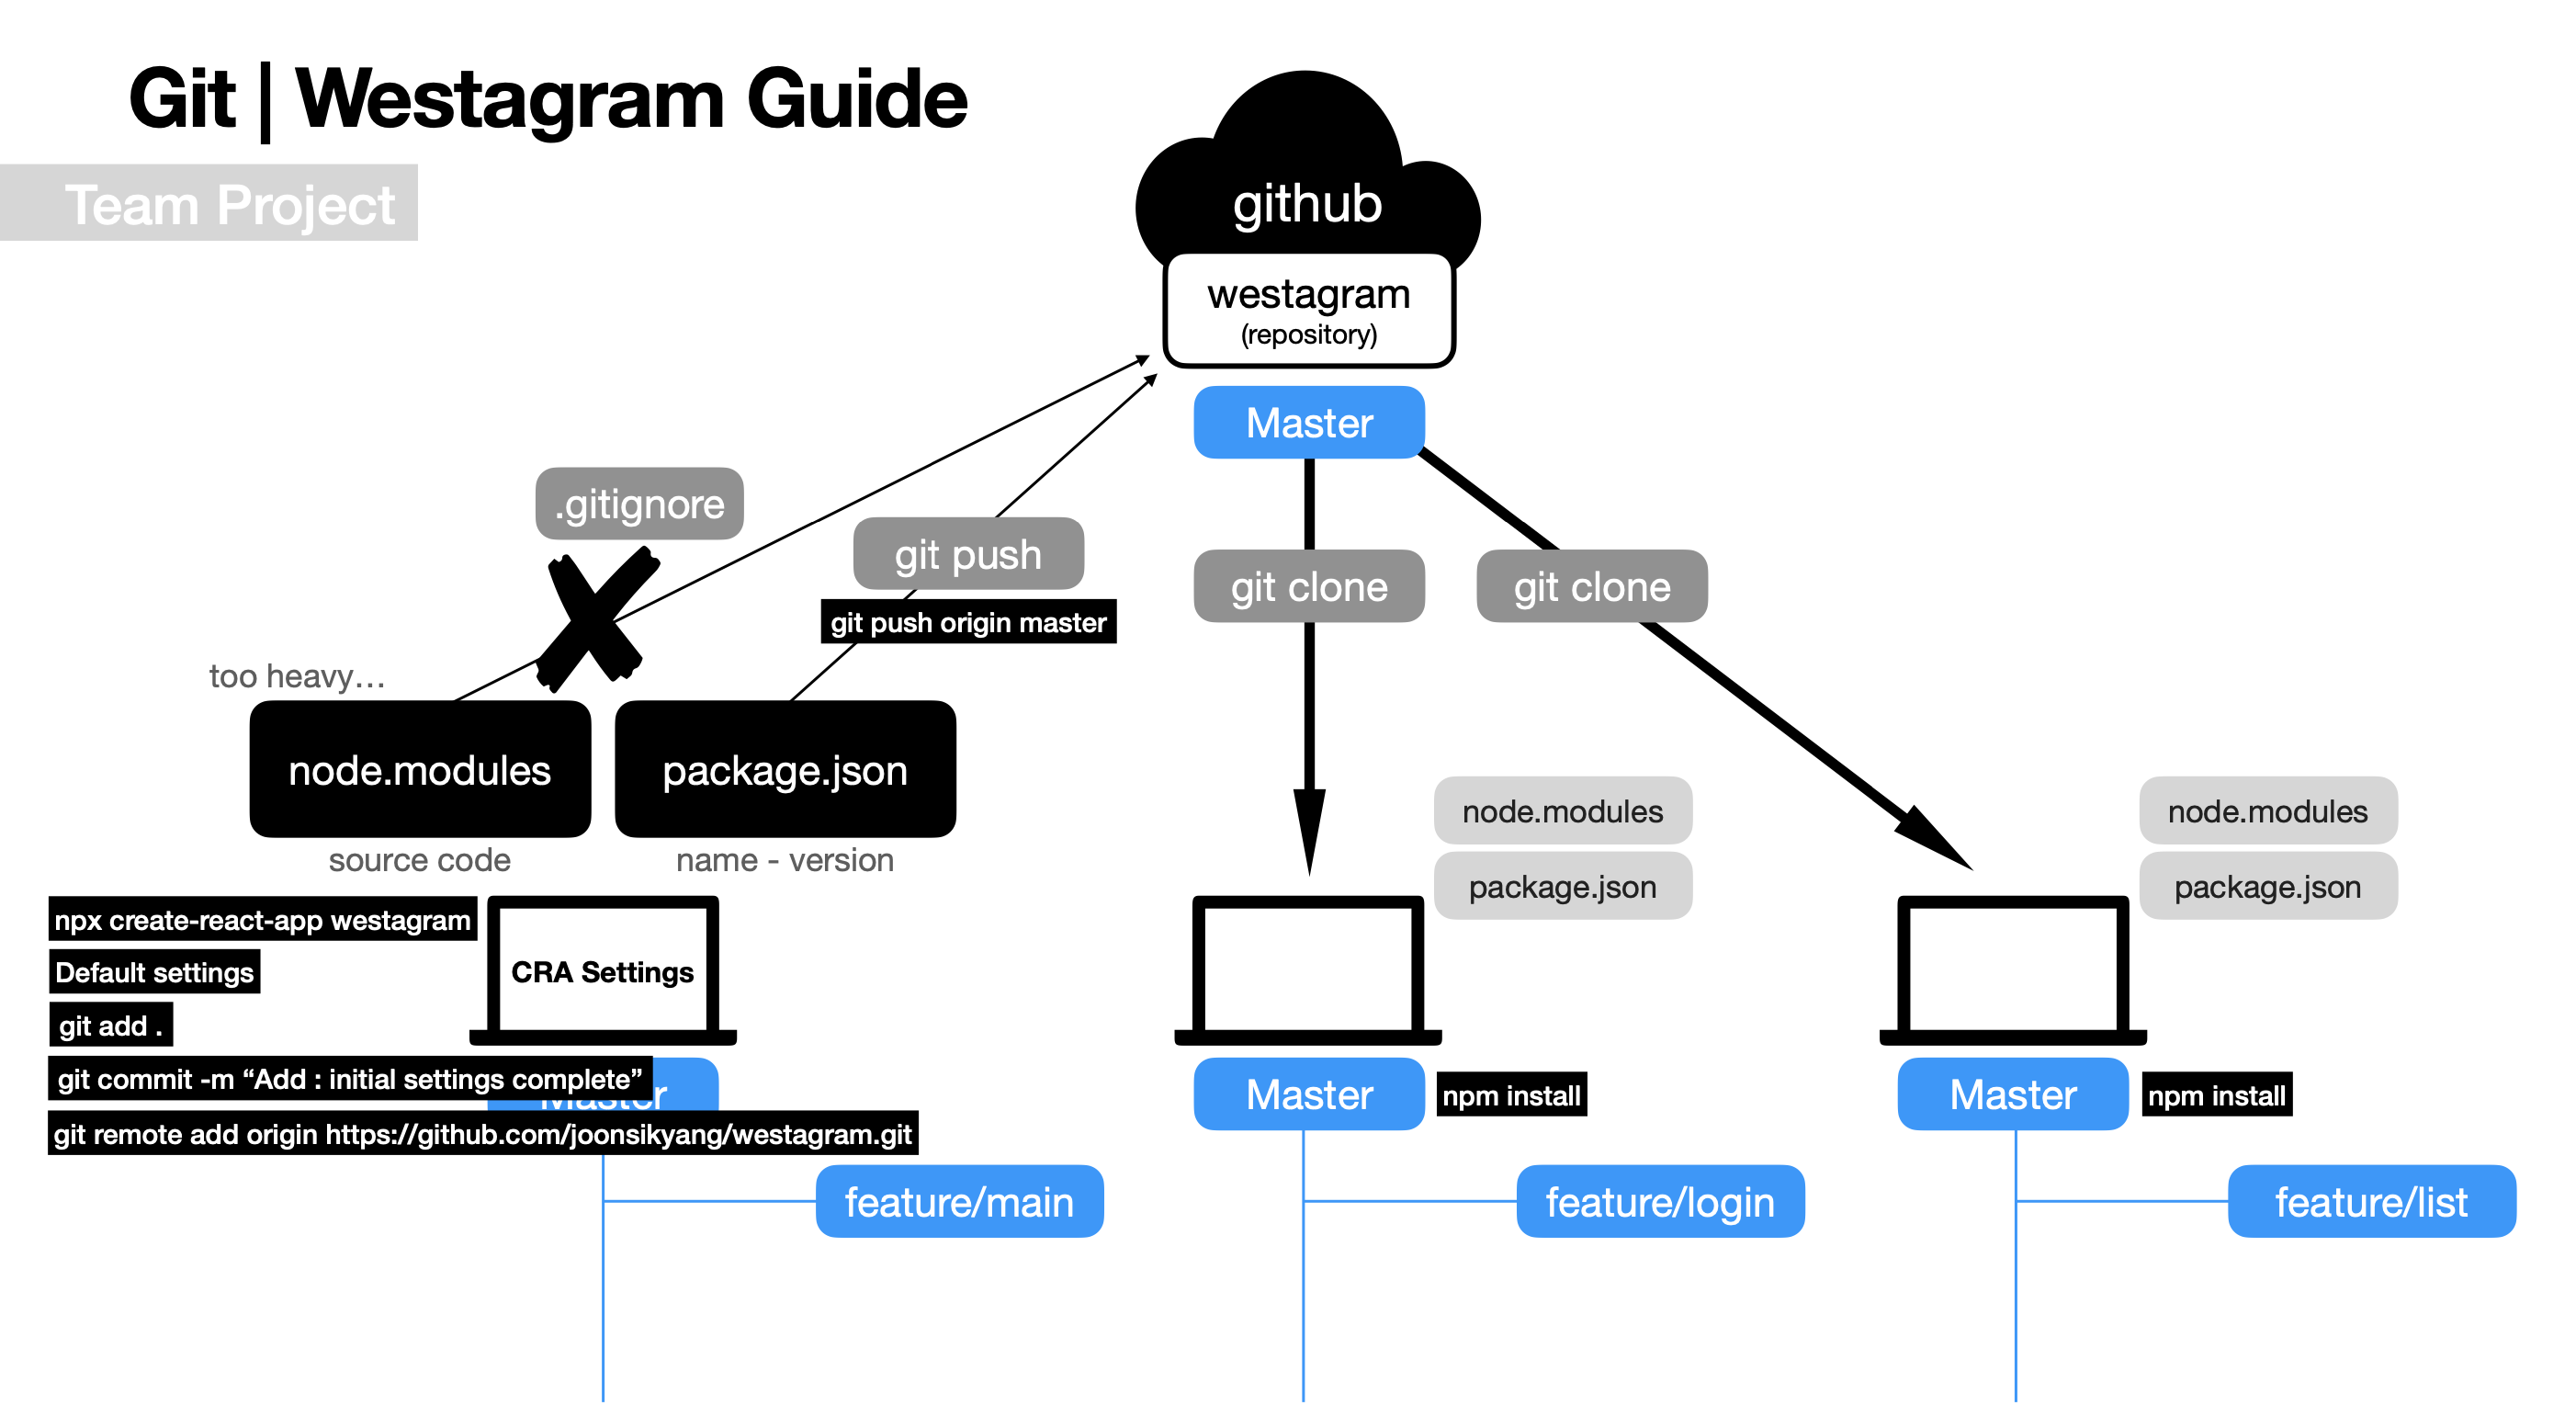
- default 세팅 후 add >> commit
- git remote add origin '해당 repo 주소'
To add a new remote, use the git remote add command on the terminal, in the directory your repository is stored at.
- git push origin master
- merge된 이후에 다른 팀원들이 clone 받고, branch 생성하여 작업.
By default, npm install will install all modules listed as dependencies in package.json.
첫 세팅에서 겪은 시행착오를 몇가지 정리해보자면,