개발 vs 운영
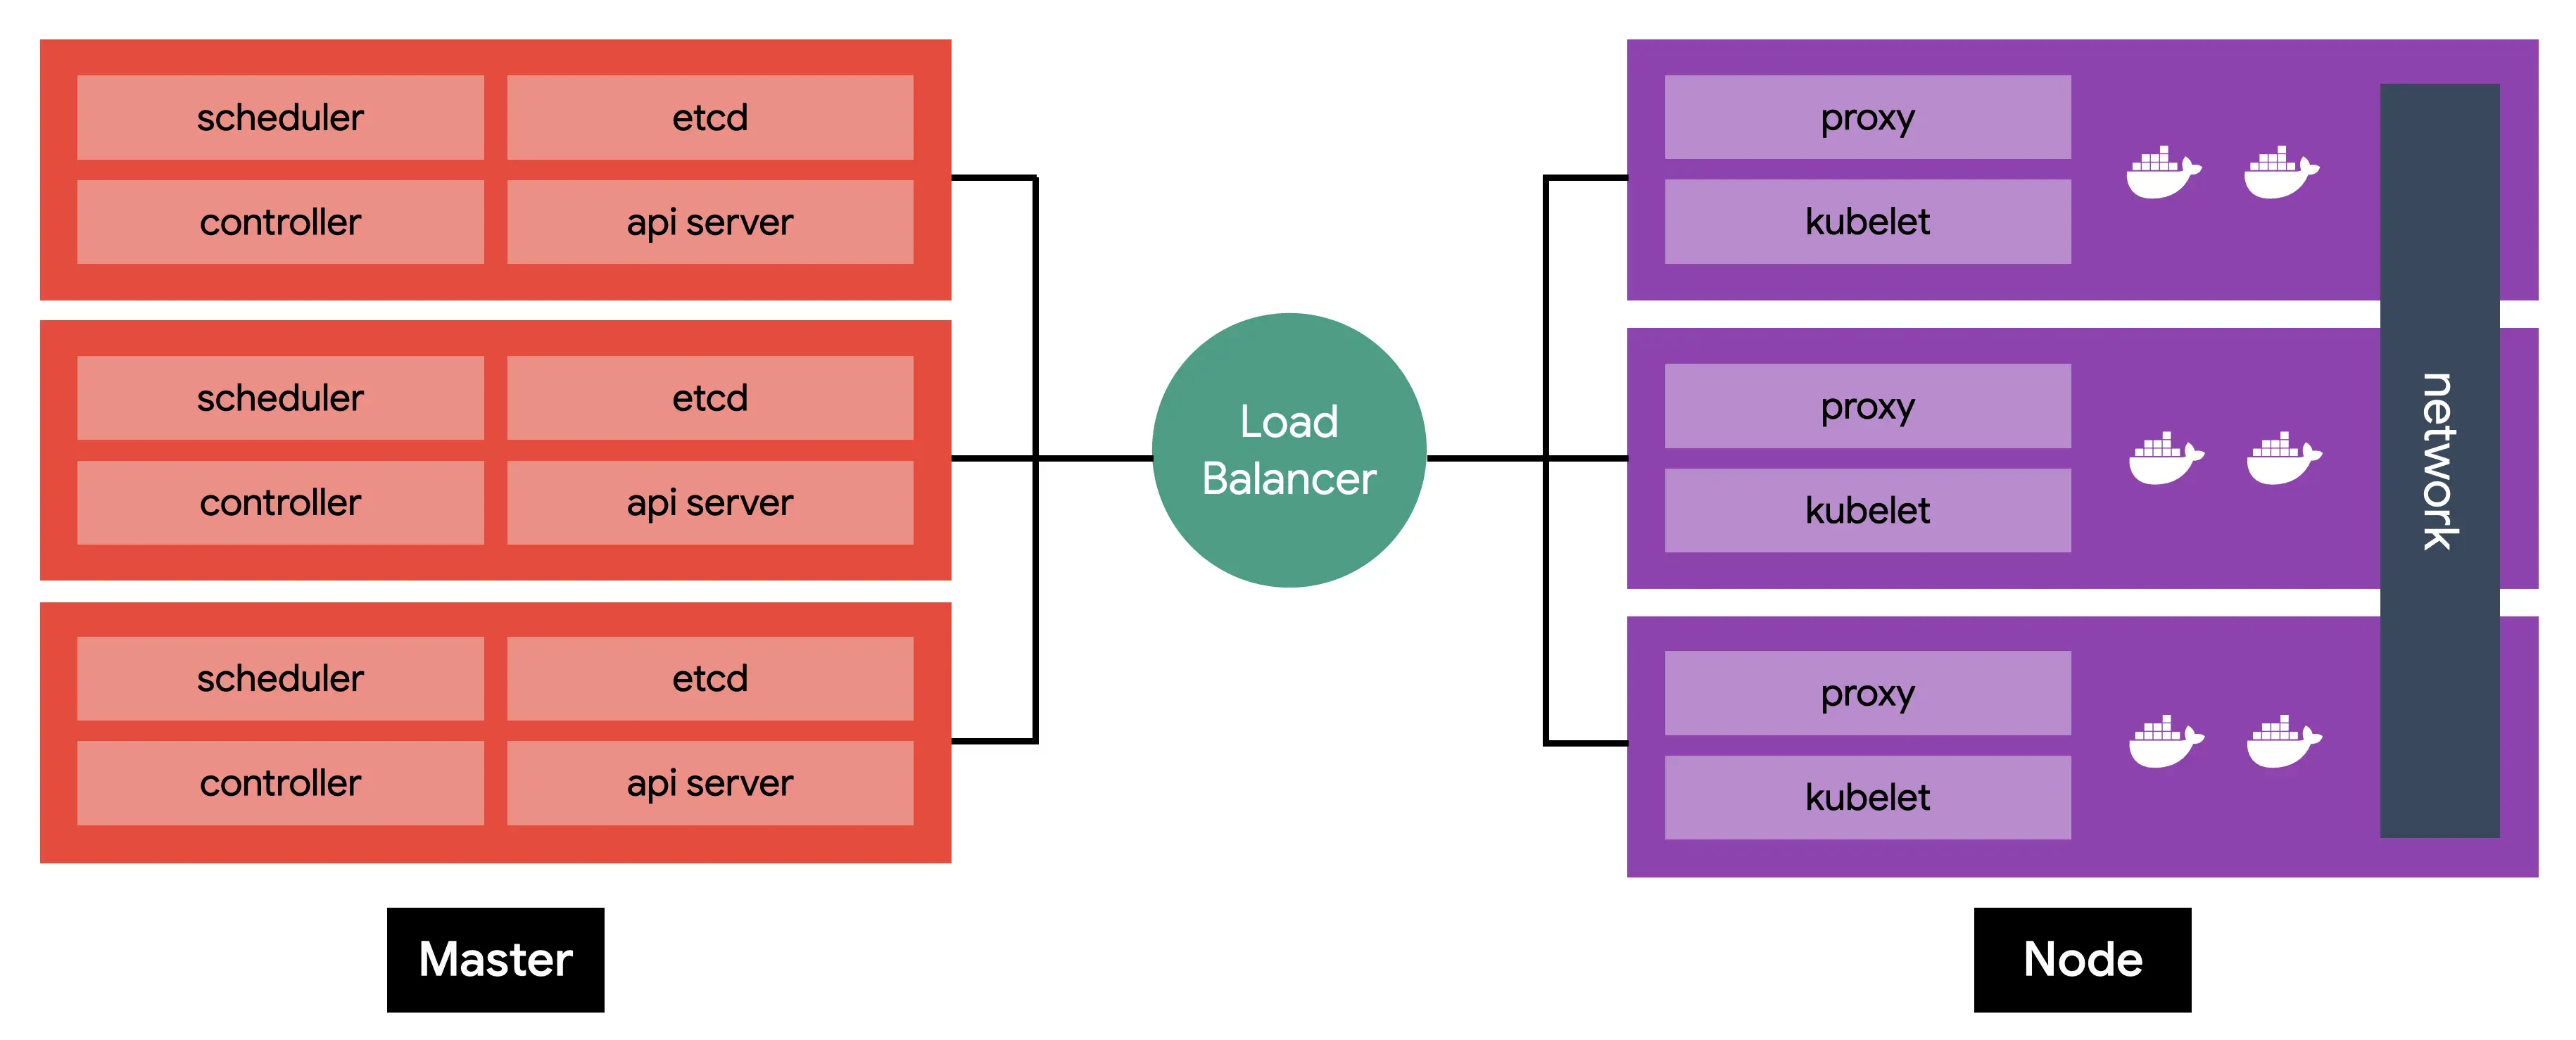
쿠버네티스를 운영환경에 설치하기 위해선 최소 3대의 마스터 서버와 컨테이너 배포를 위한 n개의 노드 서버가 필요하다.
이러한 설치는 과정이 복잡하고 배포 환경에 따라 방법이 다르기 때문에 처음 공부할 때 바로 구축하기에 적합하지 않다.
개발 환경을 위해 마스터와 노드를 하나의 서버에 설치하여 손쉽게 관리하는 방법을 사용한다. --> 대표적인 개발 환경 구축 방법으로는 minikube,k3s,docker for desktop,kind가 있다.
**대부분의 환경에서 사용할 수 있고 간편하며, 무료인 minikube를 사용한다.
개발환경과 운영환경의 가장 큰 차이점은 개발환경은 단일 노드로 여러 노드에 스케줄링하는 테스트가 어렵고 LoadBalancer와 Persistent Local Storage 또한 가상으로 만들어야 한다. 이러한 실습을 정확하게 하려면 운영환경(멀티노드)에서 진행해야 한다.
MiniKube란?
miniKube는 macOs, Linux 및 Windows에서 로컬 Kubernetes 클러스터를 빠르게 설정해주는 도구이다. 즉, miniKube를 이용하면 손쉽게 로컬에서 쿠버네티스 클러스터를 만들 수 있다. 심지어 여러 클러스터를 관리하는 것도 가능하다.
쿠버네티스 클러스터를 실행하려면 최소한 sceduler, controller, api-server, etcd, kubelet, kube-proxy를 설치해야 하고 필요에 따라 dns, ingress controller, storage class등을 설치해야 한다. 쿠버네티스는 설치 또한 중요한 과정이지만 처음 공부할땐 설치보단 실질적인 사용법을 익히는 게 중요하다.
이러한 설치를 쉽고 빠르게 하기 위한 도구가 minikube이다. minikube는 windows, macOs, linux에서 사용할 수 있고 다양한 가상 환경을 지원하여 대부분의 환경에서 문제없이 동작한다.
Minikube is an open source tool that allows you to set up a single-node Kubernetes cluster on your local machine. The cluster is run inside a virtual machine and includes Docker, allowing you to run containers inside the node.
Step 1. Update System and Install Required Packages
sudo apt-get update -y
sudo apt-get upgrade -y
Also, make sure to instal the following required packages:
sudo apt-get install curl
sudo apt-get install apt-transport-https
Step 2. Install VirtualBox Hypervisor
you need a virtual machine in which you can set up your single node cluster with Minikube. you can use VirtualBox or KVM.
1. To install VirtualBox on Ubuntu, run the command:
sudo apt install virtualbox virtualbox-ext-pack2. Confirm the installation with y and hit Enter
3. Next, the license agreement appears on the screen. Press Tab and then Enter to continue.

4. The installer asks you to agree with the terms of the VirtualBox PUEL license by selecting YES.
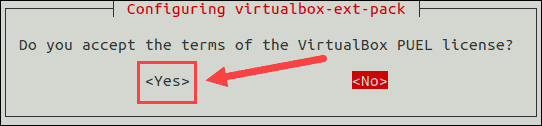
5. Wait for the installation to complete and then move on to the next step.
Step 3. Install MiniKube
With VirtualBox set up, move on to installing Minikube on your Ubuntu system.
wget: 웹 상의 파일을 다운로드 받을 때 사용하는 명령어
1. First, download the latest Minikube binary using the wget command:
wget https://storage.googleapis.com/minikube/releases/latest/minikube-linux-amd642. Copy the downloaded file and store it into the /usr/local/bin/minikube** directory with:
sudo cp minikube-linux-amd64 /usr/local/bin/minikube3. Next, give the file executive permission using the chmod command
sudo chmod 755 /usr/local/bin/minikube4. Finally, verify you have successfully installed Minikube by checking the version of the sw:
minikube versionStep 4. Install Kubectl
To deploy and manage clusters, you need to install kubectl, the official command line tool for Kubernetes.
1. Download kubectl with the following command:
curl -LO https://storage.googleapis.com/kubernetes-release/release/`curl -s https://storage.googleapis.com/kubernetes-release/release/stable.txt`/bin/linux/amd64/kubectl2. Make the binary executable by typing:
chmod +x ./kubectl3. Then, move the binary into your path with the command:
sudo mv ./kubectl /usr/local/bin/kubectl4. Verify the installation by checking the version of your kubectl instance:
kubectl version -o jsonStep 5: Start Minikube
Once you have set up all the required software, you are ready to start Minikube.
docker 설치 후 진행
Run the following command:
minikube start --driver=dockerIngress 실습
> Enable the Ingress Controller
1. To enable the NGINX Ingress Controller, run the following command:
minikube addons enable ingress2. Verify that the Nginx Ingress controller is running
kubectl get pods -n ingress-nginx> Deploy a hello, world App
1. Create a Deployment using the follow command:
kubectl create deployment web --image=gcr.io/google-samples/hello-app:1.02. Expose the Deployment:
kubectl expose deployment web --type=NodePort --port=80803. Verify the Service is created and is available on a node port:
kubectl get service web4. Visit the Service via NodePort
minikube service web --url
curl http://192.168.49.2:30667
> Create an Ingress
1. Create example-ingress.yaml from the following file:
apiVersion: networking.k8s.io/v1

kind: Ingress

metadata:

  name: example-ingress

  annotations:

    nginx.ingress.kubernetes.io/rewrite-target: /$1

spec:

  rules:

    - host: hello-world.info

      http:

        paths:

          - path: /

            pathType: Prefix

            backend:

              service:

                name: web

                port:

                  number: 8080
2. Create the Ingress object by running the following command:
kubectl apply -f https://k8s.io/examples/service/networking/example-ingress.yaml3. Verify the IP address is set:
kubectl get ingressyou should see an IPv4 address in the ADDRESS column.
4. Add the following line to the bottom of the /etc/hosts file on your computer
192.168.49.2 hello-world.info5. Verify that the Ingress controller is directing traffic:
curl hello-world.info> Create a second Deployment
1. Create another Deployment using the following command:
kubectl create deployment web2 --image=gcr.io/google-samples/hello-app:2.02. Expose the second deployment
kubectl expose deployment web2 --port=8080 --type NodePort> Edit the existing Ingress
1. Edit the existing example-ingress.yaml manifest, and add the following lines at the end:
          - path: /v2
            pathType: Prefix
            backend:
              service:
                name: web2
                port:
                  number: 8080
2. Apply the changes:
kubectl apply -f example-ingress.yaml> Test your Ingress
1. Access the 1st version of the Hello World app.
curl hello-world.info2. Access the 2nd version of the Hellow World app.
curl hello-world.info/v2