김영한 강사님의 스프링 입문을 듣고 정리한 내용입니다.
자세한 내용은 강의를 참고해주세요
1. 프로젝트 생성
순서
-
Java 11 설치
- 여기서 맥 설정 맞춰서 Java 11 설치: openjdk
- 환경변수 설정
참조자료
: 맥 java 11 설치 방법
-
IntelliJ 설치 (무료 배포판으로 설치)
- 여기서 IntelliJ 설치: jetbrain
-
Spring Boot 프로젝트 간편 생성
- 여기서 생성: start spring
- 속성
- Project: Gradle - Groovy
- Language: Java
- Spring Boot: 2.7.13
- 3 버전 부터는 Java 17로 해야되는 거 같음
- Snapshot, M1 이런거 붙은거는 아직 정식판 아니므로 사용 x
- Project Metadata
- 이름 짓는 부분
- Dependencies
- 프로젝트에 필요한 라이브러리 가져오기
- Spring Web: 웹 페이지 만들기 위해 필요
- Thymeleaf: HTML 관리를 위해 필요
- 여기서 선택하여 가져오면, 프로젝트에서 src -> build.gradle -> dependencies 에서 확인 가능
- 프로젝트에 필요한 라이브러리 가져오기
-
IntelliJ에서 Open으로 build.gradle 파일 열기
-
Spring 프로젝트 파일 구성
- src
- main
- 우리가 다루어야 할 부분은 main의 java 폴더 파일
- main의 .java 파일을 실행하여 프로젝트 실행 가능
- build.gradle
- java {
sourceCompatibility = '11'
}- sourceCompatibility는 java의 '버전'을 관리하는 부분
- 프로젝트 실행 안되면 이 부분을 java 버전에 맞게 수정해보자
- Refresh Gradle을 통해, 수정한 코드를 저장하는 방법
- java {
- main
- src
-
프로젝트 실행을 빨리하는 방법
- IntelliJ -> Preferences -> Build, Execution, Deployment -> Gradle
-> Build and run using => IntelliJ IDEA
-> Run tests using => IntelliJ IDEA
-> Gradle JVM => 다운로드한 java 버전으로 - Project structures -> Project settings -> Project -> SDK => 다운로드한 java 버전으로
- IntelliJ -> Preferences -> Build, Execution, Deployment -> Gradle
-
프로젝트 실행 확인
- main -> .java 파일 실행
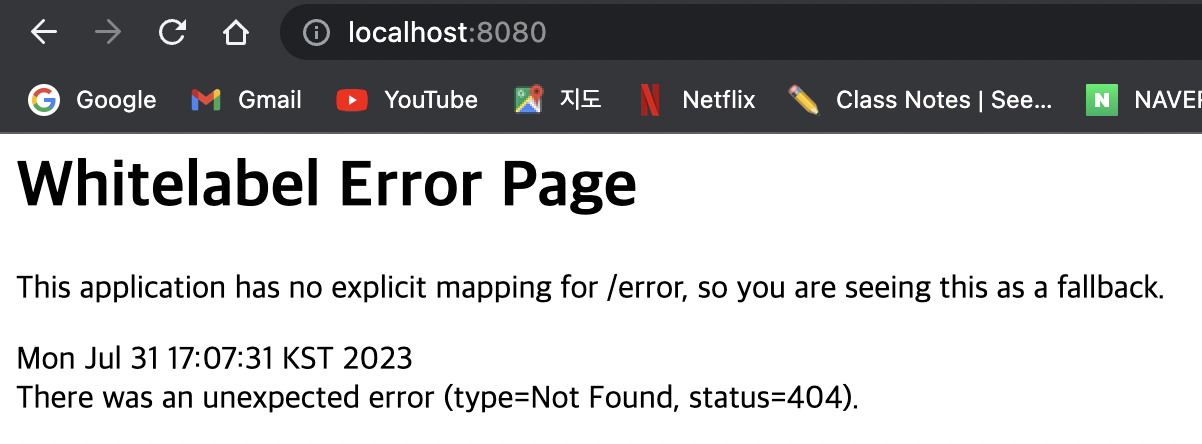
- http://localhost:8080/ 여기서 Whitelabel Error Page 라고 뜨면 실행 성공
2. 라이브러리 살펴보기
라이브러리 확인
-
src -> build.gradle
- dependencies -> Implementation
-
External Libraries
- 땡겨온 라이브러리들 확인 가능
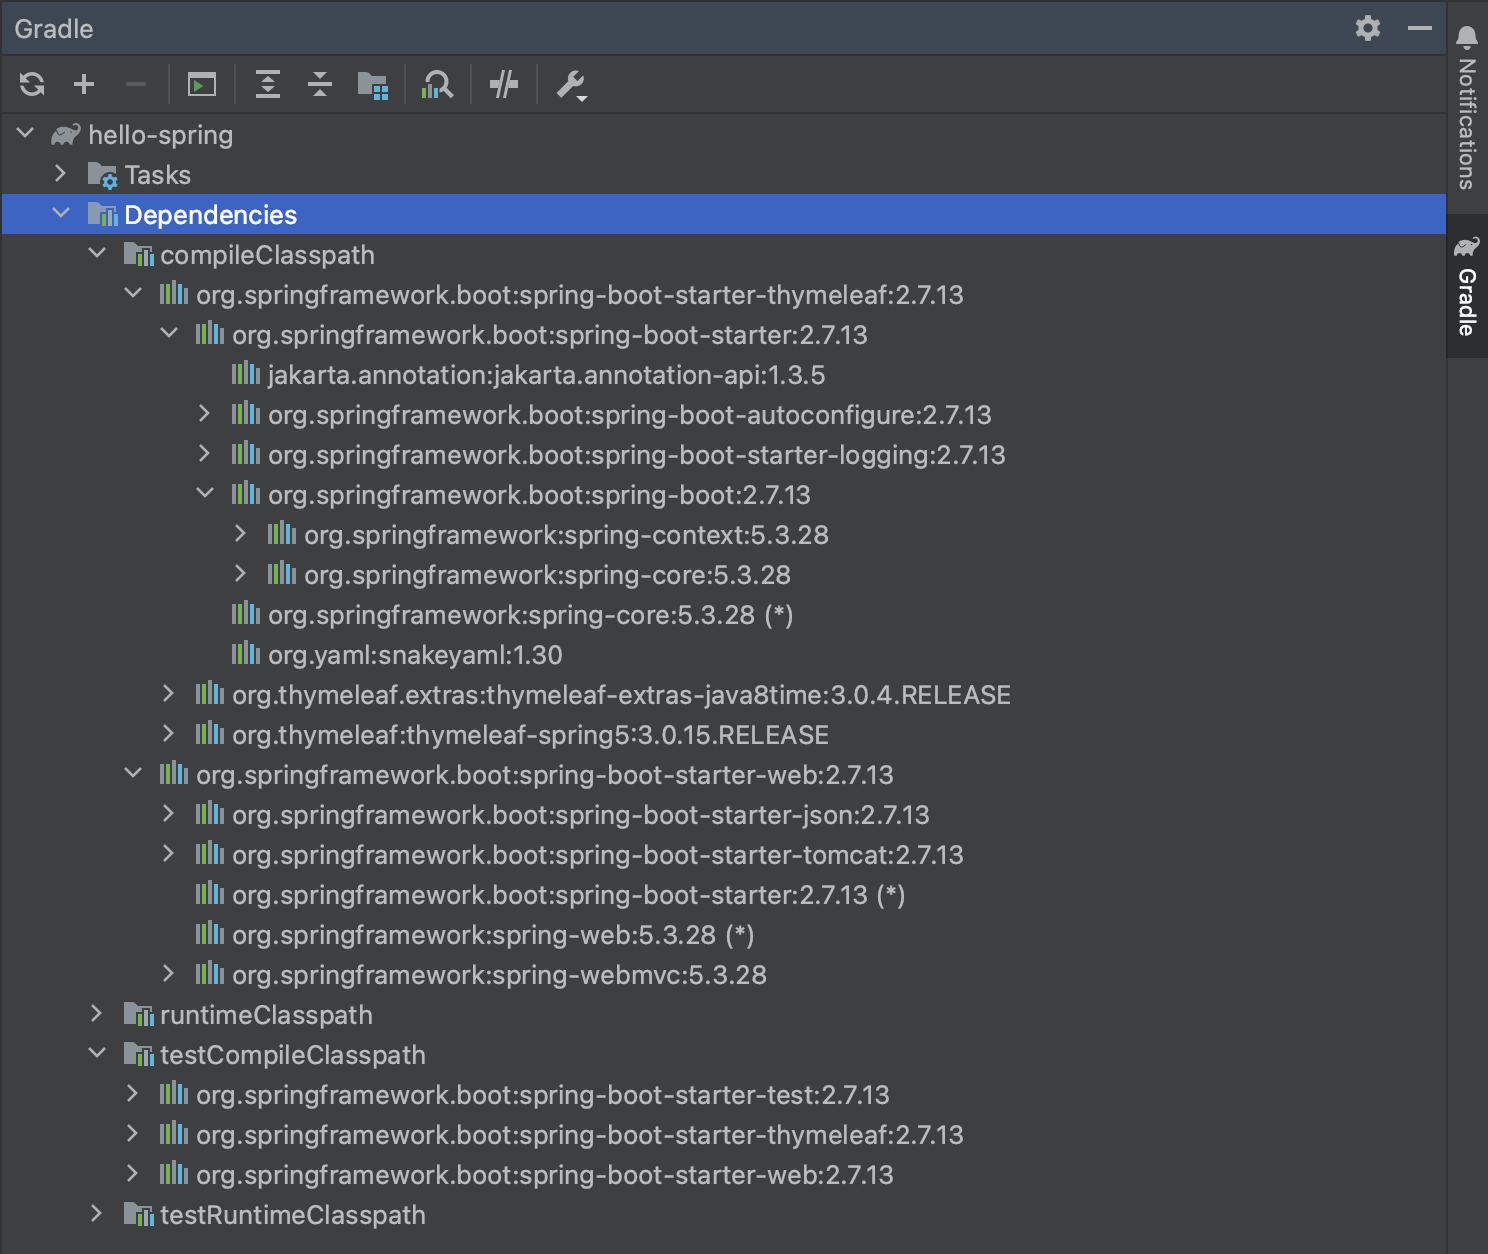
gradle의 역할
-
예를 들어, 우리가 https://start.spring.io/ 여기서 스프링 프로젝트를 만들 때, dependencies에서 필요한 라이브러리를 선택하였었다.
-
그러면, gradle은 우리가 선택한 라이브러리들과 그 라이브러리와 의존관계가 있는 라이브러리들을 다 땡겨온다.
-
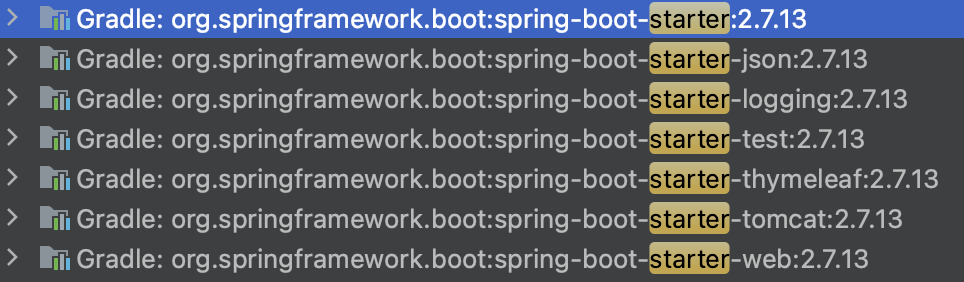
ex) 선택한 라이브러리

-
ex) 선택한 라이브러리와 의존관계에 있는 라이브러리
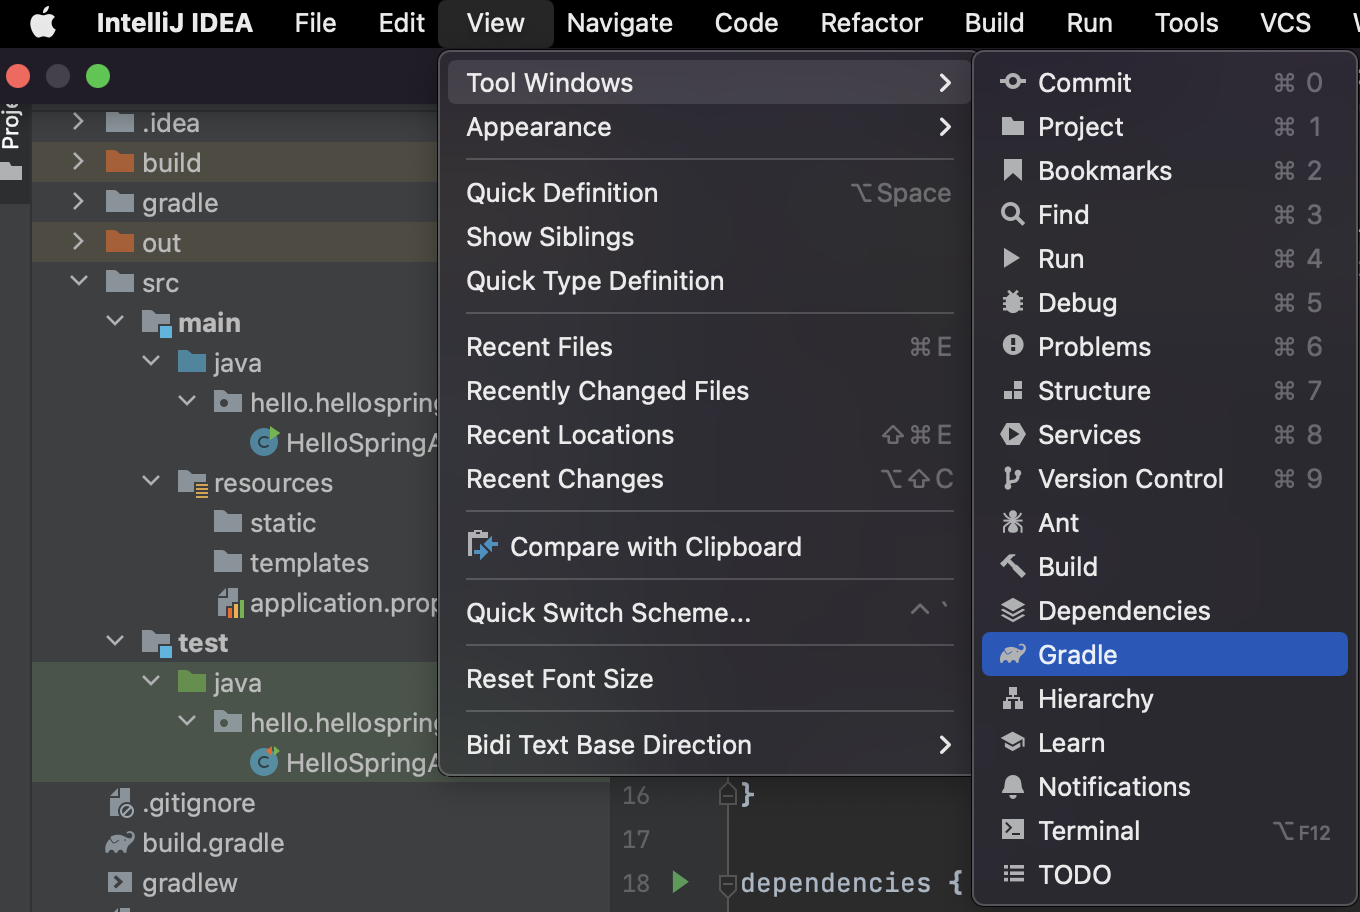
- Tip! window tool bar에 gradle 추가 방법
Spring boot 기본 라이브러리
-
스프링 부트 라이브러리
- spring-boot-starter-web
- spring-boot-starter-tomcat: 톰캣 (웹서버)
- spring-webmvc: 스프링 웹 MVC
- spring-boot-starter-thymeleaf: 타임리프 템플릿 엔진(View)
- spring-boot-starter(공통): 스프링 부트 + 스프링 코어 + 로깅
- spring-boot
- spring-core
- spring-boot-starter-logging
- logback
- slf4j
- spring-boot
- spring-boot-starter-web
-
테스트 라이브러리
- spring-boot-starter-test
- junit: 테스트 프레임워크
- mockito: 목 라이브러리
- assertj: 테스트 코드를 좀 더 편하게 작성하게 도와주는 라이브러리
- spring-test: 스프링 통합 테스트 지원
- spring-boot-starter-test
- Question? 왜 tomcap 임베디드 서버의 기본 포트가 8080일까?
tomcat 8080인 이유
3. View 환경설정
welcome page

-
Spring Boot supports both static and templated welcome pages. It first looks for an index.html file in the configured static content locations. If one is not found, it then looks for an index template. If either is found, it is automatically used as the welcome page of the application.
-
Spring Boot는 정적 및 템플릿 시작 페이지를 모두 지원합니다. 먼저 구성된 정적 콘텐츠 위치에서 index.html 파일을 찾습니다. 하나가 없으면 인덱스 템플릿을 찾습니다. 둘 중 하나가 발견되면 자동으로 애플리케이션의 시작 페이지로 사용됩니다.
welcome page 만들어보기
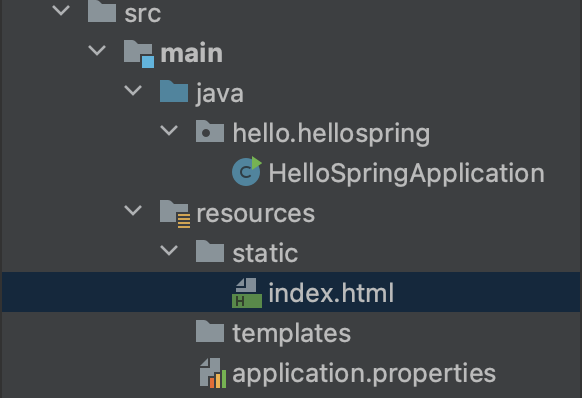
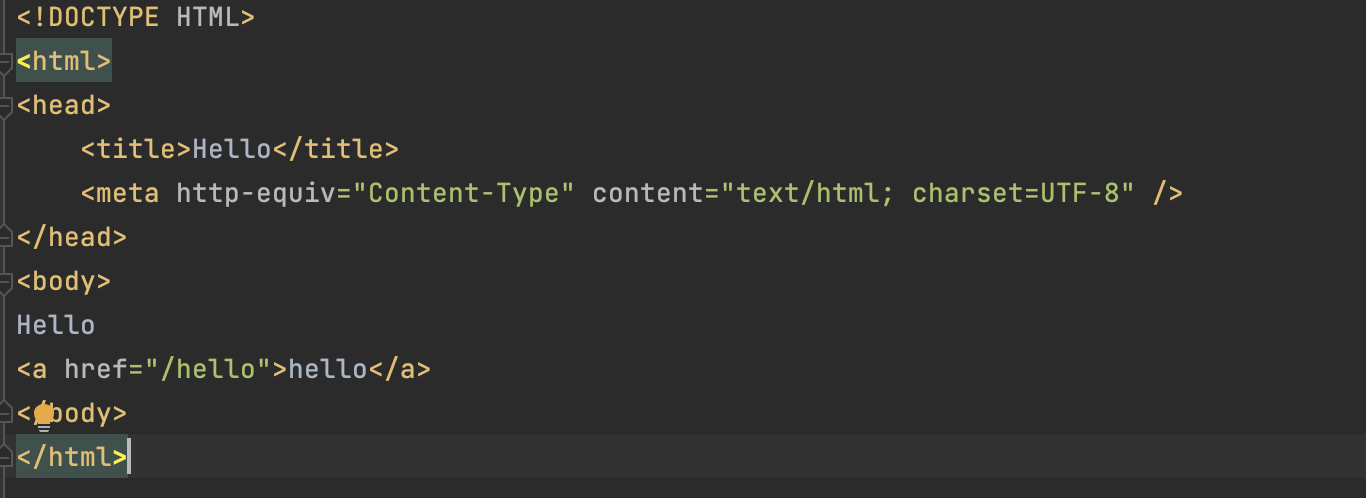
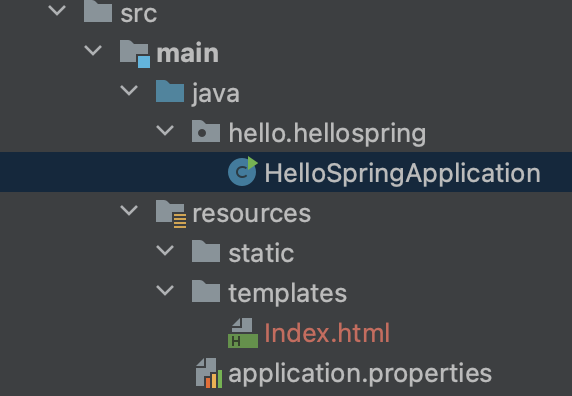
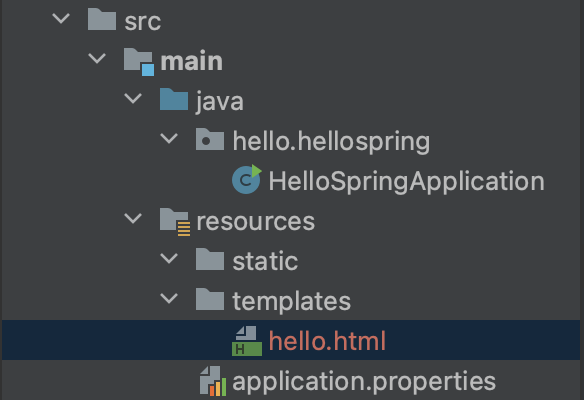
- src -> main -> resources -> static에 index.html 파일 생성
welcome page 테스트
- Test 1: static 폴더 대신에 templates 폴더에 index.html 파일 생성
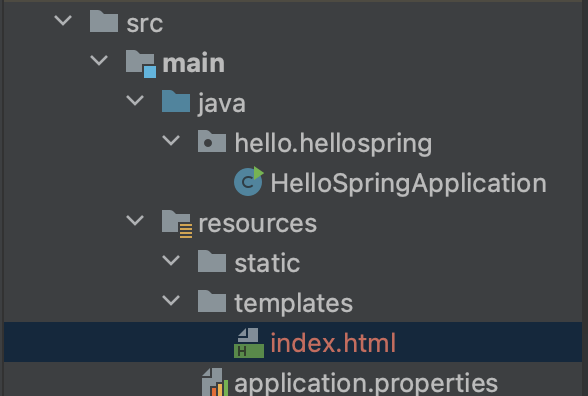
- 결과: Welcome 페이지 생성 성공
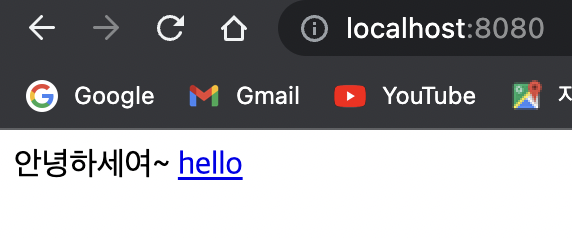
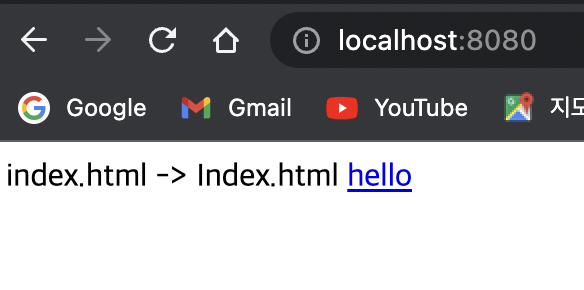
- Test 2: index.html 파일 이름을 Index.html로 변경
- 결과: Welcome 페이지 생성 성공
-
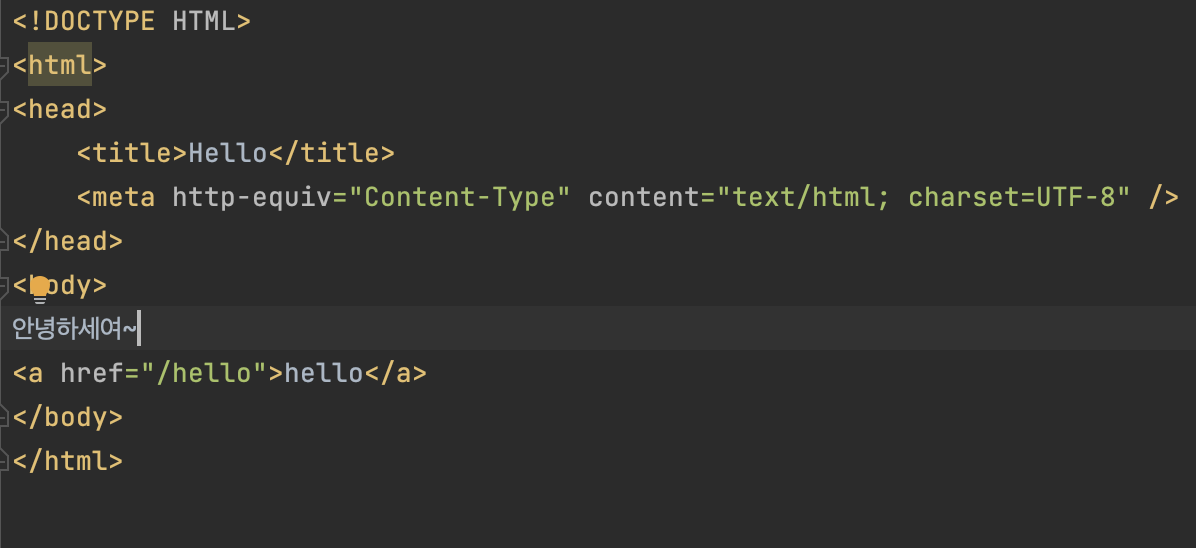
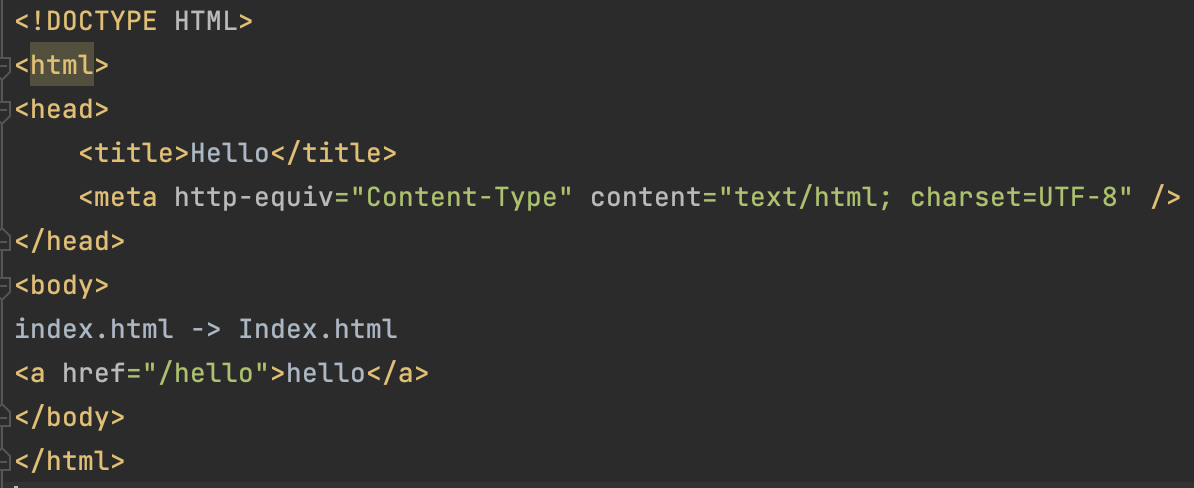
Test 3: index.html 파일 이름을 hello.html로 변경
-
결과: html 파일이 welcome page로 사용 안됨
- 결론
- welcome page를 생성하기 위해서는 파일명을 'index.html', 'Index.html'로 만들어야 한다.
- 해당 html 파일은 src -> main -> resources -> static, src -> main -> resources -> templates 둘 중 하나에 위치해야 한다.
- 위 공식문서의 내용을 생각해보면
- spring boot는 static과 templates 폴더 둘 다 Welcome page를 지원한다.
- static 폴더에서 먼저 index.html 파일을 찾는다.
- static 폴더에 없으면, templates 폴더에서 팢는다.
- 두 폴더 중 하나에서 index.html 파일이 발견되면, spring boot는 자동으로 index.html을 시작페이지로 사용한다.
thymeleaf 템플릿 엔진
-
동적인 화면을 만들 수 있다.
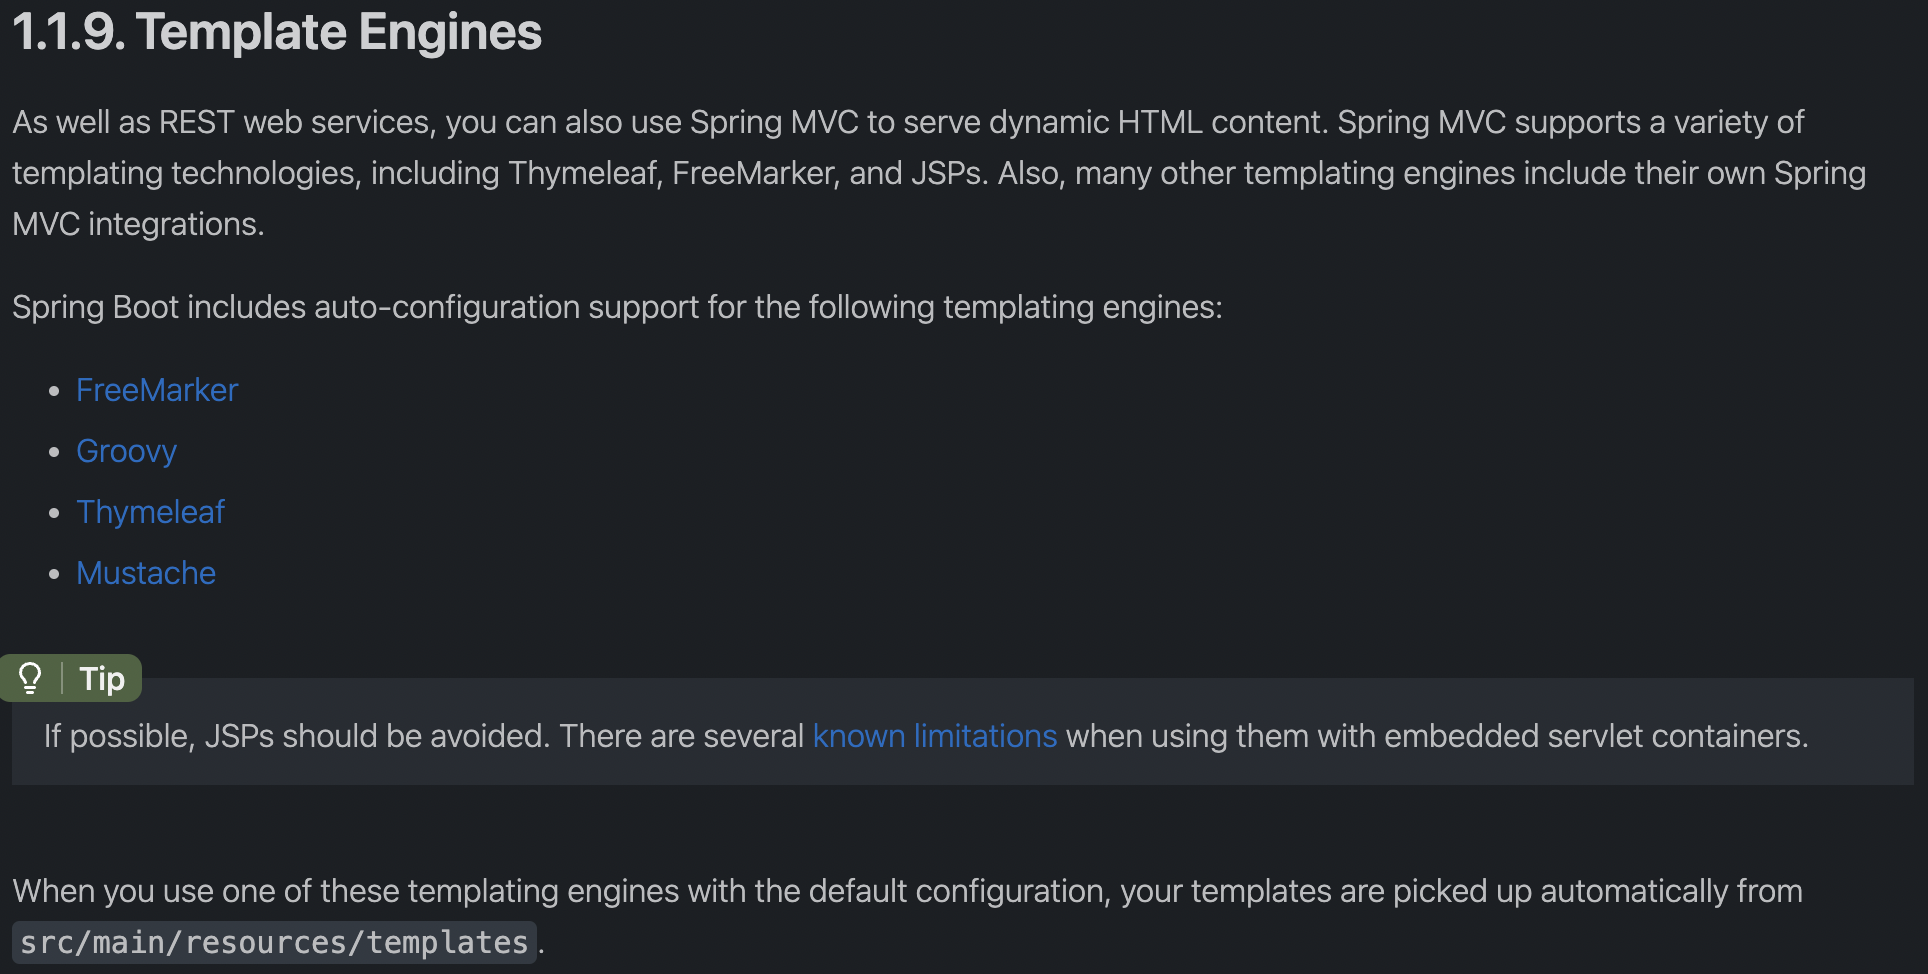
- Template Engines
As well as REST web services, you can also use Spring MVC to serve dynamic HTML content. Spring MVC supports a variety of templating technologies, including Thymeleaf, FreeMarker, and JSPs. Also, many other templating engines include their own Spring MVC integrations.
Spring Boot includes auto-configuration support for the following templating engines:
FreeMarker
Groovy
Thymeleaf
Mustache
- 템플릿 엔진
REST 웹 서비스뿐만 아니라 Spring MVC를 사용하여 동적 HTML 콘텐츠를 제공할 수도 있습니다. Spring MVC는 Thymeleaf, FreeMarker 및 JSP를 포함한 다양한 템플릿 기술을 지원합니다. 또한 다른 많은 템플릿 엔진에는 자체 Spring MVC 통합이 포함되어 있습니다. Spring Boot에는 다음 템플릿 엔진에 대한 자동 구성 지원이 포함되어 있습니다.
thymeleaf 템플릿 엔진 사용 방법 - 파일 생성
- 이제 정적인 화면에서 동적 HTML 화면을 만들어 보자.
- src -> main -> java -> project 폴더에 controller java class 파일 생성
- src -> main -> resources -> templates 폴더에 html 파일 생성
- When you use one of these templating engines with the default configuration, your templates are picked up automatically from src/main/resources/templates.
- 이러한 템플릿 엔진 중 하나를 기본 구성으로 사용하면 템플릿이 src/main/resources/templates에서 자동으로 선택됩니다.
- 공식문서에 따라, thymeleaf 엔진을 기본 구성으로 사용하고, templates의 html 파일에 thymeleaf 엔진을 선언하여 사용
thymeleaf 템플릿 엔진 사용 방법 - 동작 원리
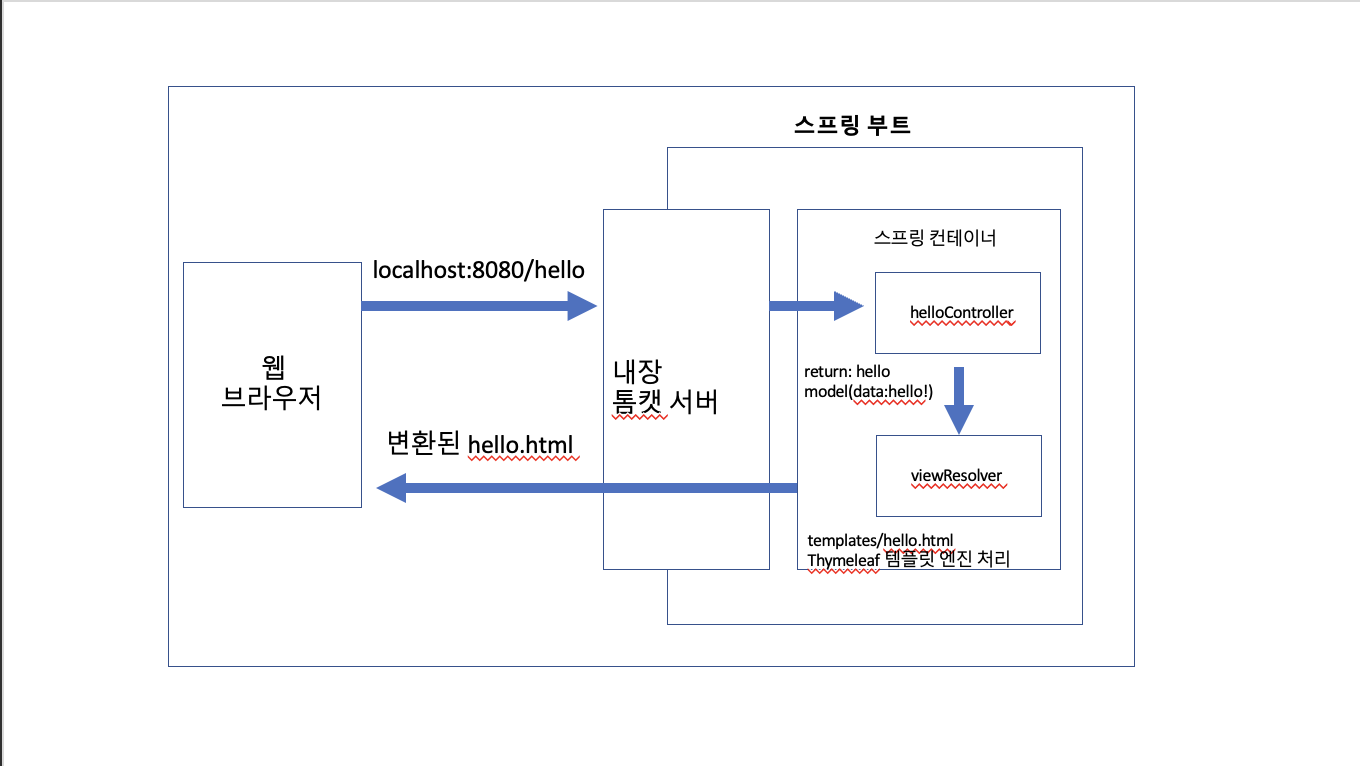
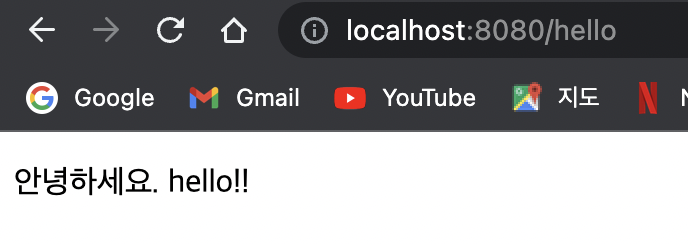
- web에서 /hello라고 처리되면(localhost:8080/hello) GetMapping(‘hello’) 메서드 호출
- 내장된 톰캣 서버에서 url 주소를 받아서 spring에게 물어봄
- http 통신에서 GetMapping은 Get 역할을 함, 이를 통해 GetMapping(‘hello’)로 url 매치
- controller의 GetMapping 메서드에서, model에 key: ”data”, value: “hello!”로 추가
- controller의 GetMapping 메서드에서, return 문자열 값은 resources -> templates -> 해당 문자열과 일치하는 파일 호출
- 이는, data를 model에 담아, hello.html 화면을 렌더링 하는 과정이다.
(controller에서 반환 값으로 문자열을 반환하면 뷰 리졸버가 화면을 찾아서 처리)
(스프링 부트 템플릿 엔진 기본 viewName 매핑 방법: ‘resources:templates’/+(ViewName)+’.html’ 방식으로 뷰 리졸버가 html 파일을 찾아 렌더링한다는 것!) - hello.html 파일에서 ${data}에 model의 key값이 ‘data’이면, 그에 따르는 value 값이 들어가게 된다.
thymeleaf 실행 화면
- hello 하이퍼링크를 클릭 시, hello.html 파일이 렌더링 되어 화면에 보임
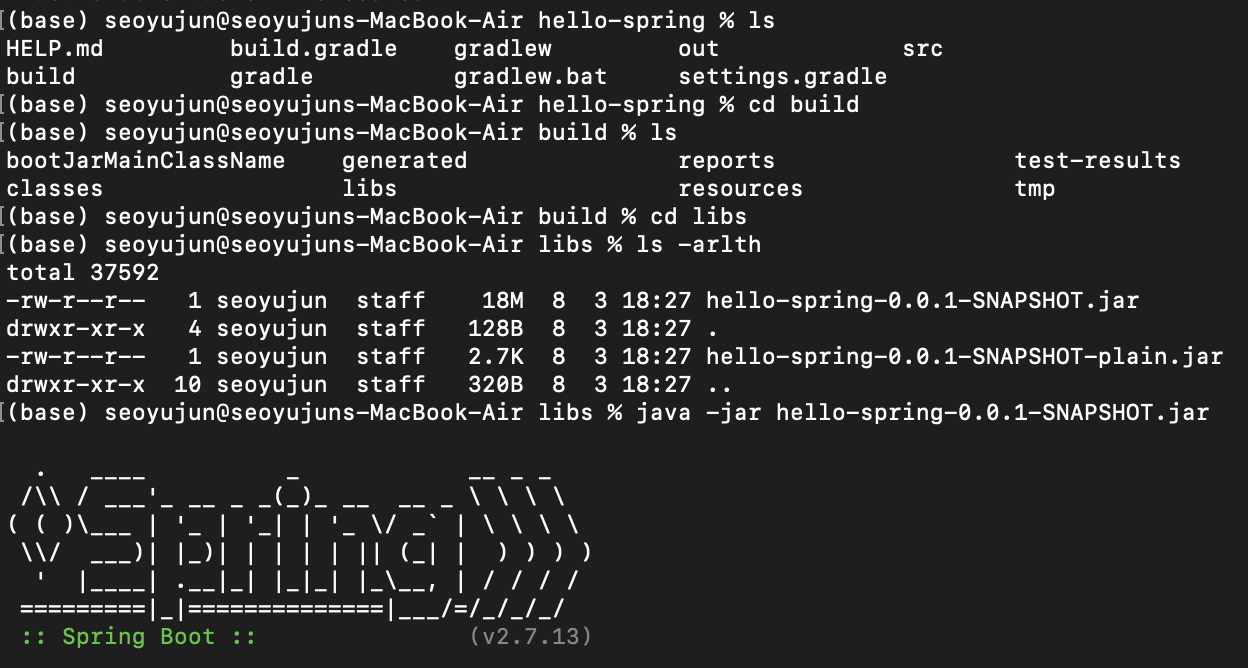
4. 빌드하고 실행하기
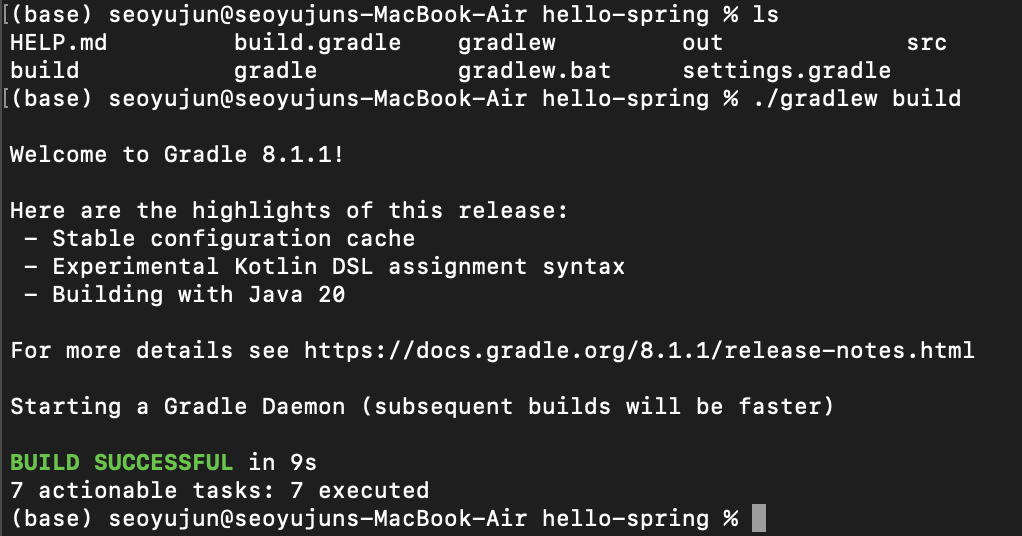
- 빌드를 하고 실제 실행할 수 있는 파일을 만들어 볼 것이다.
빌드하는 방법
- 터미널 키기
- spring 프로젝트 파일로 이동
- ./gradlew build (build 안될 시, ./gradlew clean -> ./gradlew build)로
빌드 파일 터미널에서 실행하는 방법(m1)
- build 폴더로 이동
- libs 파일로 이동
- ls -arlth로 파일 확인
- java -jar (파일 이름)으로 파일 실행
- control + c로 실행 종료