오늘은 animation효과를 주는 법을 알아보겠습니다.
그전에 css 의 keyframes의 정의에 대하여 가볍게 알아보겠습니다.
keyframes : 애니메이션 중간에 스타일이 바뀌는 지점을 의미합니다. keyframes 속성을 정의한후, animation속성과 그 하위 속성을 이용해서 애니메이션의 실행 시간이나 반복 여부 등을 지정합니다.
리액트 styled components에서 props를 사용하여 애니메이션을 사용할 수 있습니다.
import styled, { keyframes } from 'styled-components';styled component에서 animation효과를 사용하기 위해 위 코드를 먼저 넣어줍니다.
helper function을 import해줍니다.
어떤 함수가 리턴하는 값을 또 다른 함수 내에서 활용할 수 있다. 이렇게 함수 내에 호출되는 또 다른 함수를 Helper Function이라고 한다
const animation = keyframes`
  0% {
    transform:rotate(0deg);
    border-radius:0px;
  }
  50% {
    border-radius:100px;
  }
  100%{
    transform:rotate(360deg);
    border-radius:0px;
  }
`;

const Box = styled.div`
  height: 200px;
  width: 200px;
  background-color: tomato;
  animation:${animation} 1s linear infinite; //1초동안 선형 무한 속성값주기
`;
keyframes를 작성하고 back-tick안에 사용하고자 하는 애니메이션 효과를 작성해 줍니다.
animation:${animation}
js의 string interpolation을 사용하여 animation을 넣어준다
js의 string interpolation이란
animation : keyframes이름 | 전체진행시간 | 지연시간 | 반복횟수
- animation-duration: <시간>
animation-duration 속성에서 사용할 수 있는 값은 초(s)나 밀리초(ms)와 같은 시간 단위 입니다. 기본값은 0이므로 animation-duration속성값을 정하지 않으면 애니메이션은 실행 되지 않습니다.- transition-timing-function : linear | ease | ease-in |ease-out | ease-in-out | cubic-bezier(n,n,n,n)
- animation-iteration-count : <숫자> |infinite
component에서 selector를 하나 더 사용하는 방법
function App() {
  return (
  <Wrapper>
    <Box>
      <span>☺️</span>
    </Box>
  </Wrapper>
  );
}
보다시피 Box component안에 span 태그를 넣어주었다.
const Box = styled.div`
  height: 200px;
  width: 200px;
  background-color: tomato;
  display:flex;
  justify-content: center;
  align-items: center;
  animation:${animation} 1s linear infinite;
  `;
이 span 태그는 styled component안에 있지 않다
그렇다면 styled component로 span 태그를 선택하고 싶다면 어떻게 해야 할까?
Box의 styled component안에 span을 추가해주면 된다.
span{ //box 안에 있는 span을 선택 할 수 있게 된다. -> 꼭 모든 component에 styled component처리를 해주는 것이 아니라 한 component 만 styled 처리 해주고 다른 건 target 처리 해준다.
      font-size: 36px; //box안에 span을 target처리 해주고 이를 통해 box안의 span의 font-size를 변경해주고 있다.
      &:hover{
        font-size:40px;
      }
      &:active{
        opacity: 0; //pseudo selector
      }
  }
이렇게 함으로써 span을 target 하여 span 태그에 style을 지정할 수 있게 된다.
위의 코드에서 주목해봐야 할 점이 있다 바로 & 인데
&는 pseudo selector로 span:hover라고 사용하는 것과 똑같은 동작 방식을 지니고 있다.
이를 통해 우리는 모든것이 component로 쓰일 필요가 없다는 것을 알 수 있다.
function App() {
  return (
    <Wrapper>
      <Box>
        <span>☺️</span>
      </Box>
    </Wrapper>
  );
}
이코드에서 만약 span tag 가 아닌 a 태그로 바꾸면 어떻게 될까? 위에 작성한 styled component는 이모지에 적용되지 않는 것을 확인할 수 있다. 왜냐하면 우리가 지금까지 짠 코드는 태그명에 의존하고 있기 때문이다.
그럼 태그명에 의존하지 않고 이모지에 스타일을 적용 할 수 있는 방법은 무엇이 있을까?
이 경우 우리만의 이모지 styled component를 만들면 된다. 그후 box 안에서 이모지 styled component를 선택하면 된다.
const Emoji = styled.span`
  font-size: 36px;
`;
이렇게만 쓸 경우 span 태그에 의존을 받는다 따라서 우리가 다른태그를 쓸경우 이모지에는 아무런 효과도 적용 되지 않는다. 그럼 어떻게 해야할까?
 ${Emoji} :hover{
        font-size:98px;
      } //${Emoji}로 작성할 경우 이모지의 태그의 영향을 받지 않게된다.->emoji스타일을 target하고 있기 때문
      //styled component자체를 target하고 있는 것이다.
  `;
${Emoji}로 작성함으로써 태그에 구애받지 않고 이모지에 효과를 적용 할 수 있다.
function App() {
return (
<Wrapper>
<Box>
<Emoji as="a">☺️</Emoji>
</Box>
<Emoji>🔥</Emoji>
</Wrapper>
);
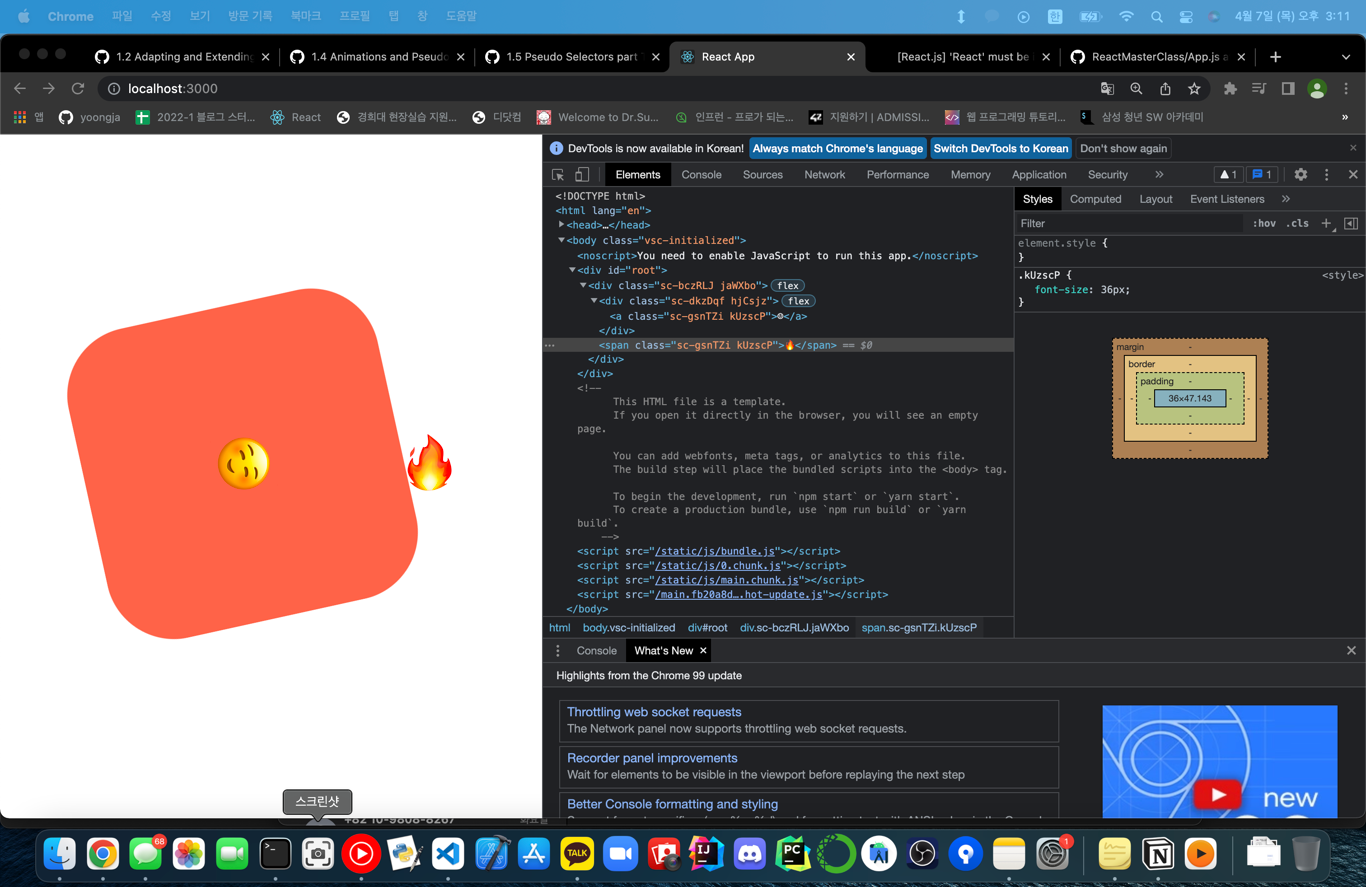
} box component밖에 emoji를 사용함으로써 if-else효과를 낼 수도 있다. 결과 화면을 보면 두가지를 주목할 수 있다. box componetn밖에 있어 효과가 적용되지 않는 🔥이모지와,
a태그로 바뀌었는데도 style 효과가 적용되는 ☺️이모지를 확인 할 수 있다.