내용
: EC2 서버를 이용하여 웹에서 이름과 나이를 입력받
아서 postgresql로 넣기
웹 서버
1) Flask, html을 웹 화면 만들기
main.py
from flask import Flask, render_template, request, url_for
import pandas as pd

app = Flask(__name__)
app.jinja_env.add_extension('jinja2.ext.loopcontrols')

@app.route("/")
def root():
    return render_template("main.html")

@app.route("/db")
def db():
    myname = request.args['myname']
    age = request.args['age']
    return_txt = f"{myname}의 정보가 입력되었습니다. 나이는 {age}세"
    return return_txt

if __name__ == "__main__":
app.run(host = '0.0.0.0', port = 3600, debug= True)- html파일은 꼭 templates안에 있어야 함
main.html
<!DOCTYPE html>
<html lang="en">
<head>
    <meta charset="UTF-8">
    <meta name="viewpoint" content="width=device-width, initial-scale=1.0">
</head>
<body>
    <form action = "/db" method="get">
        이름을 입력하시오 :  <input type = "text" name = "myname">
        <br><br>
        나이를 입력하시오 :  <input type = "number" name = "age">
        <br><br>
        <button>입력</button>

    </form>

</body>
</html>
2) 이를 EC2로 옮겨서 EC2 서버 사용하기
- 보안그룹에서 port 열어주기
결과 : 내 ec2 서버의 퍼블릭 ip:포트번호 웹에 넣어서 확인하기
| / | /db |
|---|---|
 |  |
|
3) gunicorn과 nginx 연결시켜주기
- gunicorn 백그라운드 실행
nohup gunicorn main:app --bind 127.0.0.1:3600 >& /dev/null &- nginx 연결 : proxy_pass 이용하여 내 자신 포트로 연동시켜주기
location / {
                # First attempt to serve request as file, then
                # as directory, then fall back to displaying a 404.
                #try_files $uri $uri/ =404;
                proxy_pass http://127.0.0.1:3600;
        }
4) ec2 보안그룹 변경해주기
- 이제 nginx 와 연동되었기 때문에 80번 포트만 열여줘도 되기 때문에 실습때매 열어놨던 3600번 포트는 닫아주고 80번 포트 열어주기
DB 연동
postgresql과 연동
DB 생성
1) postgresql의 flask 유저 생성
postgresql 계정에서 실행
createuser --interactive
2) flask 유저의 비밀번호 생성
psql 안에서 실행
ALTER USER flask WITH PASSWORD '설정비번';3) DB 생성
- db 이름 : flask_db
- psql안에서 실행
- owner를 flask로 설정해주기
create database flask_db owner flask;4) DB로 들어가기
\c flask_db flask-> 여기서 만약 FATAL: Peer authentication failed for user "flask" 이런 오류가 뜬다면,
/etc/postgresql/16/main/pg_hba.conf 파일 변경해주기
원래는 주석 처리 되어있는 것이 디폴트 값이지만, md5로 변경해서 다시 들어가주기

4) table 생성
- 간단하게 이름과 나이만 들어갈 수 있도록 생성
- table 이름은 info
CREATE TABLE info(id SERIAL PRIMARY KEY,
name varchar(255),
age NUMERIC);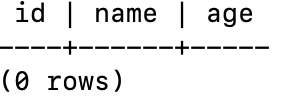
sqlalchemy 사용
- DB와 python 연동
1) 데이터 베이스와 연결을 맺는 엔진 생성
- dialect+driver://username:password@host:port/database 의 형태를 가짐
- driver 지정해주지 않으면 기본값으로 가게 됨
from sqlalchemy import create_engine

engine = create_engine("postgresql+psycopg2://계정이름:계정비번@host:port번호/db이름")
2) DB에 insert 쿼리문 실행 되도록 수정
from sqlalchemy import create_engine, text


engine = create_engine("postgresql://flask:flask@127.0.0.1:5432/flask_db")

with engine.connect() as connection:
    result = connection.execute(text("insert into info (id, name, age) values (3, 'yoonjae3',24);"))
connection.commit()- 이를 main.py와 연동시켜줄 필요가 있음
main, sqlalchemy 연동
from flask import Flask, render_template, request, url_for
import pandas as pd
from sqlalchemy import create_engine, text

app = Flask(__name__)
app.jinja_env.add_extension('jinja2.ext.loopcontrols')

#create engine
engine = create_engine("postgresql://flask:flask@127.0.0.1:5432/flask_db")

@app.route("/")
def root():
    return render_template("main.html")

@app.route("/db")
def db():
    myname = request.args['myname']
    age = request.args['age']
    with engine.connect() as connection:
        len_info =[i[0] for i in connection.execute(text("select count(name)  from info"))]
        connection.exec_driver_sql('INSERT INTO info (id, name, age) VALUES (%(id)s, %(name)s, %(age)s)',
                                   [{"id":len_info[0] + 1, "name":myname, "age":age}] )

        connection.commit()
    return_txt = f"{myname}의 정보가 저장되었습니다."
    return return_txt

if __name__ == "__main__":
    app.run(host = '0.0.0.0', port = 3600, debug= True)
위의 insert 쿼리문으로 실행 했을 때에는 문제가 많이 발생되는 것을 확인하고 찾아본 결과 insert는 보안의 문제로 인해서 f 스트링을 통해서 넣지 않는 것을 알았음.
따라서 변수를 가지고 insert를 하기 위해서는 아래 코드를 활용해야함
with engine.connect() as connection:
        connection.exec_driver_sql('INSERT INTO info (id, name, age) VALUES (%(id)s, %(name)s, %(age)s)',
                                   [{"id":len_info[0] + 1, "name":myname, "age":age}] )

connection.commit()- list안에 딕셔너리 형태로 들어가기 때문에 여러개의 정보를 넣을 수 있음

신윤재입니다