
terraform 으로 인프라 설정
main.tf
provider "aws" {
region = "ap-northeast-2"
}
variable "instance_count" {
default = 1
}
variable "instance_type" {
default = "t3.medium"
}
resource "aws_vpc" "main" {
cidr_block = "192.169.0.0/16"
tags = {
Name = "main-vpc"
}
}
resource "aws_subnet" "main_2a" {
vpc_id = aws_vpc.main.id
cidr_block = "192.169.1.0/24"
availability_zone = "ap-northeast-2a"
map_public_ip_on_launch = true
tags = {
Name = "main-subnet-2a"
}
}
resource "aws_subnet" "main_2c" {
vpc_id = aws_vpc.main.id
cidr_block = "192.169.2.0/24"
availability_zone = "ap-northeast-2c"
map_public_ip_on_launch = true
tags = {
Name = "main-subnet-2c"
}
}
resource "aws_internet_gateway" "main" {
vpc_id = aws_vpc.main.id
tags = {
Name = "main-igw"
}
}
resource "aws_route_table" "main" {
vpc_id = aws_vpc.main.id
route {
cidr_block = "0.0.0.0/0"
gateway_id = aws_internet_gateway.main.id
}
tags = {
Name = "main-route-table"
}
}
resource "aws_route_table_association" "main_2a" {
subnet_id = aws_subnet.main_2a.id
route_table_id = aws_route_table.main.id
}
resource "aws_route_table_association" "main_2c" {
subnet_id = aws_subnet.main_2c.id
route_table_id = aws_route_table.main.id
}
resource "aws_security_group" "main" {
vpc_id = aws_vpc.main.id
ingress {
from_port = 22
to_port = 22
protocol = "tcp"
cidr_blocks = ["0.0.0.0/0"]
}
egress {
from_port = 0
to_port = 0
protocol = "-1"
cidr_blocks = ["0.0.0.0/0"]
}
tags = {
Name = "main-sg"
}
}
resource "aws_instance" "web" {
count = var.instance_count
ami = "ami-062cf18d655c0b1e8"
instance_type = var.instance_type
key_name = "kakao-tech-bootcamp"
subnet_id = element([aws_subnet.main_2a.id, aws_subnet.main_2c.id], count.index % 2)
vpc_security_group_ids = [aws_security_group.main.id]
tags = {
Name = "jenkins-${count.index}"
}
}
output "instance_ips" {
value = aws_instance.web.*.public_ip
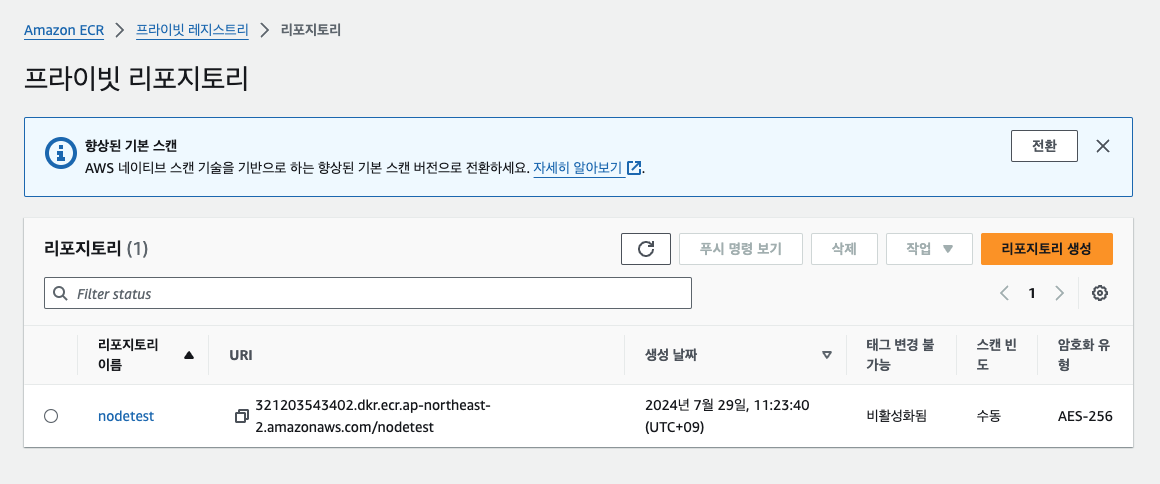
}ECR
Amazon Elastic Container Registry
프라이빗 레지스트리-리포지토리를 만든다.
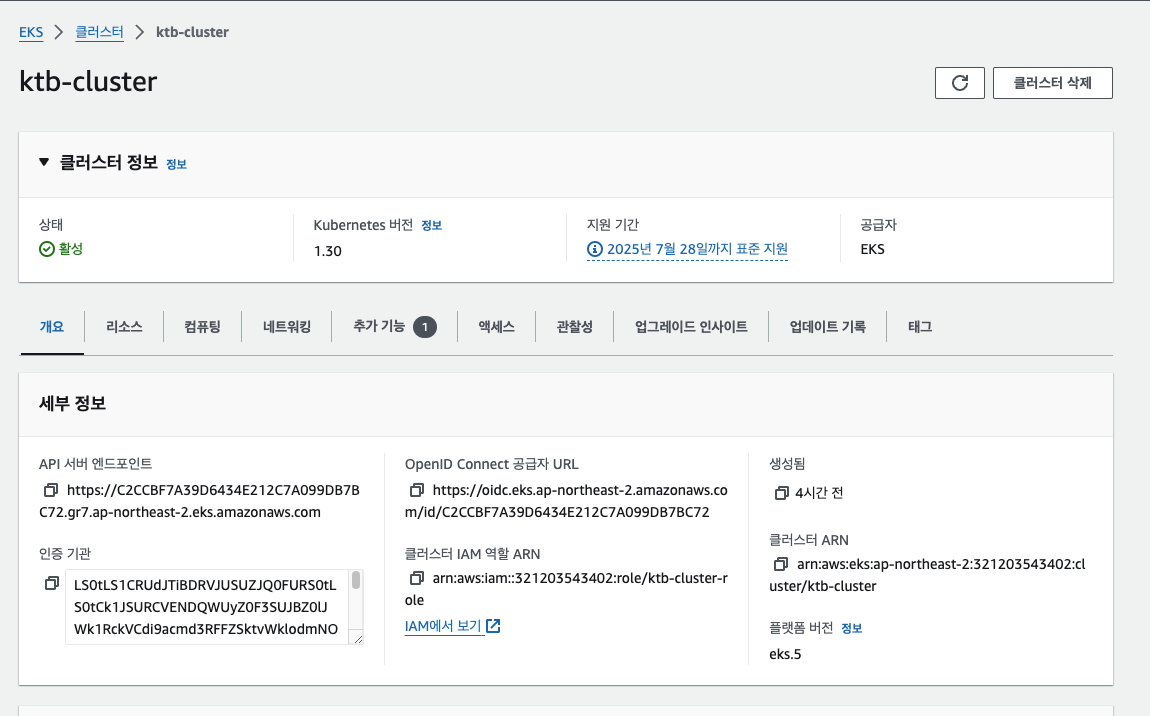
EKS
클러스터 추가시 t3.medium 으로 해야 ci/cd 가 진행되도 중간에 멈추지 않는다. micro는 성능 부족
Jenkins
초기 설정 화면
wget -q -O - https://pkg.jenkins.io/debian/jenkins.io.key | sudo apt-key add -
sudo sh -c 'echo deb http://pkg.jenkins.io/debianstable binary/ > /etc/apt/sources.list.d/jenkins.list' sudo apt update
sudo apt install jenkins openjdk-11-jdk docker.io -y
sudo chown jenkins-jenkins /var/run/docker.sock
sudo systemctl enable jenkins
sudo systemctl start jenkins
파이프라인 설정
pipeline {
    agent any

    environment {
        REPO = '<본인깃허브주소>'
        ECR_REPO = '<본인ecr레포 uri>'
        ECR_CREDENTIALS_ID = 'ecr:ap-northeast-2:ecr_credentials_id'
    }

    stages {
        stage('Checkout') {
            steps {
                git branch: 'main', url: "https://github.com/${REPO}.git"
            }
        }

        stage('Build Docker Image') {
            steps {
                script {
                    dockerImage = docker.build("${ECR_REPO}:latest")
                }
            }
        }

        stage('Push to ECR') {
            steps {
                script {
                    docker.withRegistry("https://${ECR_REPO}", "$ECR_CREDENTIALS_ID") {
                        dockerImage.push('latest')
                    }
                }
            }
        }
    }
}
• public-ip:8080 접속
sudo cat /var/lib/jenkins/secrets/initialAdminPassword
• Install suggested plugins 선택
• Jenkins 관리 - Plugins - Available plugins
• GitHub Integration, Docker Pipeline, Amazon ECR, AWS Credentials 위 4개의 플러그인 설치 및 플러그인 설치 시 Jenkins 재시작 체크
github webhook
https://github.com/yoonseopkim/nodetest.git 저장소 fork해오기
• ECR에 nodetest로 repository 생성
• 레포 Settings - Webhooks - Add webhook
• Payload URL: http://<JENKINS_SERVER_IP>:8080/githubwebhook/ Content type: application/json
Secret: 빈칸
Just the push event 선택
• 우측 상단 프로필 클릭 - settings 선택 - Developer Settings - Personal access tokens - Tokens (classic) Note : 아무거나 - Expiration : 7 days - Select scopes repo 전체 선택, adminrepo_hook 전체 선택
• Generate Token - ghp_XXX 토큰 복사
Jenkins 대시보드 - Jenkins 관리 - System - Github Server 검색 - +Add - Credential 생성 - Secret에 ghp_XXX 토큰 붙여넣기
• Manage hooks 체크 후 저장 (이름은 상관없음)
jenkins credential 세팅
• Jenkins 관리 - Credentials - (global) 클릭 - Kind : AWS Credentials 선택
• ID: ecr_credentials_id
• ACCESS_KEY_ID 입력, SECRET_ACCESS_KEY 입력
• Jenkins 메인페이지에서 좌측 새로운 Item 클릭 - Pipeline 선택 후 OK GitHub project - Project url : github.com/userid/reponame GitHub hook trigger for GITScm polling 체크
• JenkinsPipeline코드는edu에서복사
• Definition: Pipeline script 선택 후 붙여넣기
deployment.yaml
apiVersion: apps/v1
kind: Deployment
metadata:
  name: nodetest
  labels:
    app: nodetest
spec:
  replicas: 1
  selector:
    matchLabels:
      app: nodetest
  template:
    metadata:
      labels:
        app: nodetest
    spec:
      containers:
      - name: nodetest
        image: your-aws-account-id.dkr.ecr.ap-northeast-2.amazonaws.com/nodetest:latest
        ports:
        - containerPort: 80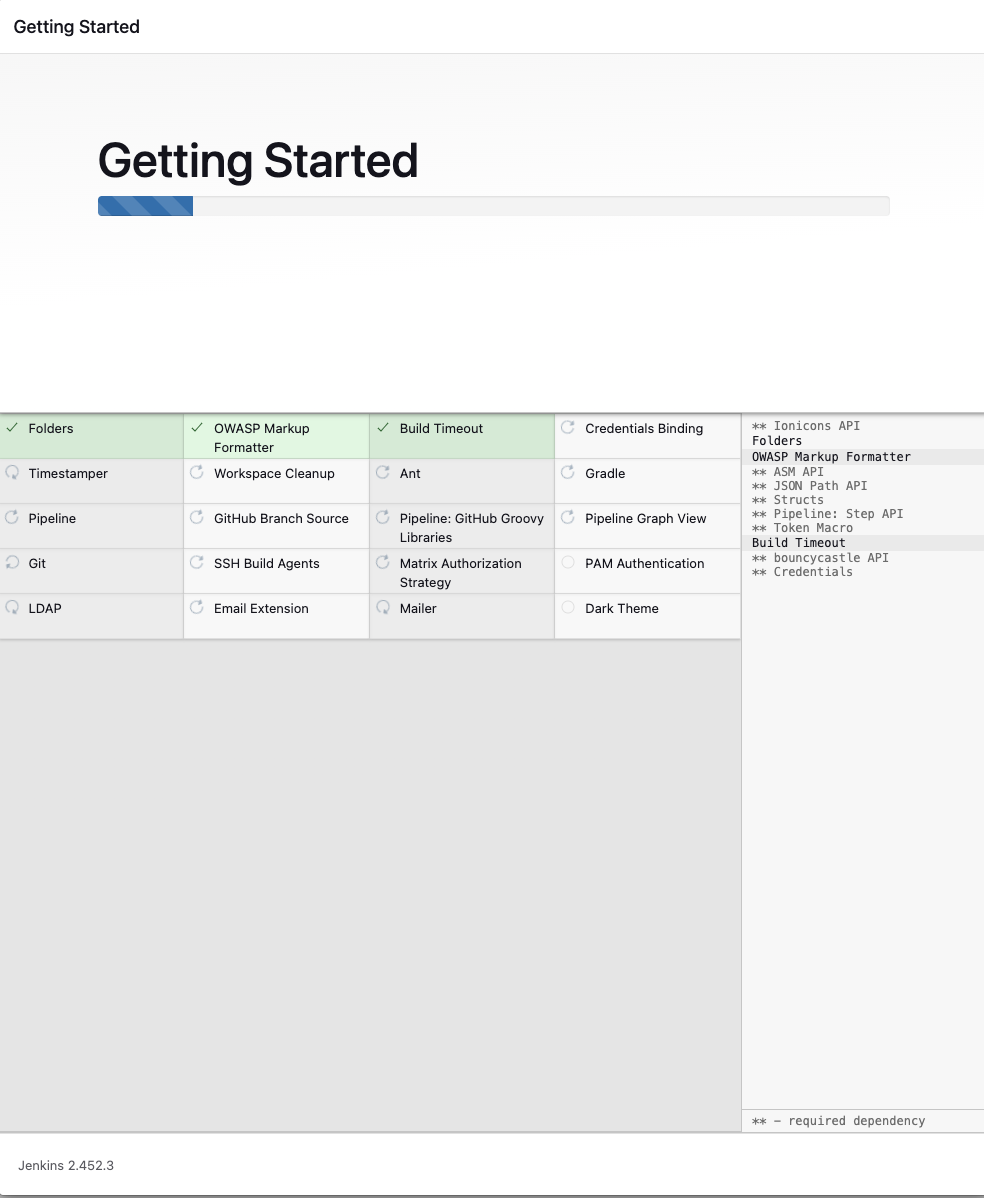
sudo apt install -y unzip
curl "https://awscli.amazonaws.com/awscli-exe-linux-x86_64.zip" -o "awscliv2.zip"
unzip awscliv2.zip
sudo ./aws/install
aws configure
curl -LO "https://storage.googleapis.com/kubernetes-release/release/$(curl -s https://storage.googleapis.com/kubernetes-release/release/stable.txt)/bin/linux/amd64/kubectl" chmod +x ./kubectl
sudo mv ./kubectl /usr/local/bin/kubectl
aws eks update-kubeconfig --region ap-northeast-2 --name your-cluster
kubectl apply -f deployment.yaml
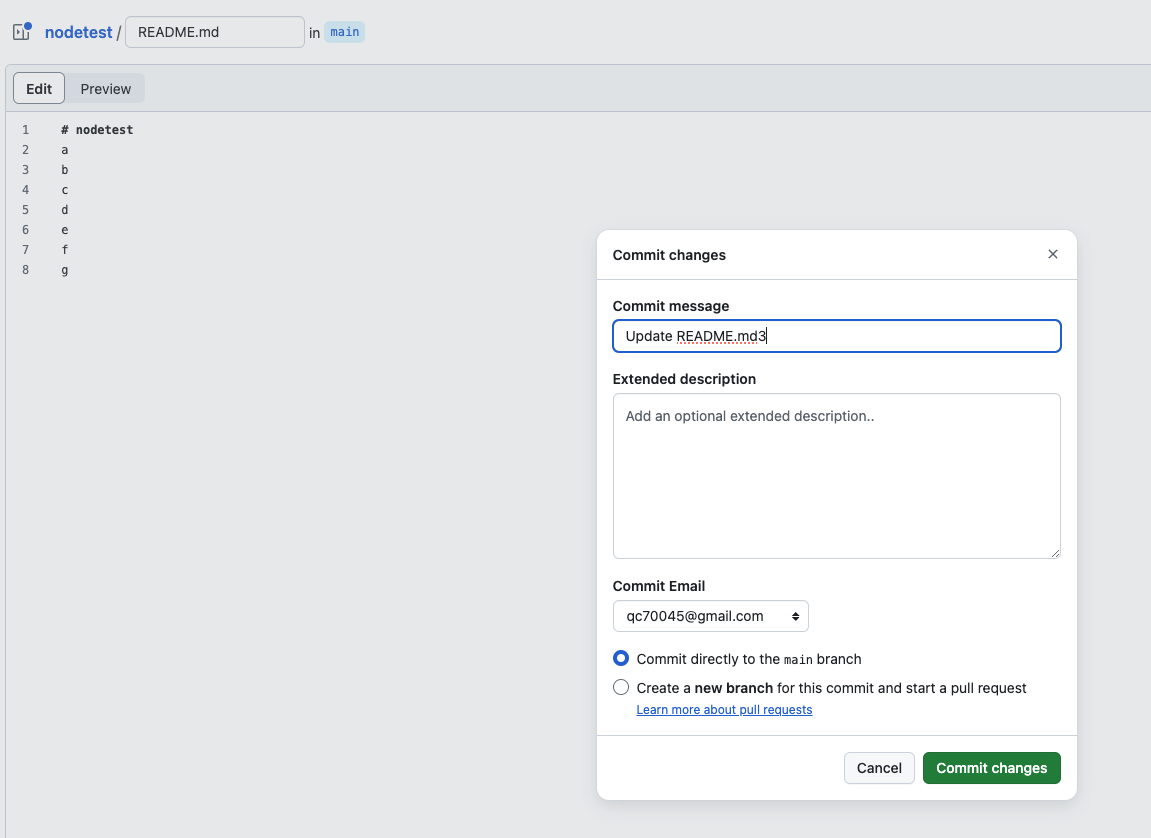
kubectl get podsReadme.md 파일을 수정할때마다 자동으로 빌드가 실행된다.
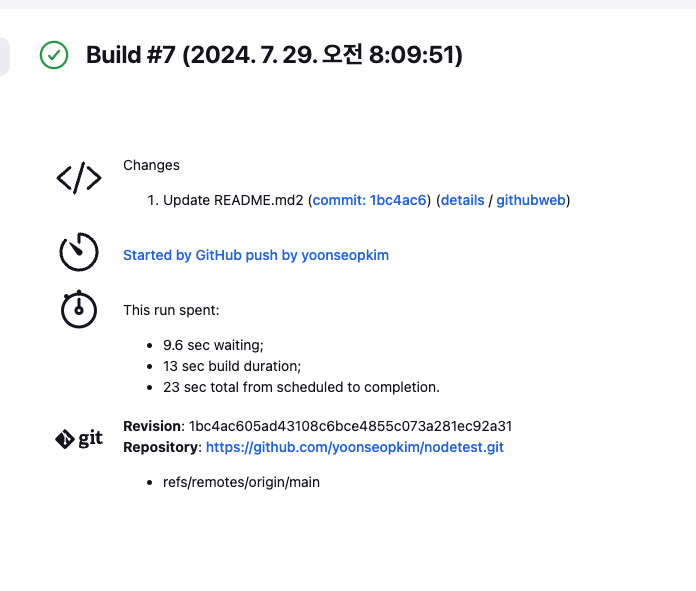
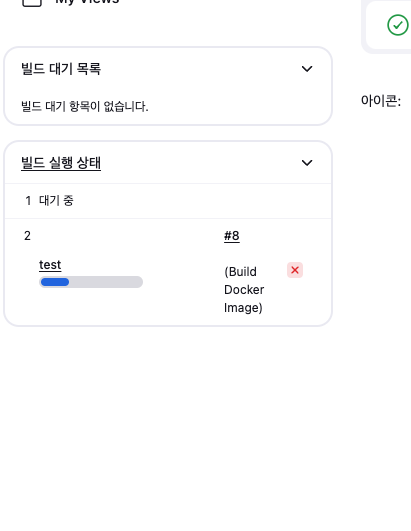
한번더 진행해보면
대시보드에서 바로 빌드가 시작되는 것을 확인할 수 있고
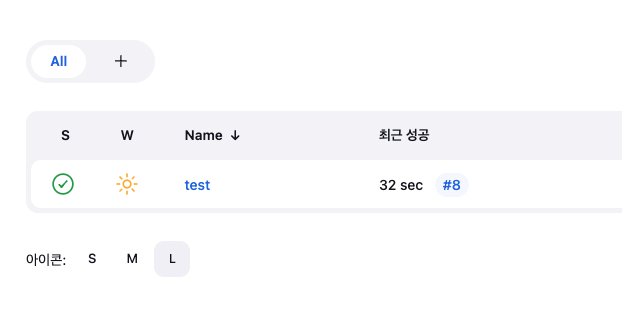
최근성공이 #7 에서 #8로 된 것을 알 수 있다.
상세항목을 보면 최근 커밋한 내역이 나온다.
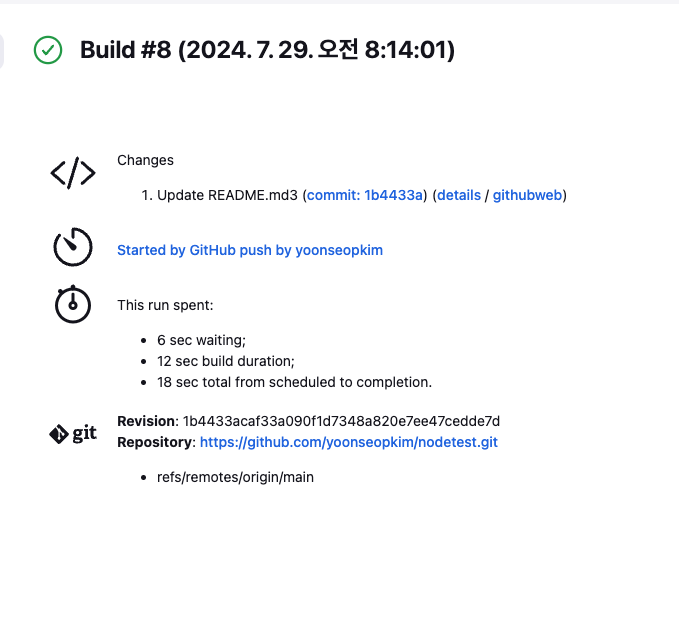
이로서 CI/CD 파이프라인이 성공적으로 구성된 것을 알 수 있다.
정리
배포의 과정중 하나인 git commit 과정을 자동으로 모니터링하고 빌드시켜주는 jenkins라는 도구를 통해 ci/cd 중 ci에 관한 개념을 이해하고 적용해볼 수 있었다.
추후에는 slack과 같은 메신저 도구와 연동하여 빌드 결과 알림을 알려주게 하는 앱도 만들어 볼 계획이다.