
개요
microk8s 로 진행
pods
replicasets
deployments
jobs
cronjobs
daemonset
pod
쿠버네티스에서 생성하고 관리할 수 있는 배포 가능한 가장 작은 단위
마이크로 k8s 설치
sudo snap install microk8s --classic --channel=1.30노드 추가 및 클러스터 상태확인
노드에 대한 개념
Node == vm == worker node == server == ec2 == instance
microk8s add-node
kubectl get nodes -o wide
특정 파드 조회
kubectl edit pods [pod 이름]DaemonSet 조회
kubectl get daemonset리소스 삭제
kubectl delete -f [file]
pod 조회하기
microk8s kubectl get pods -A
microk8s 와 쿠버네티스 명령어 맞추기 위한 설정
alias kubectl='microk8s kubectl'확인해보기
kubectl get pods -A아까와 같은 화면이 나온다.

클러스터 조회
kubectl cluster-info

현재 컨텍스트와 설정 확인
kubectl config view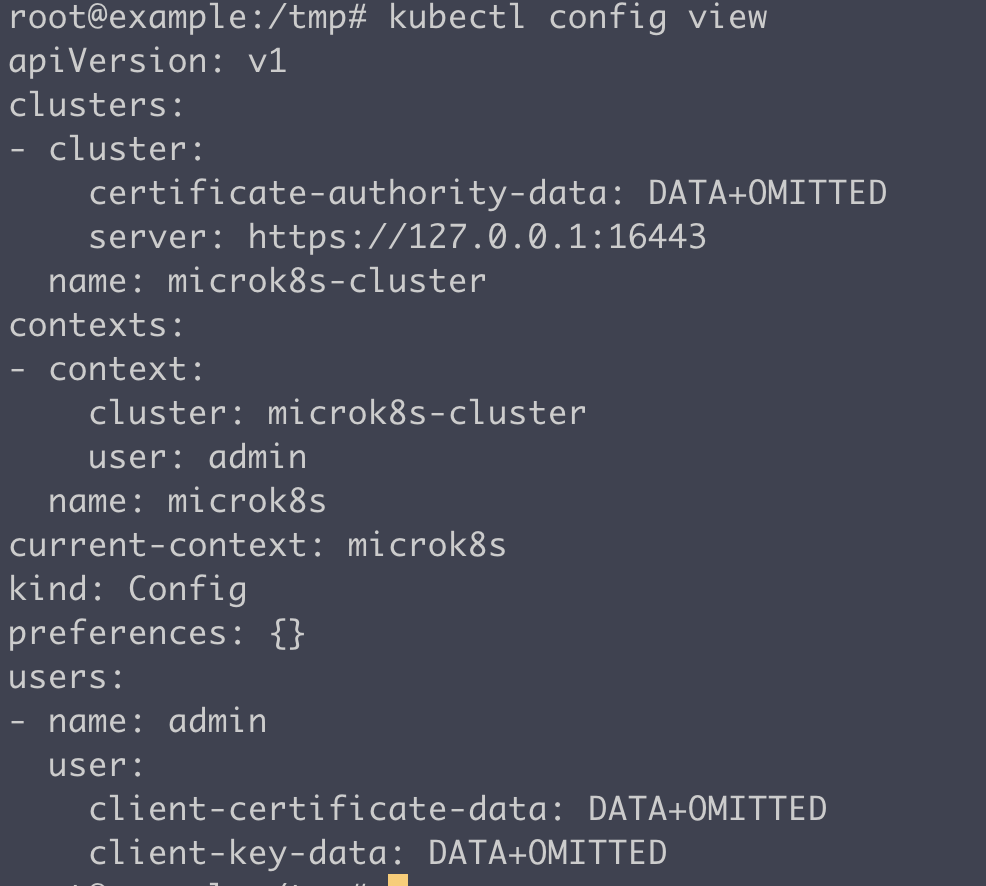
현재 사용중인 컨텍스트
kubectl config current-context

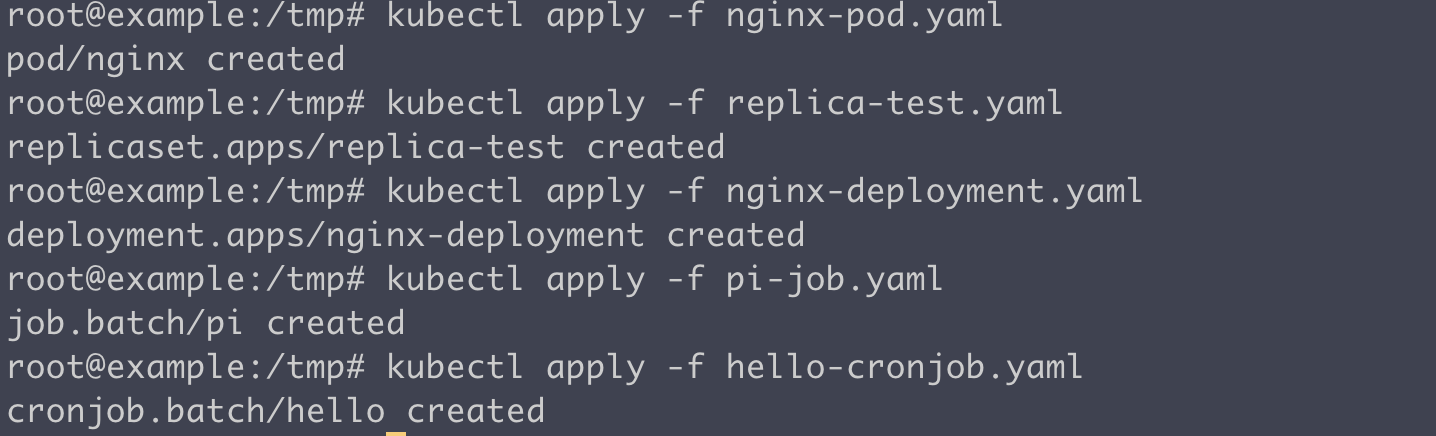
pod 생성해보기
kubectl apply -f nginx-pod.yamlapiVersion: v1
kind: Pod
metadata:
name: nginx
spec:
containers:
- name: nginx
image: nginx:1.14.2
ports:
- containerPort: 80ReplicaSet 생성
kubectl apply -f replica-test.yamlapiVersion: apps/v1
kind: ReplicaSet
metadata:
name: replica-test
labels:
tier: replica-test
spec:
replicas: 3
selector:
matchLabels:
tier: replica-test
template:
metadata:
labels:
tier: replica-test
spec:
containers:
- name: nginx
image: nginxDeployment 생성
kubectl apply -f nginx-deployment.yamlapiVersion: apps/v1
kind: Deployment
metadata:
name: nginx-deployment
labels:
app: nginx
spec:
replicas: 3
selector:
matchLabels:
app: nginx
template:
metadata:
labels:
app: nginx
spec:
containers:
- name: nginx
image: nginx:1.14.2
ports:
- containerPort: 80Job 생성
kubectl apply -f pi-job.yamlapiVersion: batch/v1
kind: Job
metadata:
name: pi
spec:
template:
spec:
containers:
- name: pi
image: alpine
command: ["echo", "-n", "helloooooo"]
restartPolicy: Never
backoffLimit: 4CronJob 생성
kubectl apply -f hello-cronjob.yamlapiVersion: batch/v1
kind: CronJob
metadata:
name: hello
spec:
schedule: "*/1 * * * *"
jobTemplate:
spec:
template:
spec:
containers:
- name: hello
image: busybox:1.28
imagePullPolicy: IfNotPresent
command:
- /bin/sh
- -c
- date; echo Hello from the Kubernetes cluster
restartPolicy: OnFailure
Daemonset 생성
kubectl apply -f daemonset.yaml
apiVersion: apps/v1
kind: DaemonSet
metadata:
  name: fluentd-daemonset
  labels:
    app: fluentd
spec:
  selector:
    matchLabels:
      app: fluentd
  template:
    metadata:
      labels:
        app: fluentd
    spec:
      containers:
      - name: fluentd
        image: fluent/fluentd:v1.11.5
        ports:
        - containerPort: 24224
생성하고 확인
확인해보는 코드
kubectl get pods
kubectl get replicasets
kubectl get deployments  #replicas 수만큼 배포
kubectl get jobs
kubectl get cronjobs
kubectl get daemonset  #마스터+워커 노드 갯수만큼 배포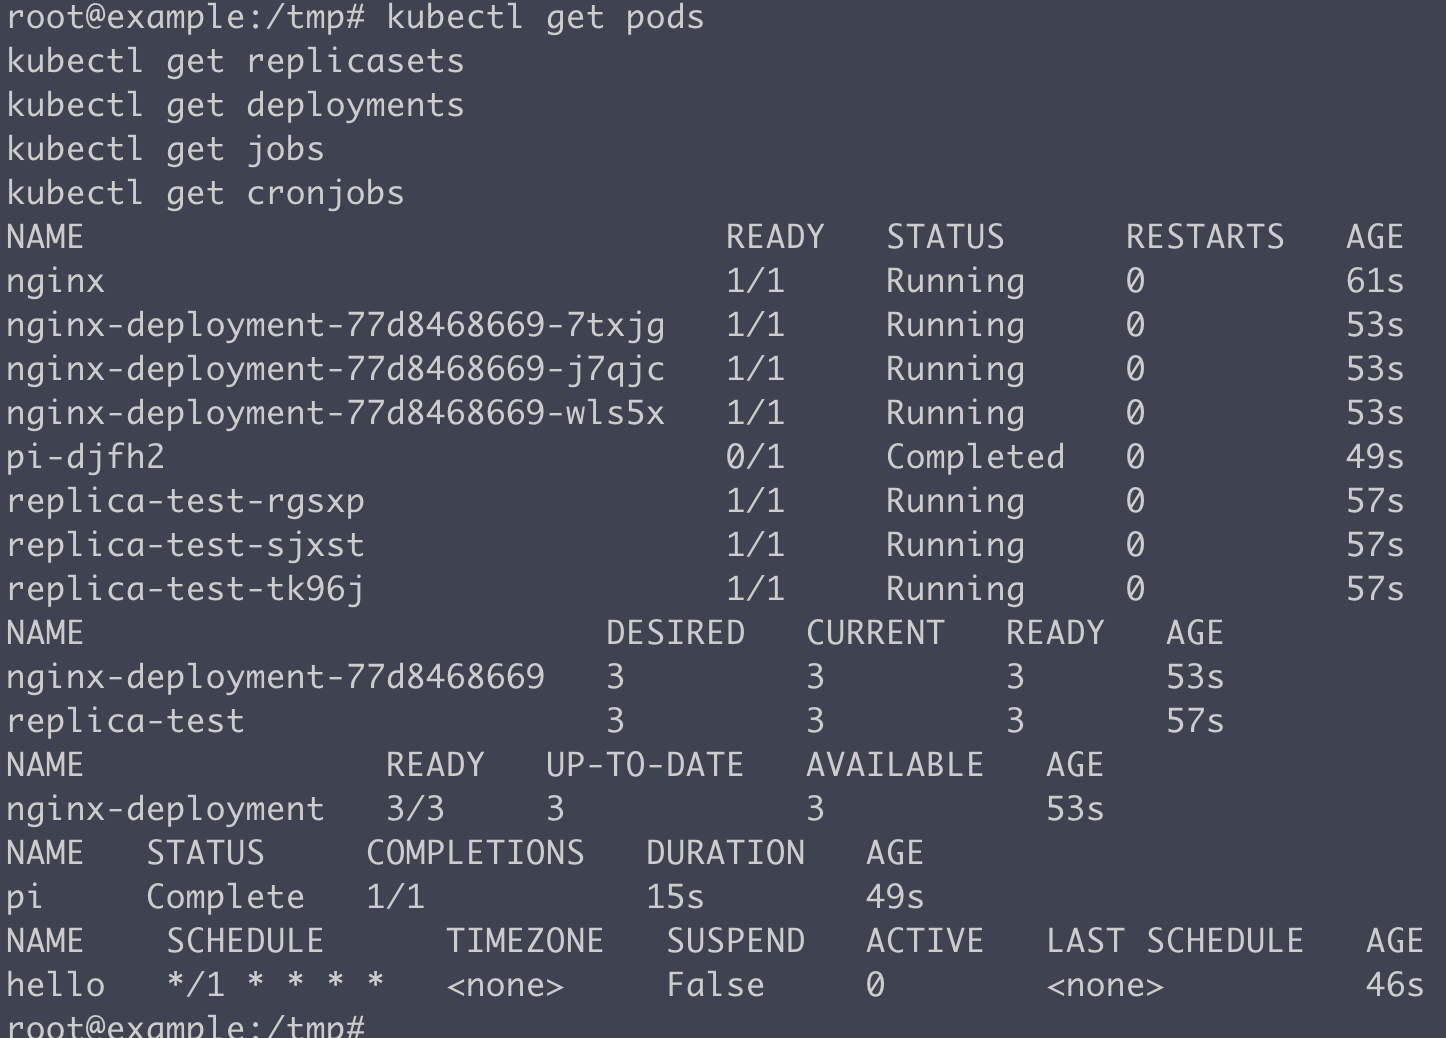
리소스 삭제
kubectl delete -f [file]worker node, master node 연결
master node에서 다음 명령어를 실행
microk8s add-node여러 방법으로 노드에 접속할 수 있다.

워커 노드에서 다음과 같은 결과가 나오고

마스터 노드에서 다음 명령어로 확인해보면
kubectl get nodes워커 노드가 생성되었음을 알수 있다.

명령어들의 차이점
# nginx Pod 생성
kubectl create deployment nginx --image=nginx
create와 apply
kubectl create deployment test --image=nginx
kubectl apply -f <(kubectl create deployment test --image=nginx --dry-run=client -o yaml)
create는 이미 존재하는 리소스를 다시 생성하려고 하면 오류가 발생하지만, apply는 존재하는 리소스를 업데이트
log와 describe
kubectl logs deployment/nginx
kubectl describe deployment/nginx
logs는 컨테이너의 출력 로그를 보여주고, describe는 리소스의 전반적인 상태와 설정 정보를 보여줌
patch와 edit
kubectl patch deployment nginx --patch '{"spec":{"replicas":2}}'
kubectl edit deployment nginx
patch는 특정 필드만 빠르게 수정할 수 있고, edit은 전체 YAML을 편집기에서 수정
결론
실무에서는 마스터노드를 배포하지 않는다. 거의 워커노드에서 작업(마스터노드 장애시 모든 노드가 죽기 때문에)
쿠버네티스의 경량화 버전인 microk8s 실습을 통해서 노드 개념에 관해 확실히 이해할 수 있었고 배포를 하기 위한 전반적인 과정들을 살펴 볼 수 있었다. 또한, 각 명령어들을 입력해보고 그에 관한 배포 규칙들을 숙지할 수 있게 되었다.