🔰목차
- 서론
- SignKey 값 생성하기
- Authorization 파라미터 값 생성하기
- Authorization 파라미터 값 인증하기
- 결론
- 레퍼런스
서론
지난 편에서는 Spring에서 외부 API를 부를 때 쓸 수 있는 메소드를 비교하고 선택해보았다.
이번에는 가져올 API인 카카오톡 퀵 API를 분석해보려고 한다.
먼저 카카오톡 퀵 API 키 값을 사용해 REST API를 호출하기 위해 필요한 Authorization 값을 인증하는 것부터 해보겠다.
SignKey 값 생성하기
이 카카오톡 REST API를 호출하려면 요청 헤더의 Authorization 파라미터 값이 필요하다.
이를 위해 먼저 Signkey를 생성해야 한다.
| Value | Type | Description |
|---|---|---|
| timestamp | Long | 요청이 생성된 시각으로 밀리 초 단위로 시간을 표기 |
| nonce | Integer | 사용자가 임의로 지정한 숫자 |
| apiKey | String | kakaoT 퀵∙도보 배송 API Sandbox에서 발급받은 API 키 |
위 timestamp값, nonce값, apiKey값을 붙여서 문자열을 만들고, HMAC-SHA512로 서명해 Signkey를 생성한다.
아래는 SignKey를 받는 샘플 코드다.
final String timestamp =
String.valueOf(System.currentTimeMillis());
  final String nonce = "121212";
  final String apiKey = "${API_KEY}"; //kakaoT ∙ API Sandbox API
  final String sign = signature(timestamp, nonce, apiKey);

  static String signature(final String timestamp, final String
nonce, final String apiKey)
      throws InvalidKeyException, NoSuchAlgorithmException {
    final String plainText = timestamp + nonce + apiKey;
    return HmacSignature.signatureSHA512(plainText);
  }

  static String signatureSHA512(final String plainText)
      throws NoSuchAlgorithmException, InvalidKeyException {

    final MessageDigest md =
MessageDigest.getInstance("SHA-512");
    md.update(plainText.getBytes());
    return String.format("%0128x", new BigInteger(1,
md.digest()));
  }
Spring에서 이 기능을 쓰기 위해 KakaoAuthComponent라는 class에 샘플 코드의 기능을 집어넣고@Component 로 불러오도록 하였다.
@Component
public class KakaoAuthComponent {
	**public String generateSignature(String timestamp, String nonce, String apiKey)
            throws NoSuchAlgorithmException, InvalidKeyException {
      String plainText = timestamp + nonce + apiKey;
      return signatureSHA512(plainText);
  }

	private String signatureSHA512(String plainText)
	        throws NoSuchAlgorithmException {
	    MessageDigest md = MessageDigest.getInstance("SHA-512");
	    md.update(plainText.getBytes());
	    return String.format("%0128x", new BigInteger(1, md.digest()));
	}**

	public String generateAuthorization(String timestamp, String nonce, String sign) {
	    String authValue = timestamp + "$$" + nonce + "$$" + sign;
	    return Base64.getEncoder().encodeToString(authValue.getBytes());
	}
}
Authorization 파라미터 값 생성하기
위에서 만든 Signkey 값, 타임스탬프(timestamp), 논스 값(nonce)의 조합을 Base64로 Authorization값을 인코딩하여 생성할 수 있다.
| Value | Type | Description |
|---|---|---|
| timestamp | Long | 요청이 생성된 시각으로 밀리 초 단위로 시간을 표기 |
| nonce | Integer | 사용자가 임의로 지정한 숫자 |
| sign | String | Signkey 값 |
위 파라미터를 통해 Authorization를 구축하는 샘플 코드이다.
final String authorization = Base64.getEncoder()
        .encodeToString(String.valueOf(timestamp + "$$" +
nonce + "$$" + sign).getBytes());
이 코드 또한 KakaoAuthComponent에서 구현해놓았다.
@Component
public class KakaoAuthComponent {
	public String generateSignature(String timestamp, String nonce, String apiKey)
            throws NoSuchAlgorithmException, InvalidKeyException {
      String plainText = timestamp + nonce + apiKey;
      return signatureSHA512(plainText);
  }

	private String signatureSHA512(String plainText)
	        throws NoSuchAlgorithmException {
	    MessageDigest md = MessageDigest.getInstance("SHA-512");
	    md.update(plainText.getBytes());
	    return String.format("%0128x", new BigInteger(1, md.digest()));
	}

	**public String generateAuthorization(String timestamp, String nonce, String sign) {
	    String authValue = timestamp + "$$" + nonce + "$$" + sign;
	    return Base64.getEncoder().encodeToString(authValue.getBytes());
	}**
}
Authorization 파라미터 값 인증하기
우린 Authorization 값을 인증하기 위해 다음과 같은 GET 요청을 보내야 한다.
curl -X 'GET' \
  'https://open-api-logistics.kakaomobility.com/v1/auth/check'
  -H 'accept: application/json' \
  -H 'Authorization: XXX' \
  -H 'Content-Type: application/json' \
  -H 'vendor: ${vendor_id}' \
미리 만들어 놓은 Authorization 값을 인증하려면 다음과 같이 하면 된다.
- Authorization, vendor, Content-Type값을 준비한다.
- 주어진 URL()에 위 헤더 파라미터 값과 함께 GET 요청을 한다.
먼저 필요한 헤더 값들은 다음과 같다.
| Parameter | Description |
|---|---|
| Authorization | 시작하기에서 생성한 Authorization 파라미터 값 |
| vendor | kakaoT 퀵∙도보 배송 API Sandbox에서 발급받은 Vendor 아이디 |
| Content-Type | application/json |
vendor 값은 카카오톡 퀵 API 서비스에서 Key값을 받을 때 같이 받게 되어있다.
고로 @Component로 생성해 놓은 KakaoAuthComponent를 Controller에서 불러와서 Get 요청을 보내보도록 하자.
@Controller
public class KakaoController {

	@Autowired
	private KakaoAuthComponent kakaoAuthComponent;

	private ApiConfig apiConfig;

	private RestTemplate restTemplate = new RestTemplate();

	@RequestMapping(value = "/hello.do")
	public String hello(Model model) {
		apiConfig = ApiConfig.getApiConfigSingleton();
		String authorization = null;
		String apiResponse = null;  // API 응답을 저장할 변수
		try {
            // 입력값
            final String timestamp = String.valueOf(System.currentTimeMillis());
            final String nonce = "121212";
            final String apiKey = apiConfig.getKeyValue();
            System.out.println("tesT");

            // 서명 및 Authorization 생성
            String sign = kakaoAuthComponent.generateSignature(timestamp, nonce, apiKey);
            authorization = kakaoAuthComponent.generateAuthorization(timestamp, nonce, sign);

            // Authorization 값 확인
            System.out.println("Authorization: " + authorization);

            // API 호출을 위한 URL 설정
            String apiUrl = apiConfig.getHostURL();

            // HttpHeaders 객체 생성
            HttpHeaders headers = new HttpHeaders();
            headers.set("accept", "application/json");
            headers.set("Authorization", authorization);  // 동적으로 생성된 Authorization
            headers.set("Content-Type", "application/json");
            headers.set("vendor", apiConfig.getVendorID());  // vendor_id 설정

            // HttpEntity 생성 (헤더 포함)
            HttpEntity<String> entity = new HttpEntity<>(headers);

            // GET 요청 보내기
            ResponseEntity<String> response = restTemplate.exchange(apiUrl, HttpMethod.GET, entity, String.class);

         // 응답 본문을 model에 저장
            apiResponse = response.getBody();

        } catch (Exception e) {
            e.printStackTrace();
            // 예외 발생 시 메시지 저장
            apiResponse = "API 요청 중 오류 발생: " + e.getMessage();
        }

        // 모델에 API 응답을 전달
        model.addAttribute("apiResponse", apiResponse);

        // "hello" 뷰 이름을 반환
        return "hello";
	}
}
ApiConfig는 따로 민감한 값들을 가져오기 위해 싱글톤 class를 import하여 해결하였다.
application.yml과 @Configuration, @Value 어노테이션을 사용해서 가져오려고 했지만 Spring 설정 관련한 에러가 나서 결국 싱글톤 class로 만들었다.
위 과정을 통해 model로 jsp에서 GET 요청한 값을 받고 화면에 요청 값을 띄울 수 있었다.
...
<%@ taglib uri="http://java.sun.com/jsp/jstl/core" prefix="c" %>
<!DOCTYPE html>
<html>
	<head>
		...
	</head>
	<body>
		<h1>Response from API</h1>
		<c:choose>
		    <c:when test="${not empty apiResponse}">
		        <p>API Response: ${apiResponse}</p>
		    </c:when>
		    <c:otherwise>
		        <p>No API Response available.</p>
		    </c:otherwise>
		</c:choose>
	</body>
</html>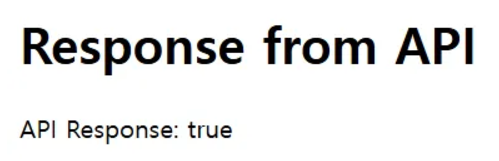
true 단조롭네…
이렇게 카카오톡 퀵 API 서비스로 기본적인 GET 요청까지는 완료했다.
결론
간단하게 외부 API를 가져오는 작업일 뿐이지만 중간 중간에 에러를 고치는 데에 시간을 많이 잡아먹은 것 같다…
다음에는 주문 정보 전달 및 주문 조회, 가격 조회 등 다양한 요청들을 적용해볼 예정이다.
레퍼런스
https://logistics-developers.kakaomobility.com/document/tutorial