목차
- 서론
- REST API로 변환하기
- 주문 정보 전달하기
- 주문 조회하기
- 가격 조회하기
- 결과
- 주문 정보 전달하기
- 주문 조회하기
- 가격 조회하기
- 결론
- 레퍼런스
서론
이번엔 지금까지 구현했던 것들을 REST API로 변환해서 구현해보도록 하겠다.
@Controller를 쓴 클래스를 새로 @RestController로 쓴 클래스로 바꾸는 과정이지만 일부만 수정하는 것이기 때문에 비교적 간단한 작업이다.
REST API로 변환하기
REST API로 바꾸기 위해선 2가지 작업만 해주면 된다.
- @ModelAttribute로 받던 객체를 @RequestBody로 받는다.
- return을 jsp 이름이 아닌 response를 그대로 보낸다.
@Controller를 쓴 웹 컨트롤러에선 객체 값들을 @ModelAttribute로 받아서 JSON 객체로 따로 바꿨다면, @RestController를 쓴 REST API 컨트롤러에선 @RequestBody로 JSON 값으로 그대로 받는다.
그리고 웹 컨트롤러에선 return을 jsp로 보내고 response값을 Model로 넘기지만 Rest 컨트롤러에선 return을 그대로 response 객체를 넘긴다.
다음 ‘주문 정보 전달하기’에서 예시를 들어보겠다.
주문 정보 전달하기
기존 주문 정보 전달하기의 과정은 다음과 같다 (일부 코드는 축약해서 적었다)
@RequestMapping(value = "/order.do", method = RequestMethod.POST)
public String submitOrder(@ModelAttribute OrderVO orderVO, Model model) {
    try {
		    // 헤더 값 불러오기
      	final String API_ENDPOINT = apiConfig.getHostURL() + "/api/v2/orders";
        final String VENDOR_ID = apiConfig.getVendorID();
        final String authorization = getAuthorization();

        // JSON 객체 생성
        JSONObject json = new JSONObject();
        ...

        // HTTP Header 설정
        HttpHeaders headers = new HttpHeaders();
        headers.set("Content-Type", "application/json");
        headers.set("Authorization", authorization);
        headers.set("vendor", VENDOR_ID);

        // HTTP 요청 생성
        HttpEntity<String> requestEntity = new HttpEntity<>(json.toString(), headers);

        // API 호출
        ResponseEntity<String> response = restTemplate.postForEntity(API_ENDPOINT, requestEntity, String.class);

        // 응답 처리
        model.addAttribute("responseCode", response.getStatusCodeValue());
        JSONObject respBody = new JSONObject(response.getBody());

        return "result";

    } catch (Exception e) {
        e.printStackTrace();
        System.out.println("Error: " + e.getMessage());

        return "result";
    }
}
위에서 JSON 객체 생성과 응답 처리, return값을 response 값으로 바꾸면
다음과 같이 REST API에 작동하는 Controller 함수를 적을 수 있다.
@RequestMapping(value = "/orderJson.do", method = RequestMethod.POST)
public String submitOrder(@RequestBody String jsonInput) {
    try {
		    // 헤더 값 불러오기
        final String API_ENDPOINT = apiConfig.getHostURL() + "/api/v2/orders";
        final String VENDOR_ID = apiConfig.getVendorID();
        final String authorization = getAuthorization();

        // HTTP Header 설정
        HttpHeaders headers = new HttpHeaders();
        headers.set("Content-Type", "application/json");
        headers.set("Authorization", authorization);
        headers.set("vendor",VENDOR_ID);

				// HTTP 요청 생성
        HttpEntity<String> requestEntity = new HttpEntity<>(jsonInput, headers);

        // API 호출
        ResponseEntity<String> response = restTemplate.postForEntity(API_ENDPOINT, requestEntity, String.class);

        return response.getBody();

    } catch (Exception e) {
        e.printStackTrace();
        System.out.println("Error: " + e.getMessage());

        return "Error";
    }
}
주문 조회하기
@GetMapping("/order/{partnerOrderId}")
public String checkOrder(@PathVariable String partnerOrderId, Model model) {
		try {
				ApiConfig apiconfig = ApiConfig.getApiConfigSingleton();
				String authorization = getAuthorization();

				// API 호출을 위한 URL 설정
		    String apiUrl = apiConfig.getHostURL() + "/api/v2/orders/" + partnerOrderId;

		    // HttpHeaders 객체 생성
		    HttpHeaders headers = new HttpHeaders();
		    headers.set("accept", "application/json");
		    headers.set("Authorization", authorization);
		    headers.set("Content-Type", "application/json");
		    headers.set("vendor", apiConfig.getVendorID());

		    // HttpEntity 생성 (헤더 포함)
		    HttpEntity<String> entity = new HttpEntity<>(headers);

		    // GET 요청 보내기
		    ResponseEntity<String> response = restTemplate.exchange(apiUrl, HttpMethod.GET, entity, String.class);
		    return response.getBody();

		} catch (Exception e) {
				e.printStackTrace();
				return "API 요청 중 오류 발생: " + e.getMessage();
	  }
}
이 기능은 GET 요청이라 return을 jsp가 아닌 response로 바꿔주고 model 구성 부분을 삭제하면 쉽게 구현할 수 있다.
가격 조회하기
@RequestMapping(value = "/price.do", method = RequestMethod.POST)
public String CheckPrice(@RequestBody String jsonInput) {
		try {
      	final String API_ENDPOINT = apiConfig.getHostURL() + "/api/v2/orders/price";
        final String VENDOR_ID = apiConfig.getVendorID();
        final String authorization = getAuthorization();

        // HTTP Header 설정
        HttpHeaders headers = new HttpHeaders();
        headers.set("Content-Type", "application/json");
        headers.set("Authorization", authorization);
        headers.set("vendor", VENDOR_ID);

        // HTTP 요청 생성
        HttpEntity<String> requestEntity = new HttpEntity<>(jsonInput, headers);

        // API 호출
        ResponseEntity<String> response = restTemplate.postForEntity(API_ENDPOINT, requestEntity, String.class);

        return response.getBody();

    } catch (Exception e) {
        e.printStackTrace();
        System.out.println("Error: " + e.getMessage());

        return "Error: " + e.getMessage();
    }
}
‘가격 조회하기’ 기능 또한 ‘주문 정보 전달하기’와 같이 기존 웹 구현 함수에서 다음 3가지만 수정하면 구현할 수 있다.
- 필요없는 JSON 구성 부분 제거
- model 구성 부분 제거
- return 값 response로 바꾸기
결과
RestController로 구성했기 때문에 Postman을 사용해서 링크와 요청방식, Body를 적절하게 보내면 응답을 받을 수 있다.
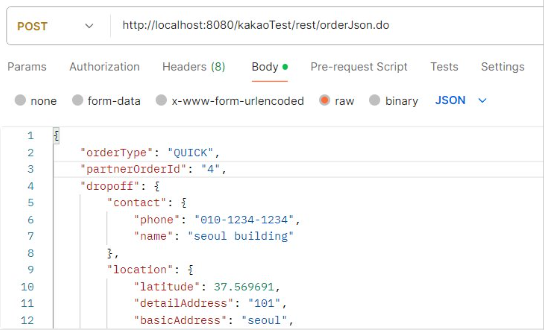
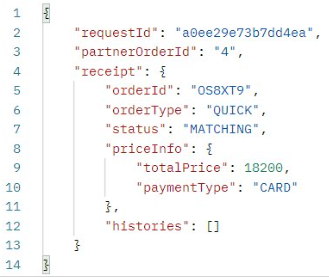
주문 정보 전달하기
요청과 Body
결과
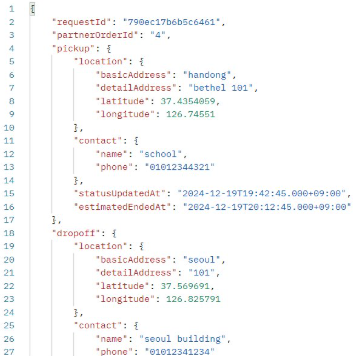
주문 조회하기
요청

결과
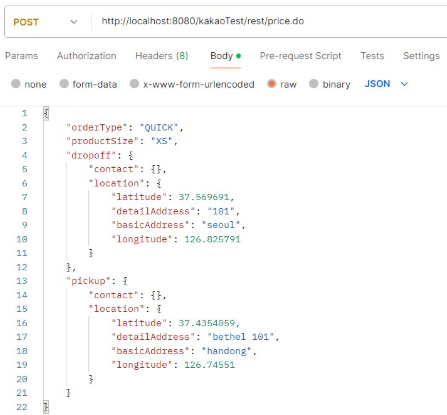
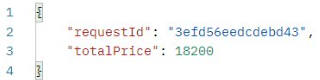
가격 조회하기
요청
결과
결론
일부 파라미터와 리턴값만 바꾸는 것만으로 쉽게 REST API로 적용되는 것을 확인할 수 있었다.
하지만 PATCH를 사용하는 기능에 대해서는 똑같이 RestController에서도 구현할 수 없었던 것이 아쉬운 부분이다.