이전에 스프링 프로젝트를 진행해봤음에도 초기 세팅은 어렵다.
인프런을 들으며 하나씩 정리하며 들어보는Spring프로젝트 초기세팅
🍋 1. 프로젝트 만들기
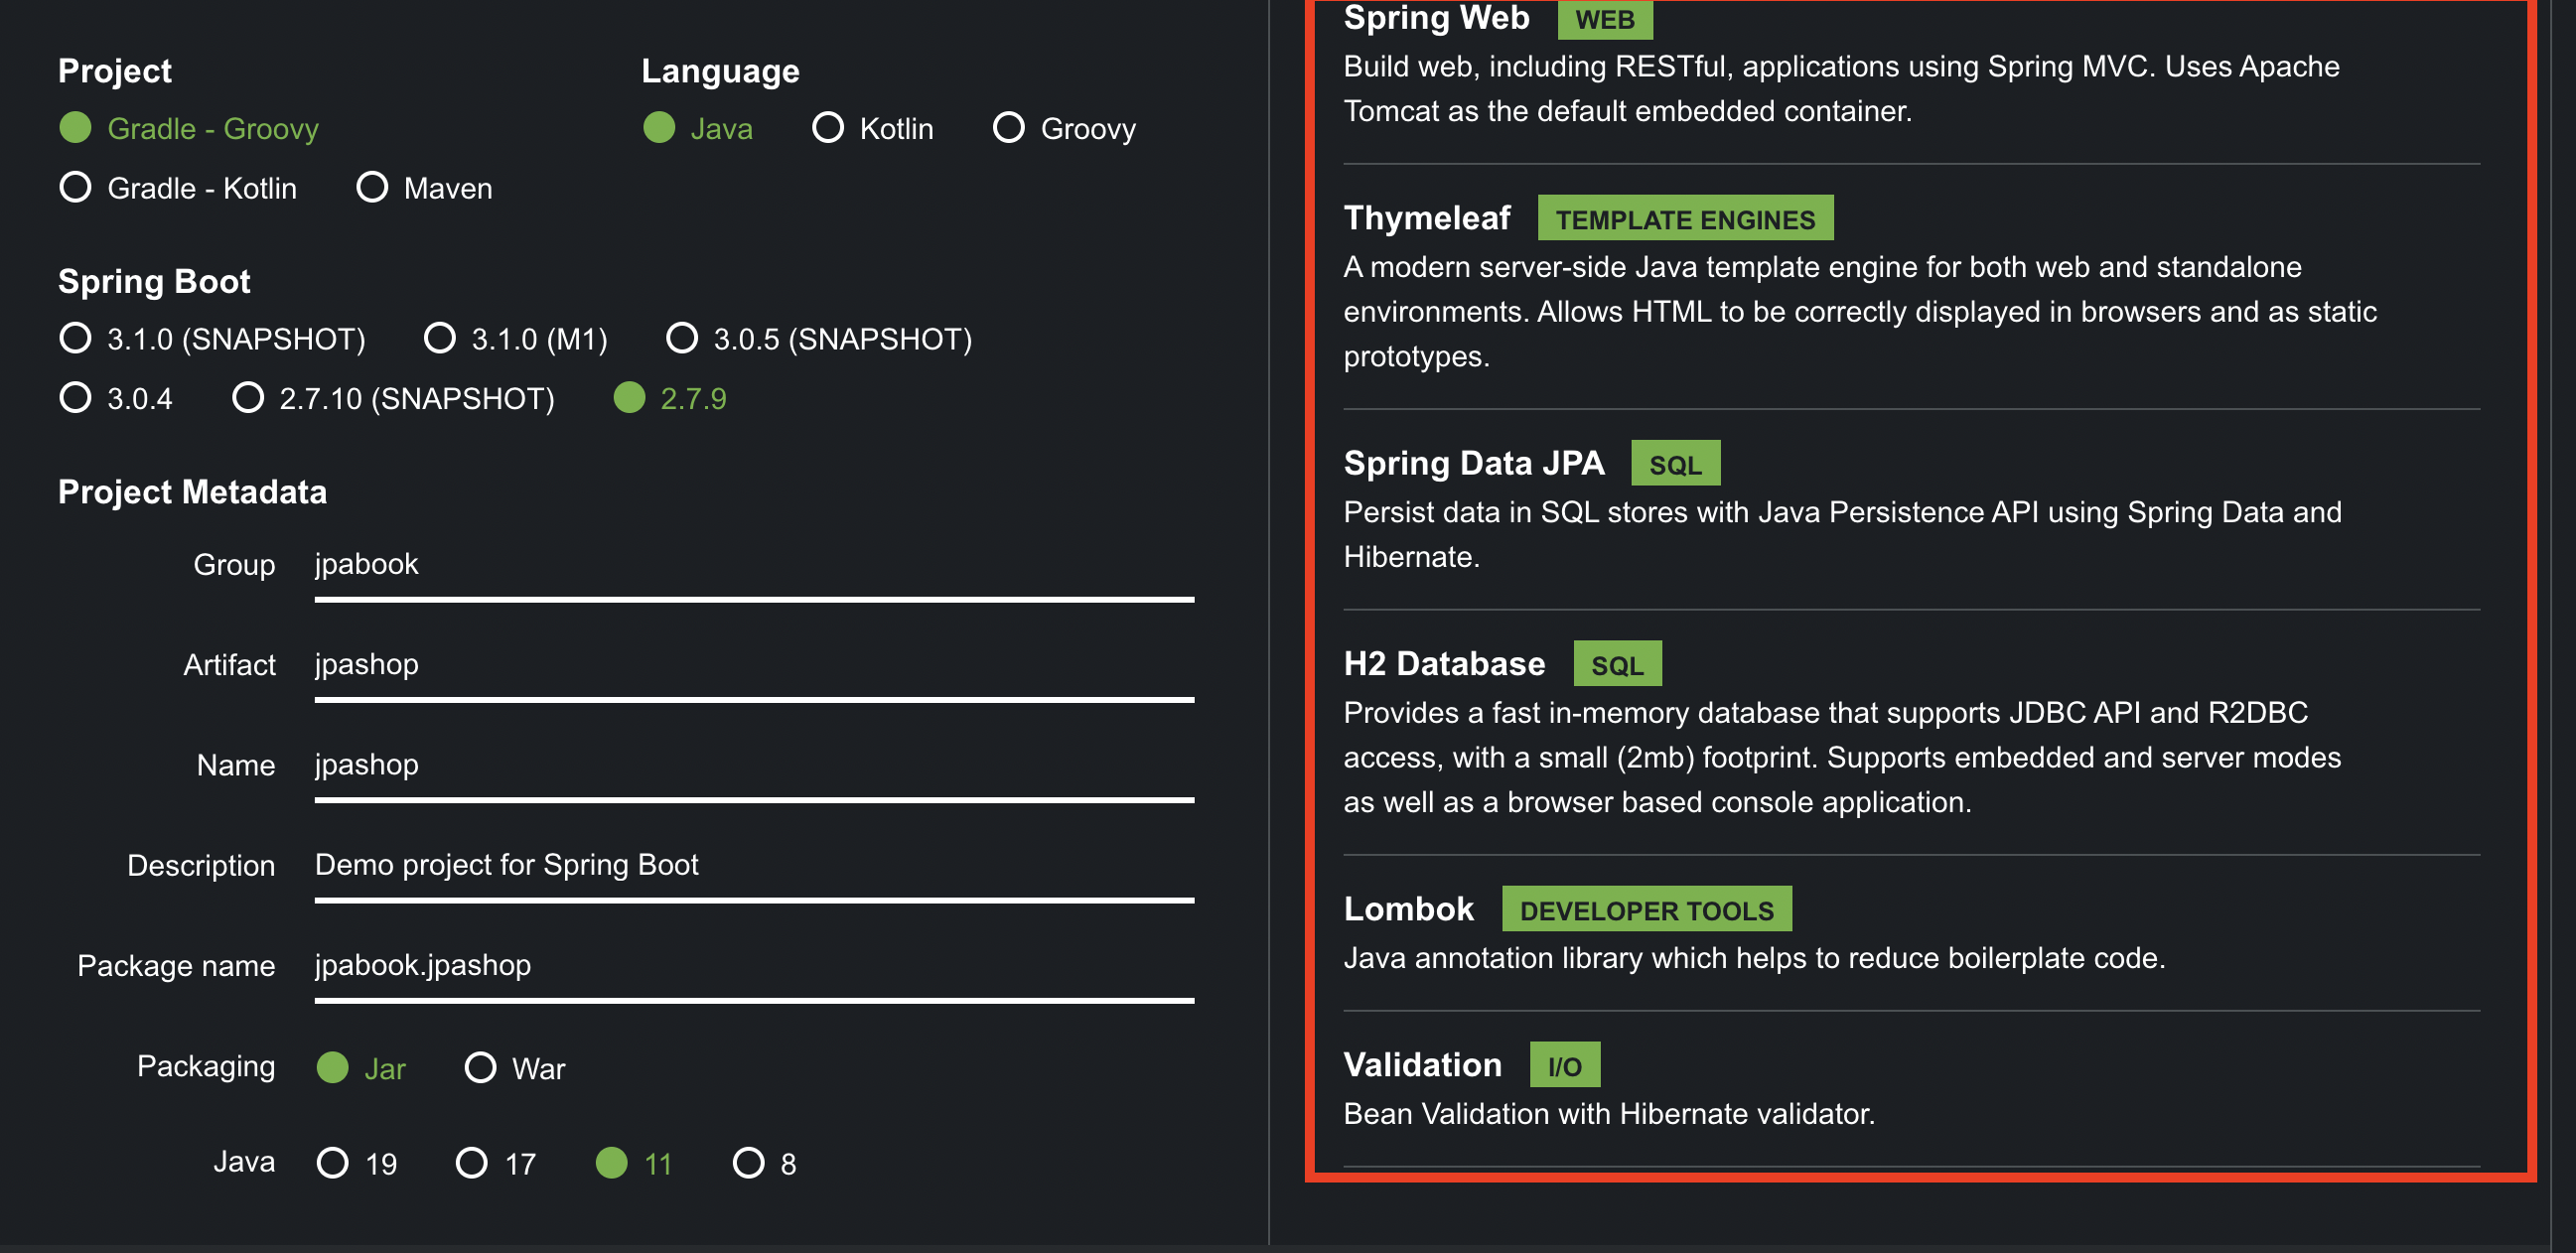
spring.io에 들어가서 프로젝트를 만든다.
-
Gradle -
Spring Boot : 2.7.9
(* 3점대는 java버전 17부터 가능하다. 나는 11을 쓰기 때문에 2점대로 설정) -
Dependencies를 추가한다.Spring Web,Thymeleaf,JPA,H2 DB,Lombok
- 설정 후
generate을 눌러 원하는 위치에 다운받는다.
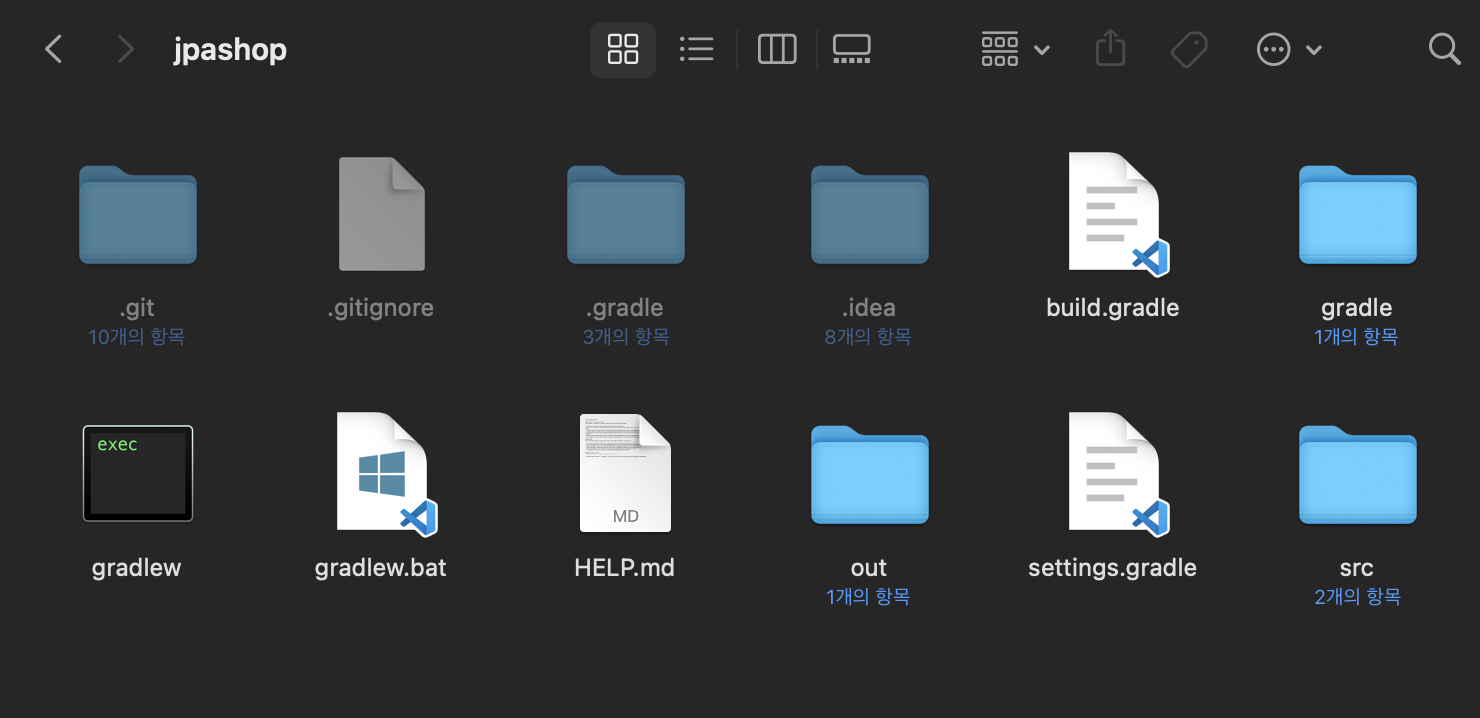
- 압축을 풀어놓는다
-
intelliJ를 열고
import나open을 누르고, 다운받은 파일 위치에서Build.gradle을 연다.
-
설치가 완료되면 끝!
( 설치가 진행되는 동안엔 기다려야한다.)
🍋 2. intelliJ에서 깃 연동
intelliJ에선 처음이라 검색을 통해 알았다.
- 깃 설치 확인
git --version- 나는 깃을 설치했고, 인텔리제이에 깃 계정을 등록해 놓았었다.
- Preferences:
command+,에서 Git - Path to Git executable을 확인.
- 설치된 경로를 찾아야 하는지 알았는데 기본적으로 세팅 되어있다.
Test를 눌러 테스트.

- 깃
clone을 하거나Git -> GitHub -> Share Project on GitHub를 한다.
- 나는
Share Project on GitHub를 했다.
누르면 깃에 레포지토리가 생기고 만들어놓은 프로젝트를 커밋한다.
🍋 3. 프로젝트 동작 확인
처음에
JUnit4 추가를 하고 돌렸는데 났다.추가📌
에러 이유 :dependencies{}아네 JUnit4를 넣어야 했다.
괄호 밖에 넣어서 에러났던것이다.
//JUnit4 추가 testImplementation("org.junit.vintage:junit-vintage-engine") {
         exclude group: "org.hamcrest", module: "hamcrest-core"
     }
에러 메세지
A problem occurred evaluating root project 'jpashop'. > Could not find method testImplementation() for arguments
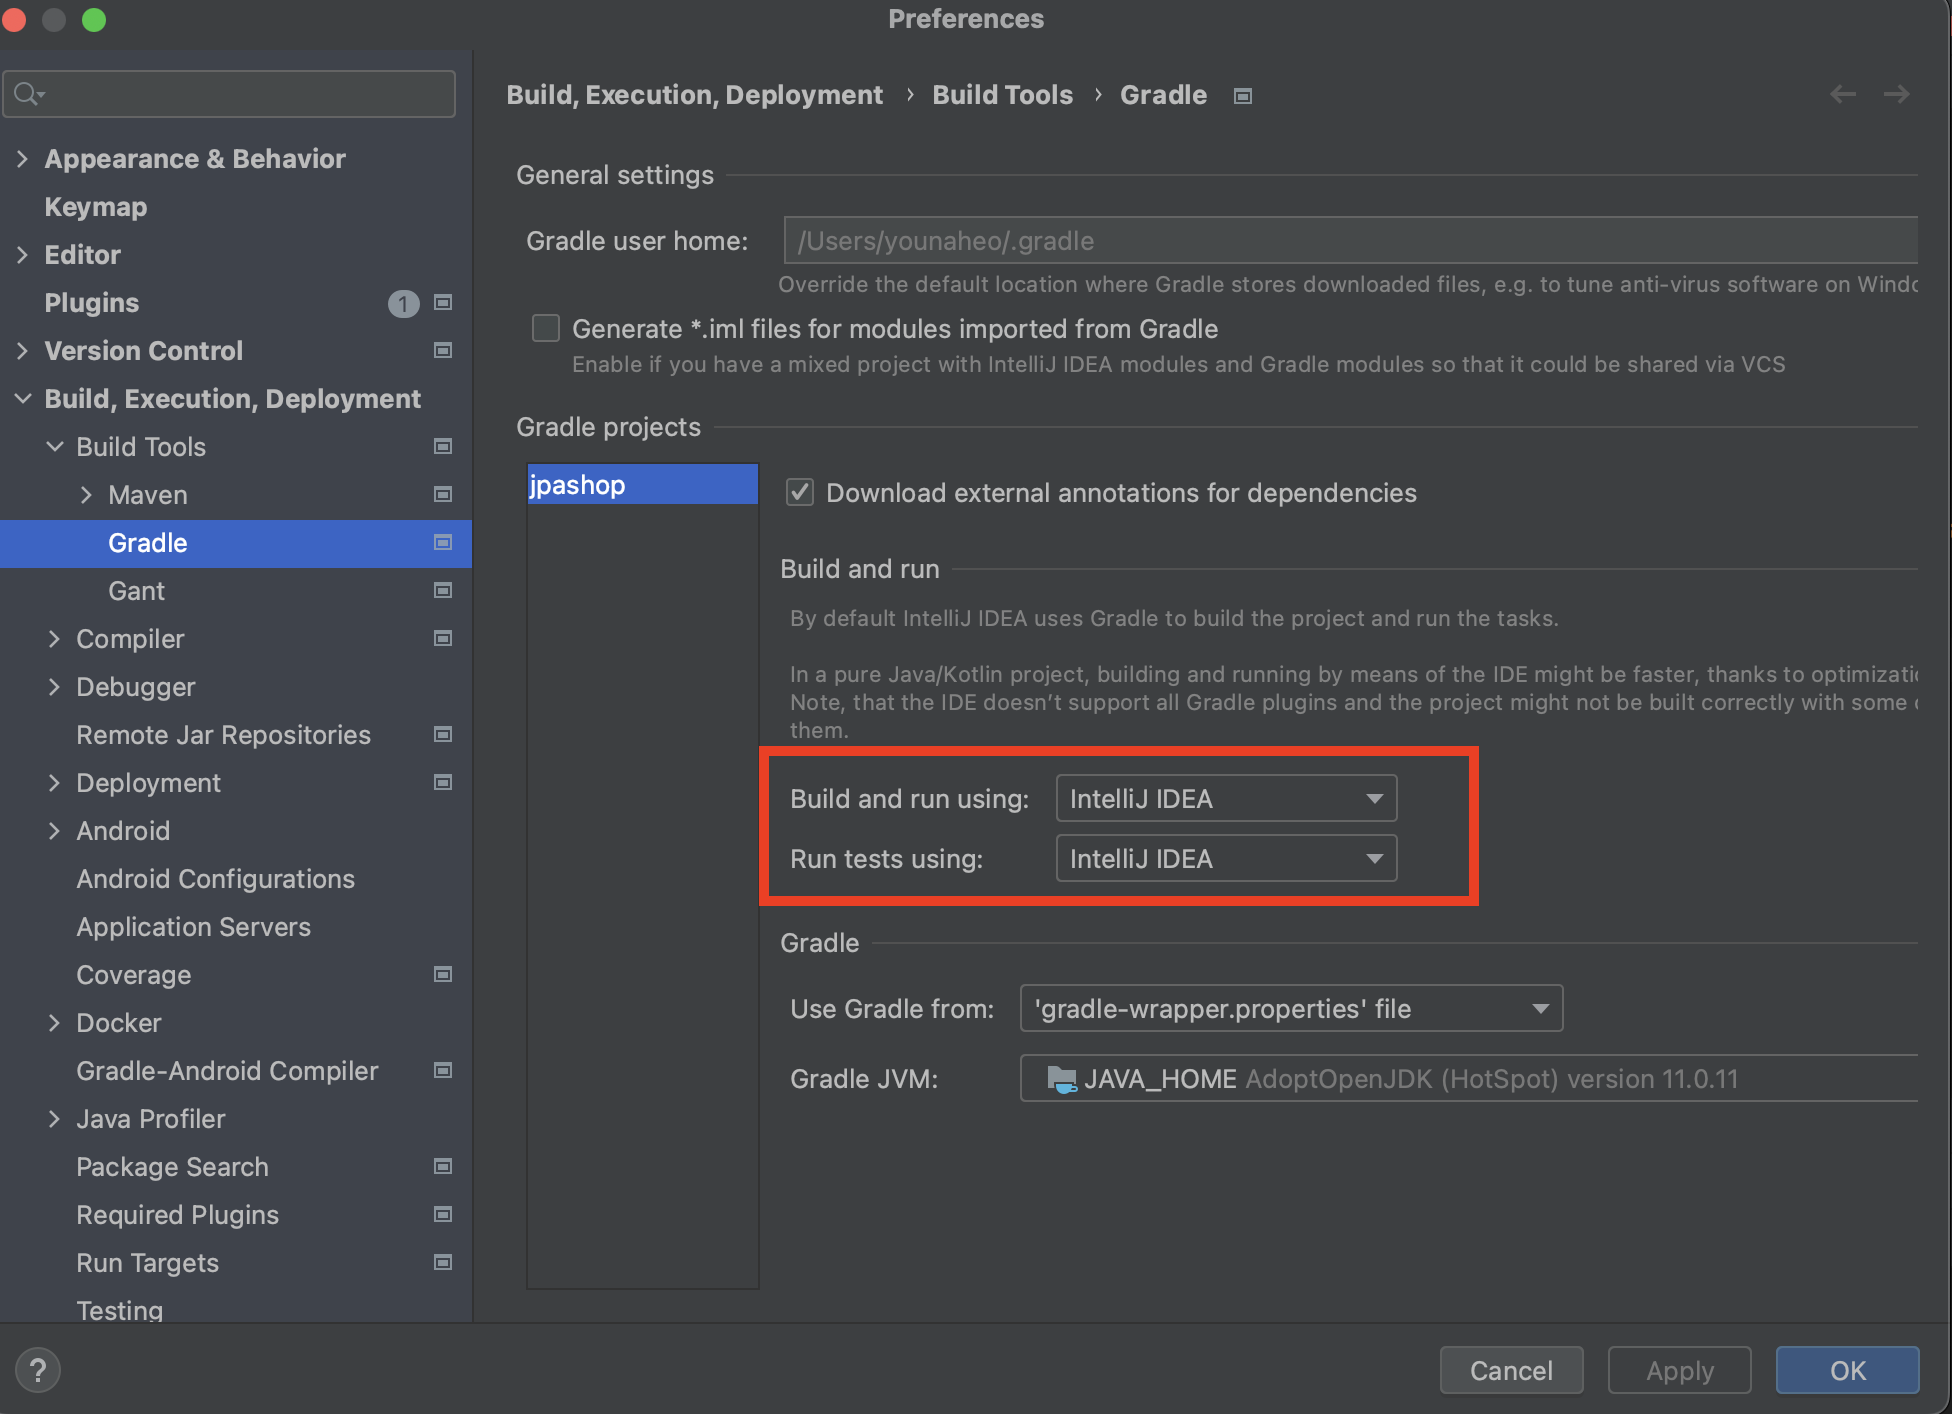
방법을 못찾다가, 인프런 자료를 보고 해결하였다.
아래처럼IntelliJ IDEA로 변경했더니 돌아간다.
[인프런] IntelliJ Gradle 대신에 자바 직접 실행
-참고: 강의에 이후에 추가된 내용입니다.
- 최근 IntelliJ 버전은 Gradle로 실행을 하는 것이 기본 설정이다. 이렇게 하면 실행속도가 느리다.
- 다음과 같이 변경하면 자바로 바로 실행해서 실행속도가 더 빠르다.
Preferences - Build, Execution, Deployment - Build Tools - Gradle
- Build and run using: Gradle ->
IntelliJ IDEA - Run tests using: Gradle ->
IntelliJ IDEA
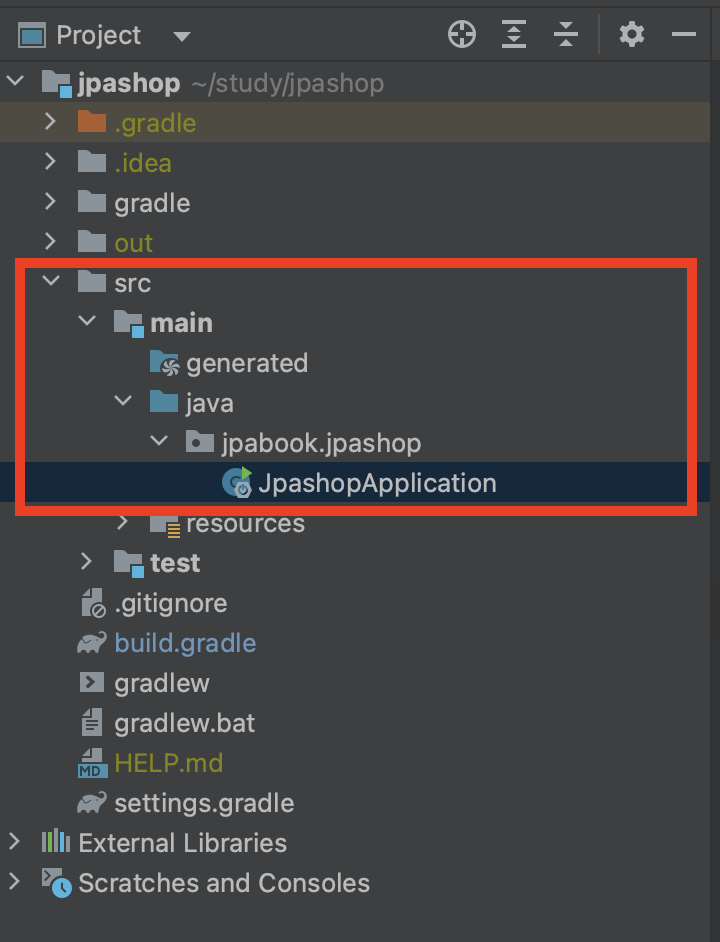
Main 실행 _ JpashopApplication
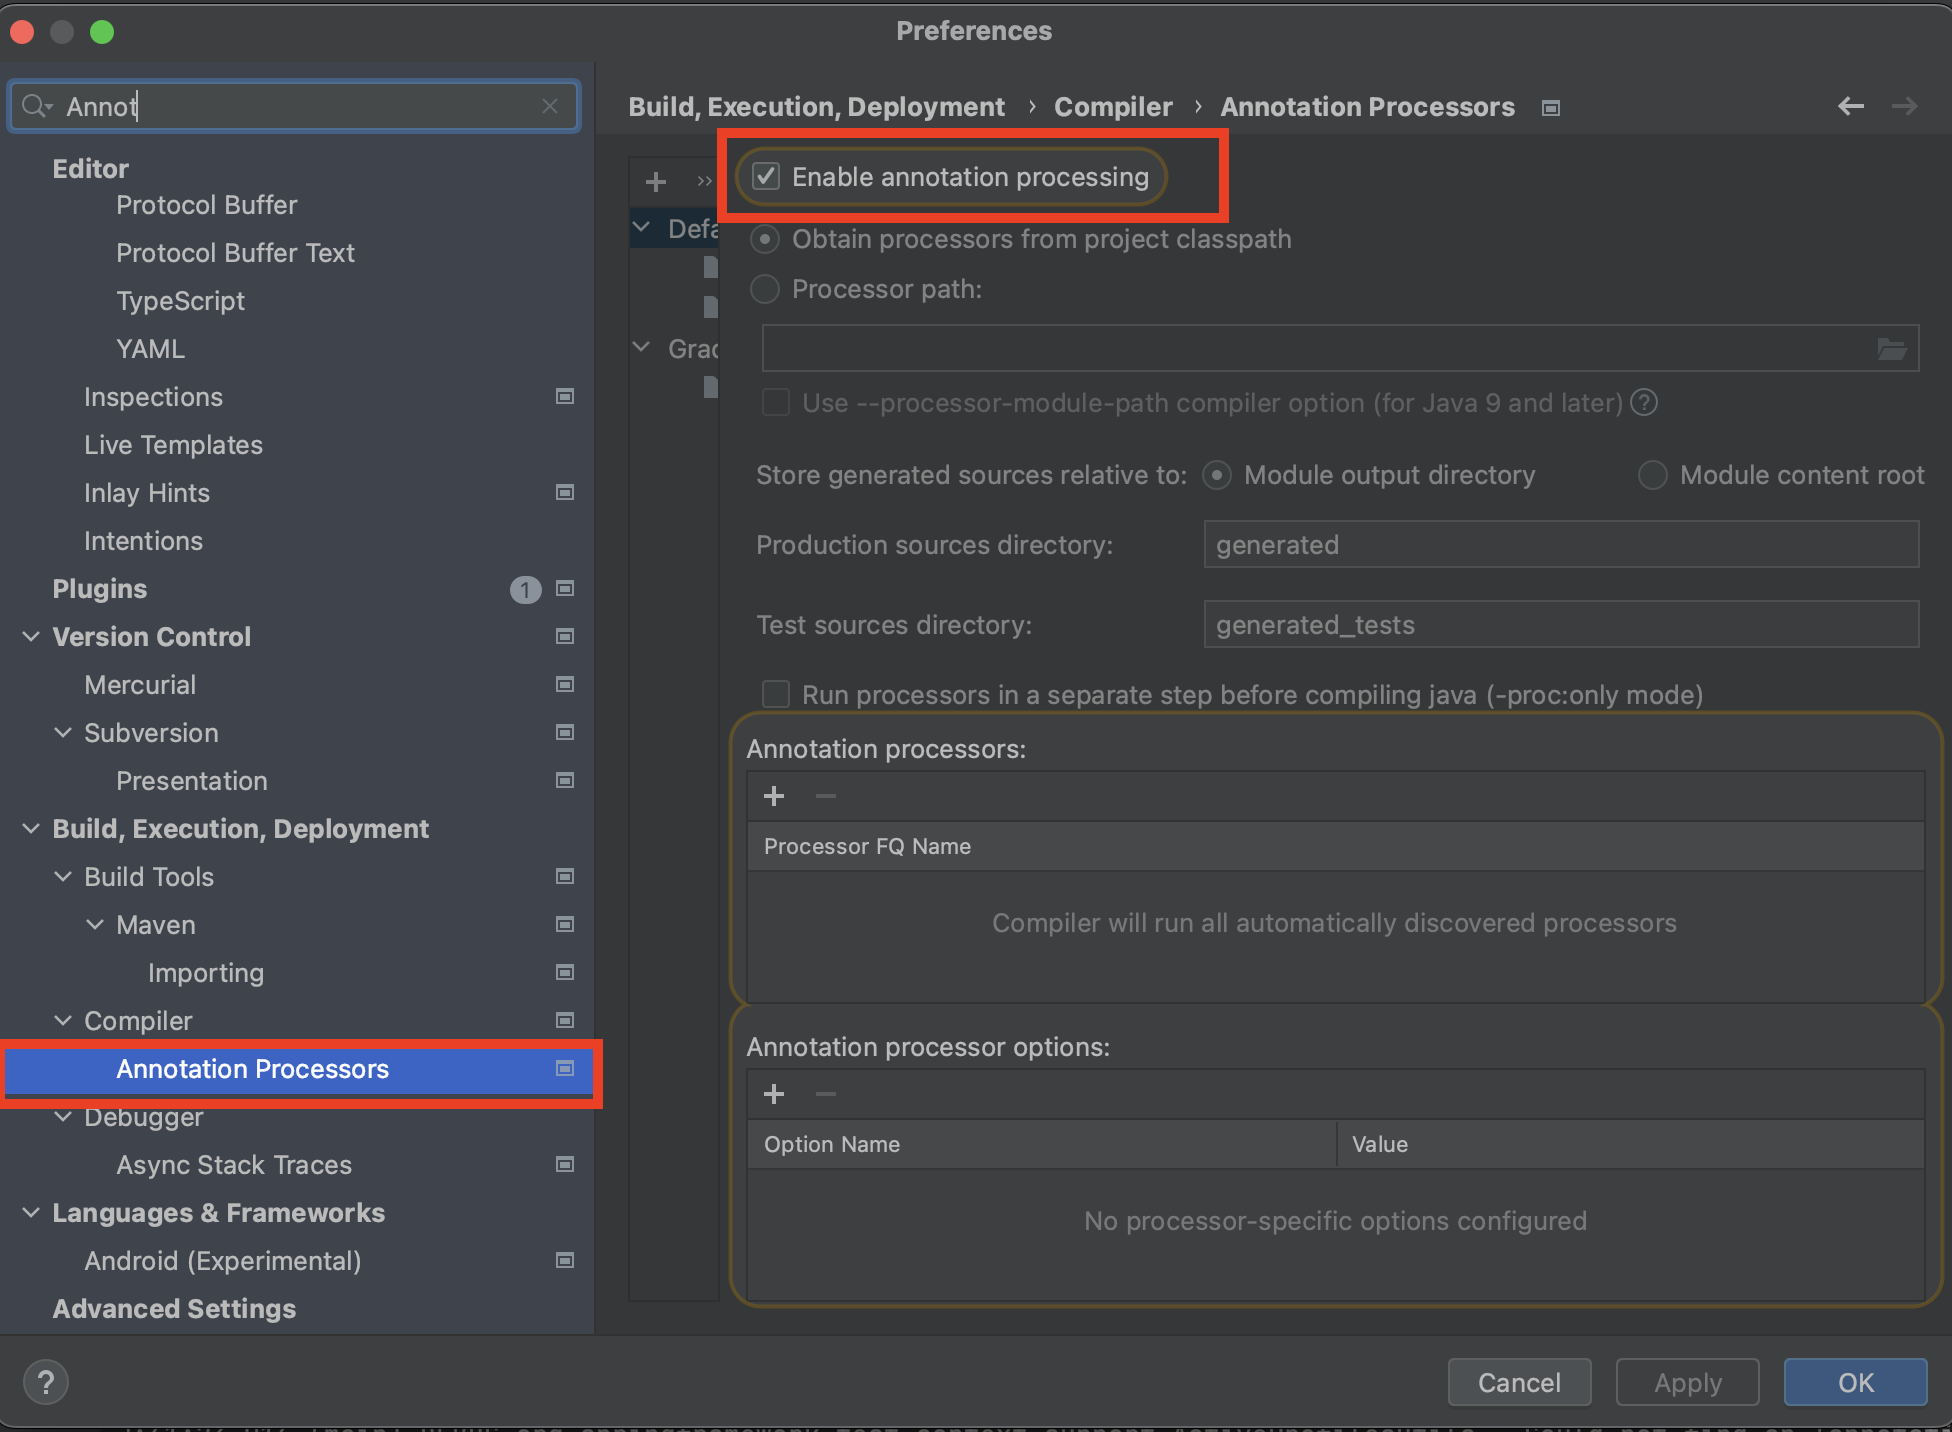
🍋 4. Lombok
- 롬복 설치 후
command + ,-Annotation Processors- Enable annotation processing 에 체크
Lombok 작동 테스트
Hello클래스를 만들고Getter,Setter
package jpabook.jpashop;

import lombok.Getter;
import lombok.Setter;

@Getter
@Setter
public class Hello {
    private String data;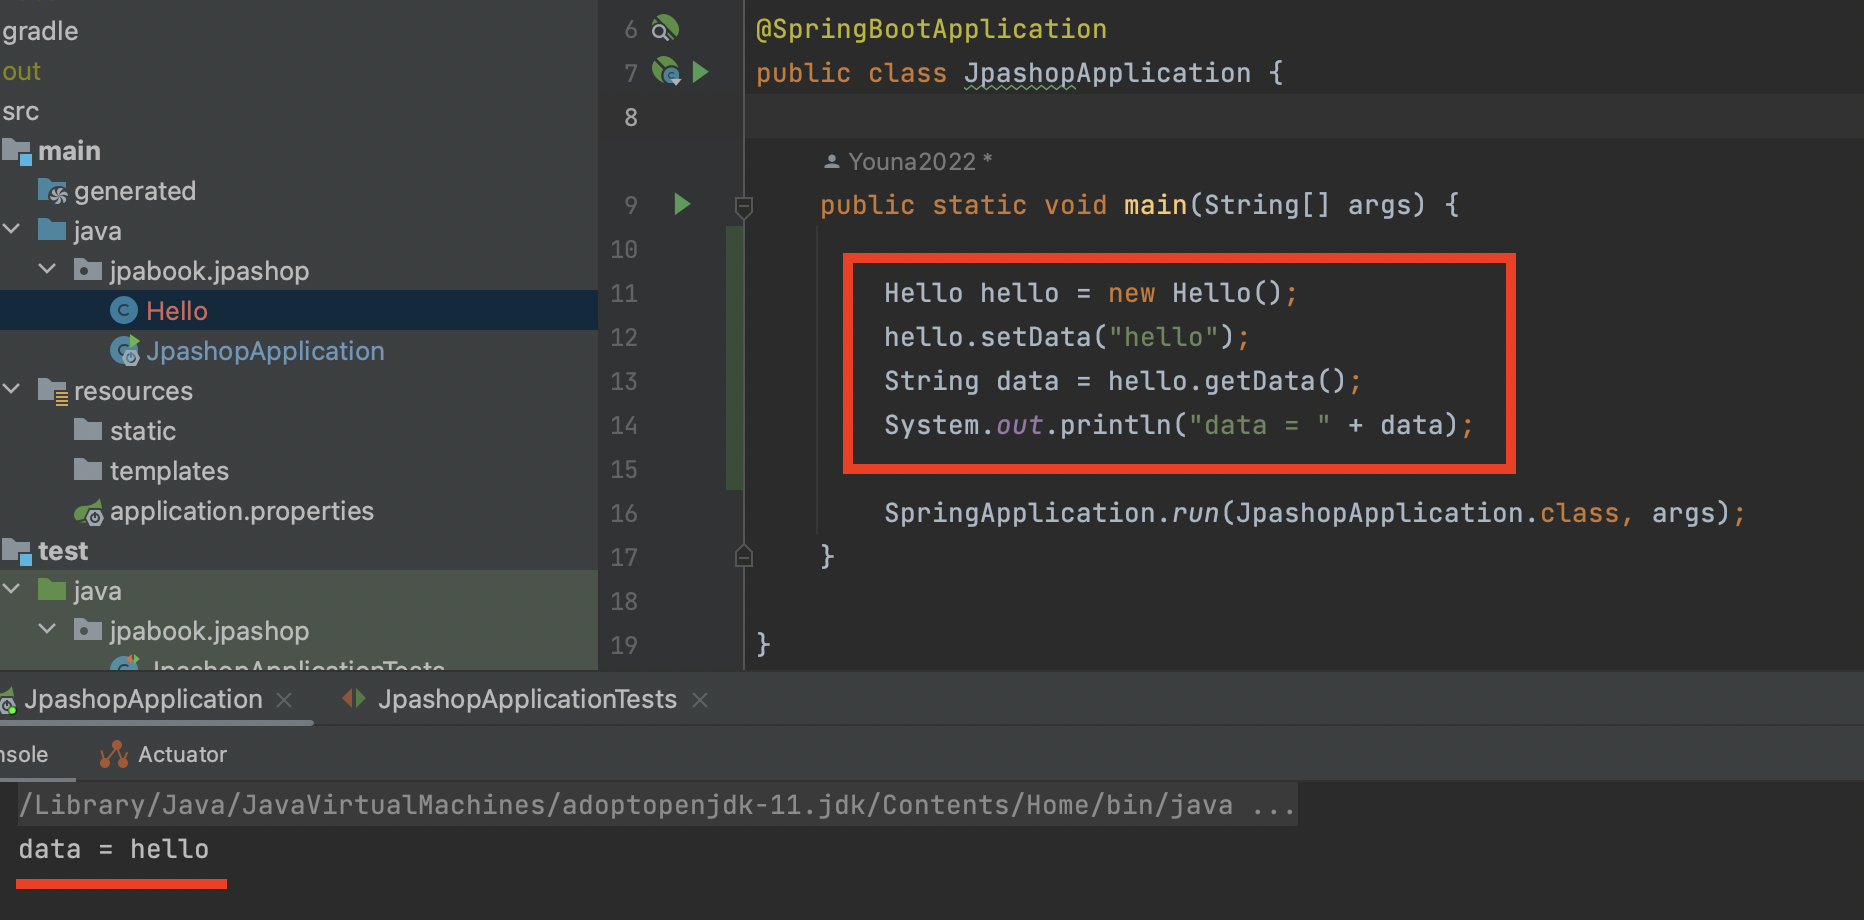
}Main으로 가서 입력
- ⭐️ 단축키 :
hello.getData();입력 후option + command + v를 누르면String data = hello.getData();이렇게 된다
package jpabook.jpashop;

import org.springframework.boot.SpringApplication;
import org.springframework.boot.autoconfigure.SpringBootApplication;

@SpringBootApplication
public class JpashopApplication {

	public static void main(String[] args) {

		Hello hello = new Hello();
		hello.setData("hello");
		String data = hello.getData();
        System.out.println("data = " + data);

		SpringApplication.run(JpashopApplication.class, args);
	}

}
실행하면 아래처럼 확인할 수 있다.

공부중인 주니어 개발자