이번 시간엔 스프링부트에 REST Docs를 설정해보겠습니다.
API 문서 관리를 위한 방식으로 Swagger와 REST Docs를 고민하였는데, REST Docs는 테스트 코드를 통해 문서를 관리한다는게 신기하기도 했고 메리트가 있을 것 같아 선정하게 되었습니다.
설정하는 방법에 대해서 구글링을 해봤는데 대부분 정상적으로 실행되지 않아서 REST Docs 공식문서를 참고하였습니다.
Build.gradle 설정
설정이 완료된 build.gradle은 아래에 있으니 급하신 분들은 바로 아래로 내려주시면 되겠습니다.
(1)
Asciidoctor 플러그인을 적용합니다.
plugins {
	...

    id "org.asciidoctor.jvm.convert" version "3.3.2"
}
(2)
Asciidoctor를 확장하는 종속성에 대한 구성을 선언합니다
configurations {
	...

    asciidoctorExt
}
(3)
생성된 스니펫의 출력 위치를 정의하도록 속성을 구성합니다.
ext {
    snippetsDir = file('build/generated-snippets')
}
위와 같이 스니펫 출력 위치를 지정하면 해당 위치에 rest docs 스니펫들이 생성됩니다.
(4)
test스니펫 디렉터리를 출력으로 추가하도록 작업을 구성합니다.
test {
    outputs.dir snippetsDir
}
(5)
스니펫에 의해 생성될 html을 만들기 전, 이전에 만들었던 html 파일을 삭제합니다.
asciidoctor.doFirst { // (5)
    delete file('src/main/resources/static/docs')
}
(6)
asciidoctor 작업을 구성합니다.
asciidoctor { // (6)
    dependsOn test // test 작업이 먼저 실행되도록 합니다.
    inputs.dir snippetsDir // 스니펫 디렉터리를 입력으로 구성합니다.
    configurations 'asciidoctorExt' // asciidoctorExt: 확장에 대한 구성 사용을 구성합니다.
}
(7)
문서를 복사합니다.
task copyDocument(type: Copy) {
    dependsOn asciidoctor // copyDocument()가 실행되기 전, 문서가 생성됩니다.
    from file("build/docs/asciidoc")
    into file("src/main/resources/static/docs") // 문서를 static/docs 디렉토리에 복사합니다.
}
(8)
문서를 복사합니다.
bootJar {
    dependsOn asciidoctor
    from "${asciidoctor.outputDir}"
    into file("src/main/resources/static/docs")
}
(9)
tasks.named('test') {
    outputs.dir snippetsDir // 스니펫 디렉터리를 출력으로 구성합니다.
    useJUnitPlatform()
}
(10)
tasks.named('asciidoctor') {
    inputs.dir snippetsDir // 스니펫 디렉터리를 입력으로 구성합니다.
    dependsOn test
}
(11)
빌드 구성을 설정합니다.
build {
    dependsOn copyDocument // 빌드되기 전, copyDocument를 실행합니다.
}
의존성
dependencies {
	...

    // Spring Rest Docs
    asciidoctorExt 'org.springframework.restdocs:spring-restdocs-asciidoctor'
    testImplementation 'org.springframework.restdocs:spring-restdocs-mockmvc'
}
전체 build.gradle은 다음과 같습니다.
plugins {
	...

    id "org.asciidoctor.jvm.convert" version "3.3.2"
}

group = 'com.example'
version = '0.0.1-SNAPSHOT'
sourceCompatibility = '17'

configurations {
    compileOnly {
        extendsFrom annotationProcessor
    }
    asciidoctorExt
}

repositories {
    mavenCentral()
}

ext {
    snippetsDir = file('build/generated-snippets')
}

test {
    outputs.dir snippetsDir
}

asciidoctor.doFirst {
    delete file('src/main/resources/static/docs')
}

asciidoctor {
    dependsOn test
    inputs.dir snippetsDir
    configurations 'asciidoctorExt'
}

task copyDocument(type: Copy) {
    dependsOn asciidoctor
    from file("build/docs/asciidoc")
    into file("src/main/resources/static/docs")
}

bootJar {
    dependsOn asciidoctor
    from "${asciidoctor.outputDir}"
    into file("src/main/resources/static/docs")
}

build {
    dependsOn copyDocument
}

tasks.named('test') {
    outputs.dir snippetsDir
    useJUnitPlatform()
}

tasks.named('asciidoctor') {
    inputs.dir snippetsDir
    dependsOn test
}

dependencies {
	...

    // Spring Rest Docs
    asciidoctorExt 'org.springframework.restdocs:spring-restdocs-asciidoctor'
    testImplementation 'org.springframework.restdocs:spring-restdocs-mockmvc'
}
설정이 끝났으며 한번 테스트로 문서를 생성해봅시다.
API 컨트롤러 생성
API를 만들기 위해선 요청을 받고 응답을 반환할 컨트롤러가 있어야겠죠.
아래와 같이 컨트롤러를 하나 생성하겠습니다.
RestDocsController
@RestController
public class RestDocsController {
    @GetMapping("/api/test")
    public ResponseDto testMethod(
            @RequestBody RequestDto request) {
        return new ResponseDto("success");
    }
}
"/api/test" 경로로 RequestDto 값을 요청으로 보내면 ResponseDto를 반환하는 간단한 코드입니다. 간단하게 예시를 보여주기 위해 서비스 계층은 생략하였습니다.
위의 코드에 나온 Request와 Response는 아래와 같습니다.
RequestDto
@Getter
@RequiredArgsConstructor
public class RequestDto {
    private final long id;
    private final String name;
}
ResponseDto
@Getter
@RequiredArgsConstructor
public class ResponseDto {
    private final String result;
}
이제 이 컨트롤러의 API를 문서화하기 위해서 테스트코드를 작성하겠습니다.
API 문서 생성
Rest Docs는 테스트 코드를 통해 API를 문서화하며, 해당 API에 대한 테스트 코드가 통과되어야만 문서가 정상적으로 작성됩니다.
테스트 코드는 아래와 같습니다.
RestDocsControllerTest
@WebMvcTest(RestDocsController.class) // (1)
@ExtendWith({RestDocumentationExtension.class, SpringExtension.class}) // (2)
public class RestDocsControllerTest {

    @Autowired
    private WebApplicationContext context;
    private MockMvc mockMvc;
    private ObjectMapper objectMapper = new ObjectMapper(); // (3)

    @BeforeEach // (4)
    void setUp(RestDocumentationContextProvider restDocumentation) {
        this.mockMvc = MockMvcBuilders
                .webAppContextSetup(context)
                .apply(documentationConfiguration(restDocumentation).snippets()
                                .withTemplateFormat(TemplateFormats.asciidoctor())
                        /*.withTemplateFormat(TemplateFormats.markdown())*/)
                .build();
    }

    /**
     * 테스트 코드 작성 부분
     */
}
우선 설정 부분입니다. 위에서 표기한 순서대로
(1): 지정한 컨트롤러 및 MVC 관련 빈들만 등록합니다.
(2): RestDocs 및 스프링 컨테이너를 확장합니다.
(3): 요청 파라미터로 RequestDto 형식의 JSON을 넘겨주기 위해서 Object를 문자열로 변환해주는 ObjectMapper 생성
(4): WebApplicationContext와 RestDocumentationContextProvider를 이용하여 MockMvc를 초기화해줍니다. 아래의 .withTemplateFormat 메서드를 이용하여 생성되는 Rest Docs 스니펫의 형식을 결정할 수 있습니다.
이제 테스트 코드를 작성해봅시다.
@WebMvcTest(RestDocsController.class)
@ExtendWith({RestDocumentationExtension.class, SpringExtension.class})
@AutoConfigureMockMvc
public class RestDocsControllerTest {

    ...

    @Test
    public void sampleTest() throws Exception {
    	// given
        RequestDto requestDto = new RequestDto(1L, "이름입니다"); // (1)

        // when
        this.mockMvc.perform(get("/api/test") // (2)
                        .contentType(MediaType.APPLICATION_JSON) // (3)
                        .content(objectMapper.writeValueAsString(requestDto))) // (4)
                .andExpect(status().isOk()) // (5)
                .andDo(document("sample", // (6)
                        preprocessRequest(prettyPrint()), // (7)
                        preprocessResponse(prettyPrint()),
                        requestFields( // (8)
                                fieldWithPath("id").description("요청 id"),
                                fieldWithPath("name").description("요청 name")
                        ),
                        responseFields( // (9)
                                fieldWithPath("result").description("응답 result")
                        )
                ));
    }
이번에도 마찬가지로 번호를 매긴 순서대로
(1): Request로 보낼 데이터를 생성합니다.
(2): "/api/test"경로로 GET 요청을 보냅니다.
(3): 요청 보낼때 요청 메시지의 타입을 JSON 형식으로 설정합니다.
(4): 요청 메시지의 데이터를 위에서 생성한 데이터를 JSON 문자열로 변환하여 요청합니다.
(5): 요청을 마친 뒤, 성공적으로 요청이 이루어졌는지 검증합니다.
(6): 요청을 마친 뒤, "sample"이라는 폴더에 Rest Docs 문서를 생성합니다. 이렇게 되면 build.gradle에서 선언한 스니펫 주소에 더해서 최종적으로 "build/generated-snippets/sample" 하위 폴더에 Rest Docs 스니펫이 생성됩니다.
(7): 요청과 응답에 대한 메시지를 Content-Type에 알맞게 출력합니다. 현재는 JSON이므로 JSON 형식에 알맞게 이쁘게 출력됩니다.
(8): 요청 필드에 대한 표시입니다. id와 name을 적어주고 각각에 대한 설명도 첨부합니다.
(9): 응답 필드에 대한 표시입니다.
이대로 테스트 코드를 실행하여 성공하면 아래와 같이 해당 경로에 스니펫들이 생성될 겁니다.
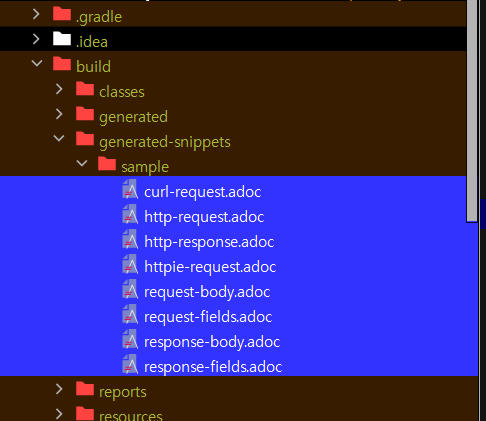
만약 보이지 않으신다면

여기 상단에 톱니바퀴 모양을 누르고
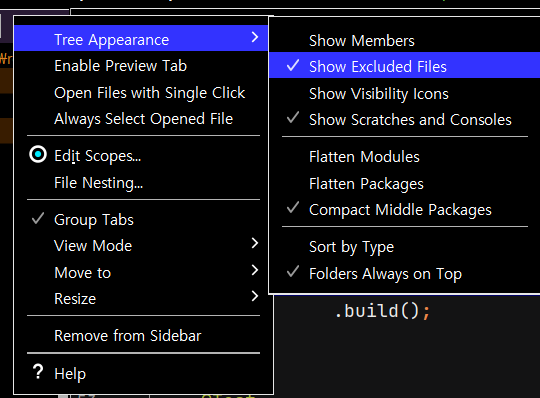
Slow Excluded Files를 체크하시면 볼 수 있으실 겁니다.
Rest Docs 문서 형식 지정
이제 스니펫들을 생성하였으니, 이 스니펫들을 이용하여 html 로 볼 수 있도록 해야겠죠. 그렇게 하기 위해선 스니펫들을 이용하여 표현할 형식을 지정해주어야 합니다.
이 형식을 지정해주는 파일은 src/docs/asciidoc 하위에 생성해주어야 합니다.
저는 이름이 index인 파일을 생성해주었습니다.
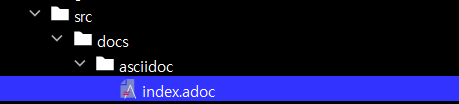
index.adoc
= Sample API
여긴 부제목입니다.
:doctype: book
:icons: font
:source-highlighter: highlightjs
:toc: left
:toclevels: 2
:sectlinks:

== API 테스트

=== 요청
include::{snippets}/sample/http-request.adoc[]
include::{snippets}/sample/request-fields.adoc[]

=== 응답
include::{snippets}/sample/http-response.adoc[]
include::{snippets}/sample/response-fields.adoc[]
위와 같이 API 테스트에 대한 요청과 응답 출력 형식을 지정해주면 됩니다.
이렇게 설정해주고, 터미널에서 ./gradlew clean build test 명령어를 실행해주면 resource/static/docs/ 하위에 제가 설정한 이름인 index.html이 생성됩니다.

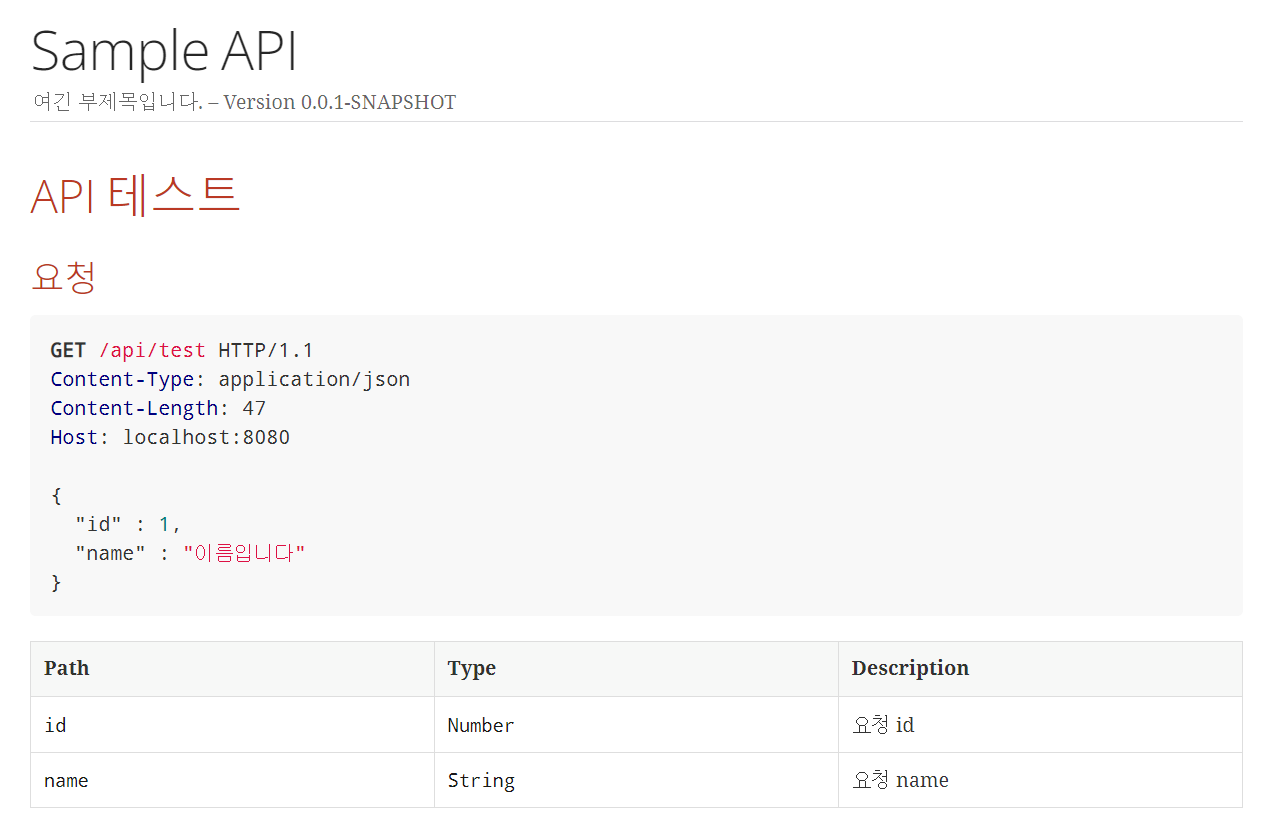
이를 확인해보기 위해서 Application을 실행시킨 후 주소창에 http://localhost:8080/docs/index.html 를 입력하면 아래와 같이 API 문서가 출력되는걸 확인할 수 있습니다.
Rest Docs 문서
요청
응답
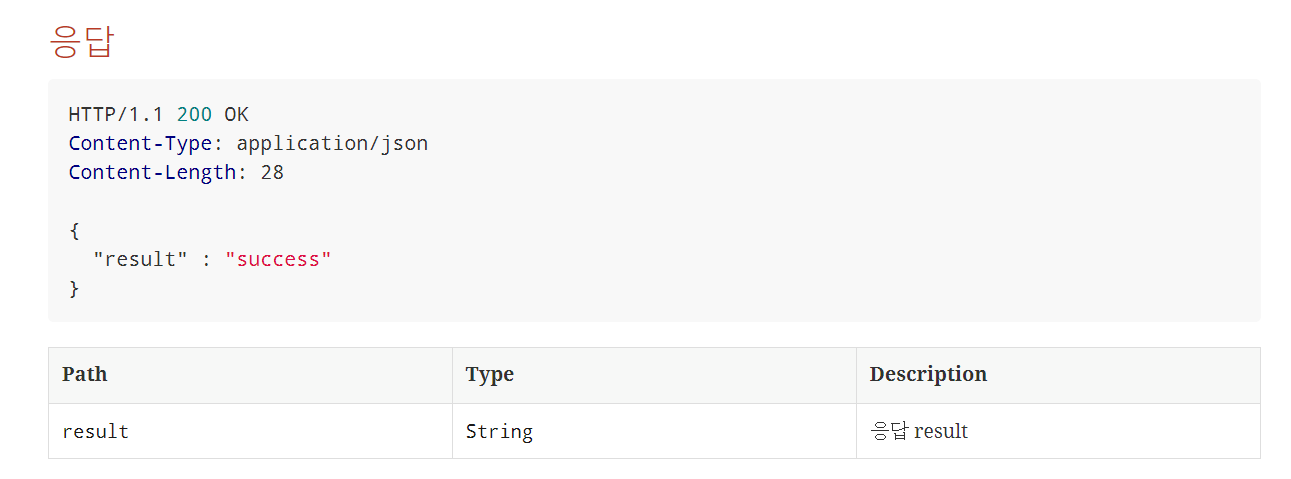
Request와 Response에 저희가 원하는대로 필드 값들이 선언되어 있는걸 볼 수 있습니다.
