파일 업로드 처리
파일 업로드에 필요한 모든 기능은 이미 스프링 Web 관련 라이브러리에 존재하므로 프로젝트의 application.properties에 이와 관련된 설정을 추가한다.
spring.servlet.multipart.max-request-size=30MB
spring.servlet.multipart.max-file-size=10MB

org.zerock.upload.path=upload
예제에서는 프로젝트의 실행 폴더에 upload 폴더를 생성해서 파일들을 보관하도록 할 것이다.
추가된 설정은 파일 하나의 최대 크기를 10MB로 제한하고 한 번에 전송하는 데이터는 30MB로 제한하는 설정이다.
ProductDTO
@Data
@Builder
@AllArgsConstructor
@NoArgsConstructor
public class ProductDTO {

    private Long pno;
    private String pname;
    private int price;
    private String pdesc;
    private boolean delFlag;

    @Builder.Default
    private List<MultipartFile> files = new ArrayList<>();
    @Builder.Default
    private List<String> uploadFileNames = new ArrayList<>();

}
CustomFileUtil
@Component
@Log4j2
@RequiredArgsConstructor
public class CustomFileUtil {

    @Value("${org.zerock.upload.path}")
    private String uploadPath;

    @PostConstruct
    public void init() {
        File tempFolder = new File(uploadPath);

        if (!tempFolder.exists()) {
            tempFolder.mkdir();
        }

        uploadPath = tempFolder.getAbsolutePath();

        log.info("----------------------------------------");
        log.info(uploadPath);
    }

    public List<String> saveFiles(List<MultipartFile> files) throws RuntimeException {
        if (files == null || files.size() == 0) {
            return null;
        }

        List<String> uploadNames = new ArrayList<>();

        for (MultipartFile multipartFile : files) {
            String saveName =
                UUID.randomUUID().toString() + "_" + multipartFile.getOriginalFilename();

            Path savePath = Paths.get(uploadPath, saveName);

            try {
                Files.copy(multipartFile.getInputStream(), savePath);
                uploadNames.add(saveName);
            } catch (IOException e) {
                throw new RuntimeException(e.getMessage());
            }
        }

        return uploadNames;
    }
}
하나씩 살펴보자
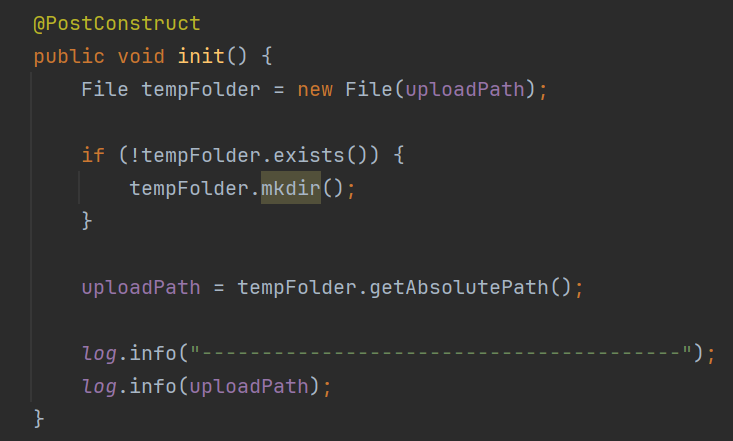
먼저 @PostConstruct를 통해 폴더를 미리 만들어 둘 건데,
File tempFolder = new File(uploadPath)은 uploadPath에 지정된 경로에 대한 File 객체를 생성하는 코드다. 지정된 경로에 파일이나 디렉토리가 없다면 mkdir()을 통해 폴더를 만들어주는 것이다.
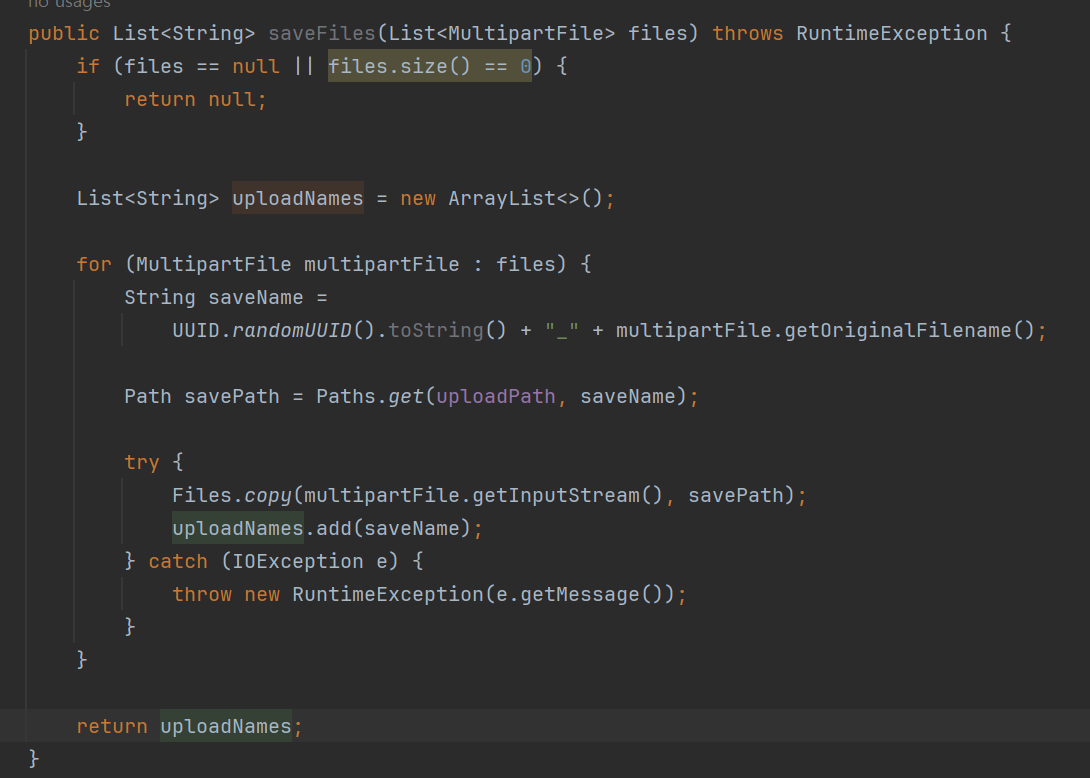
그 다음 만들어진 폴더에 파일들을 저장해야한다.
Path savePath = Paths.get(uploadPath, saveName)를 통해 저장할 파일의 경로를 생성한다. uploadPath는 파일을 저장할 디렉토리의 경로이며, saveName은 파일의 이름이다.
이후 Files.copy(multipartFile.getInputStream(), savePath)을 통해 multipartFile의 입력 스트림에서 읽어와서 savePath로 복사한다. 즉, 업로드된 파일을 저장 경로에 복사하여 저장한다.
ProductController
@RestController
@RequiredArgsConstructor
@Log4j2
@RequestMapping("/api/products")
public class ProductController {

    private final CustomFileUtil fileUtil;

    @PostMapping("/")
    public Map<String, String> register(ProductDTO productDTO) {

        log.info("register: " + productDTO);

        List<MultipartFile> files = productDTO.getFiles();

        List<String> uploadFileNames = fileUtil.saveFiles(files);

        productDTO.setUploadFileNames(uploadFileNames);

        log.info(uploadFileNames);

        return Map.of("RESULT", "SUCCESS");
    }
}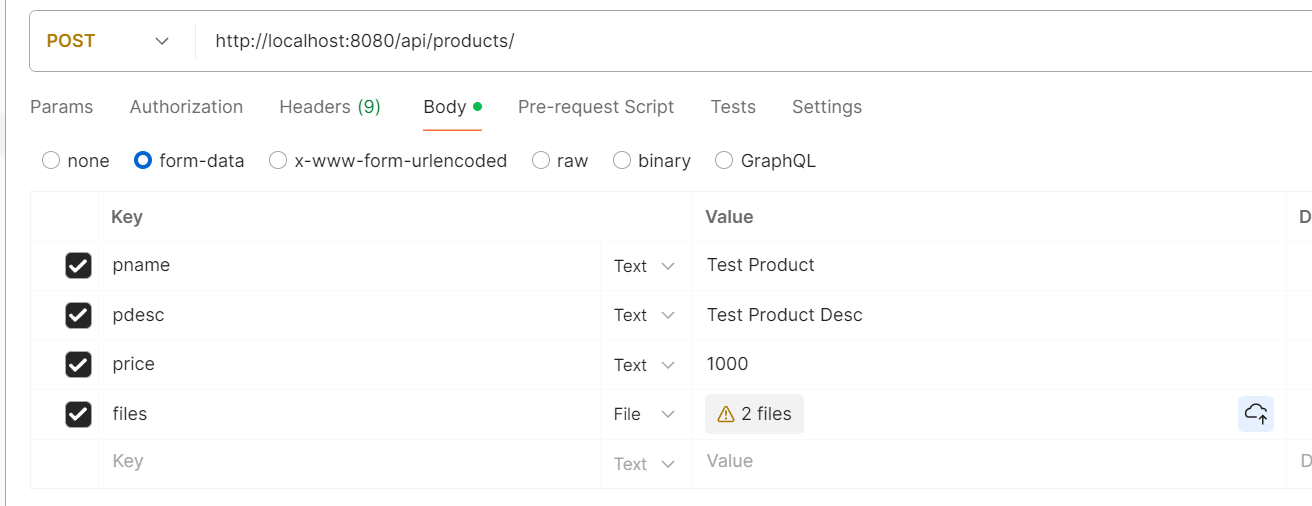
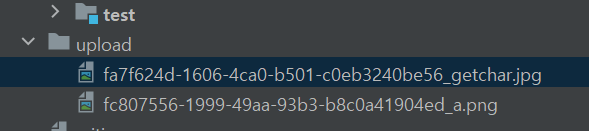
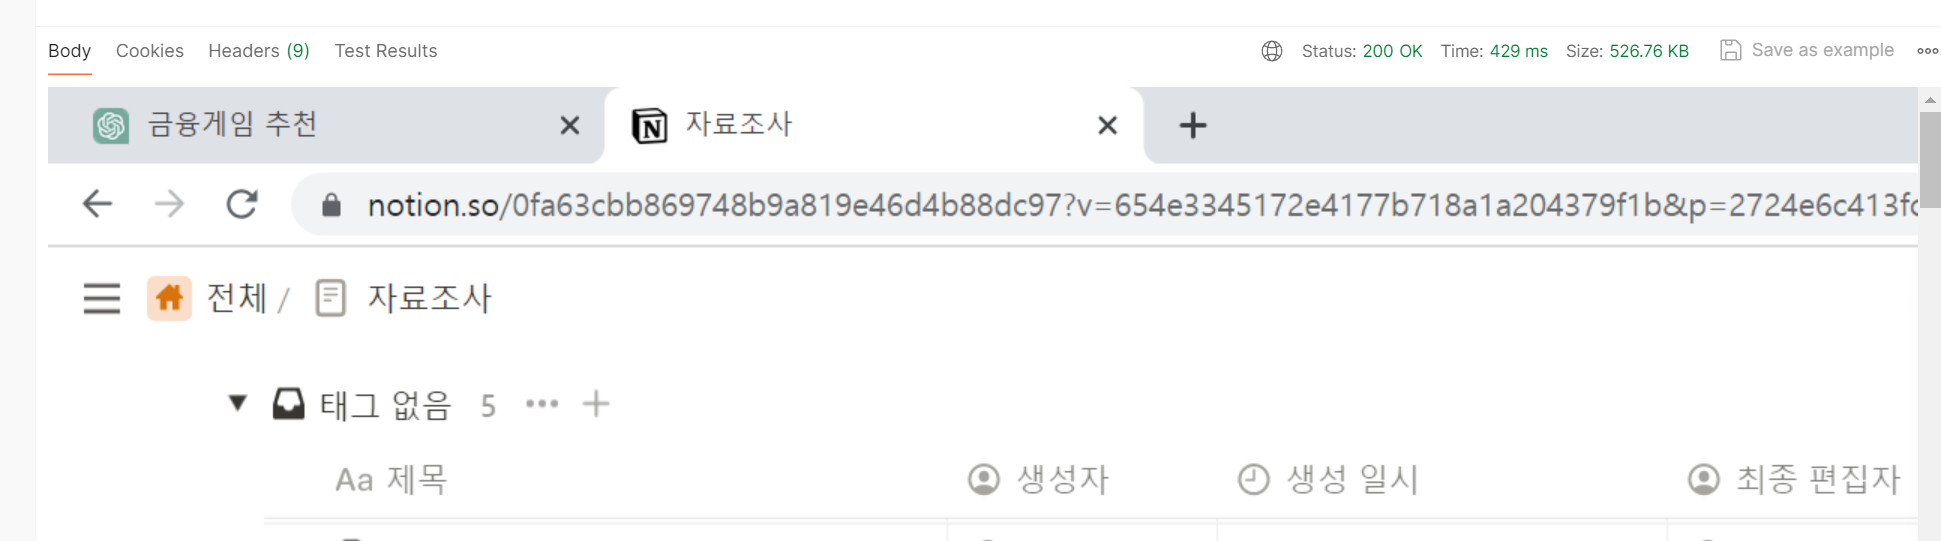
postman을 통해 업로드를 하면 다음과 같이 정상적으로 업로드 되는것을 확인할 수 있다.
썸네일 이미지 처리
업로드된 이미지 파일의 용량이 크다면 나중에 사용자들이 이미지를 보는데 많은 자원과 시간을 소비해야하므로 이미지는 썸네일을 만들어서 처리한다. 먼저 build.gradle에 다음을 추가한다.
implementation 'net.coobird:thumbnailator:0.4.19'CustomFileUtil
@Component
@Log4j2
@RequiredArgsConstructor
public class CustomFileUtil {

    @Value("${org.zerock.upload.path}")
    private String uploadPath;

    @PostConstruct
    public void init() {
        File tempFolder = new File(uploadPath);

        if (!tempFolder.exists()) {
            tempFolder.mkdir();
        }

        uploadPath = tempFolder.getAbsolutePath();

        log.info("----------------------------------------");
        log.info(uploadPath);
    }

    public List<String> saveFiles(List<MultipartFile> files) throws RuntimeException {
        if (files == null || files.size() == 0) {
            return null;
        }

        List<String> uploadNames = new ArrayList<>();

        for (MultipartFile multipartFile : files) {
            String saveName =
                UUID.randomUUID().toString() + "_" + multipartFile.getOriginalFilename();

            Path savePath = Paths.get(uploadPath, saveName);

            try {
                Files.copy(multipartFile.getInputStream(), savePath);

                String contentType = multipartFile.getContentType();

                if (contentType != null && contentType.startsWith("image")) {
                    Path thumbnailPath = Paths.get(uploadPath, "s_" + saveName);

                    Thumbnails.of(savePath.toFile()).size(200, 200).toFile(thumbnailPath.toFile());
                }

                uploadNames.add(saveName);
            } catch (IOException e) {
                throw new RuntimeException(e.getMessage());
            }
        }

        return uploadNames;
    }
}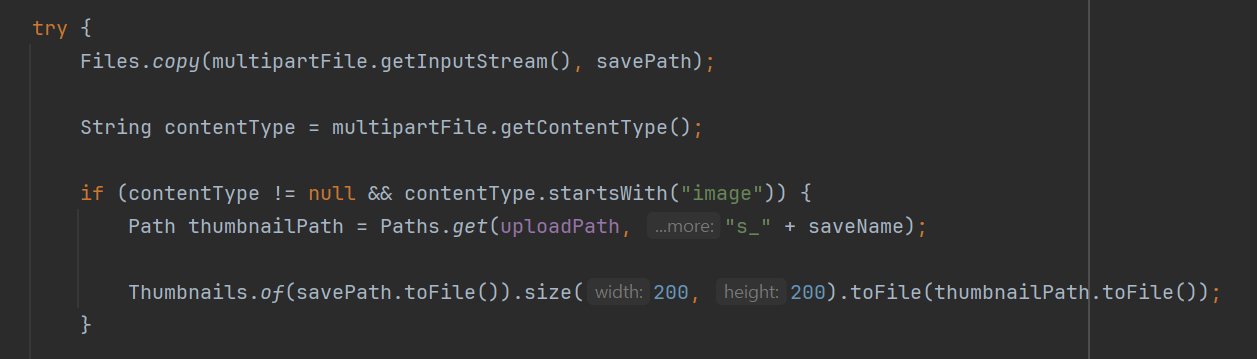
해당 부분을 살펴보자.
Thumbnails.of(savePath.toFile())에서 savePath.toFile()은 썸네일을 만들 이미지의 원본 파일을 지정한다.
Thumbnails.of() 메서드는 썸네일을 생성할 이미지 파일을 지정하는데 사용된다. 여기서 savePath.toFile()은 원본 이미지 파일을 가리키는 File 객체이다. 이를 통해 썸네일을 생성할 원본 이미지를 지정할 수 있다.
따라서 Thumbnails.of(savePath.toFile())는 원본 이미지 파일을 지정하여 해당 이미지에 대한 썸네일을 생성할 준비를 하는 것이다. 그 후에 .size(200, 200)로 썸네일의 크기를 설정하고, .toFile(thumbnailPath.toFile())로 썸네일을 저장할 파일의 경로를 지정하여 실제로 썸네일을 생성하고 저장한다.
업로드 파일 조회/삭제
조회
 public ResponseEntity<Resource> getFile(String filename) {

        Resource resource = new FileSystemResource(uploadPath + File.separator + filename);

        if (!resource.isReadable()) {
            resource = new FileSystemResource(uploadPath + File.separator + "default.png");
        }

        HttpHeaders headers = new HttpHeaders();

        try {
            headers.add("Content-Type", Files.probeContentType(resource.getFile().toPath()));
        } catch (Exception e) {
            return ResponseEntity.internalServerError().build();
        }
        return ResponseEntity.ok().headers(headers).body(resource);
} @GetMapping("/view/{filename}")
public ResponseEntity<Resource> viewFileGET(@PathVariable String filename) {
return fileUtil.getFile(filename);
}하나씩 살펴보자. 먼저 Resource라는 인터페이스가 나오는데 Resource는 Spring Framework에서 제공하는 추상화된 리소스 인터페이스로, 다양한 유형의 리소스를 표현할 수 있다. 여기서는 uploadPath + File.separator + filename 경로의 파일을 가져오는 역할을 한다. 여기서 File.separator라는게 나오는데 이는 '/'를 의미한다. 따라서 예를 들자면 Resource 객체를 이용해 'C:/upload/aaa.jpg' 경로의 파일을 읽어오는 것이다.
이후 HttpHeaders를 통해 해당 파일의 MIME유형을 추가해주면 된다. resource.getFile()로 파일 객체를 가져오고 toPath()로 파일의 경로를 찾아 MIME유형을 찾으면 된다.
headers를 통해 MIME유형을 추가해줘야하는 이유
headers를 통해 MIME유형을 추가해주지 않으면 클라이언트가 서버로부터 전송되는 데이터의 형식을 정확히 인식할 수 없기 때문에 문제가 발생할 수 있다.
다음의 경우를 headers를 추가하지 않은 경우를 보자.
그림과 같이 이미지파일이 깨져서 보이는 것을 확인할 수 있는데, 이는 현재 MIME타입을 명시해주지 않았기때문에 Content-type이 application/json 타입으로 되어있기 때문이다.

headers를 통해 MIME 유형을 제대로 명시해주면 다음과 같이 Content-Type이 image/png로 변해서 이미지를 올바르게 조회할 수 있다.

아래는 Chatgpt에게 Resource에 대해 물어본 글이다.
FileSystemResource는 Spring Framework에서 파일 시스템에 있는 리소스를 나타내는 클래스입니다. 이 클래스는 Spring의 Resource 인터페이스를 구현한 것으로, 파일 시스템에서 리소스를 로드하고 읽어오는 데 사용됩니다.
일반적으로 Spring 애플리케이션에서는 다양한 위치에 있는 리소스를 사용해야 하는데, 이를 위해 Spring은 Resource 인터페이스를 제공합니다. Resource 인터페이스를 구현한 여러 클래스 중 하나가 FileSystemResource입니다.
FileSystemResource를 사용하면 파일 시스템에 있는 파일을 Resource 객체로 간편하게 변환할 수 있습니다. 이를 통해 파일을 읽어오거나 다운로드할 수 있습니다.
위의 코드에서는 FileSystemResource를 사용하여 파일 시스템에서 요청된 파일을 읽어옵니다. 주어진 파일 경로를 인자로 전달하여 FileSystemResource 객체를 생성하고, 이를 통해 파일의 내용을 읽어올 수 있습니다.
삭제
 public void deleteFiles(List<String> fileNames) {

        if (fileNames == null || fileNames.size() == 0) {
            return;
        }

        fileNames.forEach(fileName -> {
            String thumbnailFileName = "s_" + fileName;
            Path thumbnailPath = Paths.get(uploadPath, thumbnailFileName);
            Path filePath = Paths.get(uploadPath, fileName);

            try {
                Files.deleteIfExists(filePath);
                Files.deleteIfExists(thumbnailPath);
            } catch (IOException e) {
                throw new RuntimeException(e.getMessage());
            }
        });
    }