
RDBMS
컴퓨터에 정보를 저장하고 관리하는 기술
매우 고도화된 엑셀과 비슷하다.
MySQL, PostgreSQL, Oracle Database등의 종류가 있다.
프로젝트 java11버전으로 맞추기
- file - Project Structure에서 SDK, Language Level 11로 설정
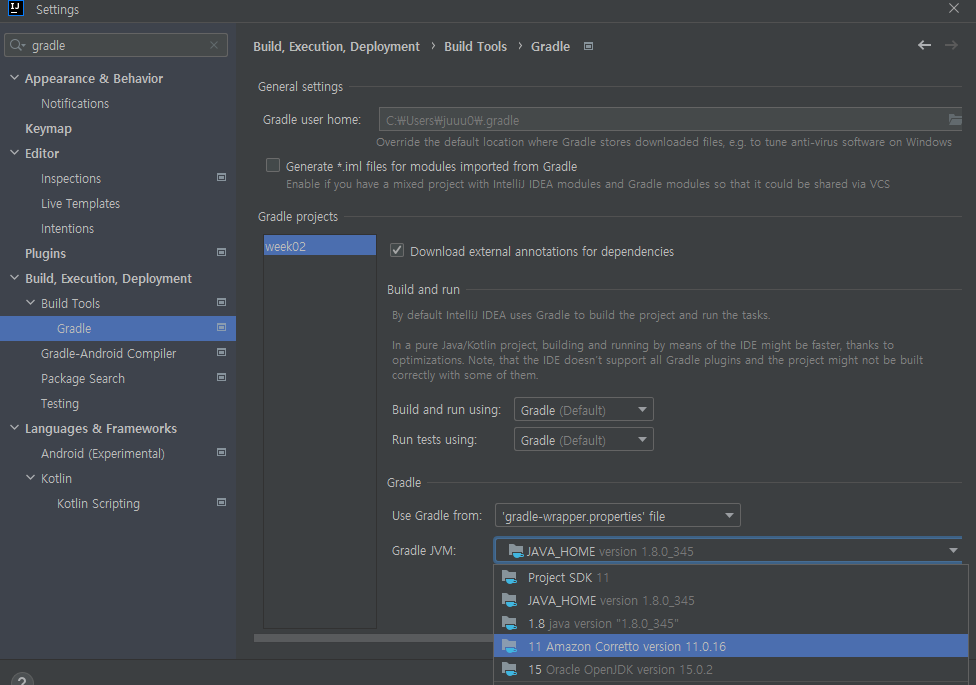
2. settings - gradle에서 11로 설정
H2
In-memory DB, 서버가 작동하는 동안만 내용을 저장하고, 서버가 작동을 멈추면 데이터가 모두 삭제된다.
이 문구를 보고 오류를 해결할 수 있을것같다.
나는 서버를 다시 실행시켰는데, 그래서 만들어뒀던 table도 날아간것이다.
H2콘솔 오류 해결
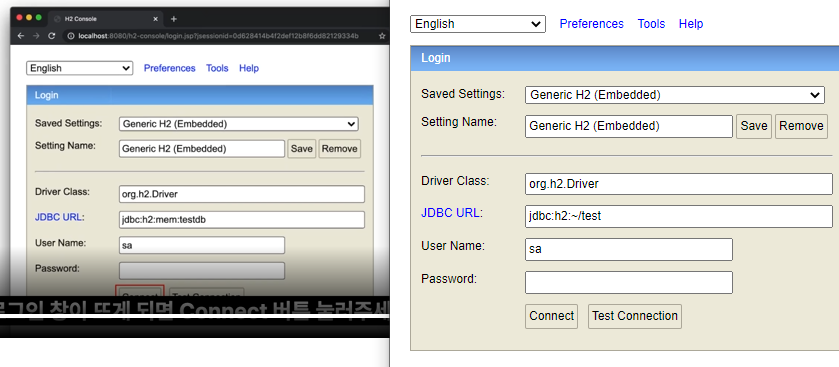
JDBC URL을 왼쪽과 동일하게 수정하기
SQL
- 테이블 생성
CREATE TABLE IF NOT EXISTS courses (
    id bigint(5) NOT NULL AUTO_INCREMENT,
    title varchar(255) NOT NULL,
    tutor varchar(255) NOT NULL,
    PRIMARY KEY (id)
);- 데이터(entity) 삽입
INSERT INTO courses (title, tutor) VALUES
('웹개발의 봄, Spring', '남병관'), ('웹개발 종합반', '이범규');- 삽입된 데이터 조회
SELECT * FROM courses;JPA
jpa는 SQL을 쓰지 않고도 데이터 생성, 조회, 수정, 삭제를 가능하게 하는 번역기이다.
@는 스프링에게 해당 메소드의 역할을 알려준다. (annotation)
@Id는 프라이머리 키로 설정하겠다는 어노테이션이다. (null이거나, 공백일 수 없고, 겹칠 수 없다.)
@GeneratedValue는 특정 값을 넣었을 때 자동으로 증가 카운팅을 해준다.
@Column은 nullable, null일 수 없는 데이터이다.
@NoArgsConstructor // 기본생성자를 대신 생성해줍니다.
@Entity // 테이블임을 나타냅니다.
public class Course {

    @Id // ID 값, Primary Key로 사용하겠다는 뜻입니다.
    @GeneratedValue(strategy = GenerationType.AUTO) // 자동 증가 명령입니다.
    private Long id;

    @Column(nullable = false) // 컬럼 값이고 반드시 값이 존재해야 함을 나타냅니다.
    private String title;

    @Column(nullable = false)
    private String tutor;

		public Course(String title, String tutor) {
        this.title = title;
        this.tutor = tutor;
    }

		public Long getId() {
        return id;
    }

    public String getTitle() {
        return this.title;
    }

    public String getTutor() {
        return this.tutor;
    }
}
repository
JpaRepository의 기능을 모두 물려받아 사용한다.
public interface CourseRepository extends JpaRepository<Course, Long> {
}
SQL문이 콘솔창에 보이게하는 설정
spring.jpa.show-sql=true최초 생성 일자, 최종 수정 일자
beanCreationException 에러
Caused by: org.springframework.beans.factory.BeanCreationException: Error creating bean with name 'courseRepository' defined in com.sparta.week02.domain.CourseRepository defined in @EnableJpaRepositories declared on JpaRepositoriesRegistrar.EnableJpaRepositoriesConfiguration: Invocation of init method failed; nested exception is java.lang.IllegalArgumentException: Not a managed type: class com.sparta.week02.domain.Course
해결
import javax.persistence.Column;
import javax.persistence.Entity;
import javax.persistence.GeneratedValue;
import javax.persistence.GenerationType;
import javax.persistence.Id;
entity와 Id를 잘못 import해서 난 오류이다.
import해보려 하면 두가지 선택지가 나오는데, annotation말고 javax.persistence로 선택해주면 된다.
CRUD
생성(Create), 조회(Read), 변경(Update), 삭제(Delete)
create, read
Week02Application.java
서버를 다시실행하기
데이터 저장 원리
repository에 save를 이용하여, new Course로 만든 인스턴스를 save함수가 파라미터로 받고, 이것을 JPA를 통해 query로 변환하고, 이 쿼리가 DB로 가서 insert명령어를 수행한다.
데이터 조회 원리
List로 Course라는 객체를 받고, findAll()로 모든 데이터를 조회
조회한 것을 하나하나 꺼내기 위해 for문과 .get()을 사용
데이터를 하나만 조회할때는, .findById(찾을 값)를 사용, orElseThrow는 찾지 못했을 때 예외처리 하는 역할이다.
package com.sparta.week02;

import com.sparta.week02.domain.Course;
import com.sparta.week02.domain.CourseRepository;
import org.springframework.boot.CommandLineRunner;
import org.springframework.boot.SpringApplication;
import org.springframework.boot.autoconfigure.SpringBootApplication;
import org.springframework.context.annotation.Bean;
import org.springframework.data.jpa.repository.config.EnableJpaAuditing;

import java.util.List;

@EnableJpaAuditing
@SpringBootApplication
public class Week02Application {

    public static void main(String[] args) {
        SpringApplication.run(Week02Application.class, args);
    }

    // Week02Application.java 의 main 함수 아래에 붙여주세요.
    @Bean
    public CommandLineRunner demo(CourseRepository repository) {
        return (args) -> {
            repository.save(new Course("프론트엔드의 꽃, 리액트", "임민영"));
            // 데이터 전부 조회하기
            List<Course> courseList = repository.findAll();
            for (int i = 0; i < courseList.size(); i++) {
                Course course = courseList.get(i);
                System.out.println(course.getId());
                System.out.println(course.getTitle());
                System.out.println(course.getTutor());
            }

// 데이터 하나 조회하기
            Course course = repository.findById(1L).orElseThrow(
                    () -> new IllegalArgumentException("해당 아이디가 존재하지 않습니다.")
            );

        };
    }
}
Service
스프링의 구조
- controller : 가장 바깥 부분, 요청과 응답을 처리
- Service : 중간 부분, 실제 중요한 작동이 많이 일어나는 부분
- Repo : 가장 안쪽 부분, DB와 맞닿아있음. (Repository, Entity)
Update는 service부분에 작성하게된다.
update
public void update(Course course) {
    this.title = course.title;
    this.tutor = course.tutor;
}
Course.java에 update메소드를 추가한다.
업데이트를 하려면 객체가 필요하기 때문에 파라미터로 객체를 받는다.
Service 패키지를 추가하고, CourseService.java를 작성한다.
package com.sparta.week02.service;

import com.sparta.week02.domain.Course;
import com.sparta.week02.domain.CourseRepository;
import org.springframework.stereotype.Service;

import javax.transaction.Transactional;

@Service // 스프링에게 이 클래스는 서비스임을 명시
public class CourseService {

    // final: 서비스에게 꼭 필요한 녀석임을 명시
    private final CourseRepository courseRepository;

    // 생성자를 통해, Service 클래스를 만들 때 꼭 Repository를 넣어주도록
    // 스프링에게 알려줌
    public CourseService(CourseRepository courseRepository) {
        this.courseRepository = courseRepository;
    }

    @Transactional // SQL 쿼리가 일어나야 함을 스프링에게 알려줌
    public Long update(Long id, Course course) {
        Course course1 = courseRepository.findById(id).orElseThrow(
                () -> new IllegalArgumentException("해당 아이디가 존재하지 않습니다.")
        );
        course1.update(course);
        return course1.getId();
    }
}
Week02Application에 와서 메인함수 안에 작성한다.
@Bean
public CommandLineRunner demo(CourseRepository courseRepository, CourseService courseService) {
    return (args) -> {
        courseRepository.save(new Course("프론트엔드의 꽃, 리액트", "임민영"));

        System.out.println("데이터 인쇄");
        List<Course> courseList = courseRepository.findAll();
        for (int i=0; i<courseList.size(); i++) {
            Course course = courseList.get(i);
            System.out.println(course.getId());
            System.out.println(course.getTitle());
            System.out.println(course.getTutor());
        }

        Course new_course = new Course("웹개발의 봄, Spring", "임민영");
        courseService.update(1L, new_course);
        courseList = courseRepository.findAll();
        for (int i=0; i<courseList.size(); i++) {
            Course course = courseList.get(i);
            System.out.println(course.getId());
            System.out.println(course.getTitle());
            System.out.println(course.getTutor());
        }
    };
}
delete
@Bean
public CommandLineRunner demo(CourseRepository courseRepository, CourseService courseService) {
    return (args) -> {
        courseRepository.save(new Course("프론트엔드의 꽃, 리액트", "임민영"));

        System.out.println("데이터 인쇄");
        List<Course> courseList = courseRepository.findAll();
        for (int i=0; i<courseList.size(); i++) {
            Course course = courseList.get(i);
            System.out.println(course.getId());
            System.out.println(course.getTitle());
            System.out.println(course.getTutor());
        }

        Course new_course = new Course("웹개발의 봄, Spring", "임민영");
        courseService.update(1L, new_course);
        courseList = courseRepository.findAll();
        for (int i=0; i<courseList.size(); i++) {
            Course course = courseList.get(i);
            System.out.println(course.getId());
            System.out.println(course.getTitle());
            System.out.println(course.getTutor());
        }

        courseRepository.deleteAll();
    };
}
추가 키워드
Spring Boot VS Node.js
Spring boot
springboot는 spring의 복잡한 초기 세팅 문제를 해결하기 위해 등장한 프레임워크이다.
다양한 라이브러리를 가지고있다.
TypeSafe하기 때문에 프로젝트 규모가 커지고 안정성이 중요해지는 시점에서 큰 장점을 가진다.
Node.js
Non-blocking I/O, 다른 작업이 처리되는 것을 기다리는 중 다른 작업을 할 수 있기에 효율적이며 서버의 부하가 줄어든다.
싱글 스레드를 사용하여 멀티 스레드에 비해 메모리 절약적으로 효율적이다.
하지만 CPU 연산이 많거나 복잡한 프로그램에는 적합하지 않다. (채팅처럼 특정 값의 변화와 많은 양의 작은 데이터를 주고받는 프로그램 등)
Javascript언어를 이용하기 때문에 Type Safe하지 못해서, 빌드하는 과정이 없기 때문에 에러를 실행 전에 잡아주지 못한다.
Gradle VS Maven
빌드 관리 도구란, 프로젝트에서 작성한 java 코드와 프로젝트 내에 필요한 각종 xml, properties, jar 파일들을 JVM이나 WAS가 인식할 수 있도록 패키징해주는 빌드 과정을 자동화해주는 도구이다.
필요한 라이브러리들을 설정 파일을 통해 자동으로 다운로드해주고, 간편하게 관리해준다.
Gradle
Maven과 Ant를 보완하여 대안으로서 나온 빌드 관리 도구이다.
Groovy언어를 사용한 Domain-specific-language를 사용한다.
maven보다 코드가 훨씬 간결하며, 빌드 시간을 단축시킬 수 있다.
Maven
Ant의 대안으로 만들어졌다.
pom.xml파일에 정보 데이터를 명시한다.
외부 저장소에 필요한 라이브러리와 플러그인을 모두 다운로드 하고, 로컬 시스템 캐시에 모두 저장한다.
Rest API
Representational State Tansfer API
자원(resource), 행위(verb), 표현(Representation)
으로 이루어져있다
- HTTP URI를 통해 자원을 명시하고,
- HTTP Method(POST,GET,PUT,DELETE,PATCH 등)을 통해
- 해당 자원(URI)에 대한 CRUD operation(컴퓨터 소프트웨어가 가지는 기본적인 데이터 처리 기능, 생성, 읽기, 수정, 삭제)을 적용하는 것
REST API 설계 규칙
- URI는 동사보다 명사, 대문자보다는 소문자를 사용한다
- 마지막에 슬래시/를 포함하지 않는다.
- 언더바 대신 하이픈을 사용한다
- 파일확장자를 URI에 포함하지 않는다. (.jpg등)
- 행위를 포함하지 않는다 (delete-post x / post o)
RESTful이란?
REST의 원리를 따르는 것. REST API의 설계 규칙을 올바르게 지키고 적절한 Method를 사용하여 CRUD기능을 처리해야한다.
