Flexible
박스를 일정 비율로 나누고 싶을 때 Flexible 이라는 태그를 사용하면 됨
return MaterialApp(
home: Scaffold(
appBar: AppBar(
title: Text('앱임')
),
body: Row(
children: [
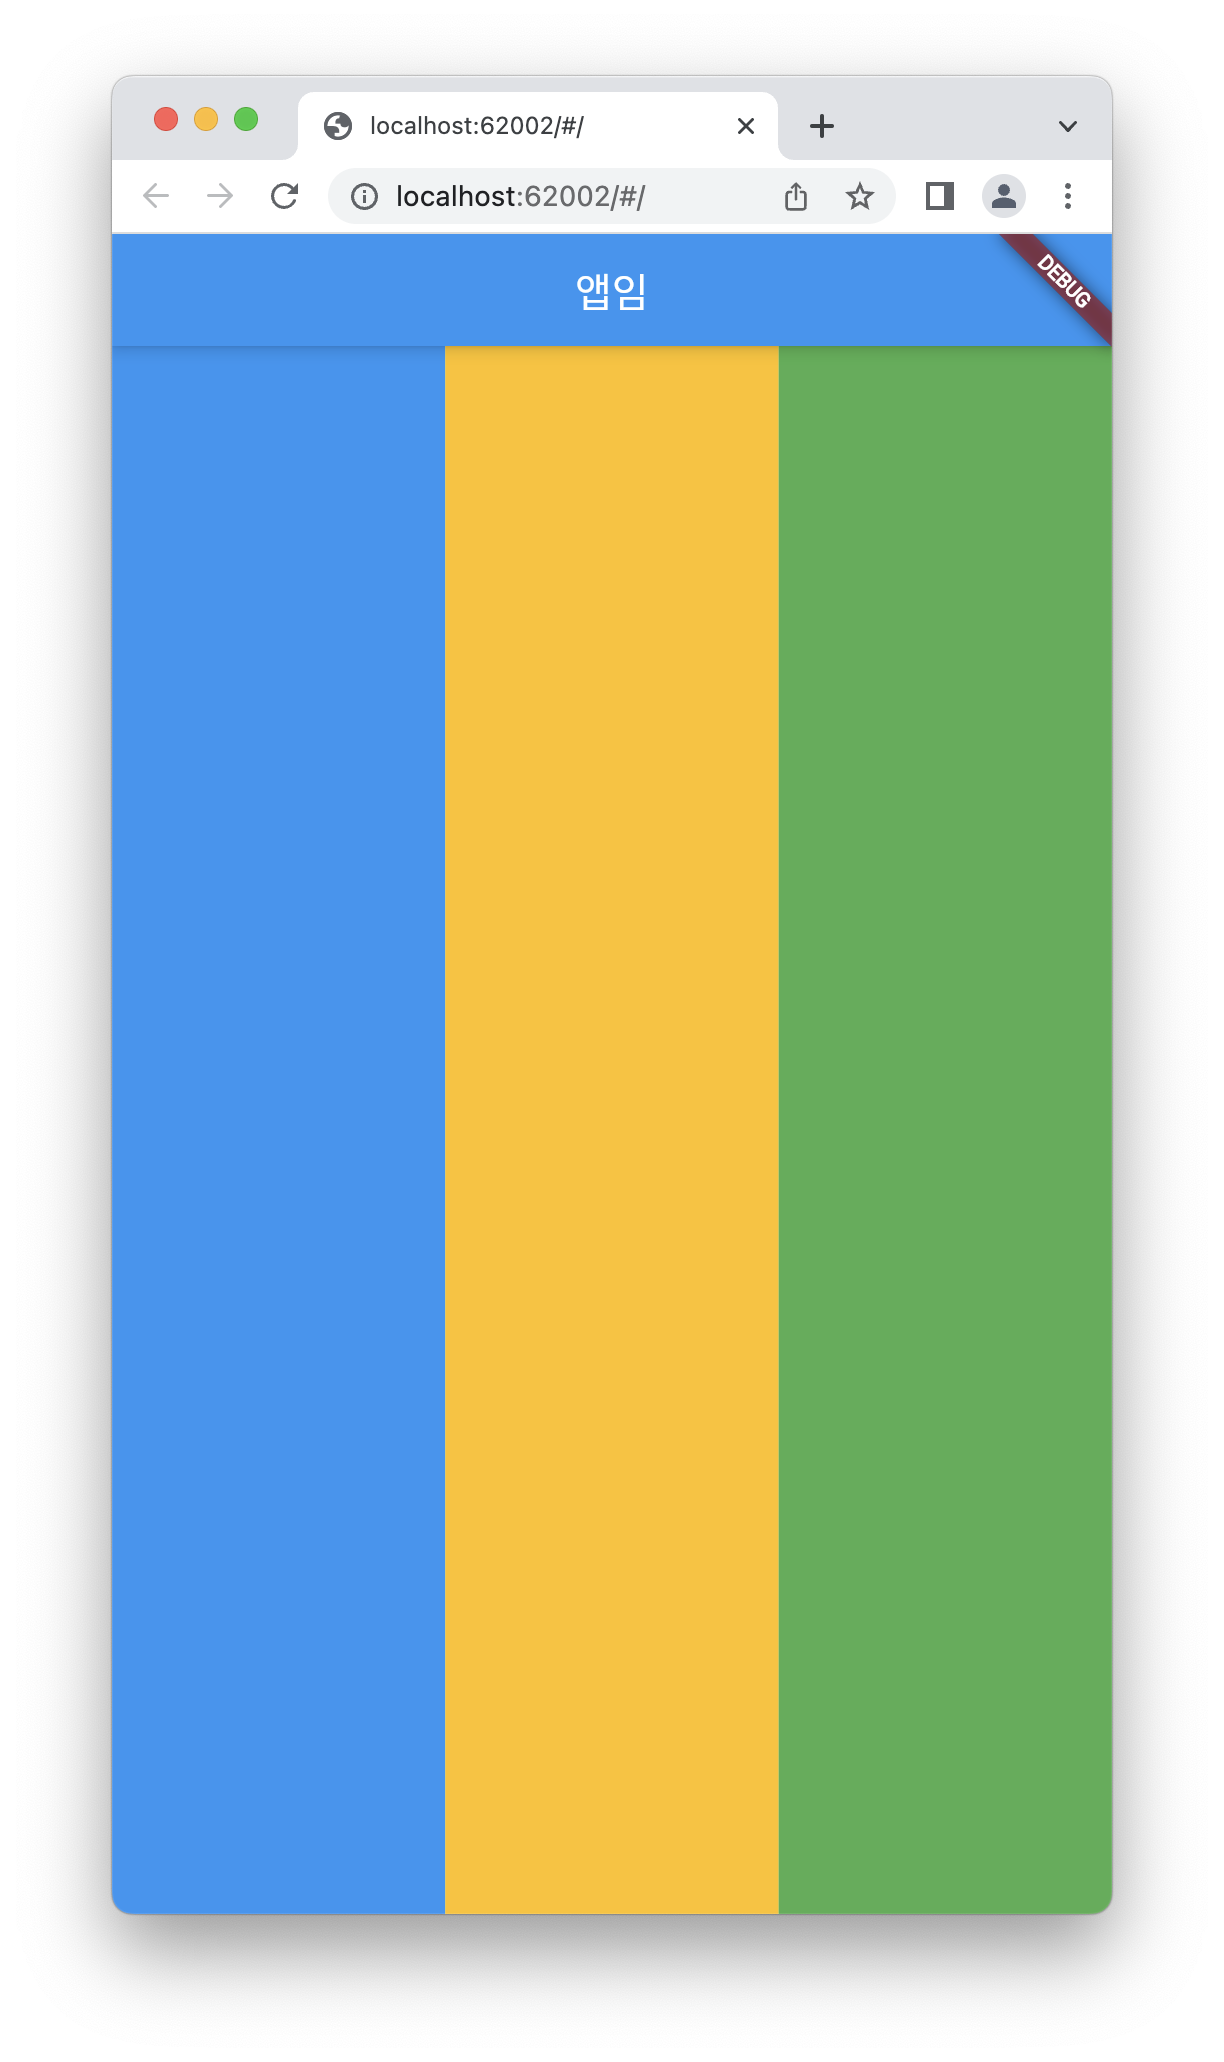
Flexible(child: Container(color: Colors.blue), flex: 3),
Flexible(child: Container(color: Colors.amber), flex: 3,),
Flexible(child: Container(color: Colors.green), flex: 3,),
],
)
)
);위처럼 Flexible 태그 아래에 컨테이너를 넣고 원하는 비율을 넣으면 다음과 같이 완성됨
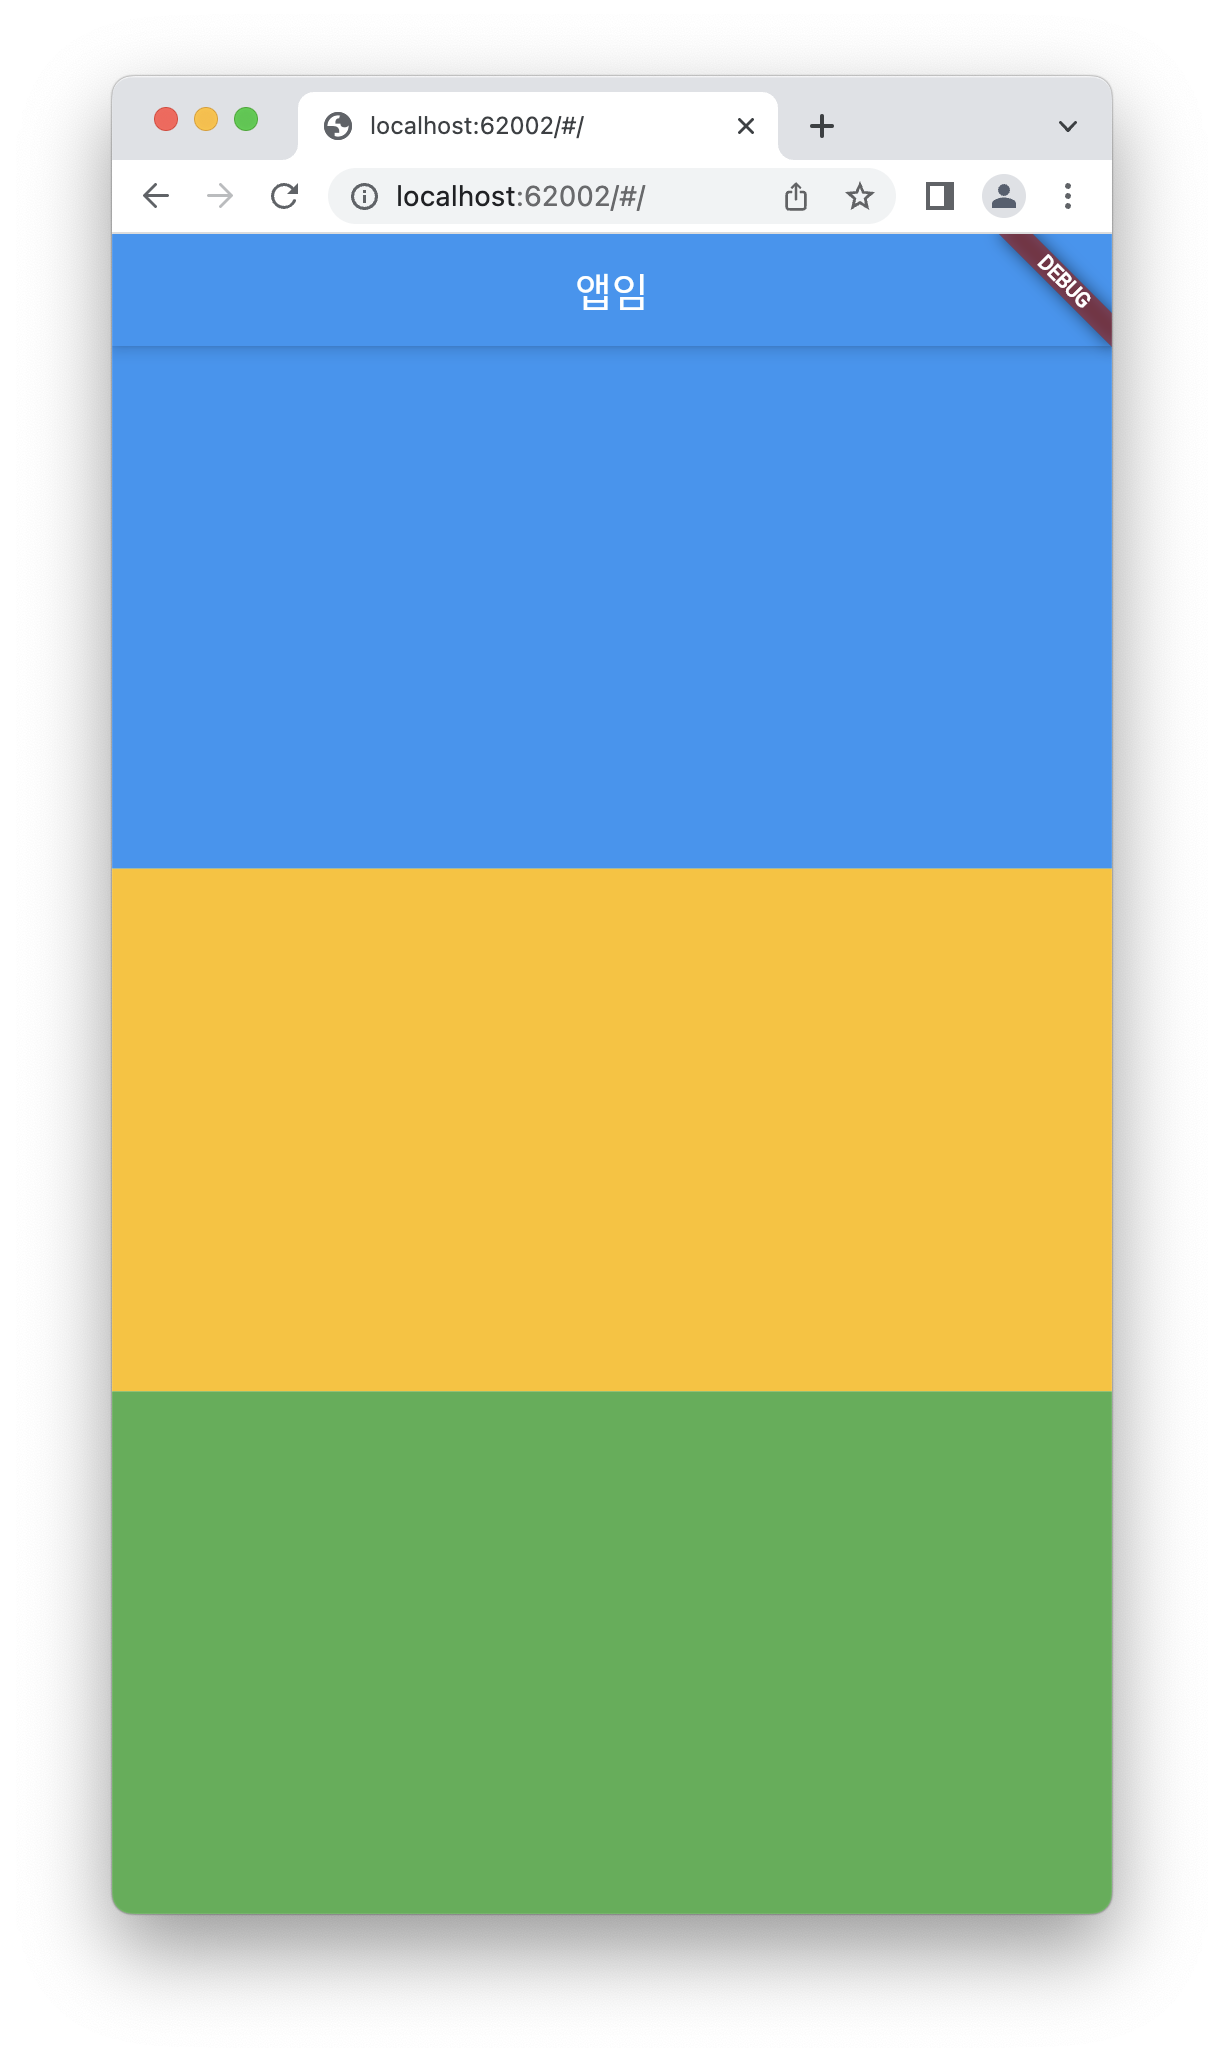
Row 대신 Column으로 설정하면 세로 배치도 가능
Expanded
하나의 박스가 화면을 차지하게 하기 위해서는 Expanded 태그를 이용하면 된다.
Expanded 코드는 flex:1 가진 Flexible 박스랑 똑같다.
혼자서만 flex:1 을 가지면 박스 하나가 화면을 꽉 채우게 된다.
return MaterialApp(
home: Scaffold(
appBar: AppBar(
title: Text('앱임')
),
body: Row(
children: [
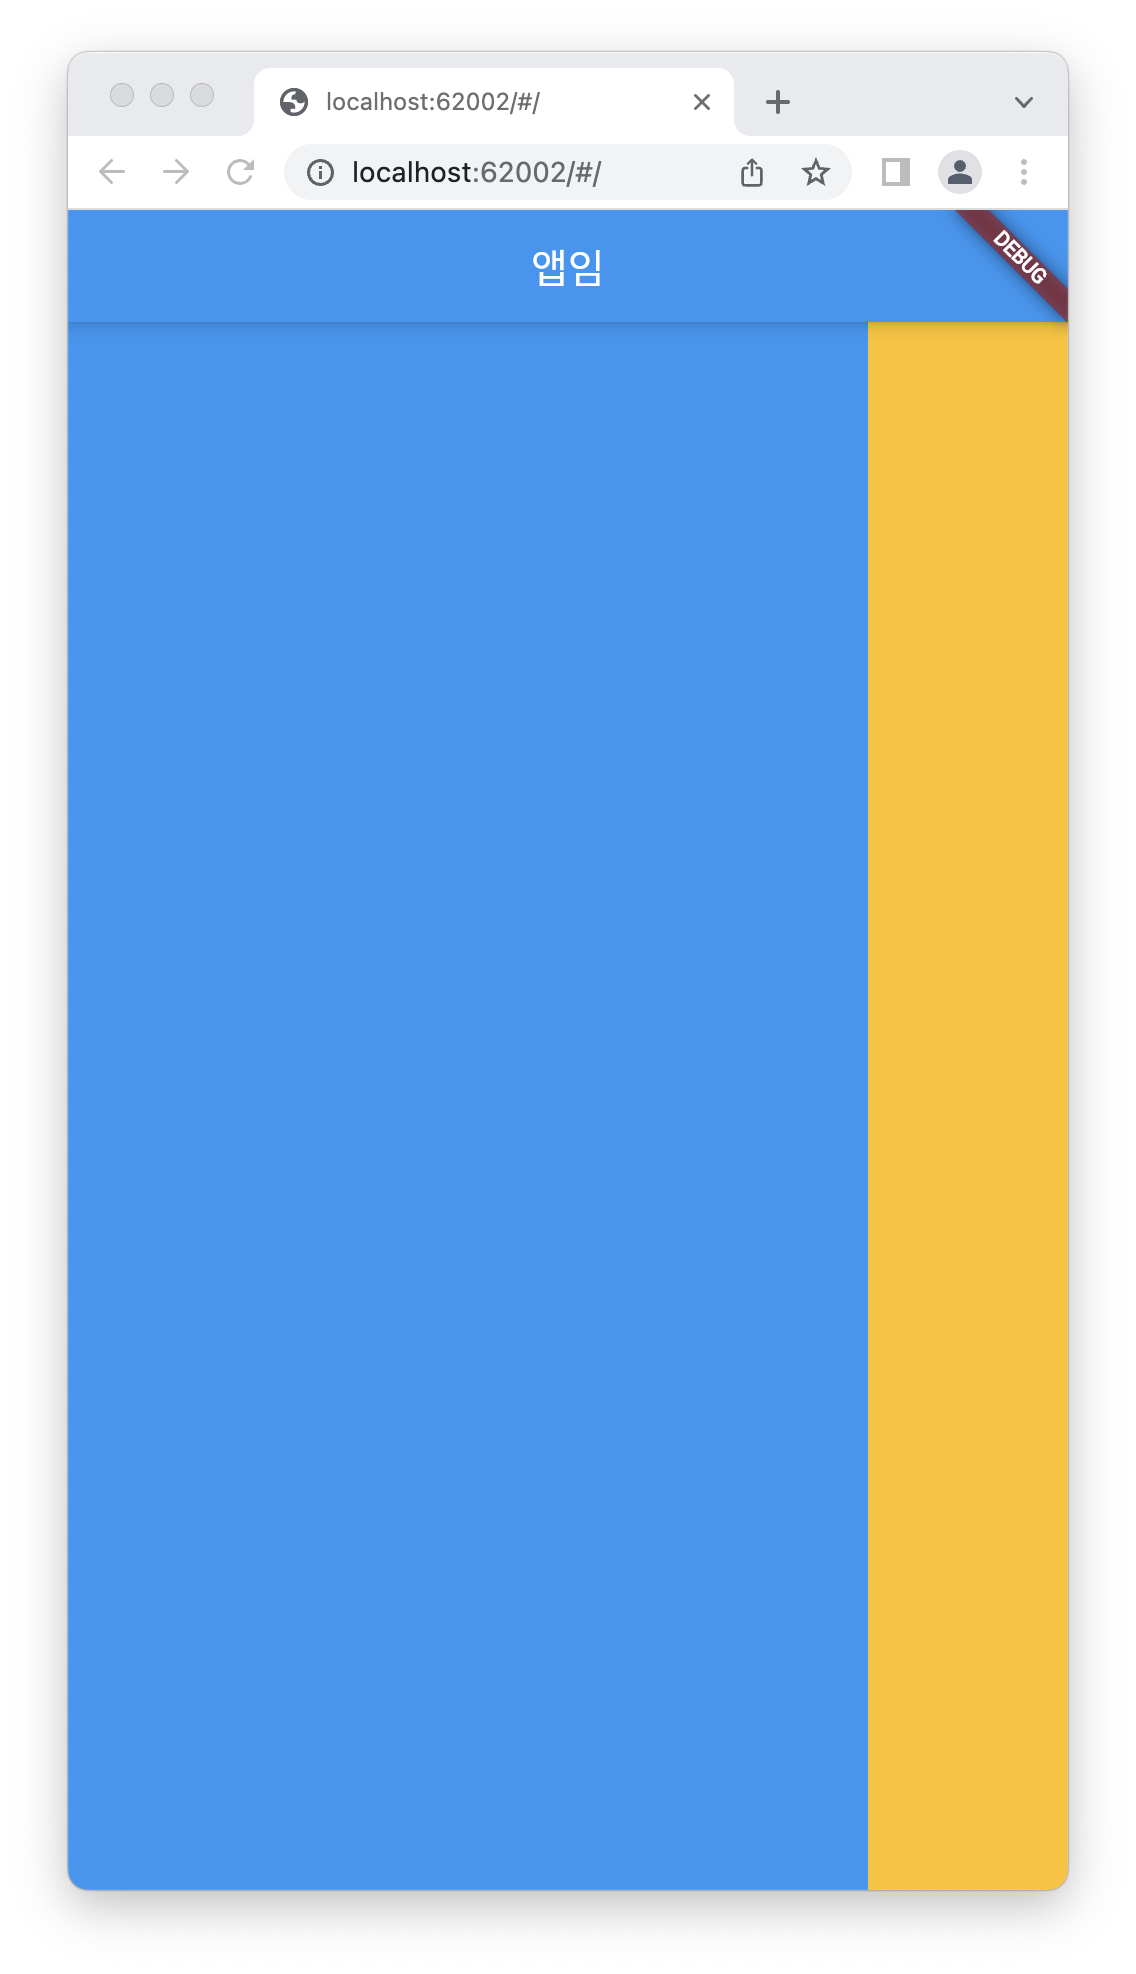
Expanded(child: Container(color: Colors.blue)),
Container(width: 100, color: Colors.amber)
],
)
)
);우선 Expanded 처리 된 박스가 화면을 꽉 채우게 되고
위처럼 width 가 지정된 박스가 있으면 그 박스도 표시되긴 함
박스를 디자인했는데 의도와 다르다면?
- 사이즈가 이상해서
- 박스 위치가 이상해서
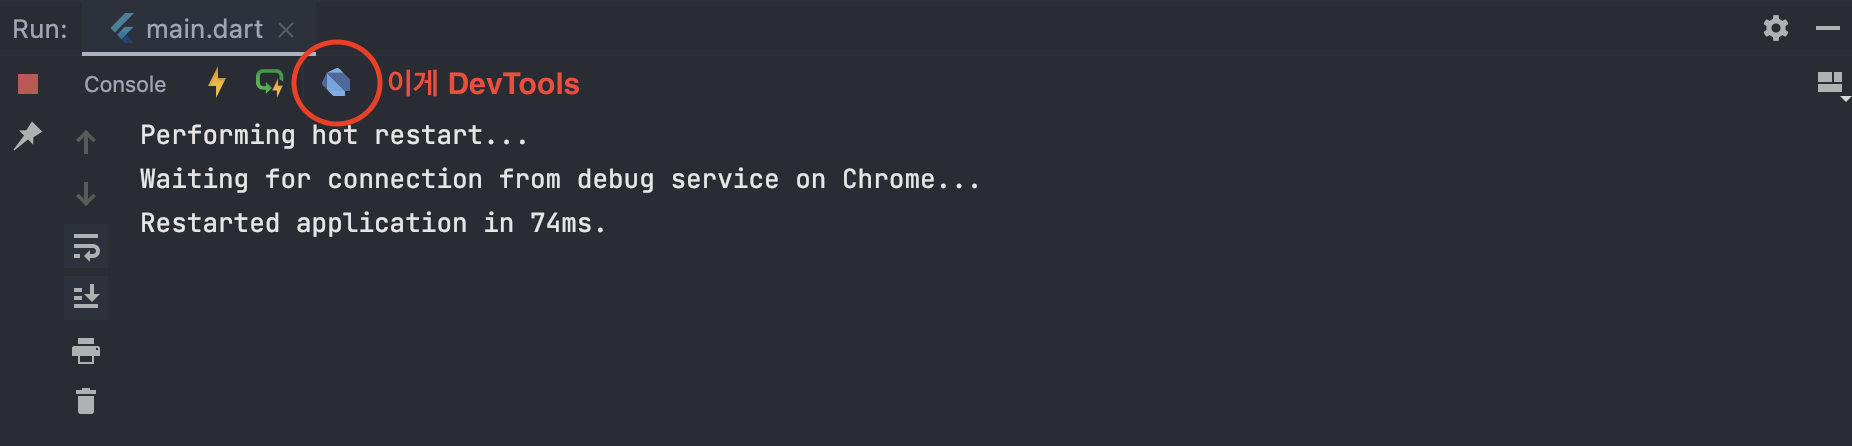
- DevTools 켜보자(안드로이드스튜디오 하단부 콘솔)
실습
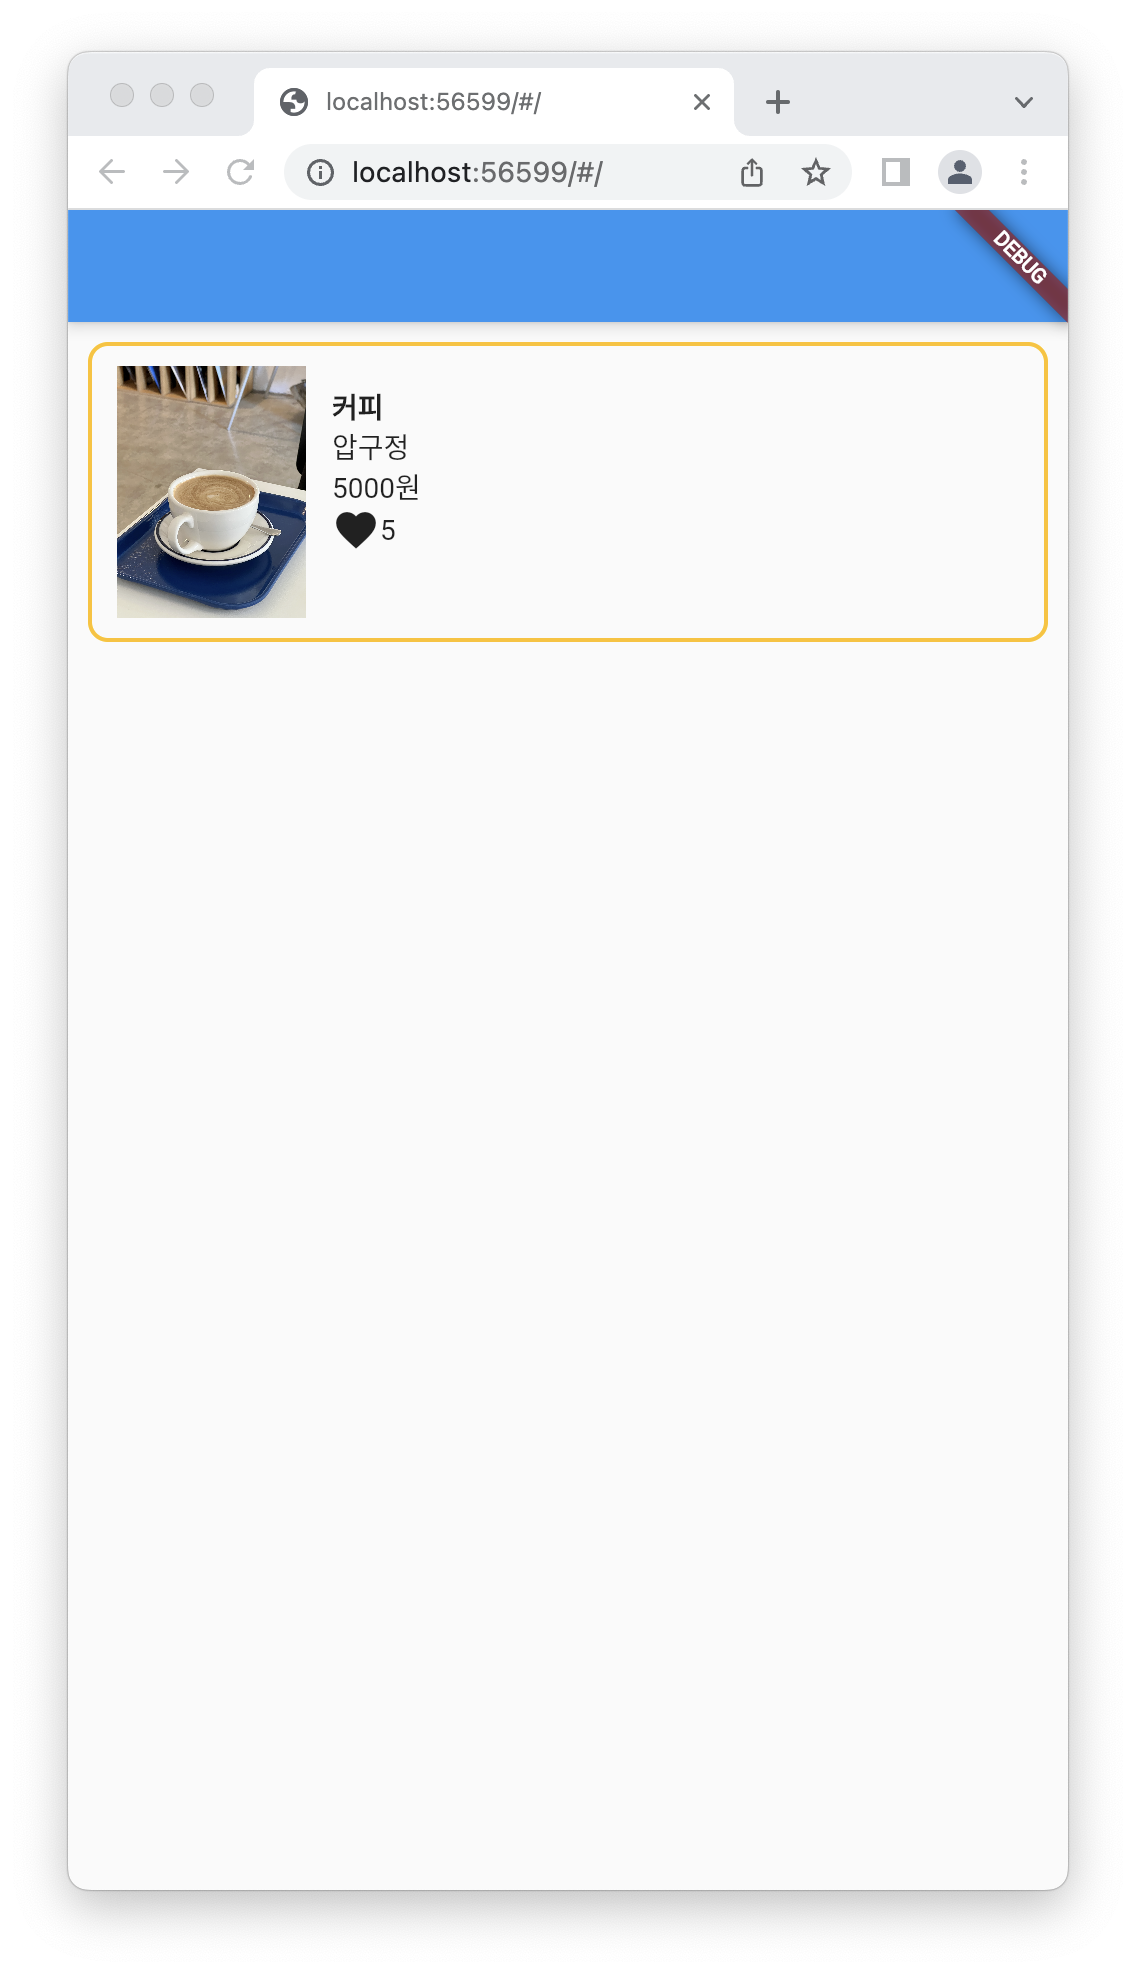
import 'package:flutter/material.dart';
void main() {
runApp(const MyApp());
}
class MyApp extends StatelessWidget {
const MyApp({Key? key}) : super(key: key);
Widget build(BuildContext context) {
return MaterialApp(
home: Scaffold(
appBar: AppBar(),
body: Container(
height: 150,
padding: EdgeInsets.all(10),
margin: EdgeInsets.all(10),
decoration: BoxDecoration(
borderRadius: BorderRadius.circular(10),
border: Border.all(
width: 2,
color: Colors.amber,
),
),
child: Row(
children: [
Image.asset('coffee.jpg', width: 100,),
Container(
width: 300,
padding: EdgeInsets.all(10),
child: Column(
crossAxisAlignment: CrossAxisAlignment.start,
children: [
Text("커피", style: TextStyle(fontWeight: FontWeight.bold),),
Text("압구정"),
Text("5000원"),
Row(
children: [
Icon(Icons.favorite),
Text('5')
],
)
],
),
)
],
),
)
)
);
}
}margin / padding
padding: EdgeInsets.all(10),
margin: EdgeInsets.all(10),EdgeInsets.all(10) : 모든 방향에 10만큼 padding / margin 주기
EdgeInsets 정리
EdgeInsets.all(10) : 모든 방향에 10만큼 여백 주기
EdgeInsets.fromLTRB(10,15,20,25) : 좌-상-우-하 방향대로 각각 10, 15, 20, 25만큼 여백 주기
EdgeInsets.only(right:50) : 오른쪽에만 50만큼 여백 주기
EdgeInsets.only(left:50, right: 50) : 왼쪽과 오른쪽에만 50만큼 여백 주기
EdgeInsets.symmetric(vertical:30, horizontal:15) : 상하에는 30만큼, 좌우에는 15만큼 여백 주기
EdgeInsets.zero : 여백 주지 않기
테두리 (Border)
decoration: BoxDecoration(
  border: Border.all(
    width: 1,
    color: Colors.amber,
  ),
),
위젯에 테두리를 설정하는 방법에는 DecoratedBox 를 이용하여 border를 주는 방법과 위와 같이 Containder 태그 안에서 decoration 태그 아래에서 border 값을 주는 방법이 있다..
border: Border.all() : 모든 방향에 테두리를 설정
모서리 둥글게 : Border Radius
border와 마찬가지로 decoration 태그 아래 속성을 설정해주면 된다.
borderRadius: BorderRadius.circular(10) : 모든 모서리 10만큼 둥글게 하기
BorderRadius.only(topLeft:Radius.circular(10)) : 한 모서리(상단 왼쪽)만 10만큼 둥글게 하기(topLeft, topRight, bottomLeft, bottomRight)
BorderRadius.only(topLeft: Radius.circular(10), bottomLeft: Radius.circular(10)) : 선택한 모서리(상단 왼쪽, 하단 왼쪽) 10만큼 둥글게 하기(topLeft, topRight, bottomLeft, bottomRight)
<참조>
코딩애플 쉬운 플러터 5강 : Flexible과 숙제 안해오면 때림