2.1 Kubesphre

2.1.1 Kubesphre이란?
2.2 EKS에 Kubesphre 설치하기
2.2.1 Kubesphre 설치하기
이전 포스팅에서 구축한 환경을 기준으로 합니다
- 테스트
kubectl get svc- kubectl 명령어를 활용하여 kubesphere를 설치합니다.(minimal installation)
kubectl apply -f https://github.com/kubesphere/ks-installer/releases/download/v3.1.0/kubesphere-installer.yaml

kubectl apply -f https://github.com/kubesphere/ks-installer/releases/download/v3.1.0/cluster-configuration.yaml- log 확인
kubectl logs -n kubesphere-system $(kubectl get pod -n kubesphere-system -l app=ks-install -o jsonpath='{.items[0].metadata.name}') -f다 끝나면 아래와 같은 명령어를 확인 할 수 있어요
#####################################################
###              Welcome to KubeSphere!           ###
#####################################################
Account: admin
Password: P@88w0rd
NOTES:
1. After logging into the console, please check the
   monitoring status of service components in
   the "Cluster Management". If any service is not
   ready, please wait patiently until all components
   are ready.
2. Please modify the default password after login.
2.2.2 Kubesphre 콘솔 접근을 위한 작엄
- 아래 명령어를 통해 kubesphere 콘솔의 서비스를 체크합니다.
kubectl get svc -n kubesphere-system- 하면 ks-console 서비스가 NodePort TYPE으로 되어 있는것을 확인 할 수 있습니다.
우리는 public ip를 얻을 수 있게끔 ks-console 서비스 type을 LoadBalalncer로 변경해야합니다.
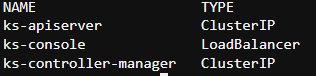
- svc type 수정을 위해 아래 명령어를 친 후 type 수정
kubectl edit svc -n kubesphere-system ks-console- 수정 후 아래 명령어 쓰면 변경 되었는지 확인할 수도, public ip 주소를 확인 할 수도 있음.
kubectl get svc -n kubesphere-system 2.2.3 Kubesphre 콘솔 접근하기
- 아까
kubectl logs -n kubesphere-system $(kubectl get pod -n kubesphere-system -l app=ks-install -o jsonpath='{.items[0].metadata.name}') -f명령어를 쳤을 때 얻은 계정값 (Account: admin / Password: P@88w0rd)을 통해서 접근하면아래와 같은 페이지를 확인할 수 있음!
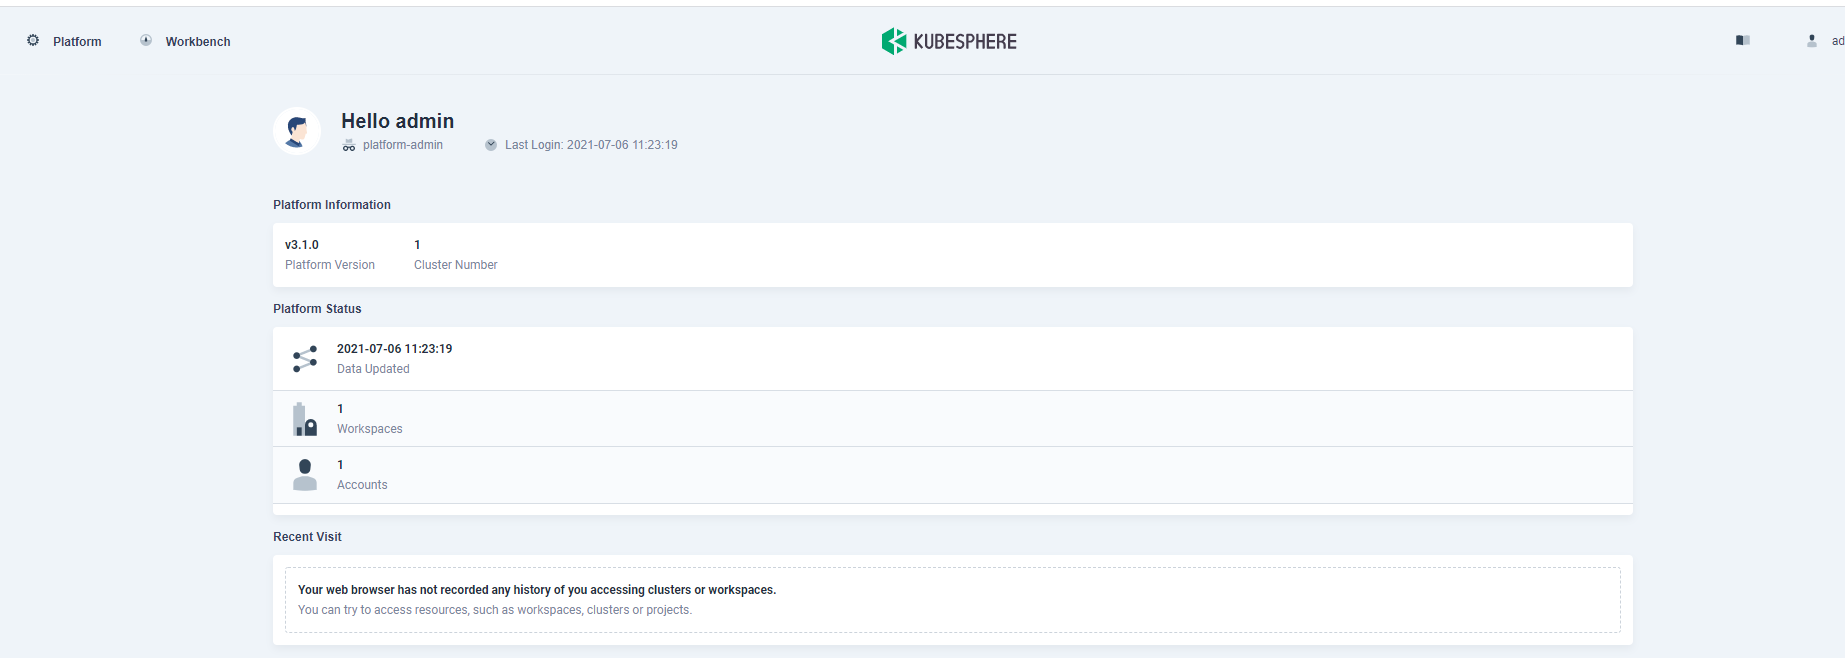

하이