Flutter : 상태 관리 (Provider 사용 예제) - 2
Provider 사용 예제
전 게시글에서 provider 패키지를 pubspec.yaml 에 추가해줬다. 이제 아주아주 간단한 예제를 통해 사용해 보자!
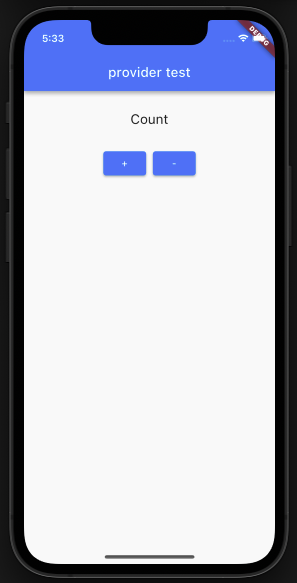
- 플러스 버튼을 누르면 카운트가 증가하고, 마이너스 버튼을 누르면 카운트가 감소하는 예제를 만들기 위해 뷰를 먼저 만들어 줬다. 카운트라고 써 있는 곳을 변수로 대체할 예정이다. (main.dart)
 @override
  Widget build(BuildContext context) {
    return Scaffold(
      appBar: AppBar(
        title: const Text("provider test"),
      ),
      body: Center(
        child: Column(
          children: [
            const Padding(
              padding: EdgeInsets.all(30.0),
              child: Text(
                "Count",
                style: TextStyle(fontSize: 20),
              ),
            ),
            Row(
              children: [
                Expanded(
                  child: Container(),
                ),
                ElevatedButton(
                  onPressed: () {},
                  child: const Text("+"),
                ),
                const SizedBox(
                  width: 10,
                ),
                ElevatedButton(
                  onPressed: () {},
                  child: const Text("-"),
                ),
                Expanded(
                  child: Container(),
                ),
              ],
            )
          ],
        ),
      ),
    );
  }
- 프로바이더 클래스를 만들어 주고, 증가할 때의 함수와 감소할 때의 함수를 작성한다. 첫 게시글에서 알아봤던 것처럼 provider 를 사용하기 위해서 ChangeNotifier 를 상속받은 클래스를 만들었고 값을 증가하거나 감소한 뒤에는 notifyListeners(); 메서드로 상태 변화를 알렸다.
import 'package:flutter/material.dart';

class ProviderEx extends ChangeNotifier {
  int _count = 0;
  int get count => _count;

  void increase() {
    _count++;
    notifyListeners();
  }

  void decrease() {
    _count--;
    notifyListeners();
  }
}
- 이제 main.dart 에 적용해 보자! 먼저 최상단에 있는 void main() 에서 MyHomePage() 로 첫 화면을 불러오는 부분을 ChangeNotifierProvider() 로 감싸주어야 한다.
void main() {
  runApp(MaterialApp(
    home: ChangeNotifierProvider(
      create: (_) => ProviderEx(),
      child: const MyHomePage(),
    ), // 앱의 첫 페이지 또는 홈 페이지를 지정하세요.
  ),
 );
}
- 그 다음 build 함수를 수정해 적용해 보자. 위에서 만들었던 providerEx 프로바이더를 생성해 주고, Consumer로 내가 원하는 부분만 다시 빌드할 수 있게 변경하였다. 플러스 버튼을 눌렀을 땐 providerEx 로 increase 함수를 호출해 값을 증가시켜주었고, 마이너스 버튼을 눌렀을 땐 decrease 함수를 호출해 값을 감소시켰다. 동영상을 추가할 상황이 안 돼 추가는 못하지만, 이렇게 하니 값의 증가와 감소가 화면에 잘 표시되었다!
@override
  Widget build(BuildContext context) {
    final providerEx = Provider.of<ProviderEx>(context, listen: false);

    return Scaffold(
      appBar: AppBar(
        title: const Text("provider test"),
      ),
      body: Center(
        child: Consumer<ProviderEx>(
          builder: (context, provider, child) => Column(
            children: [
              Padding(
                padding: const EdgeInsets.all(30.0),
                child: Text(
                  providerEx.count.toString(),
                  style: const TextStyle(fontSize: 20),
                ),
              ),
              Row(
                children: [
                  Expanded(
                    child: Container(),
                  ),
                  ElevatedButton(
                    onPressed: () {
                      //증가 함수 실행
                      providerEx.increase();
                    },
                    child: const Text("+"),
                  ),
                  const SizedBox(
                    width: 10,
                  ),
                  ElevatedButton(
                    onPressed: () {
                      providerEx.decrease();
                    },
                    child: const Text("-"),
                  ),
                  Expanded(
                    child: Container(),
                  ),
                ],
              )
            ],
          ),
        ),
      ),
    );
}- 처음 프로바이더를 배웠을 때 사용한 예제였는데, 이 때까지만 해도 그래도 상태 관리라는 게 잘 와닿지 않았다. 전역적으로 관리하는 변수! 인 건 알겠는데... 그래도 이걸 실무에서 어디에 쓴다는 거야? 라고 생각했었다... 막상 프로젝트를 시작하고 나니 숨쉬듯이 쓰고 있는 나를 발견했다. 좀 더 복잡한 예제는 다음 게시글에 작성해 보겠다!

유라라랜드에 오신 것을 환영합니다!