🔍 JSON
@RestController에서 가장 많이 사용되는 데이터 형식
🧠 JSON 통신이 중요한 이유
- 오늘날 대부분의 REST API는 JSON 형식으로 데이터 송수신
- 클라이언트는 JSON을
요청 바디에 담고, 서버는 JSON으로 응답 - 따라서 JSON ↔ Java 객체 간 변환이 매우 중요
🔑 JSON 처리를 위한 필수 조건
| 항목 | 설명 |
|---|---|
| Content-Type | 요청 헤더에 반드시 application/json 설정 |
| 변환 도구 | Spring은 HttpMessageConverter를 통해 JSON을 객체로 자동 변환 |
| 변환기 | JSON 처리에 특화된 MappingJackson2HttpMessageConverter 사용 |
1. JSON 수동 처리 (HttpServletRequest + ObjectMapper)
@PostMapping("/v1/request-body-json")
public void requestJsonV1(HttpServletRequest request, HttpServletResponse response) throws IOException {
    ServletInputStream inputStream = request.getInputStream();
    String requestBody = StreamUtils.copyToString(inputStream, StandardCharsets.UTF_8);

    Tutor tutor = objectMapper.readValue(requestBody, Tutor.class);
    response.getWriter().write("tutor = " + tutor);
}
→ Postman: Body → raw → JSON
→ Header: application/json
→ 직접 JSON 문자열을 읽어 Java 객체로 수동 변환
2. @RequestBody + String (ObjectMapper 수동 변환)
@PostMapping("/v2/request-body-json")
public String requestJsonV2(@RequestBody String requestBody) throws IOException {
    Tutor tutor = objectMapper.readValue(requestBody, Tutor.class);
    return "name = " + tutor.getName() + ", age = " + tutor.getAge();
}
→ @RequestBody로 message body 내용을 String으로 자동 주입받음
→ 이후 ObjectMapper로 수동 파싱
3. @RequestBody + 객체 직접 바인딩 (권장 방식)
@PostMapping("/v3/request-body-json")
public String requestJsonV3(@RequestBody Tutor tutor) {
    return "name = " + tutor.getName() + ", age = " + tutor.getAge();
}
→ Spring이 자동으로 JSON → Java 객체 변환
→ 내부적으로 MappingJackson2HttpMessageConverter가 ObjectMapper 호출
✅ 가장 깔끔하고 실무에서 가장 많이 사용되는 방식
4. @RequestBody는 생략 불가
@PostMapping("/v4/request-body-json")
public String requestJsonV4(Tutor tutor) {
    // 이 경우는 @ModelAttribute 동작 → Query Parameter 처리 시도
}
→ @RequestBody를 생략하면 @ModelAttribute처럼 동작
→ 즉, Request Body가 아닌 요청 파라미터에서 데이터를 찾음 → 실패 발생
5. HttpEntity<T> 사용
@PostMapping("/v5/request-body-json")
public String requestJsonV5(HttpEntity<Tutor> httpEntity) {
    Tutor tutor = httpEntity.getBody();
    return "name = " + tutor.getName() + ", age = " + tutor.getAge();
}
→ Body와 Header를 함께 다룰 수 있지만, @RequestBody보다 코드가 복잡할 수 있음
6. JSON 응답 반환 (@ResponseBody)
@PostMapping("/v6/request-body-json")
@ResponseBody
public Tutor requestJsonV6(@RequestBody Tutor tutor) {
    return tutor; // JSON 형태로 자동 변환되어 응답됨
}
→ 응답도 자동 변환
→ @ResponseBody는 반환 값을 View가 아닌 HTTP Response Body에 직렬화함
→ 내부적으로 역시 HttpMessageConverter가 작동 → Java 객체 → JSON 문자열
🔄 HTTPMessageConverter
- Spring의 핵심 자동 변환 메커니즘
- 데이터를 Obejct로 변환하며 대표적으로 JSON을 변환
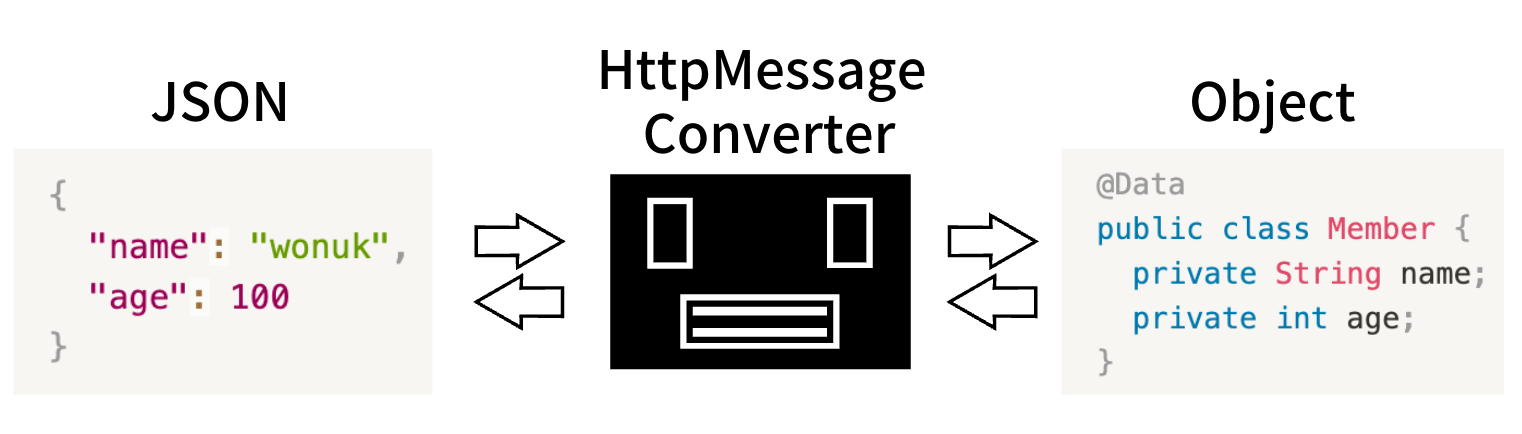
📌 요청 흐름 (@RequestBody)
HTTP Request Body (JSON)
        ↓
HttpMessageConverter (Jackson)
        ↓
Java 객체 (DTO, VO)
📌 응답 흐름 (@ResponseBody)
Java 객체
        ↓
HttpMessageConverter (Jackson)
        ↓
HTTP Response Body (JSON)
✅ JSON 변환기: MappingJackson2HttpMessageConverter
Spring Boot starter-web에 기본 포함- Jackson 라이브러리를 내부적으로 사용