Storybook 테스트하기
먼저 Button 컴포넌트를 만들어보자.
export interface ButtonProps {
  handleClick?: () => void;
  label?: string;
  size?: 'sm' | 'md' | 'lg';
  backgroundColor?: string;
  color?: string;
}

function Button({ label, backgroundColor, size, handleClick }: ButtonProps) {
  let scale = 1;
  if (size === 'sm') scale = 0.75;
  if (size === 'lg') scale = 1.5;

  const style = {
    backgroundColor,
    padding: `${scale * 0.5}rem ${scale * 1}rem`,
    border: 'none',
    color: 'white',
  };

  return (
    <button onClick={handleClick} style={style}>
      {label}
    </button>
  );
}

export default Button;
그리고 버튼의 스토리를 만들어보자
import Button, { ButtonProps } from '../components/Button';
import { Meta, Story } from '@storybook/react';

export default {
  title: 'Button',
  component: Button,
  argTypes: { handleClick: { action: 'clicked' } },
} as Meta;

const Template: Story<ButtonProps> = (args) => <Button {...args} />;

export const RedButton = Template.bind({});
RedButton.args = {
  label: 'Red',
  backgroundColor: 'red',
  size: 'md',
  color: 'white',
};

export const BlueButton = Template.bind({});
BlueButton.args = {
  label: 'Blue',
  backgroundColor: 'blue',
  size: 'md',
  color: 'white',
};

export const SmButton = Template.bind({});
SmButton.args = {
  label: 'Small Button',
  backgroundColor: 'gray',
  size: 'sm',
};

export const LgButton = Template.bind({});
LgButton.args = {
  label: 'Large Button',
  backgroundColor: 'gray',
  size: 'lg',
};

export const MainButton = Template.bind({});
MainButton.args = {
  label: 'Main Button',
  backgroundColor: 'gray',
  size: 'md',
};
빨강, 파랑, 스몰, 라지, 메인 각각 다섯개의 버튼을 만들어냈다
그렇다면 한번 테스트를 진행해보자
import {
  BlueButton,
  LgButton,
  MainButton,
  RedButton,
  SmButton,
} from '../stories/Button.stories';
import { render, screen } from '@testing-library/react';

const mainColor = 'brown';

test('Red Button이 랜더링 된다', () => {
  render(<RedButton {...RedButton.args} />);

  expect(screen.getByRole('button')).toHaveTextContent(/Red/i);
  expect(screen.getByRole('button')).toHaveStyle(`backgroundColor: red`);
});

test('Blue Button이 랜더링 된다', () => {
  render(<BlueButton {...BlueButton.args} />);

  expect(screen.getByRole('button')).toHaveTextContent(/Blue/i);
  expect(screen.getByRole('button')).toHaveStyle(`backgroundColor: blue`);
});

test('SmButton이 랜더링 된다', () => {
  render(<SmButton {...SmButton.args} />);

  expect(screen.getByRole('button')).toHaveTextContent(/Small Button/i);
  expect(screen.getByRole('button')).toHaveStyle(`backgroundColor: gray`);
});

test('LgButton이 랜더링 된다', () => {
  render(<LgButton {...LgButton.args} />);

  expect(screen.getByRole('button')).toHaveTextContent(/Large Button/i);
  expect(screen.getByRole('button')).toHaveStyle(`backgroundColor: gray`);
});

test('Main Button이 랜더링 된다', () => {
  render(<MainButton {...MainButton.args} />);

  expect(screen.getByRole('button')).toHaveTextContent(/Main Button/i);
  expect(screen.getByRole('button')).toHaveStyle(`backgroundColor: gray`);
});
→ 간단하게 각각의 버튼들이 제대로 랜더링되고 있는지를 확인할 수 있게 테스트 코드를 작성해보자
테스트를 진행하기 전에 원하는 부분만 테스트를 할 수 있도록 지정해주자
package.json
"jest": {
"collectCoverageFrom": [
  "<rootDir>/src/components/**/*.{ts,tsx}",
  "!**/node_modules/**",
  "!**/*.stories.{ts, tsx}"
]
이제 한번 테스트를 돌려보자
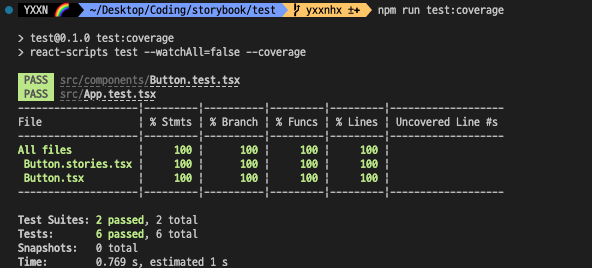
정상적으로 모든 테스트가 통과되는 것을 확인할 수 있다.
혹은 coverage/lcov-report/index.html을 서버로 연결하여 자세히 보는 방법도 있다
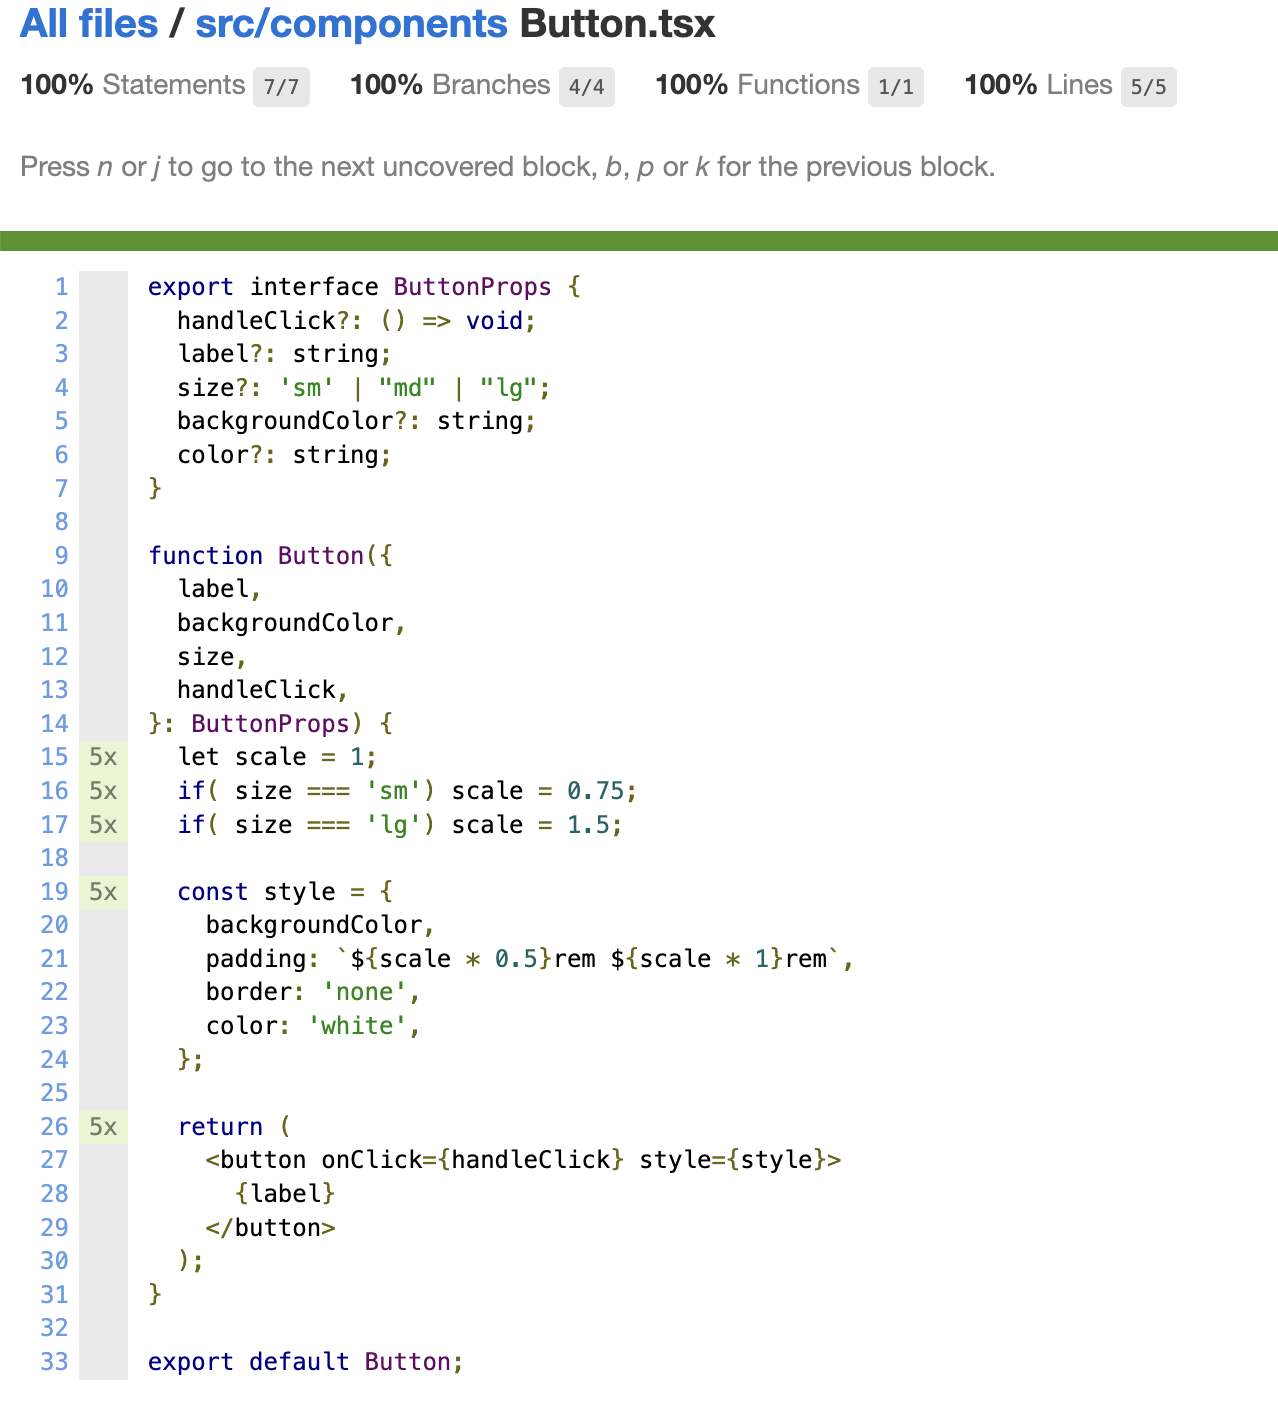
이와 같이 어느 부분이 통과가 되었는지를 손쉽게 확인할 수 있다

뚝딱뚝딱 개발공부