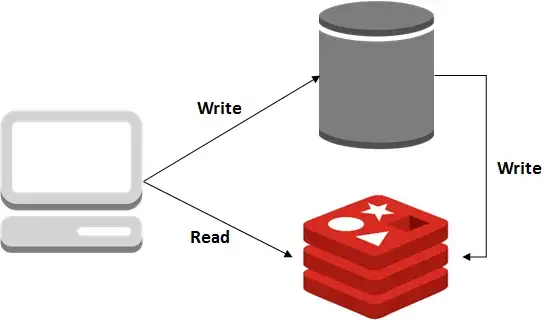
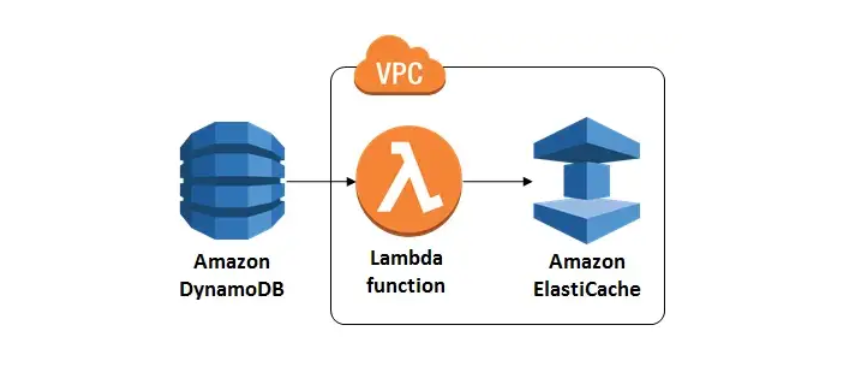
White-Through 캐싱 전략을 AWS로 구현해보도록 한다.
이 전략은 데이터베이스에 데이터를 추가, 수정 또는 삭제할 때마다 데이터베이스와 동시에 캐시를 업데이트하는 것으로 구성되는 것이다.
사용할 서비스: Dynamodb, ElasticCache, Lambda
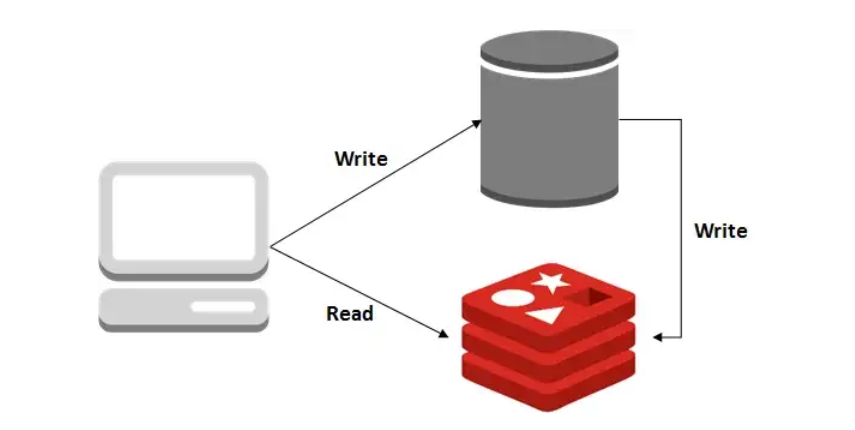
우리는 아래 사진처럼 구현을 해 볼것이다. 해당 다이어그램은 다음과 같다.
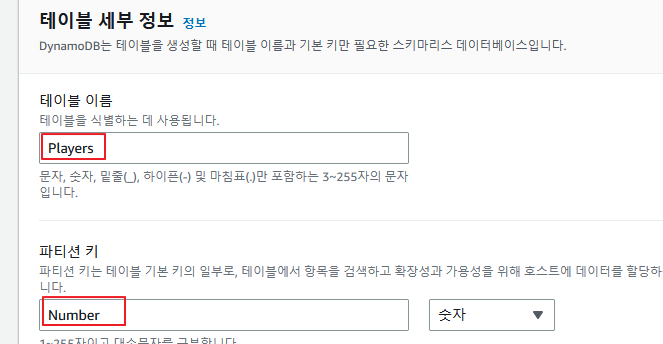
먼저 우리는 이것을 구현하기 위해서 dynamodb 콘솔로 접속해줘야한다.
https://console.aws.amazon.com/dynamodb 로 접속해준다. 이후
사진과 같이 테이블을 하나 생성해주도록 한다.

다 생성되었다면 cloudformation stack을 통해 vpc를 생성해주도록 한다.
해당 stack은 다음과 같다. 3개 이상의 private-subnet을 가지는 stack이다.
Parameters:
  EnvironmentName:
    Description: An environment name that is prefixed to resource names
    Type: String
    Default: "demo"
  VpcCIDR:
    Description: Please enter the IP range (CIDR notation) for this VPC
    Type: String
    Default: 10.0.0.0/16

  PublicSubnet1CIDR:
    Description: Please enter the IP range (CIDR notation) for the public subnet in the first Availability Zone
    Type: String
    Default: 10.0.10.0/24

  PublicSubnet2CIDR:
    Description: Please enter the IP range (CIDR notation) for the public subnet in the second Availability Zone
    Type: String
    Default: 10.0.11.0/24

  PublicSubnet3CIDR:
    Description: Please enter the IP range (CIDR notation) for the public subnet in the second Availability Zone
    Type: String
    Default: 10.0.12.0/24

  PrivateSubnet1CIDR:
    Description: Please enter the IP range (CIDR notation) for the private subnet in the first Availability Zone
    Type: String
    Default: 10.0.20.0/24

  PrivateSubnet2CIDR:
    Description: Please enter the IP range (CIDR notation) for the private subnet in the second Availability Zone
    Type: String
    Default: 10.0.21.0/24


  PrivateSubnet3CIDR:
    Description: Please enter the IP range (CIDR notation) for the private subnet in the second Availability Zone
    Type: String
    Default: 10.0.22.0/24

Resources:
  VPC:
    Type: AWS::EC2::VPC
    Properties:
      CidrBlock: !Ref VpcCIDR
      EnableDnsSupport: true
      EnableDnsHostnames: true
      Tags:
        - Key: Name
          Value: !Sub ${EnvironmentName}-vpc

  InternetGateway:
    Type: AWS::EC2::InternetGateway
    Properties:
      Tags:
        - Key: Name
          Value: !Ref EnvironmentName

  InternetGatewayAttachment:
    Type: AWS::EC2::VPCGatewayAttachment
    Properties:
      InternetGatewayId: !Ref InternetGateway
      VpcId: !Ref VPC

  PublicSubnet1:
    Type: AWS::EC2::Subnet
    Properties:
      VpcId: !Ref VPC
      AvailabilityZone: !Select [ 0, !GetAZs '' ]
      CidrBlock: !Ref PublicSubnet1CIDR
      MapPublicIpOnLaunch: true
      Tags:
        - Key: Name
          Value: !Sub ${EnvironmentName}-public-a

  PublicSubnet2:
    Type: AWS::EC2::Subnet
    Properties:
      VpcId: !Ref VPC
      AvailabilityZone: !Select [ 1, !GetAZs  '' ]
      CidrBlock: !Ref PublicSubnet2CIDR
      MapPublicIpOnLaunch: true
      Tags:
        - Key: Name
          Value: !Sub ${EnvironmentName}-public-b

  PublicSubnet3:
    Type: AWS::EC2::Subnet
    Properties:
      VpcId: !Ref VPC
      AvailabilityZone: !Select [ 2, !GetAZs  '' ]
      CidrBlock: !Ref PublicSubnet3CIDR
      MapPublicIpOnLaunch: true
      Tags:
        - Key: Name
          Value: !Sub ${EnvironmentName}-public-c

  PrivateSubnet1:
    Type: AWS::EC2::Subnet
    Properties:
      VpcId: !Ref VPC
      AvailabilityZone: !Select [ 0, !GetAZs  '' ]
      CidrBlock: !Ref PrivateSubnet1CIDR
      MapPublicIpOnLaunch: false
      Tags:
        - Key: Name
          Value: !Sub ${EnvironmentName}-private-a

  PrivateSubnet2:
    Type: AWS::EC2::Subnet
    Properties:
      VpcId: !Ref VPC
      AvailabilityZone: !Select [ 1, !GetAZs  '' ]
      CidrBlock: !Ref PrivateSubnet2CIDR
      MapPublicIpOnLaunch: false
      Tags:
        - Key: Name
          Value: !Sub ${EnvironmentName}-private-b
  PrivateSubnet3:
    Type: AWS::EC2::Subnet
    Properties:
      VpcId: !Ref VPC
      AvailabilityZone: !Select [ 3, !GetAZs  '' ]
      CidrBlock: !Ref PrivateSubnet3CIDR
      MapPublicIpOnLaunch: false
      Tags:
        - Key: Name
          Value: !Sub ${EnvironmentName}-private-c

  NatGateway1EIP:
    Type: AWS::EC2::EIP
    DependsOn: InternetGatewayAttachment
    Properties:
      Domain: vpc

  NatGateway2EIP:
    Type: AWS::EC2::EIP
    DependsOn: InternetGatewayAttachment
    Properties:
      Domain: vpc

  NatGateway3EIP:
    Type: AWS::EC2::EIP
    DependsOn: InternetGatewayAttachment
    Properties:
      Domain: vpc


  NatGateway1:
    Type: AWS::EC2::NatGateway
    Properties:
      AllocationId: !GetAtt NatGateway1EIP.AllocationId
      SubnetId: !Ref PublicSubnet1

  NatGateway2:
    Type: AWS::EC2::NatGateway
    Properties:
      AllocationId: !GetAtt NatGateway2EIP.AllocationId
      SubnetId: !Ref PublicSubnet2

  NatGateway3:
    Type: AWS::EC2::NatGateway
    Properties:
      AllocationId: !GetAtt NatGateway3EIP.AllocationId
      SubnetId: !Ref PublicSubnet3

  PublicRouteTable:
    Type: AWS::EC2::RouteTable
    Properties:
      VpcId: !Ref VPC
      Tags:
        - Key: Name
          Value: !Sub ${EnvironmentName}-public-rt

  DefaultPublicRoute:
    Type: AWS::EC2::Route
    DependsOn: InternetGatewayAttachment
    Properties:
      RouteTableId: !Ref PublicRouteTable
      DestinationCidrBlock: 0.0.0.0/0
      GatewayId: !Ref InternetGateway

  PublicSubnet1RouteTableAssociation:
    Type: AWS::EC2::SubnetRouteTableAssociation
    Properties:
      RouteTableId: !Ref PublicRouteTable
      SubnetId: !Ref PublicSubnet1

  PublicSubnet2RouteTableAssociation:
    Type: AWS::EC2::SubnetRouteTableAssociation
    Properties:
      RouteTableId: !Ref PublicRouteTable
      SubnetId: !Ref PublicSubnet2

  PublicSubnet3RouteTableAssociation:
    Type: AWS::EC2::SubnetRouteTableAssociation
    Properties:
      RouteTableId: !Ref PublicRouteTable
      SubnetId: !Ref PublicSubnet3

  PrivateRouteTable1:
    Type: AWS::EC2::RouteTable
    Properties:
      VpcId: !Ref VPC
      Tags:
        - Key: Name
          Value: !Sub ${EnvironmentName}-private-a-rt

  DefaultPrivateRoute1:
    Type: AWS::EC2::Route
    Properties:
      RouteTableId: !Ref PrivateRouteTable1
      DestinationCidrBlock: 0.0.0.0/0
      NatGatewayId: !Ref NatGateway1

  PrivateSubnet1RouteTableAssociation:
    Type: AWS::EC2::SubnetRouteTableAssociation
    Properties:
      RouteTableId: !Ref PrivateRouteTable1
      SubnetId: !Ref PrivateSubnet1

  PrivateRouteTable2:
    Type: AWS::EC2::RouteTable
    Properties:
      VpcId: !Ref VPC
      Tags:
        - Key: Name
          Value: !Sub ${EnvironmentName}-private-b-rt

  DefaultPrivateRoute2:
    Type: AWS::EC2::Route
    Properties:
      RouteTableId: !Ref PrivateRouteTable2
      DestinationCidrBlock: 0.0.0.0/0
      NatGatewayId: !Ref NatGateway2

  PrivateSubnet2RouteTableAssociation:
    Type: AWS::EC2::SubnetRouteTableAssociation
    Properties:
      RouteTableId: !Ref PrivateRouteTable2
      SubnetId: !Ref PrivateSubnet2


  PrivateRouteTable3:
    Type: AWS::EC2::RouteTable
    Properties:
      VpcId: !Ref VPC
      Tags:
        - Key: Name
          Value: !Sub ${EnvironmentName}-private-c-rt

  DefaultPrivateRoute3:
    Type: AWS::EC2::Route
    Properties:
      RouteTableId: !Ref PrivateRouteTable3
      DestinationCidrBlock: 0.0.0.0/0
      NatGatewayId: !Ref NatGateway3

  PrivateSubnet3RouteTableAssociation:
    Type: AWS::EC2::SubnetRouteTableAssociation
    Properties:
      RouteTableId: !Ref PrivateRouteTable3
      SubnetId: !Ref PrivateSubnet3
vpc를 생성해 주엇다면, elastic cache 콘솔로 접속해준다.
아래 링크로 이동하면 된다.
https://ap-northeast-2.console.aws.amazon.com/elasticache/home?region=ap-northeast-2#/
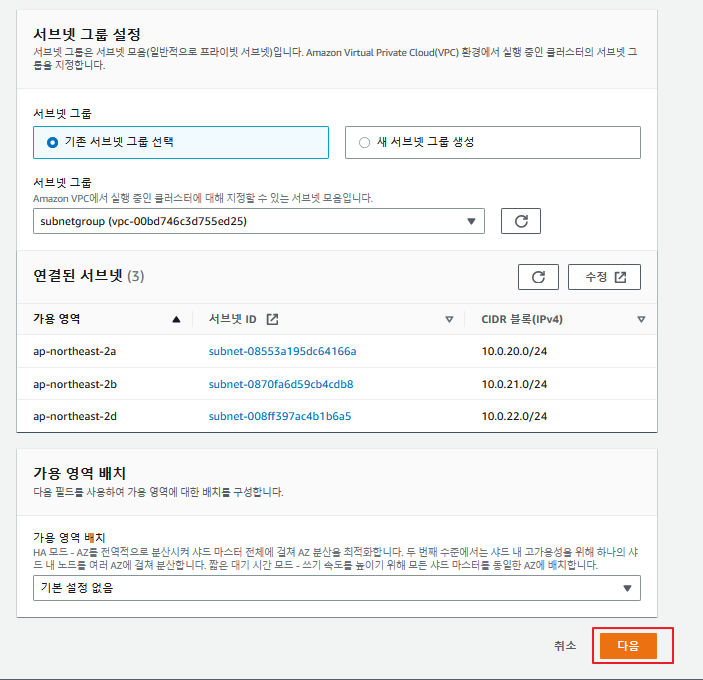
이제 서브넷 그룹을 하나 생성해준다.

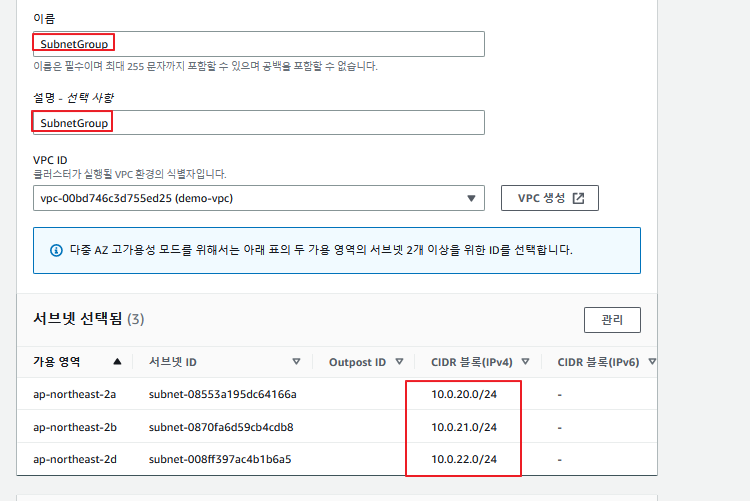
이런식으로 모두 private 서브넷을 지정해주고 생성하면 된다.
이제 redis를 생성해준다.

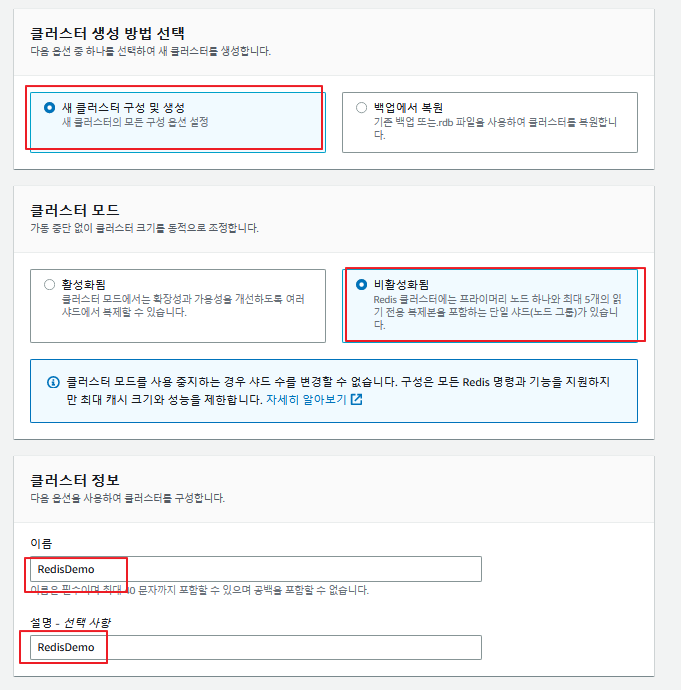
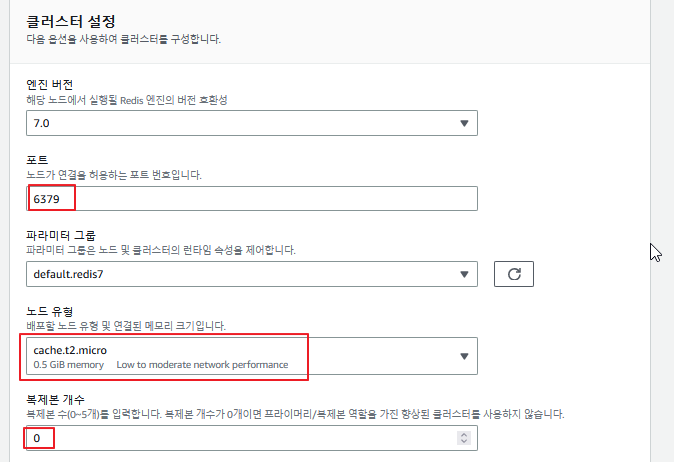
적은 비용으로 구성하기 때문에 복제본을 사용하지 않았다. 노드도 프리티어인 t2.micro를 사용하였고, 포트는 기본값으로 정의하였다.

이후 보안그룹을 임의로 생성하고 시작해주도록 한다.
이제 Lambda 보안그룹을 하나 생성해주도록 한다. 우선 aws iam 콘솔에 접속하여 역할을 하나 생성해준다.
https://console.aws.amazon.com/iam 에 접속하여 역할을 하나 생성해준다.
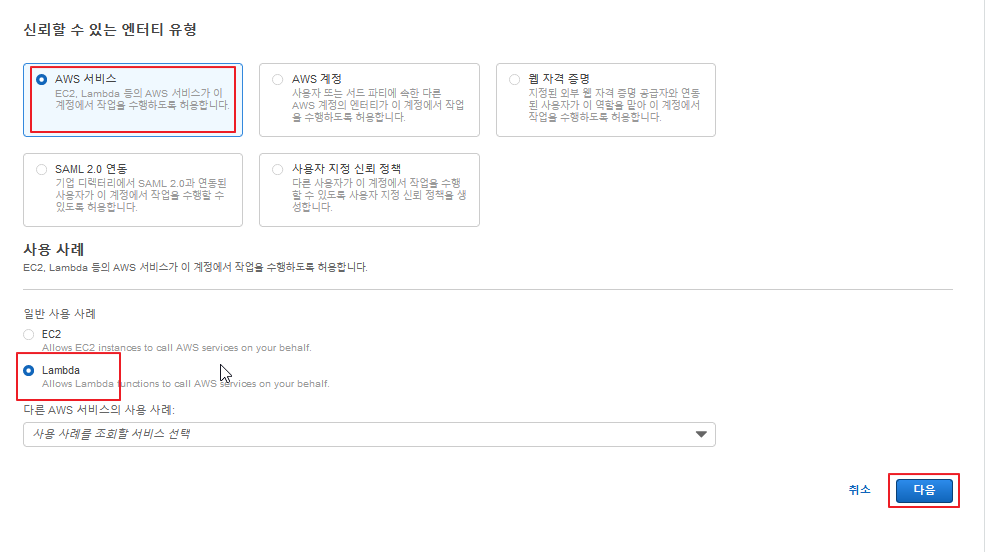
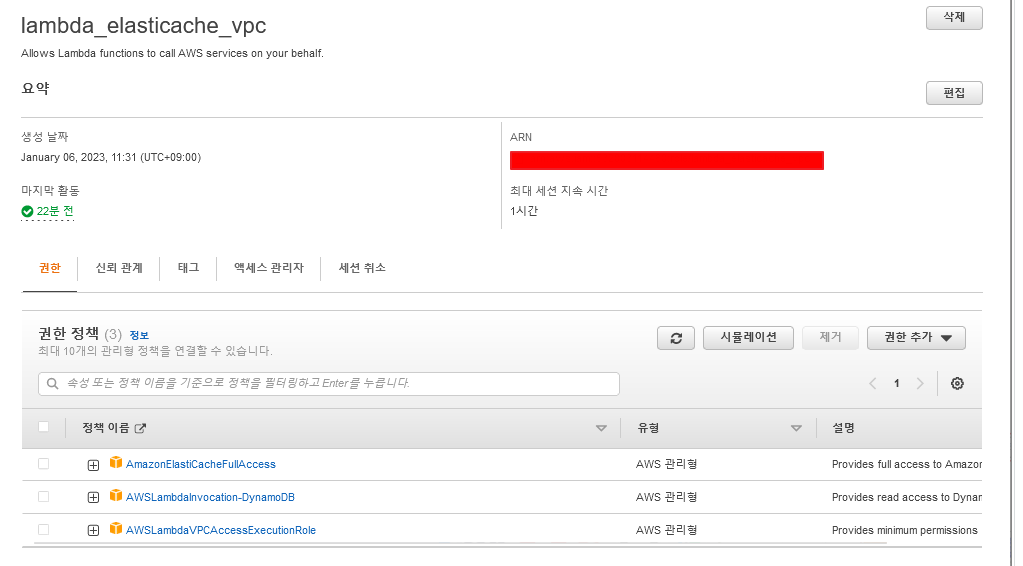
다음 이름이랑 동일하게 생성해준다
이제 람다 함수 코드로 lambda를 생성해주도록 한다. 해당 lambda code는 다음 깃허브 링크에 있다. https://github.com/fepereiro/WriteRedisFromDynamoDB
이제 람다를 생성해주도록 한다.


다음 사진과 같이 지정해준다.
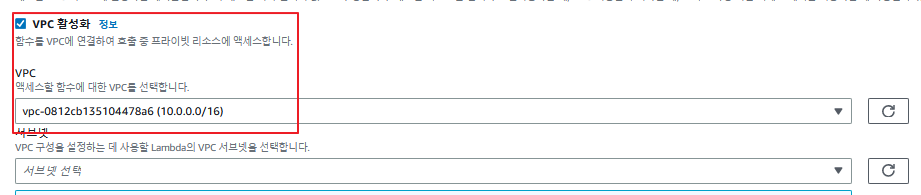
redis에서 구성한것과 같이 설정해준다.
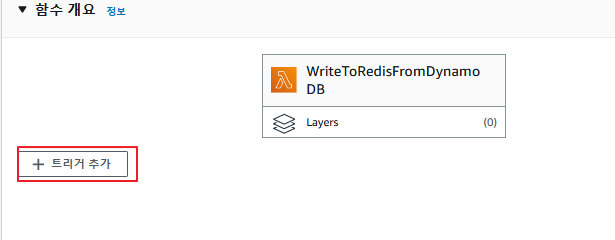
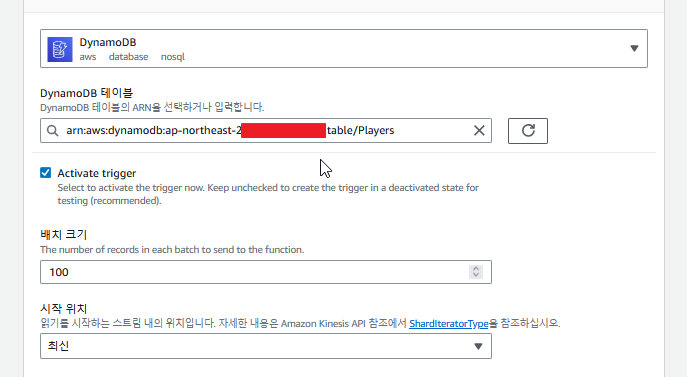
트리거를 하나 추가한다.
환경변수도 세팅하고 람다 핸들러를 변경해준다.


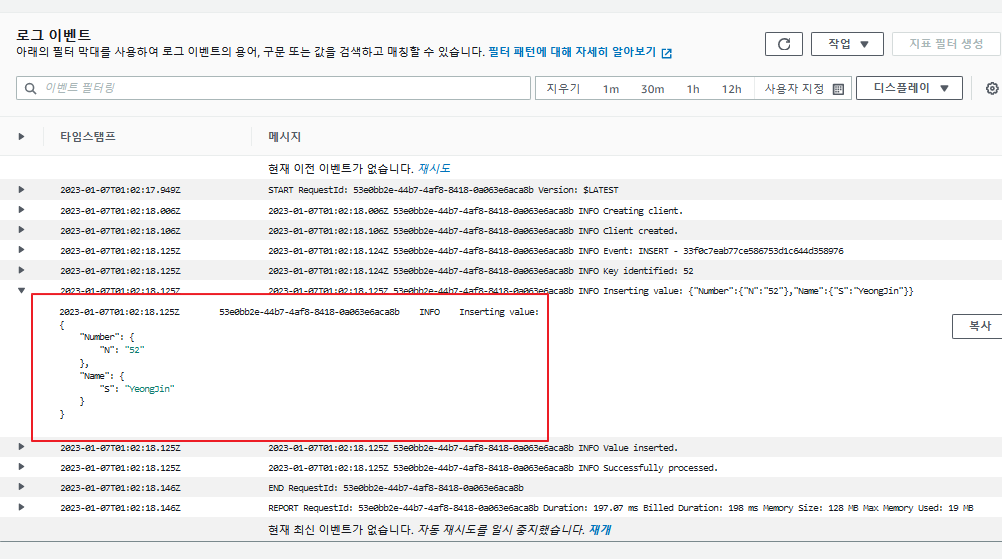
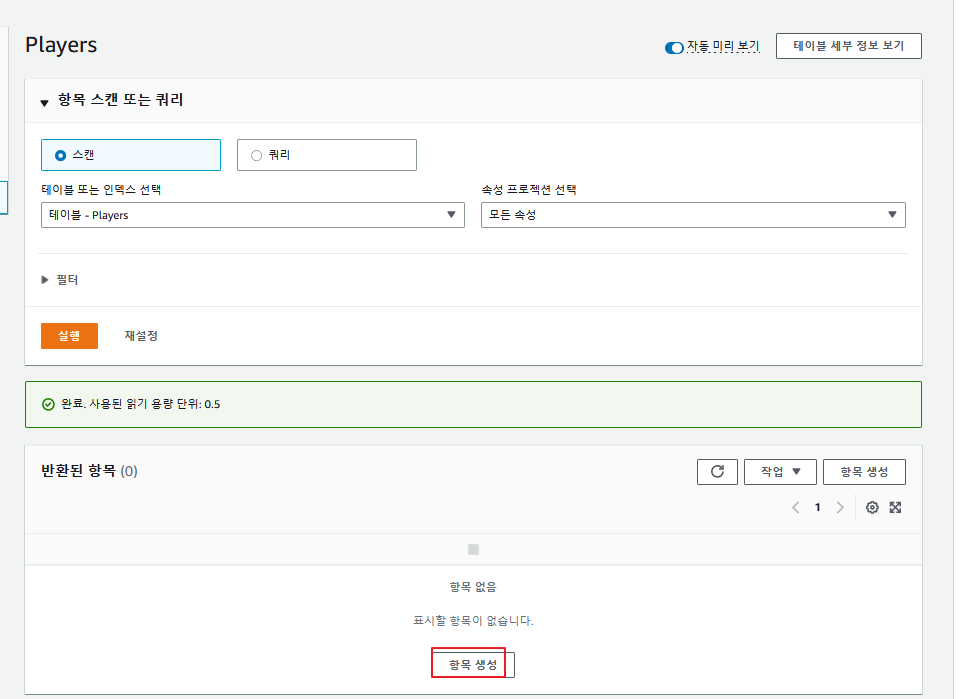
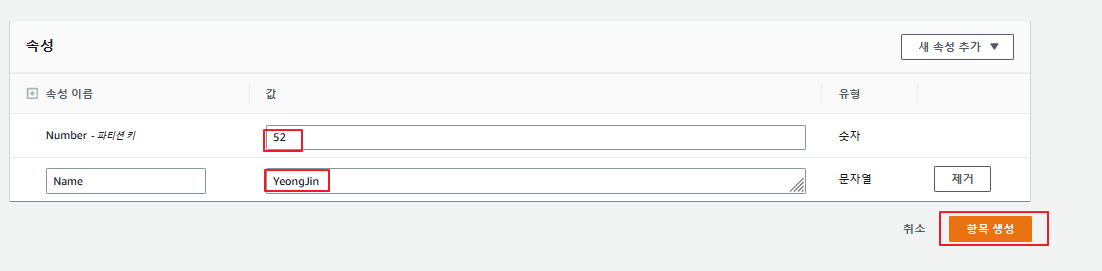
이후 dynamodb 콘솔로 접속하여 항목을 하나 생성해준다.
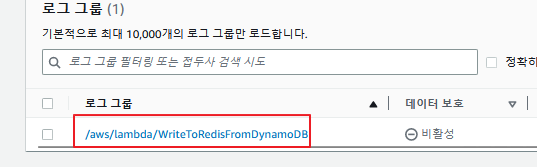
이제 클라우드 워치에서 확인해본다.
https://ap-northeast-2.console.aws.amazon.com/cloudwatch/home?region=ap-northeast-2#