
출처 및 참고
제목: "[AWS,Github Action] Elastic Beanstalk에 SpringBoot 배포하기 (2) = IAM 인증키 Github Action에서 사용하여 배포"
작성자: tistory(EARTH_ROOPRETELCHAM)
작성자 수정일: 2021년10월14일
링크: https://earth-95.tistory.com/111
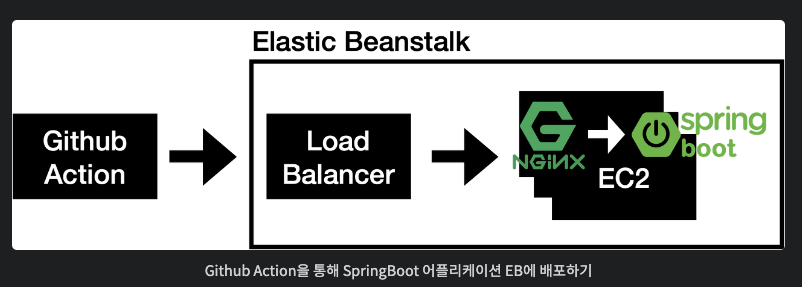
작성일: 2022년6월10일Github Action을 통해 SpringBoot 어플리케이션 EB에 배포하기
Github Action을 통해 EB에 SpringBoot 어플리케이션을 배포해보자
-
SpringBoot 어플을 JAR로 말아 올릴 때에 SpringBoot 앞단에 Nginx를 띄우기 위한 과정 역시 포함되어 있다.
-
EB 환경 구성 시 ALB를 사용한다고 가정하고 진행한다
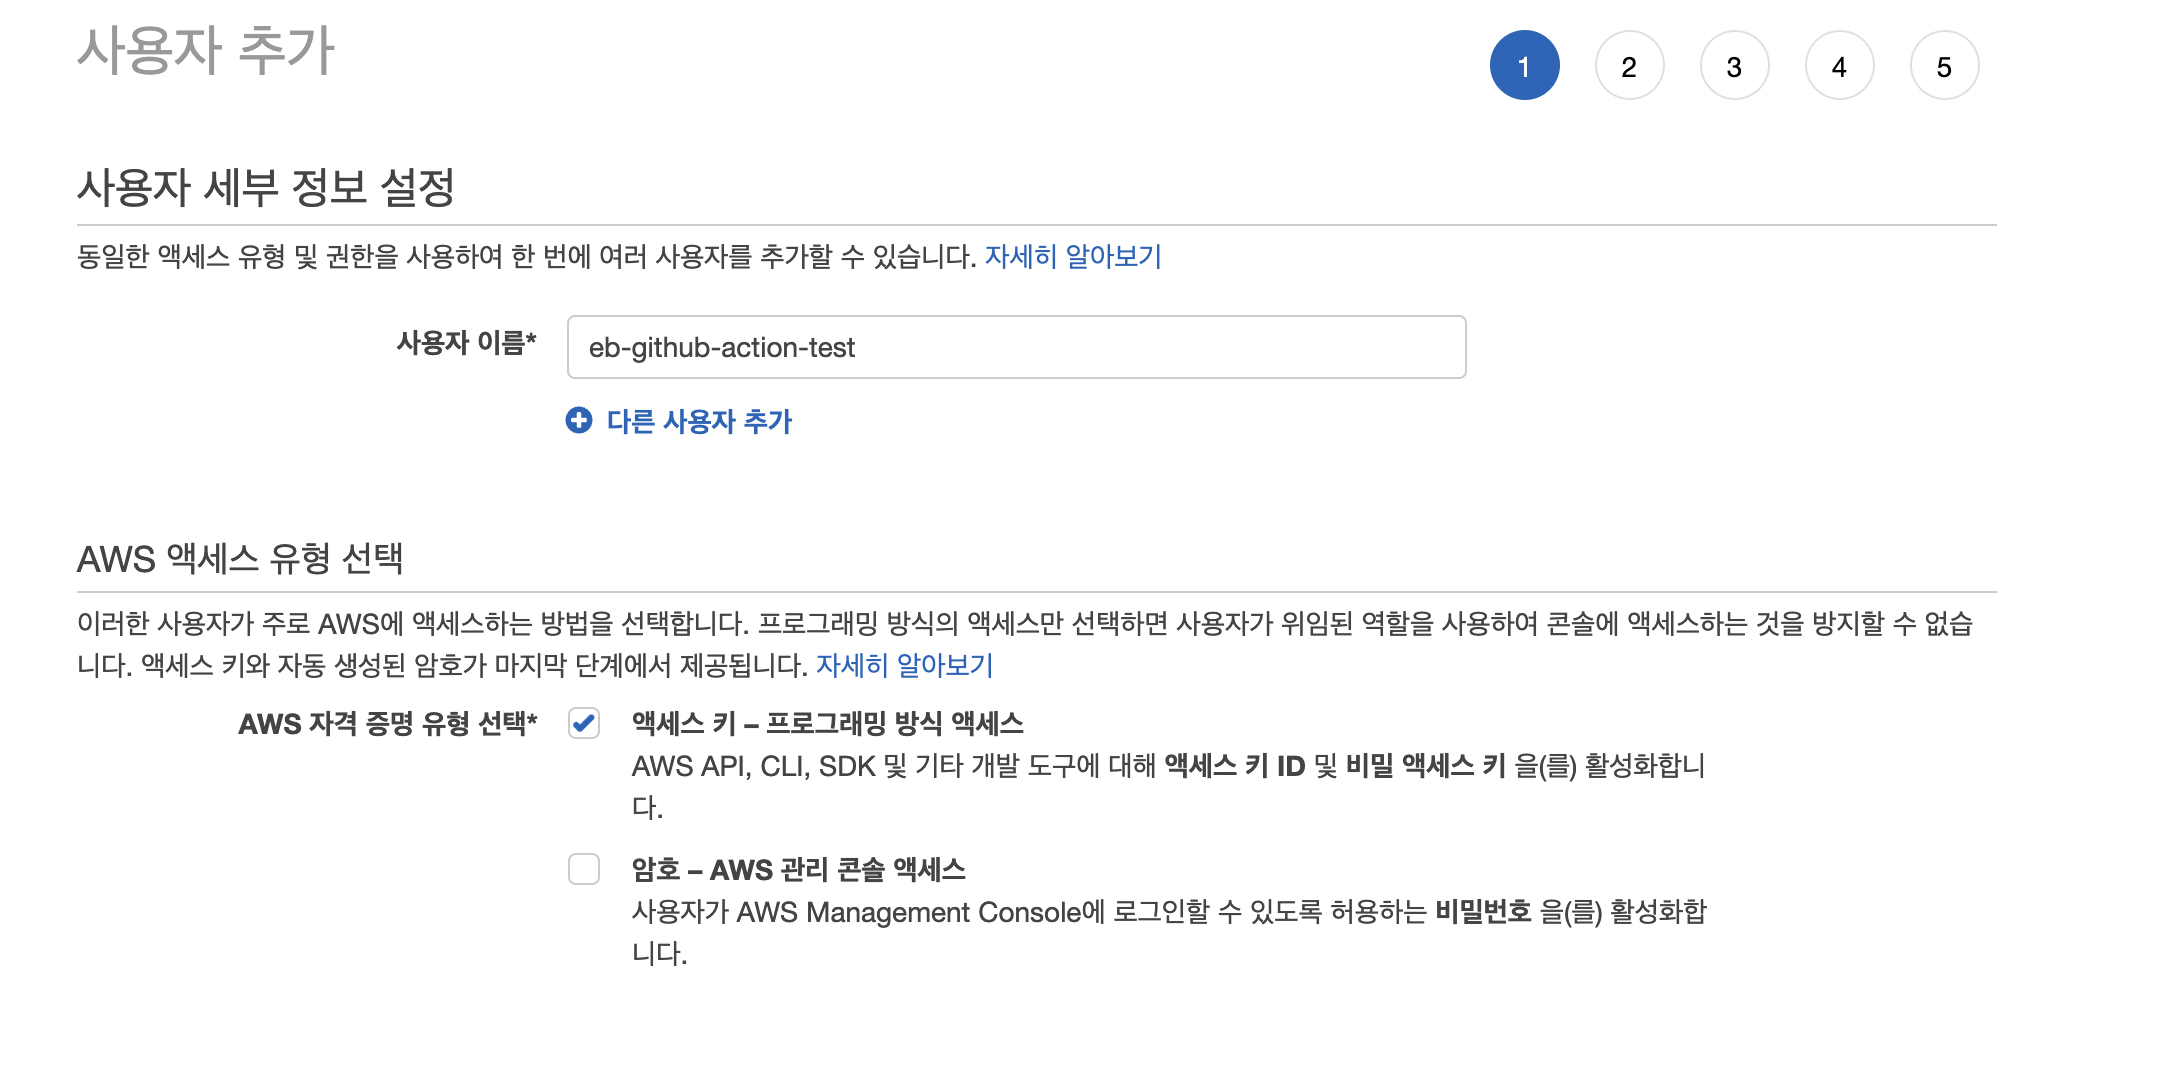
IAM 인증키 Github Action에서 사용
-
AWS 서비스가 아닌 깃허브 액션을 통해 EB에 명령을 하고자 한다면 권한이 있어야 한다.
-
IAM 사용자를 이용한 인증기(
accessKey,secretKey)를 이용해 외부 서비스에서 AWS로 접근 권한을 받을 수 있다.
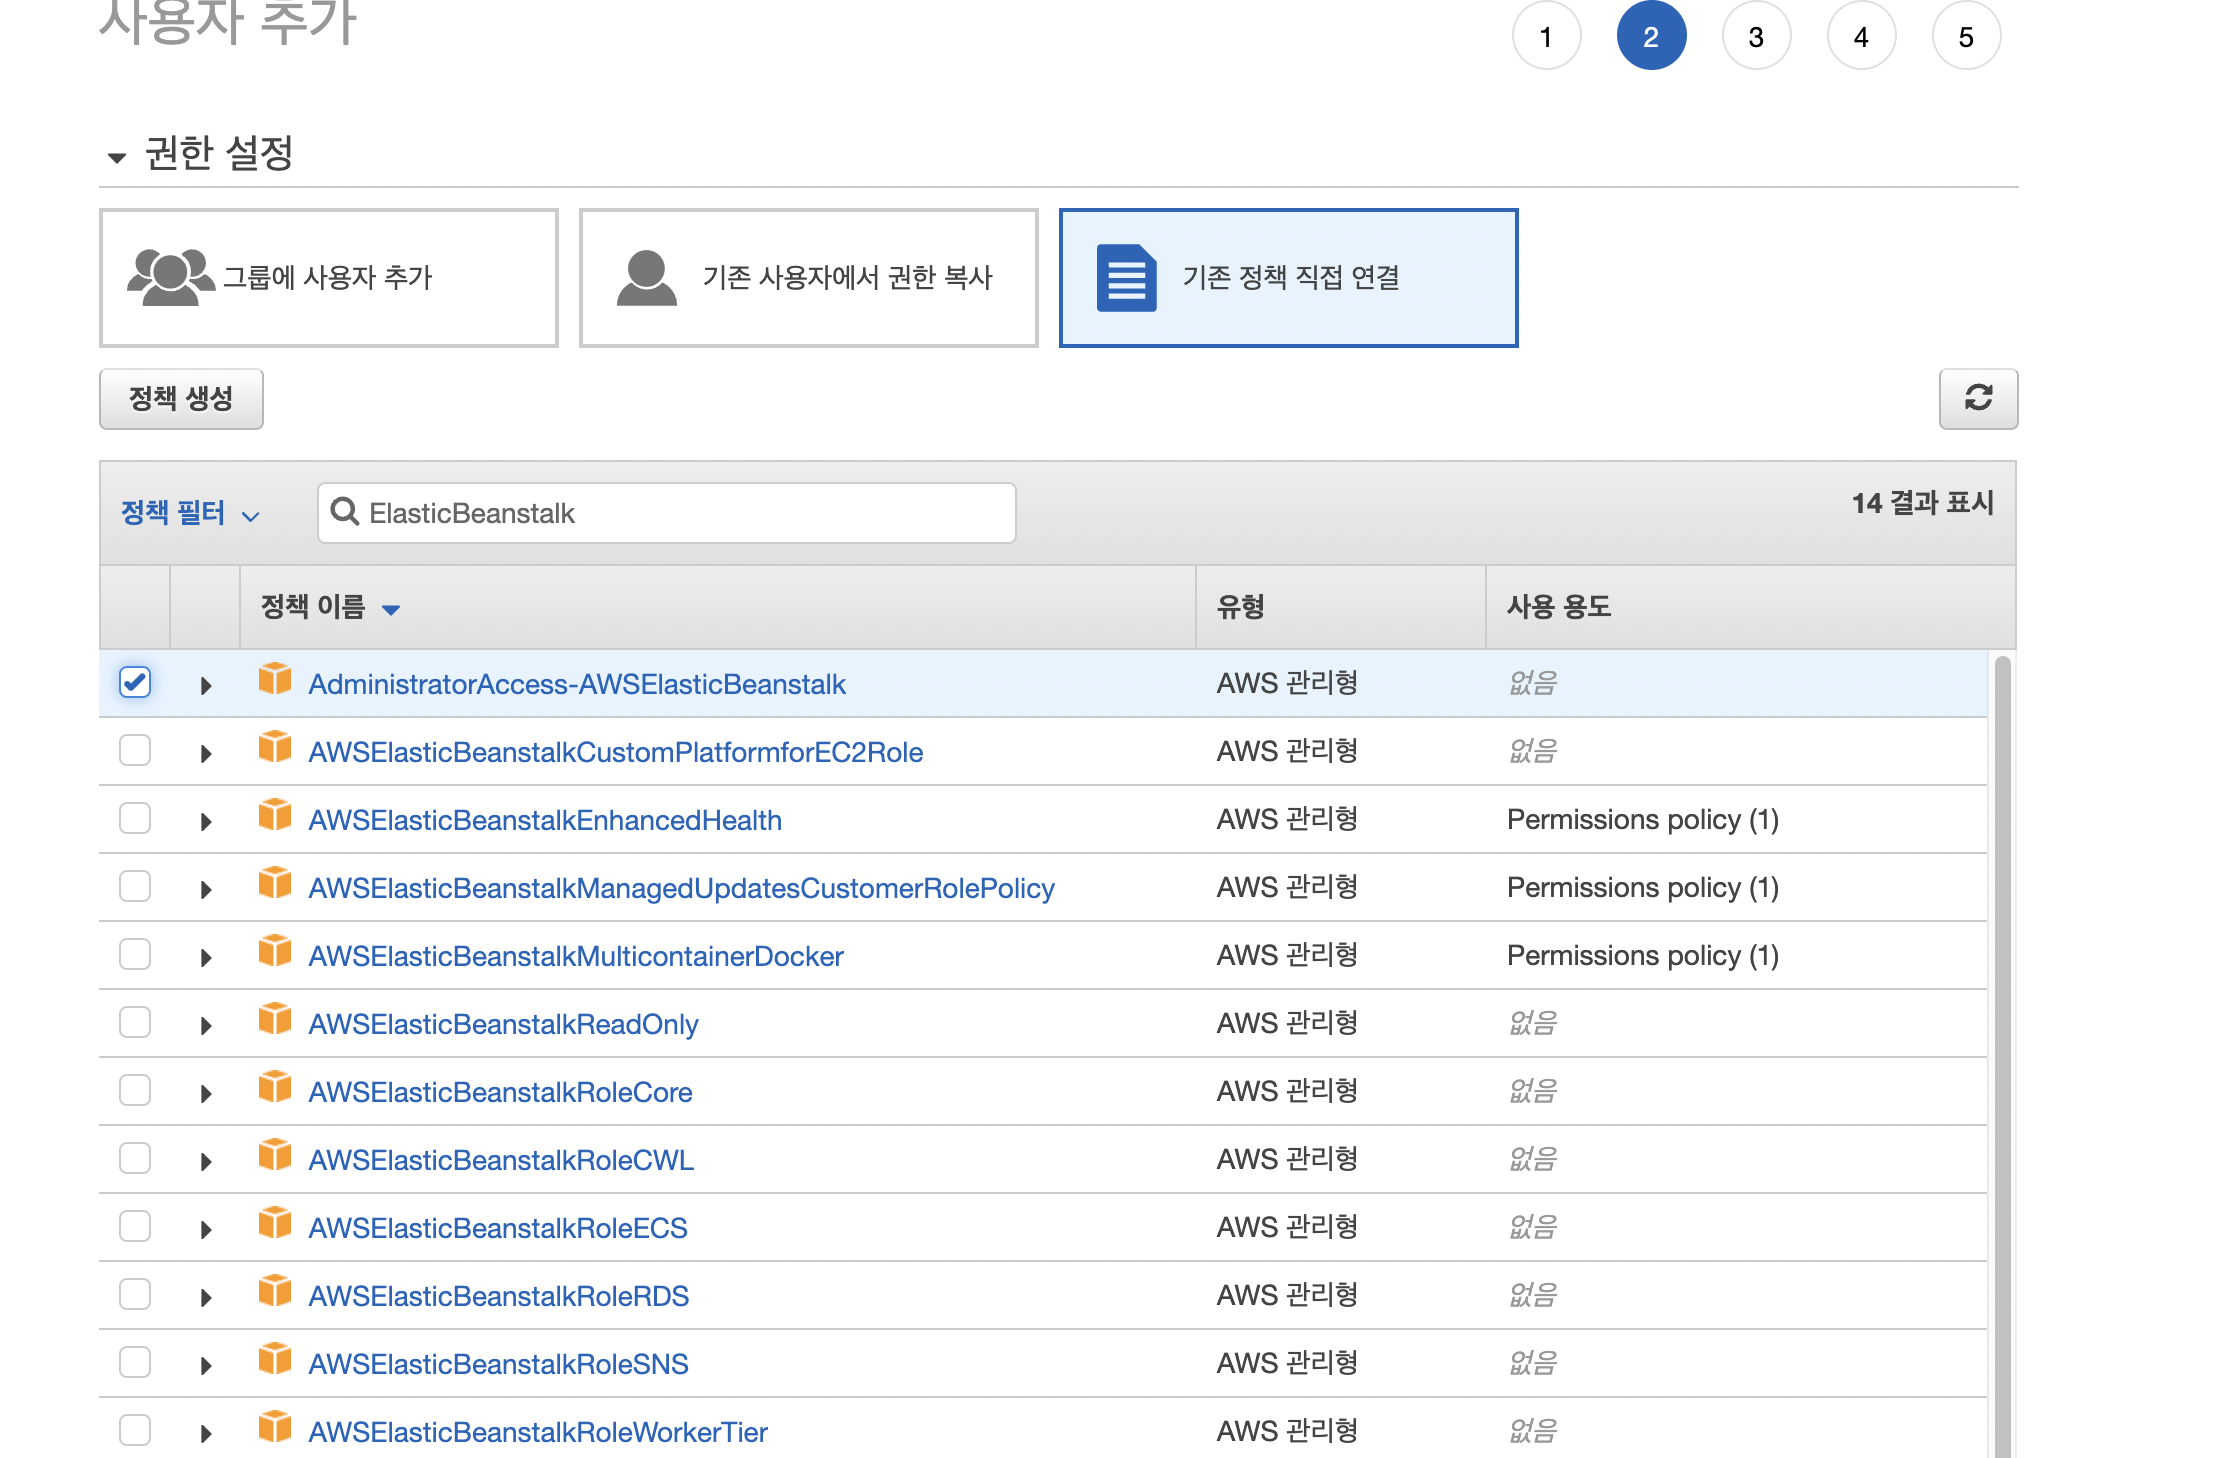
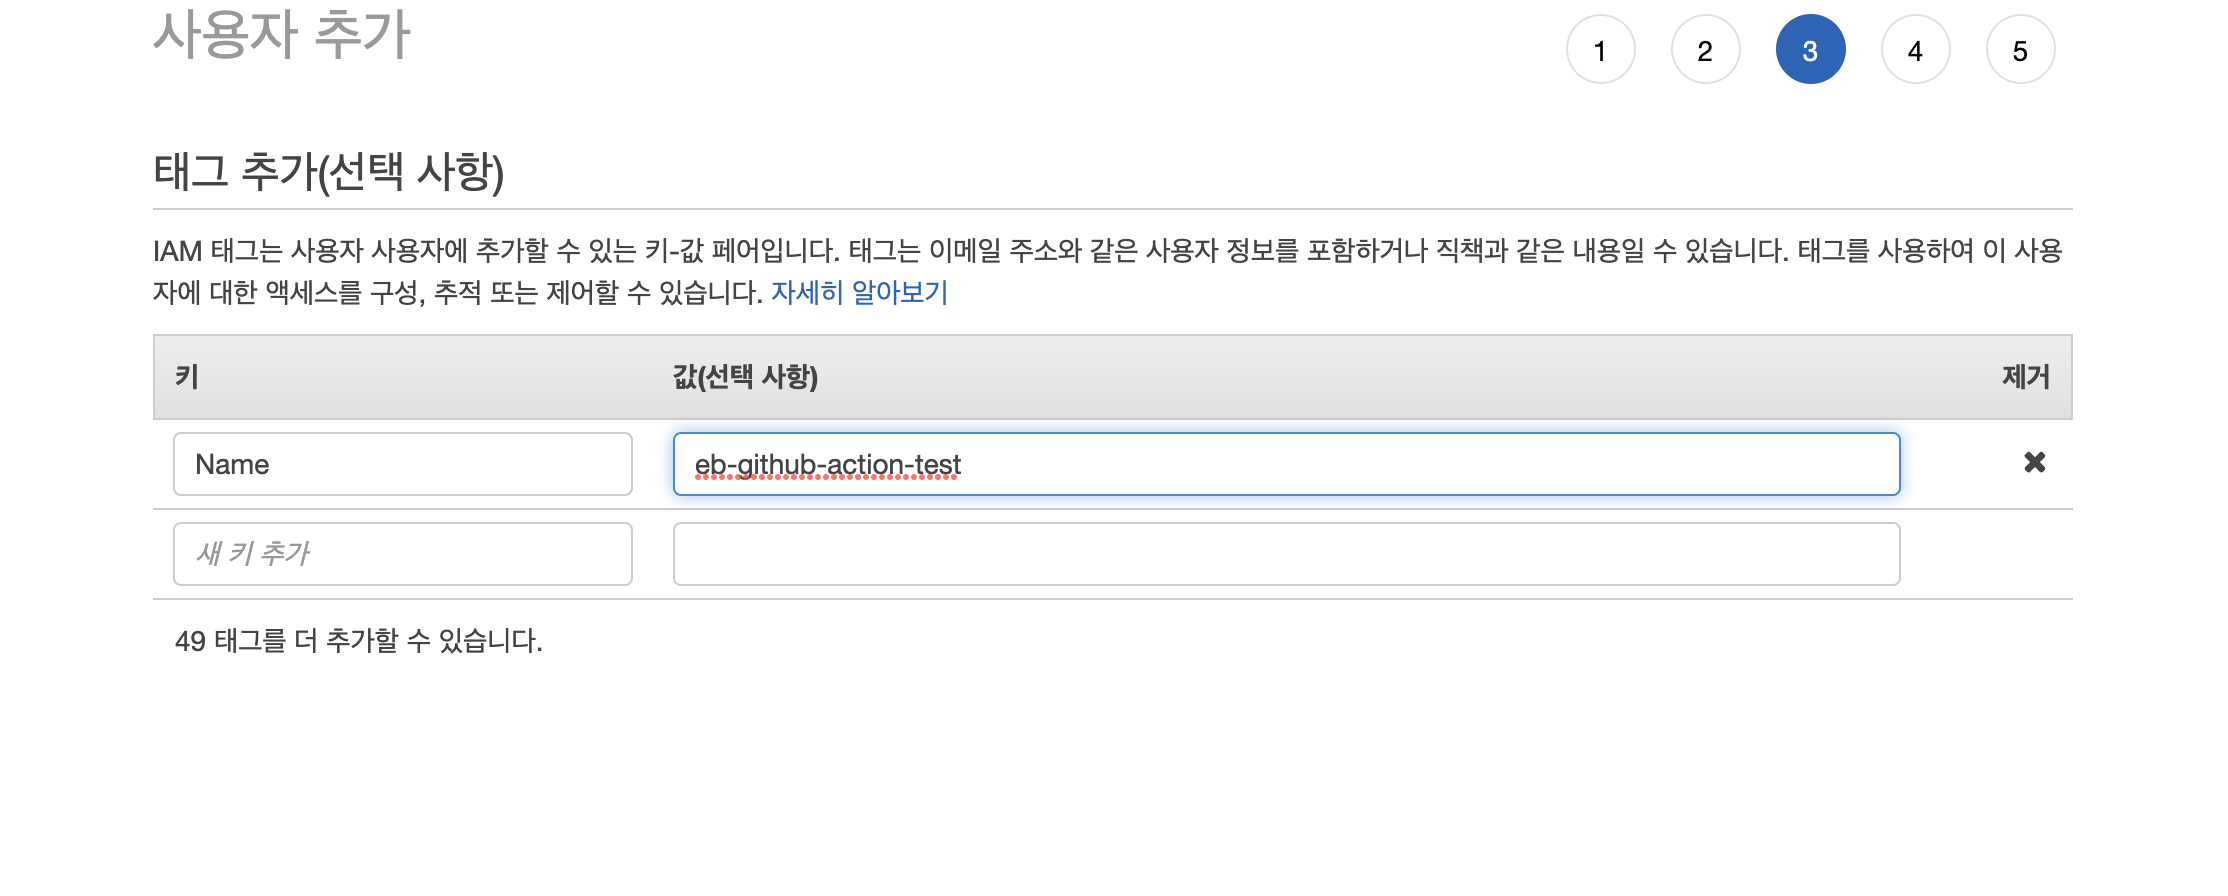
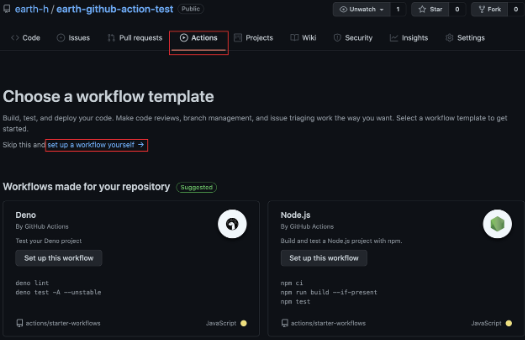
IAM 인증키 발급
IAM 인증키 Github에 적용
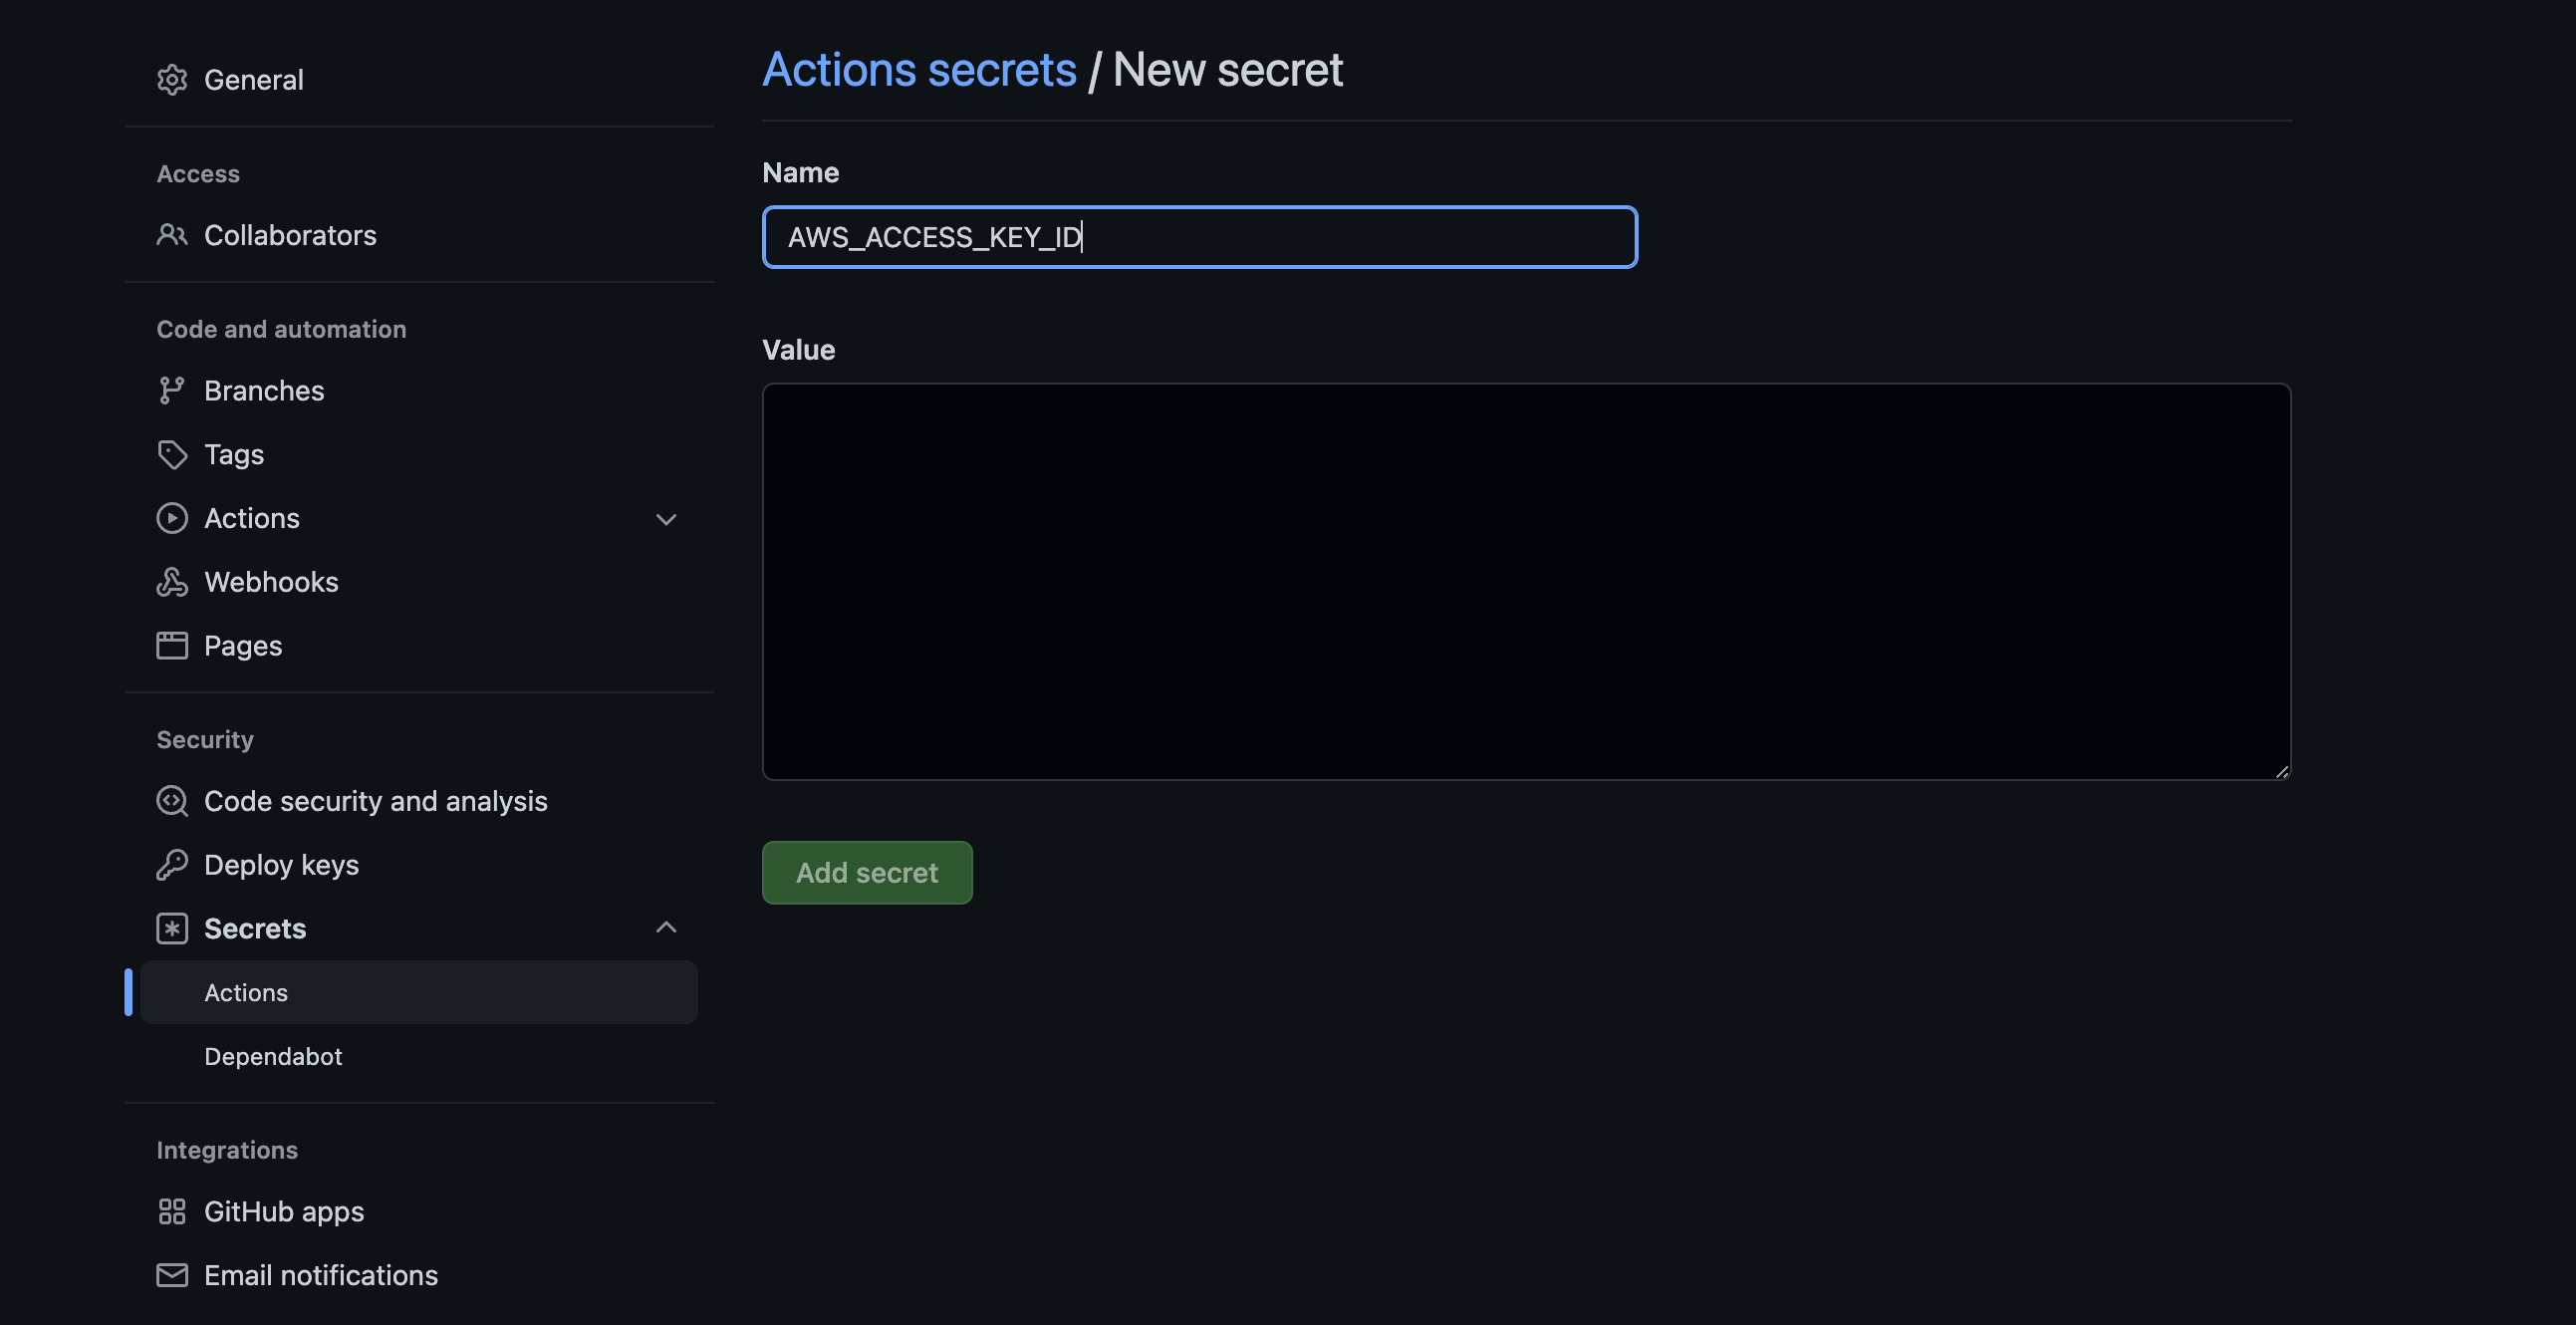
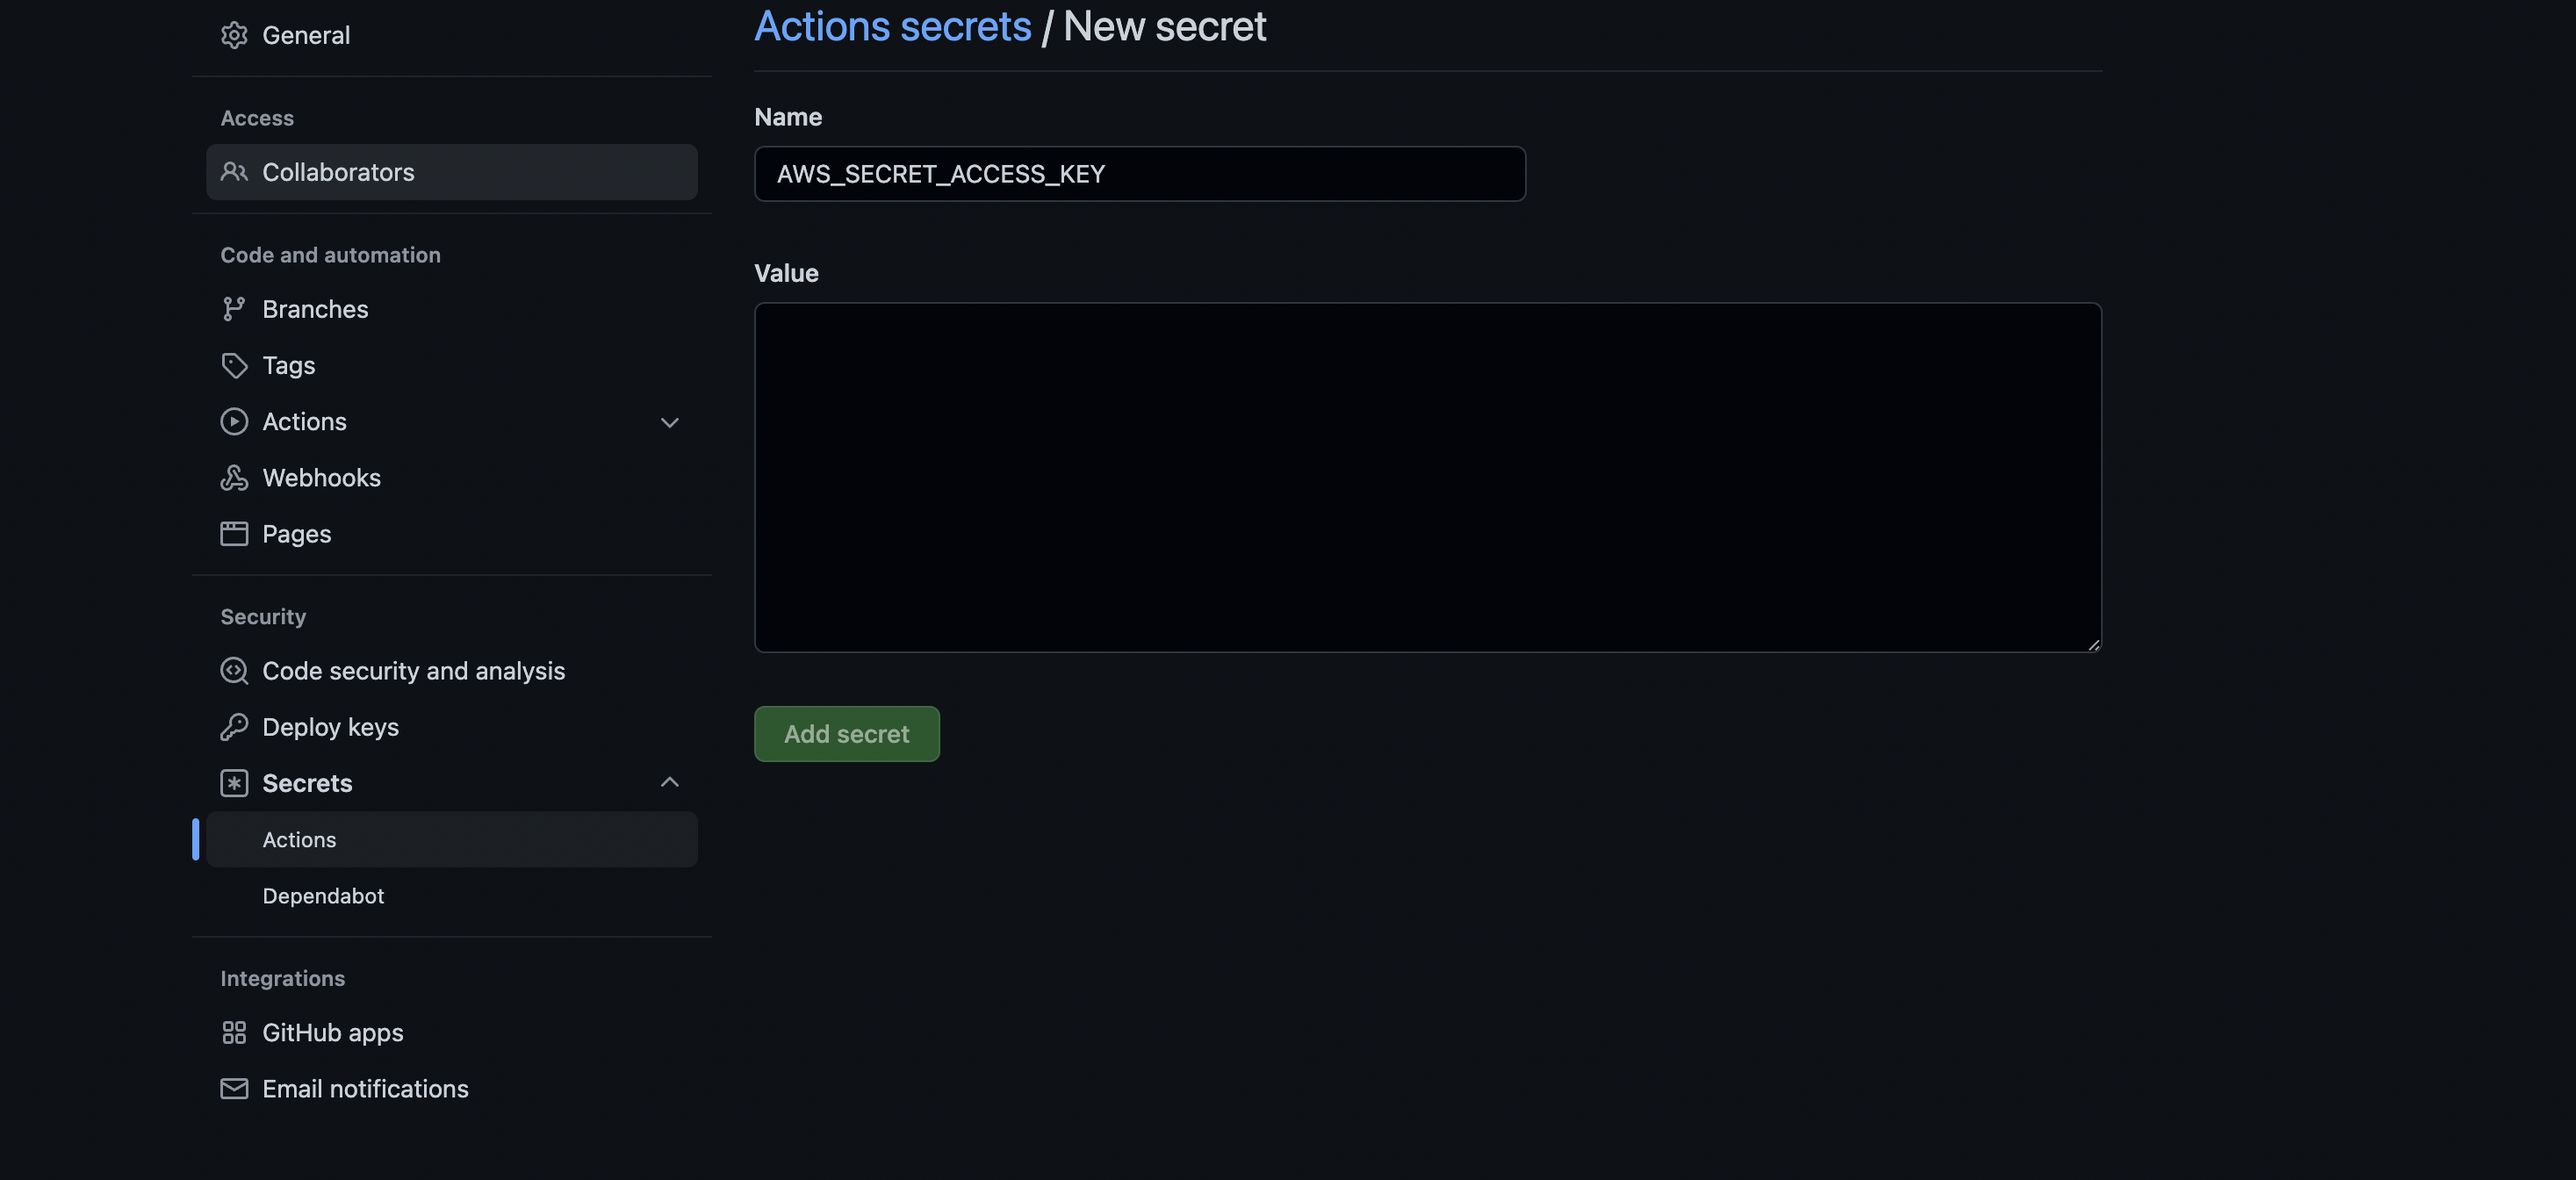
먼저 EB와 연결하여 CD를 진행할 Repository에 접속한다. 그 뒤 Setting -> Secrets -> New repository secret 을 클릭한다.

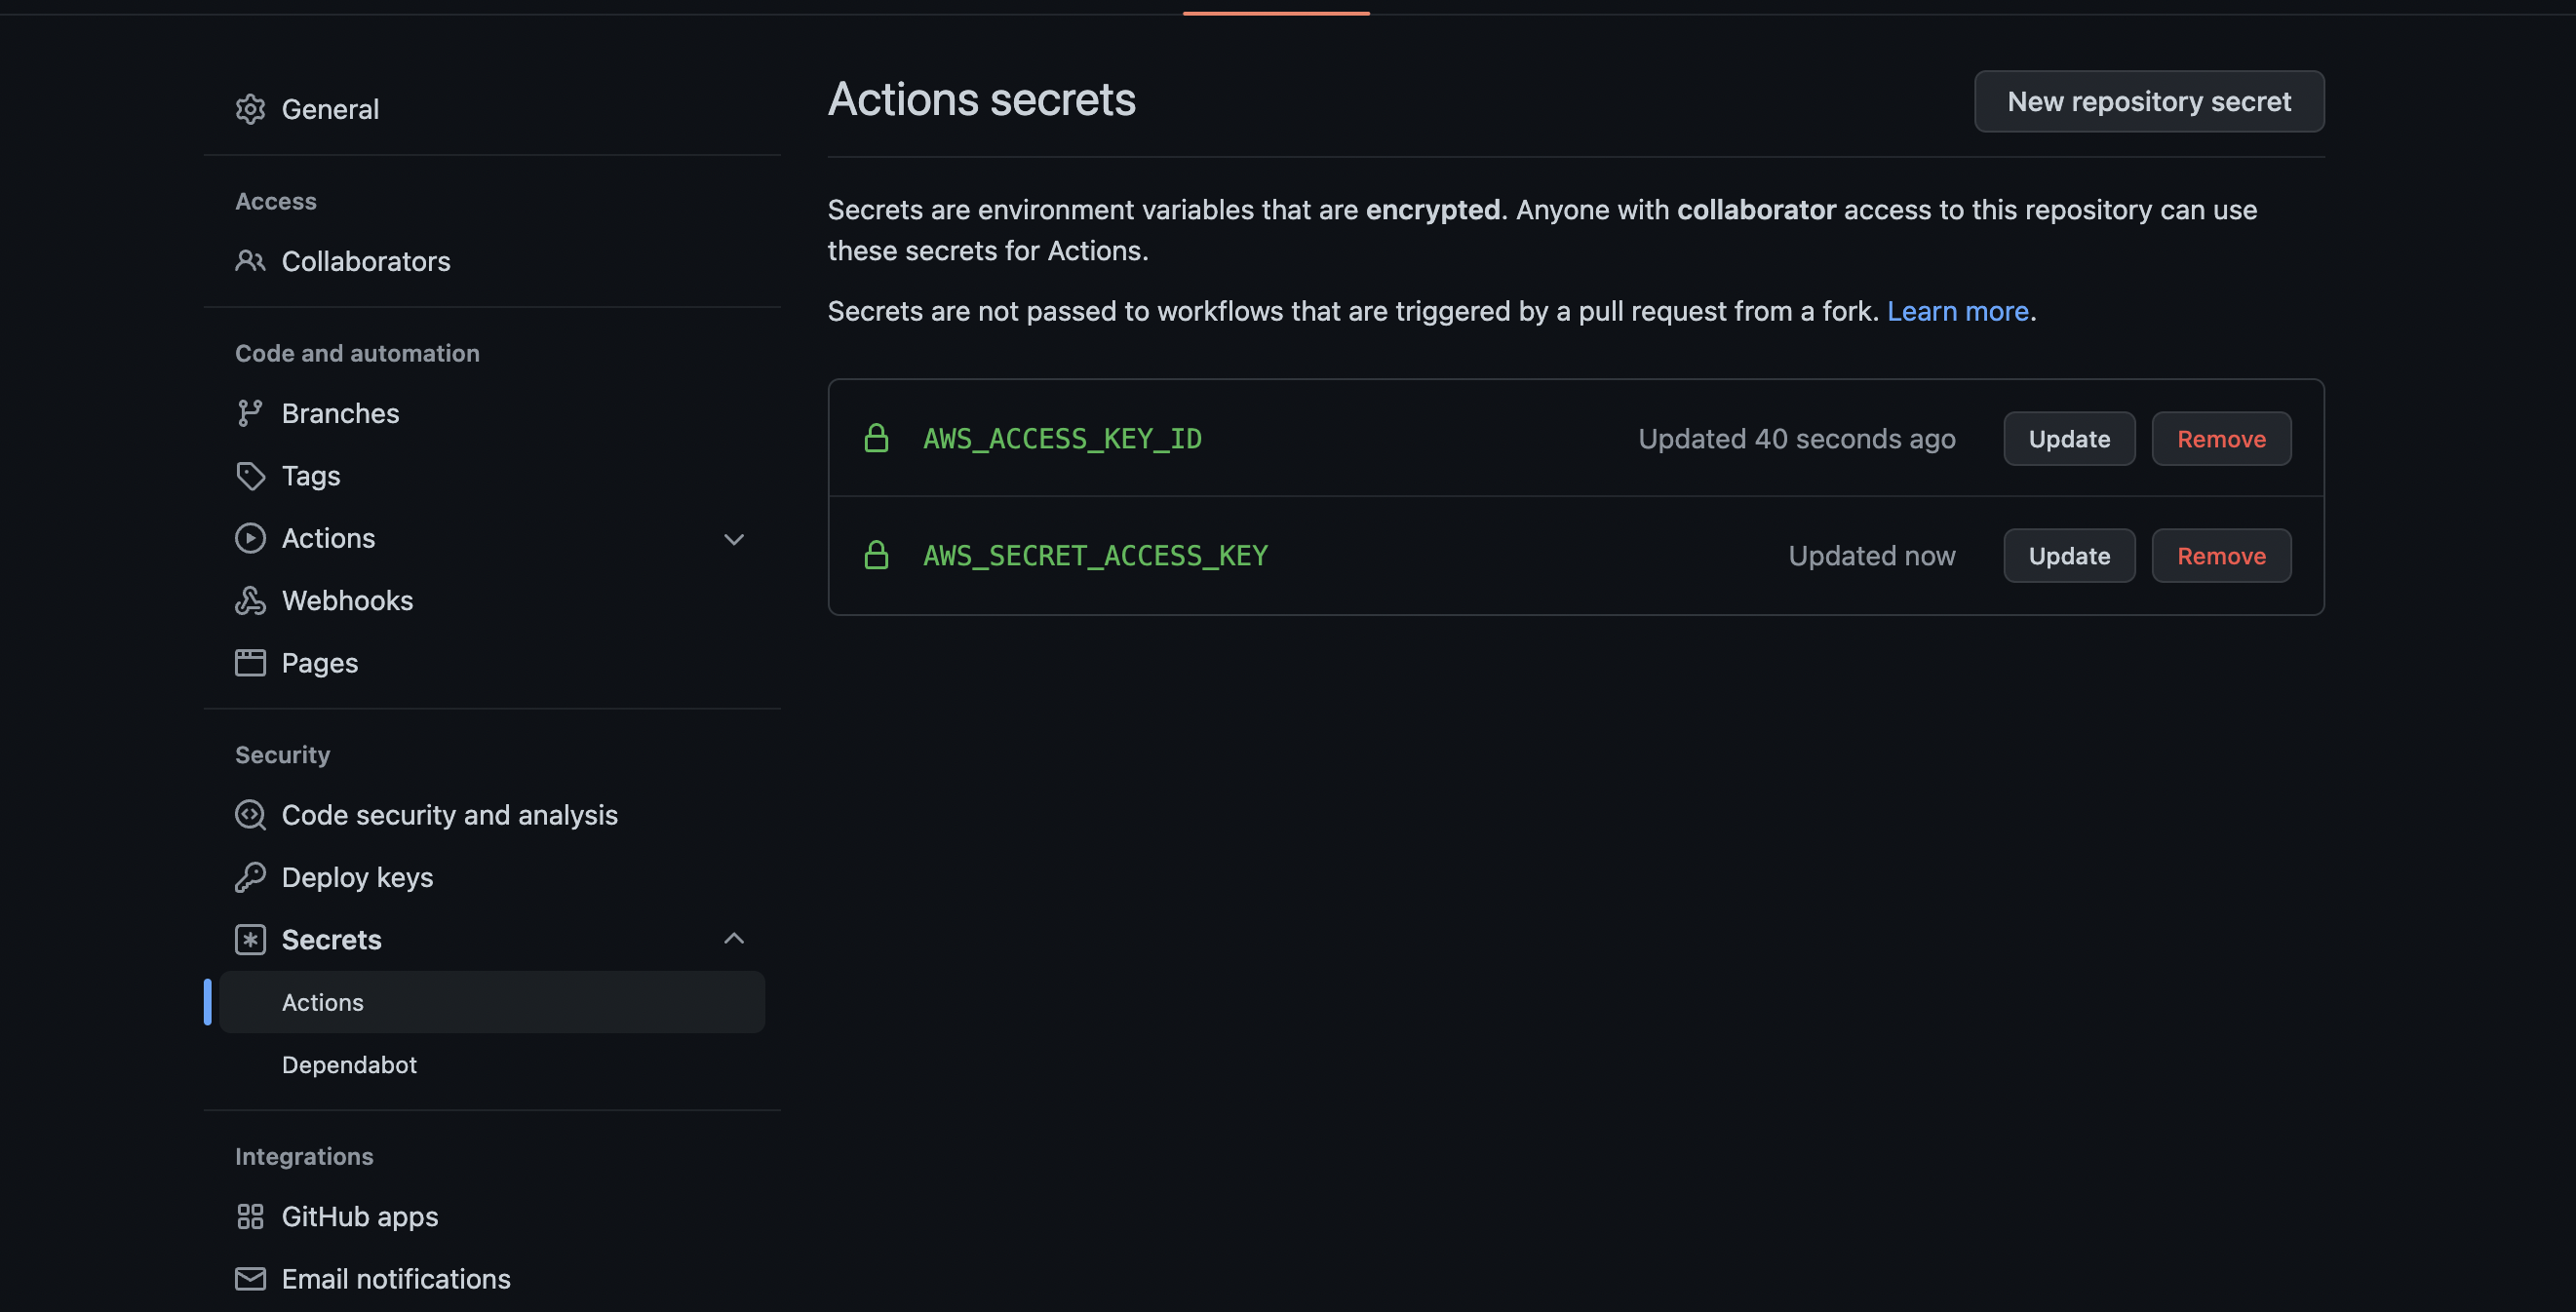
위 과정이 완료되면, 키 설정은 완료되었다.
AWS_ACCESS_KEY_ID: 엑세스 키 IDAWS_SECRET_ACCESS_KEY: 비밀 엑세스 키
이제는 위에서 등록한 깃허브 Secrets을 Github Action에서 사용할 수 있도록 workflow 스크립트 내에 설정을 해보자.
Github Action CD 스크립트 작성
Beanstalk으로 배포하기 위한 스크립트이므로, Beanstalk Deploy 라는 깃허브 액션 플러그인을 사용해보자
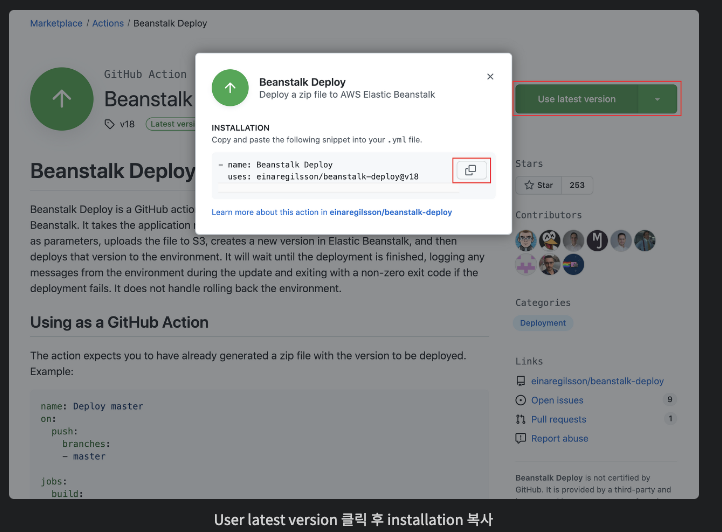
위와 같이 Beanstalk Deploy Github Action 플러그인에 접근하여 최신 버전 설치 코드를 복사한 후 아래와 같이 Github Action에서 신규 workflows를 생성한다. 자세한 코드 내용은 하단에 있다.
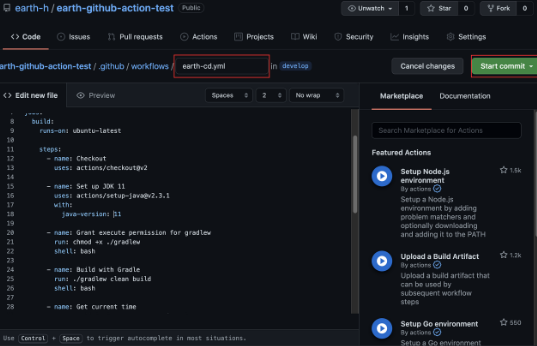
eb-cd.yml
# This is a basic workflow to help you get started with Actions

name: eb-github-action test CI

# Controls when the workflow will run
on:
  # Triggers the workflow on push or pull request events but only for the "main" branch
  push:
    branches: [ "main" ] # main에 push가 될 때 CD가 일어나도록 핸들링
  #pull_request:
    #branches: [ "main" ]

  #Allows you to run this workflow manually from the Actions tab
  #workflow_dispatch:

# A workflow run is made up of one or more jobs that can run sequentially or in parallel
jobs:
  # This workflow contains a single job called "build"
  build:
    # The type of runner that the job will run on
    runs-on: ubuntu-latest

    # Steps represent a sequence of tasks that will be executed as part of the job
    steps:

      - name: Checkout
        uses: actions/checkout@v2.4.2


      - name: Set up JDK 11
        uses: actions/setup-java@v3.3.0
        with:
          java-version: 11


      - name: Grant execute permission for gradlew
        run: chmod +x ./gradlew
        shell: bash


      - name: Build with Gradle
        run: ./gradlew clean build
        shell: bash


      - name: Get current time
        uses: josStorer/get-current-time@v2.0.0
        id: current-time
        with:
          format: YYYY-MM-DDTHH-mm-ss # 다른 포맷으로 변경 가능
          utcOffset: "+09:00" ## 한국시간에 맞추기 위함


      # Gradle build를 통해 만들어진 JAR를 beanstalk에 배포하기 위한 ZIP 파일로 만드는 것
      - name: Generate deployment package
        run: |
          mkdir -p deploy
          cp build/libs/*.jar deploy/application.jar  # 빌드 완료 시 JAR 파일명을 application.jar로 변경
          cp Procfile deploy/Procfile
          cp -r .ebextensions deploy/.ebextensions
          cp -r .platform deploy/.platform
          cd deploy && zip -r deploy.zip . # Procfile, .ebextensions, .playform 포함하여 zip 생성


      # Beanstalk Deploy 플러그인 사용
      - name: Beanstalk Deploy
        uses: einaregilsson/beanstalk-deploy@v20
        with:
          aws_access_key: ${{ secrets.AWS_ACCESS_KEY_ID }} # github secrets로 등록한 값 사용
          aws_secret_key: ${{ secrets.AWS_SECRET_ACCESS_KEY }} # github secrets로 등록한 값 사용
          application-name: eb-github-action-test # EB application 이름
          environment_name: dev-eb-github-action-test # EB environment 이름
          version_label: Github Action-${{steps.current-time.outputs.formattedTime}} # 배포 버전은 타임스탬프를 이용하여 구분
          region: ap-northeast-2
          deployment_package: deploy/deploy.zip
wait_for_environment_recovery: 180 # default wait time은 30초이며, 필자의 EB가 느려서 180초로 지정했습니다(지정 안하면 간혹 timeout 발생).- Get Current Time 스탭에서 사용하는 시간 Format은 MomentJs format syntax를 따른다. 따라서, 아래 사이트를 통해 포맷 변경이 가능하다.
Procfile,.ebextensions,.platform 구성
-
기본적인 Github Action 세팅은 위에서 완료되었으며, deploy.zip을 생성할 때 함께 들어가는 Procfile, .ebextensions, .platform 을 설정해보자
-
먼저 EB로 배포할 프로젝트에 접근하여 루트에 아래와 같이 파일 및 디렉토리를 생성한다.
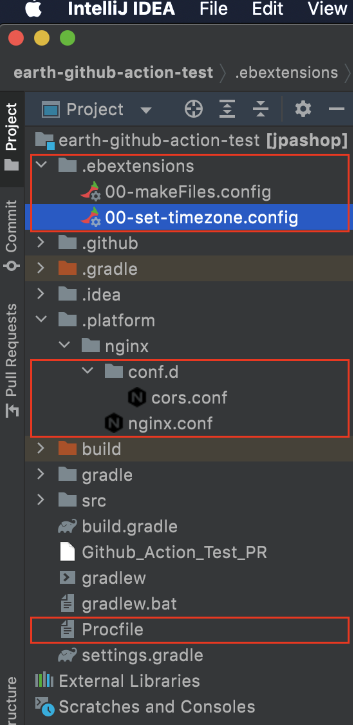
EB를 위해 생성한 파일들에 대해 하나씩 알아보자
.ebextensions/00-makeFiles.config
files:
    "/sbin/appstart":
        mode: "000755"
        owner: webapp
        group: webapp
        content: |
            #!/usr/bin/env bash
            JAR_PATH=/var/app/current/application.jar

            # run app
            killall java
java -Dfile.encoding=UTF-8 -jar $JAR_PATH-
/sbin으로 시작하여 전역에서 실행할 수 있기 때문에,/sbin아래에appstart라는 이름의 스크립트 파일을 만들고,755권한을 가진webapp(user).webapp(group)사용자가content내용을 가진 스크립트를 만들 수 있도록 스크립트를 구성했다. -
추후 해당 springboot 프로젝트를 환경에 상관없이 동일한 VM options가 필요하다면, 00-makeFiles.config의 content 내에 추가하여 옵션을 추가할 수 있다.
- 예)
java -Dfile.encoding=UTF-8 -DSpring.profiles.active=dev -jar $JAR_PATH
- 예)
.ebextensions/00-set-timezone.config
commands:
    set_time_zone:
command: ln -f -s /usr/share/zoneinfo/Asia/Seoul /etc/localtime- EC2를 Default로 생성하면 timezone이 UTC로 생성되기 때문에 로컬 타임존인 Asia/Seoul로 변경하기 위해 위와 같은 Config를 추가하였다.
Procfile
EB는 깃허브 액션으로부터 배포파일들을 전달받고 나면, .ebextensions을 비롯한 각종 설정 파일들을 실행한 뒤 어플리케이션을 실행한다.
- 이 어플리케이션 실행 단계란,
Procfile을 실행하는 것이다 - 따라서, 아래와 같이 appstart를 실행하기 위해
/sbin/appstart발생 시 어떤 일을 할지에 대해.ebextensions/00-makeFiles.config에 작성한 것이다.
web: appstart./platform/ngix/ngix.conf
이 부분은 넣어주지 않으면, default값으로 nginx를 띄운다. Nginx를 사용하는 이유는 Reverse Proxy로 사용하기 위함이다
- 무중단 배포를 위한 역할은 nginx가 아닌, EB에 의해 추가된 ALB에 의해 진행된다.
이 경우 ngix에서 reverse proxy로 스프링부트에 트래픽을 보낼 때, default로 5000 포트를 이용하기 대문에, springBoot의 기본 포트를 통해 springboot를 사용하기 우해 아래와 같이 작성하였다.
또한 추후 static 자원에 대해서는 SpringBoot까지 가지 않고 사용하고 싶을 때 해당 설정을 nginx를 진행할 수도 있다.
user                    nginx;
error_log               /var/log/nginx/error.log warn;
pid                     /var/run/nginx.pid;
worker_processes        auto;
worker_rlimit_nofile    33282;

events {
    use epoll;
    worker_connections  1024;
}

http {
  include       /etc/nginx/mime.types;
  default_type  application/octet-stream;

  log_format  main  '$remote_addr - $remote_user [$time_local] "$request" '
                    '$status $body_bytes_sent "$http_referer" '
                    '"$http_user_agent" "$http_x_forwarded_for"';

  include       conf.d/*.conf;

  map $http_upgrade $connection_upgrade {
      default     "upgrade";
  }

  upstream springboot {
    server 127.0.0.1:8080;
    keepalive 1024;
  }

  server {
      listen        80 default_server;

      location / {
          proxy_pass          http://springboot;
          proxy_http_version  1.1;
          proxy_set_header    Connection          $connection_upgrade;
          proxy_set_header    Upgrade             $http_upgrade;

          proxy_set_header    Host                $host;
          proxy_set_header    X-Real-IP           $remote_addr;
          proxy_set_header    X-Forwarded-For     $proxy_add_x_forwarded_for;
      }

      access_log    /var/log/nginx/access.log main;

      client_header_timeout 60;
      client_body_timeout   60;
      keepalive_timeout     60;
      gzip                  off;
      gzip_comp_level       4;

      # Include the Elastic Beanstalk generated locations
      include conf.d/elasticbeanstalk/healthd.conf;
  }
}
Github Action을 통해 Beanstalk에 배포하기
CD Github Action을 적용한 레포지토리의 브랜치에 push를 하면 하기와 같이 Beanstalk에 배포가 되는 것을 확인할 수 있다.
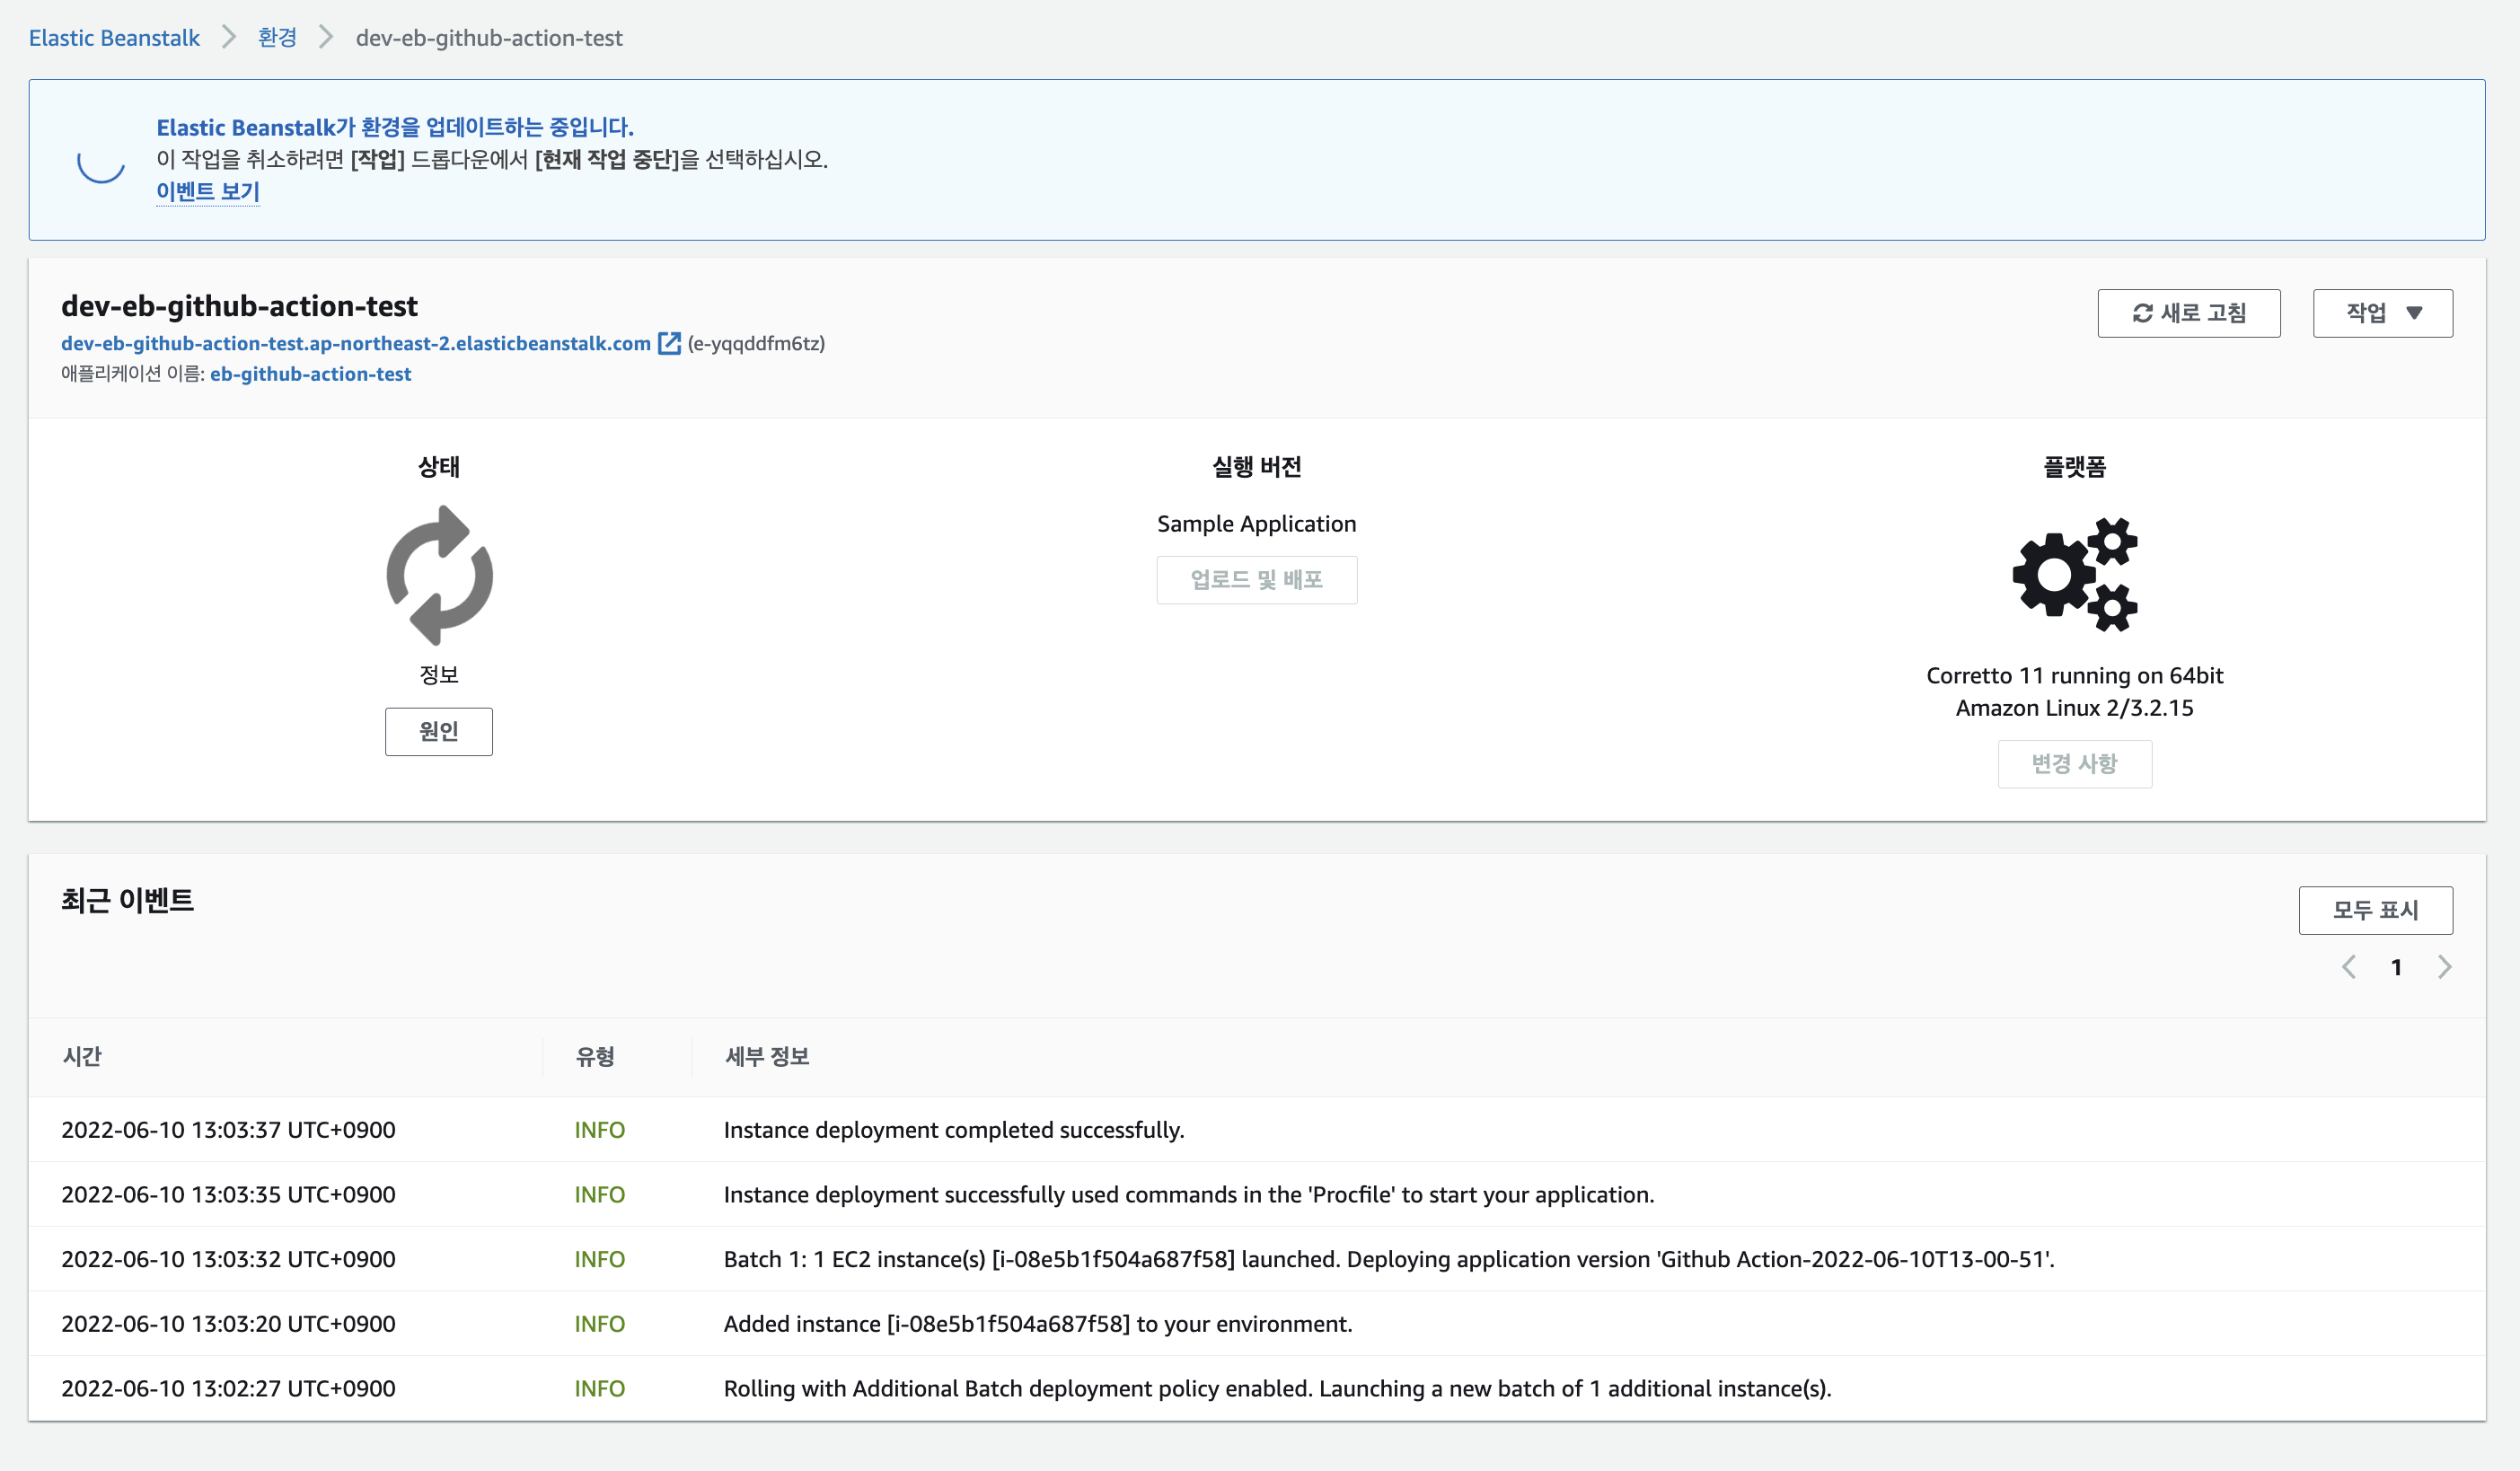
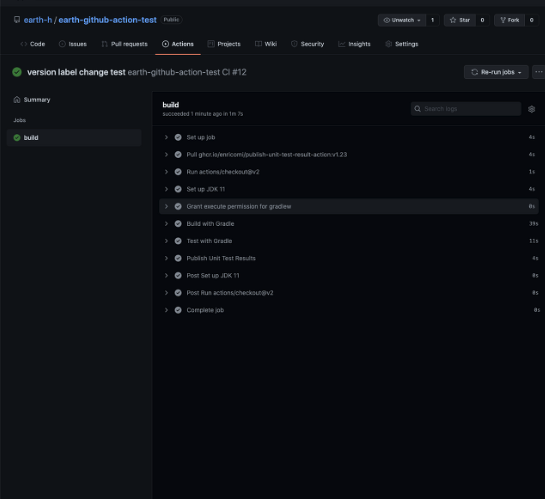
- github action 수행 완료 시에만 캡쳐를 진행해서, Elastic Beanstalk에서 초록불이 뜨지 않았지만, 위 상황은 Beanstalk에 배포파일이 넘어 갔고, 해당 배포 파일을 통해 신규 EC2 인스턴스를 만들어 올리는 과정이라고 봐주면 된다.
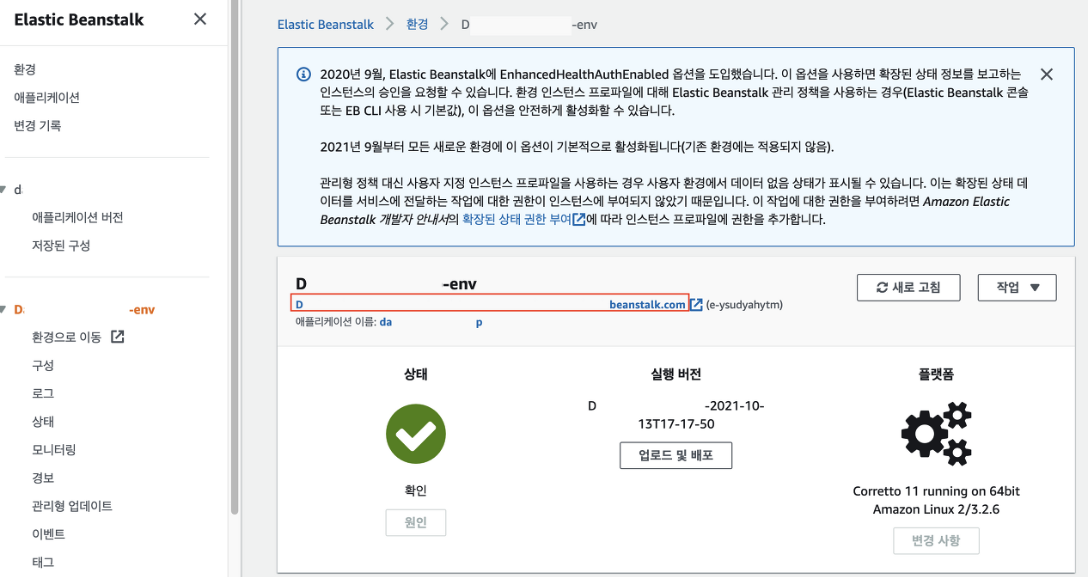
위 처럼 배포가 완료되면 상태가 초록 동그라미로 변경되며, 이 때 빨간 네모 박스에 적힌 도메인을 클릭하면, 배포가 완료된 환경으로 접속해볼 수 있다.

글 잘보고 있습니다! 그런데 eb-cd.yml 파일에 오타가 있더라고요 eb app name에서 그냥 하이픈이 아니라 언더바 하이픈이네요
application-name: eb-github-action-test => application_name: eb-github-action-test