프로그래머스 쇼핑몰 SPA - 커피주문페이지 만들기 공부 겸 해설 1. 상품 목록 만들기

👉 github에서 코드 보기
오늘은 프로그래머스의 과제 테스트를 풀고 공부해봤다
근데 리액트만 공부하다 바닐라 자바스크립트로 구현하려니 막막했고 모르는 부분이 너무 많았다 그래서 공부겸 기록용으로 블로그를 작성해본다
참고로 작성한 글은 로컬에서 돌린걸 기준으로 작성했다
프로그래머스에선 제한 시간이 있어서 로컬에서 돌릴 방법을 찾다 발견한 레포다
https://github.com/ChangHyun2/programmers-vanillaJS-SPA
로컬에서 돌려보고 싶다면 참조하자
문제
당신의 FE 기술을 이용해 새로운 쇼핑몰 사이트의 프로토타입을 만드는 업무를 받게 되었습니다. 그런데 아무런 외부 라이브러리를 사용하지 말고 vanilla js를 이용한 SPA로 만들라는 요구사항이 떨어졌습니다.
문제의 요구사항을 잘 보고, 업무를 완료할 수 있도록 요구사항을 잘 만족하는 SPA 쇼핑몰을 만들어보도록 합시다.
어려웠던 점
-
별도 라이브러리 없이 SPA 구현하기
: 프레임워크에서 기본적으로 지원해서 생각도 안해본 URL 라우팅 처리 -
리액트 위주로 공부하다보니 Vanilla JS 자체가 어려웠음
: 그나마 답지를 제공해줘서 공부라도 가능
문제 풀이
1. URL 라우팅 처리
location.pathname 사용해 URL 별로 분기 태우기
location.pathname
:The pathname property of the Location interface is a string containing the path of the URL for the location, which will be the empty string if there is no path.
- 상품 목록 페이지 url: /web/
- 상품 상세 페이지 url: /web/products/:productId
- 장바구니 페이지 url: /web/cart
	const { pathname } = location;

    if (pathname === "/coffee/index.html") {
      // 상품 목록 페이지 ProductListPage

    } else if (pathname.indexOf("/products/" === 0)) {
      // 싱품 상세 페이지 ProductDetailPage

    } else if (pathname === "/cart") {
      // 장바구니 페이지 CartPage

    }
2. Page 컴포넌트들
그럼 이제 각 페이지 컴포넌트를 만들어보자
- ProductListPage
<main class="App">
   <div class="ProductListPage">
    <h1>상품목록</h1>
   </div>
</main>
// ListPage.js

function ListPage({ $app }) {
  const $page = document.createElement("div");
  $page.className = "ProductListPage";
  $page.innerHTML = `<h1>상품목록</h1>`;

  this.render = () => {
    $app.appendChild($page);
  };
}

export default ListPage;
참고로 여기서 $(달러)는 document.getElementById() 대신 아이디 값처럼 단일한 변수를 표시할 때 사용한다고 한다.
이제 리스트 페이지를 렌더링 해보자
// App.js

function App({ $app }) {
  this.route = () => {
    const { pathname } = location;

    $app.innerHTML = " ";

    if (pathname === "/coffee/index.html") {
      new ListPage({ $app }).render();
    } else if (pathname.indexOf("/products/" === 0)) {
       // 싱품 상세 페이지 ProductDetailPage

    } else if (pathname === "/cart") {
       // 장바구니 페이지 CartPage

    }
  };

  this.route();
}

export default App;
이때 $app은 index.js에서 온 변수
// index.js
import App from "./src/App.js";
const $app = document.querySelector(".App");
new App({ $app });
즉 index.js에서 $app 변수 선언 이때 app은<main class="App"> 이걸 가리킴 ➡️ 생성자 함수 new App({ $app }); 실행 ➡️ App 함수에서 pathname에 따라 라우팅 해줌
나머지 페이지도 같은 방식으로 만들어준다
- ProductListPage
function DetailPage({ $app, productId }) {
  const $page = document.createElement("div");
  $page.className = "ProductDetailPage";
  $page.innerHTML = `<h1>상품정보</h1>`;

  this.render = () => {
    $app.appendChild($page);
  };
}
export default DetailPage;- CartPage
function CartPage({ $app }) {
  const $page = document.createElement("div");
  $page.className = "CartPage";
  $page.innerHTML = `<h1>장바구니</h1>`;

  this.render = () => {
    $app.appendChild($page);
  };
}
export default CartPage;
// App.js
import CartPage from "./pages/CartPage.js";
import DetailPage from "./pages/DetailPage.js";
import ListPage from "./pages/ListPage.js";

function App({ $app }) {
  this.route = () => {
    const { pathname } = location;

    $app.innerHTML = "";

    if (pathname === "/coffee/index.html") {
      new ListPage({ $app }).render();
    } else if (pathname.indexOf("/products/" === 0)) {
      const [, , productId] = pathname.split("/");
      new DetailPage({ $app, productId }).render();
    } else if (pathname === "/cart") {
      new CartPage({ $app }).render();
    }
  };
  this.route();
}

export default App;
3. ProductList
먼저 api 통신 부분은 따로 분리해준다(관심사 분리)
// api.js

const BASE_URL = "http://127.0.0.1:8080/https://uikt6pohhh.execute-api.ap-northeast-2.amazonaws.com/dev"; // 로컬에서 돌려서!

const request = async (url) => {
  try {
    const fullUrl = `${BASE_URL}${url}`;
    const res = await fetch(fullUrl);

    if (res.ok) {
      const json = await res.json();
      return json;
    }
    throw new Error(res.message);
  } catch (err) {
    alert(err.message);
  }
};

export const getProductList = async () => await request("/products");
ListPage에서 통신을 하고 저장한 값을 ProductList에 넘겨준다
import { getProductList } from "../apis/api.js";
import ProductList from "../components/ProductList.js";

function ListPage({ $app }) {
  const $page = document.createElement("div");
  $page.className = "ProductListPage";
  $page.innerHTML = `<h1>상품목록</h1>`;

  this.render = () => {
    $app.appendChild($page);
  };

  // 여기서 부터 새로 짠 코드
  this.setState = (nextState) => {
    this.state = nextState;
  };

  const fetchProducts = async () => {
    const listData = await getProductList();
    this.setState(listData); // setState 함수를 이용해 불러온 상품 목록 저장

    new ProductList({
      $target: $page,
      initialState: this.state,
    });
  };

  // ListPage 생성 시 api 요청해오도록
  fetchProducts();
}

export default ListPage;
다음으로 ProductList 컴포넌트를 만들어보자
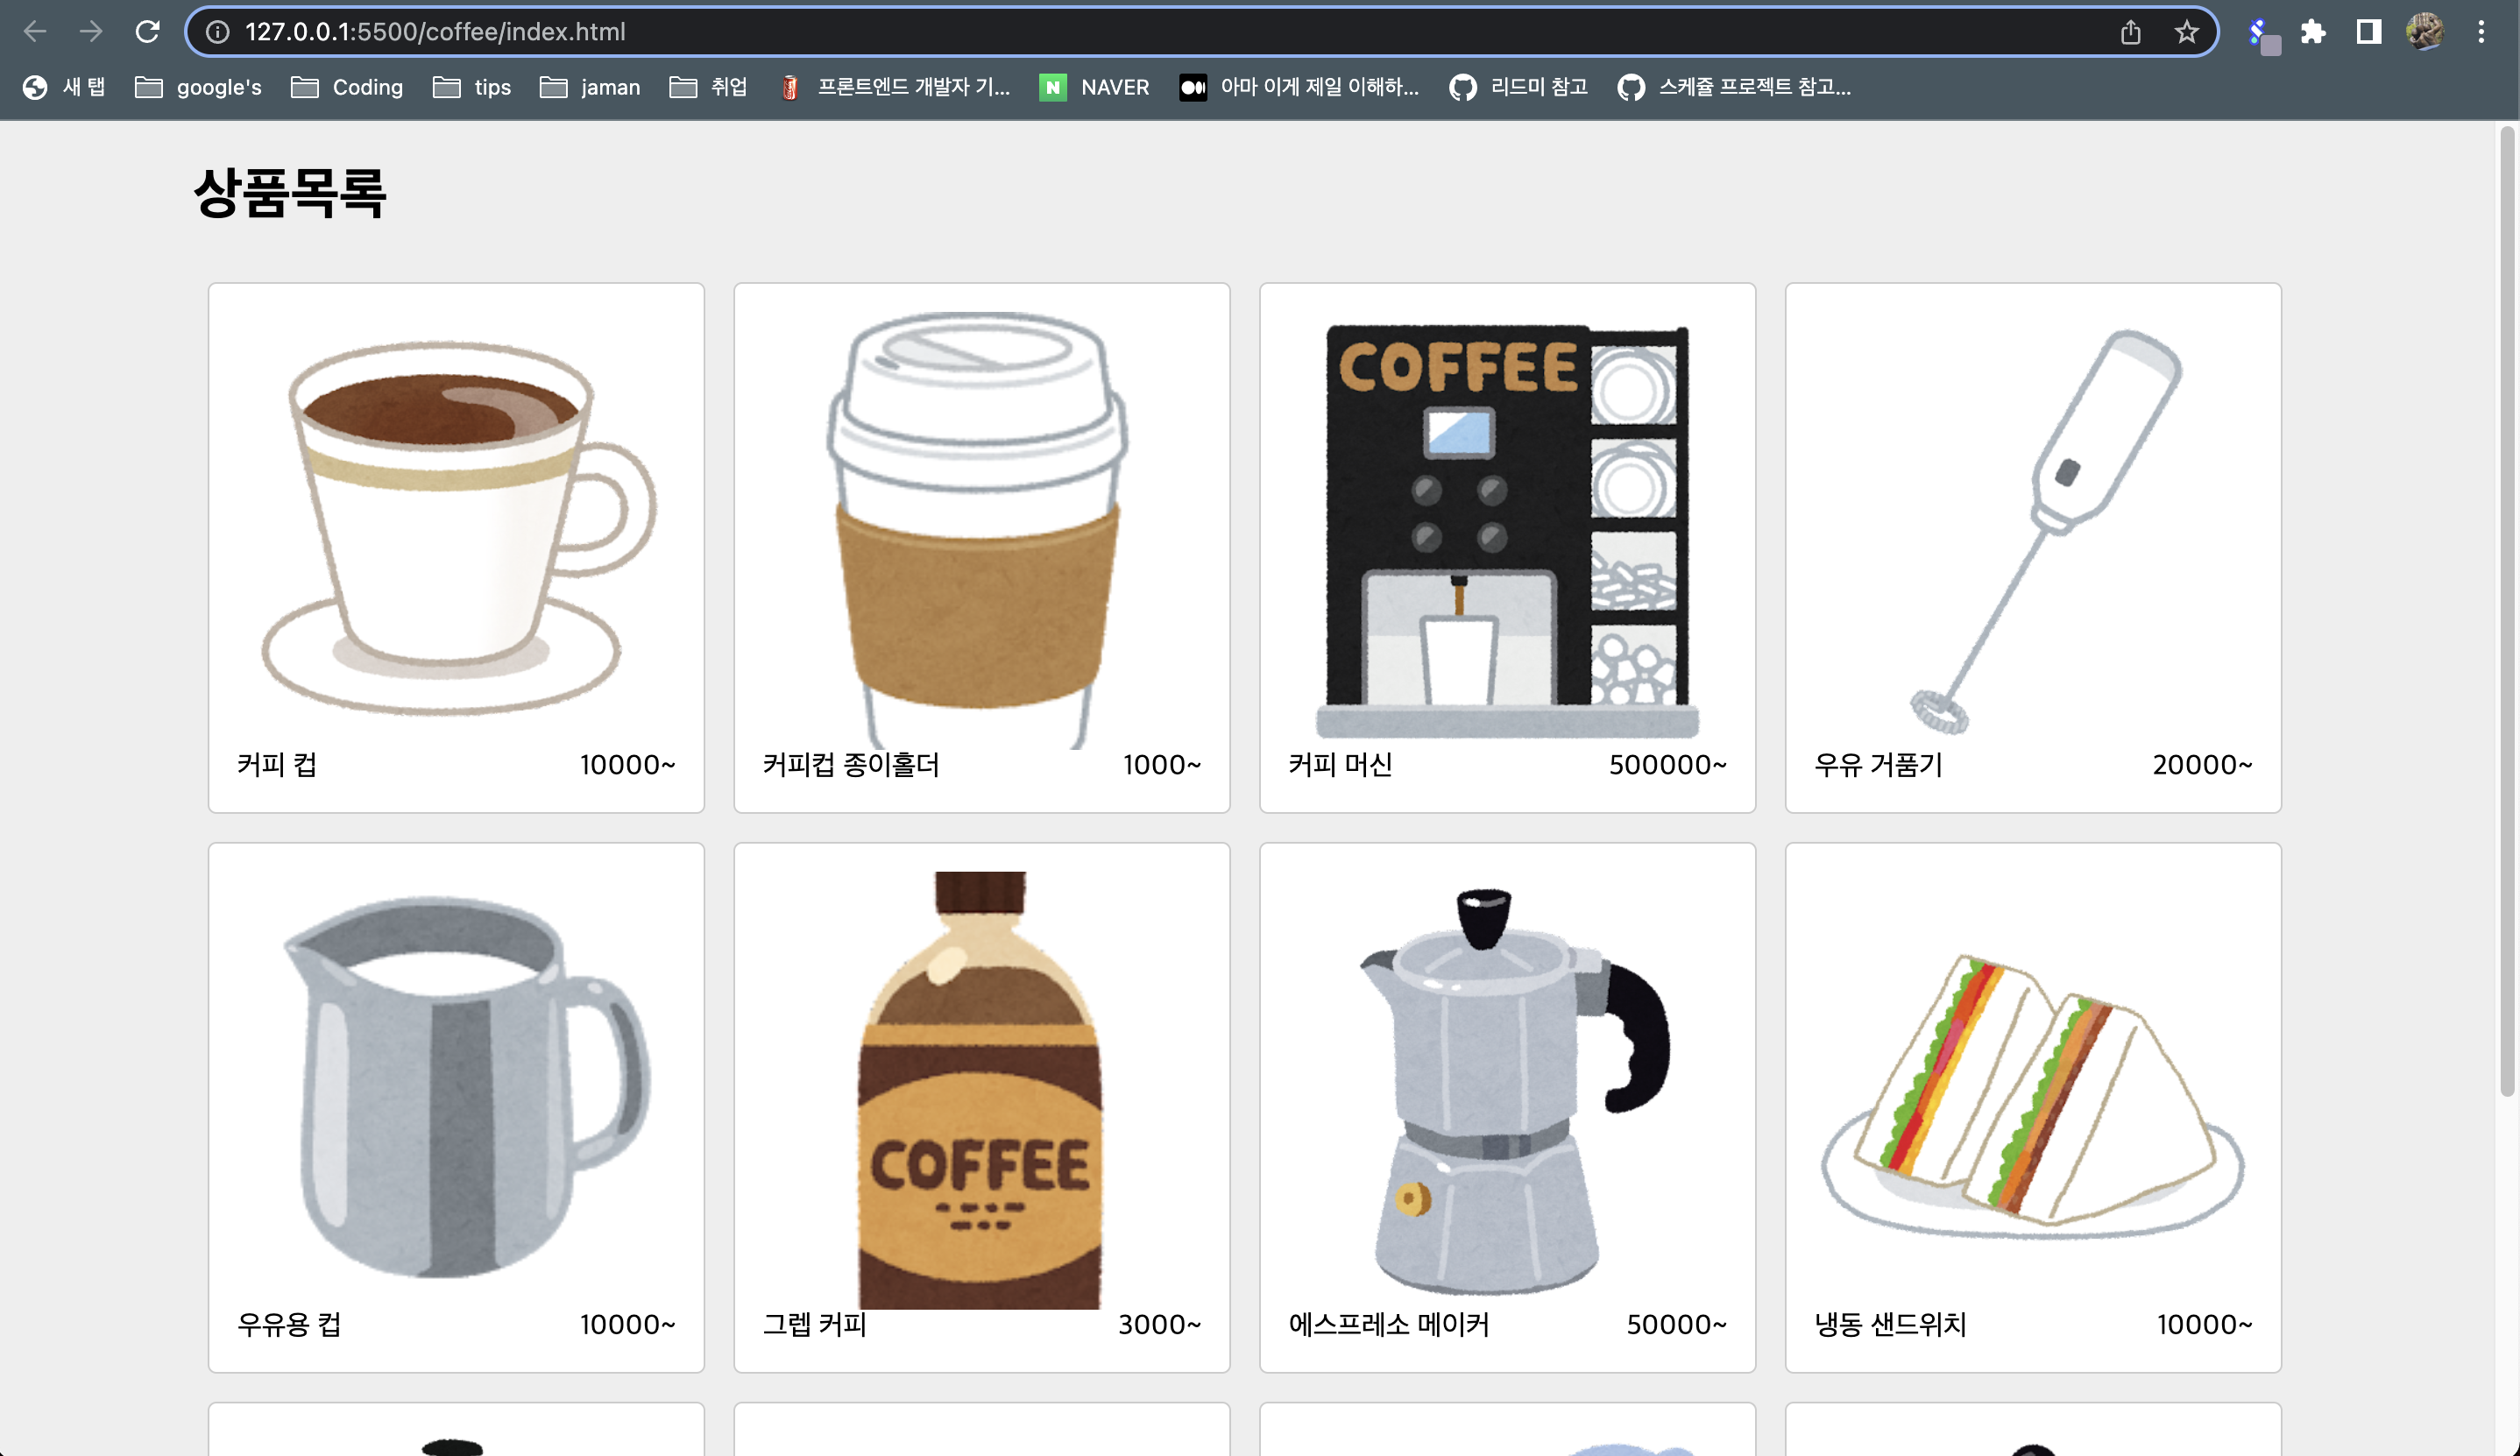
// 원본 html
<main class="App">
   <div class="ProductListPage">
    <h1>상품목록</h1>
     <ul >
       <li class="Product">
          <img src="imageUrl">
          <div class="Product__info">
            <div>name</div>
            <div>price~</div>
          </div>
   	   </li>
       ...
     </ul>
   </div>
</main>
// 타겟과 초기상태값은 ListPage에서!
function ProductList({ $target, initialState }) {
  const $productList = document.createElement("ul");
  $target.appendChild($productList);

  this.state = initialState;

  this.render = () => {
    if (!this.state) {
      return;
    }

    const list = this.state
      .map(
        (item) => `<li class="Product">
      <img src="${item.imageUrl}">
      <div class="Product__info">
        <div>${item.name}</div>
        <div>${item.price}~</div>
      </div>
    </li>`
      )
      .join(``);

    $productList.innerHTML = list;
  };

  this.render(); // render 호출
}

export default ProductList;
그럼 이렇게 목록이 잘 렌더링 된 것을 확인할 수 있다
참조
https://github.com/ChangHyun2/programmers-vanillaJS-SPA
https://prgms.tistory.com/113
