1. Creating a Landmark Model
- copy items if needed 선택해서 json 파일 첨부.
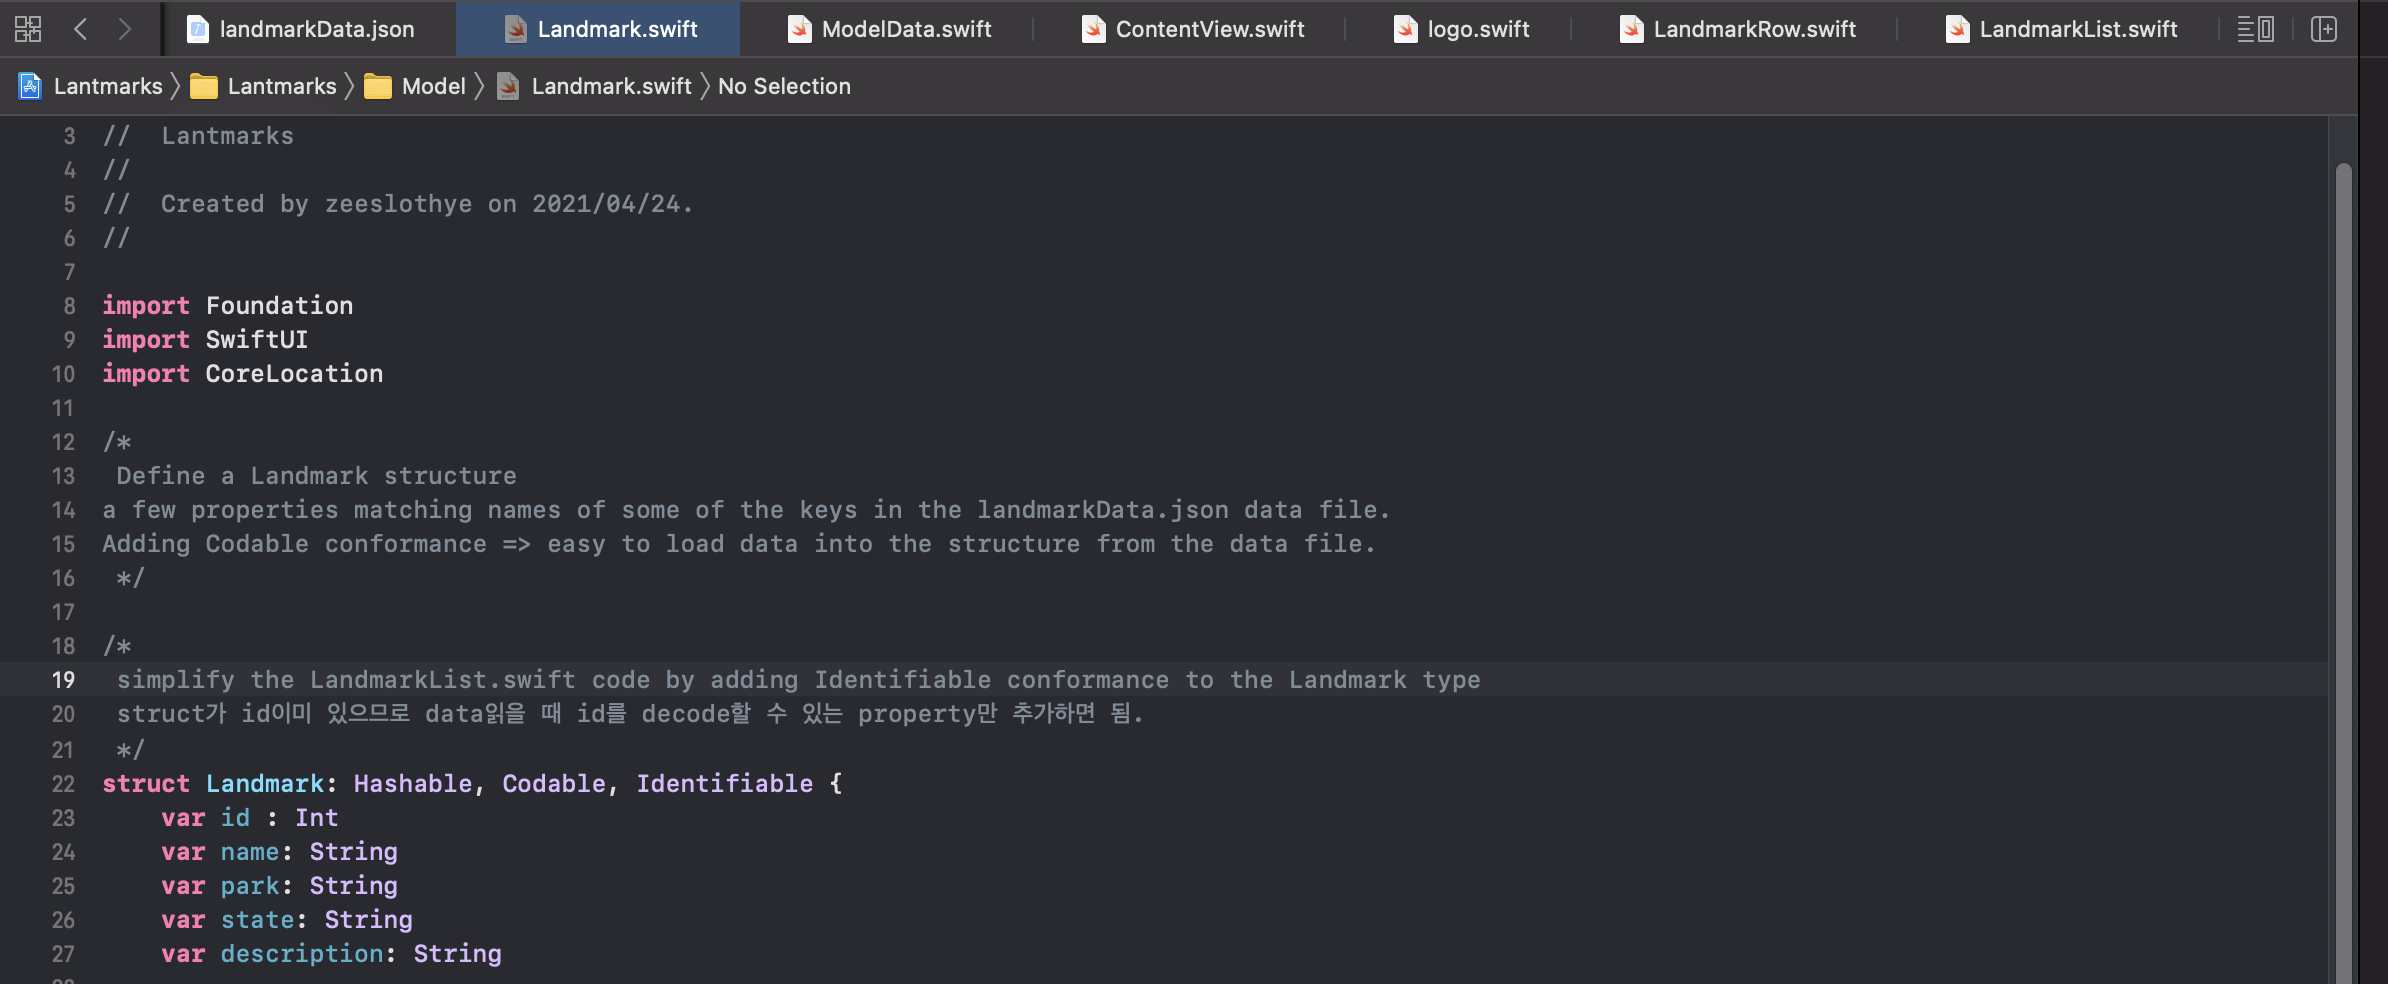
- Landmark.swift file 새로 만들고, json에 있는것들로 struct만들기.
Codable=> easier to load data into the structure from the data file
; json에서 structure로 data를 전송하기 쉬워진다. - image resource를 asset에 갖다넣기. (jpg파일)
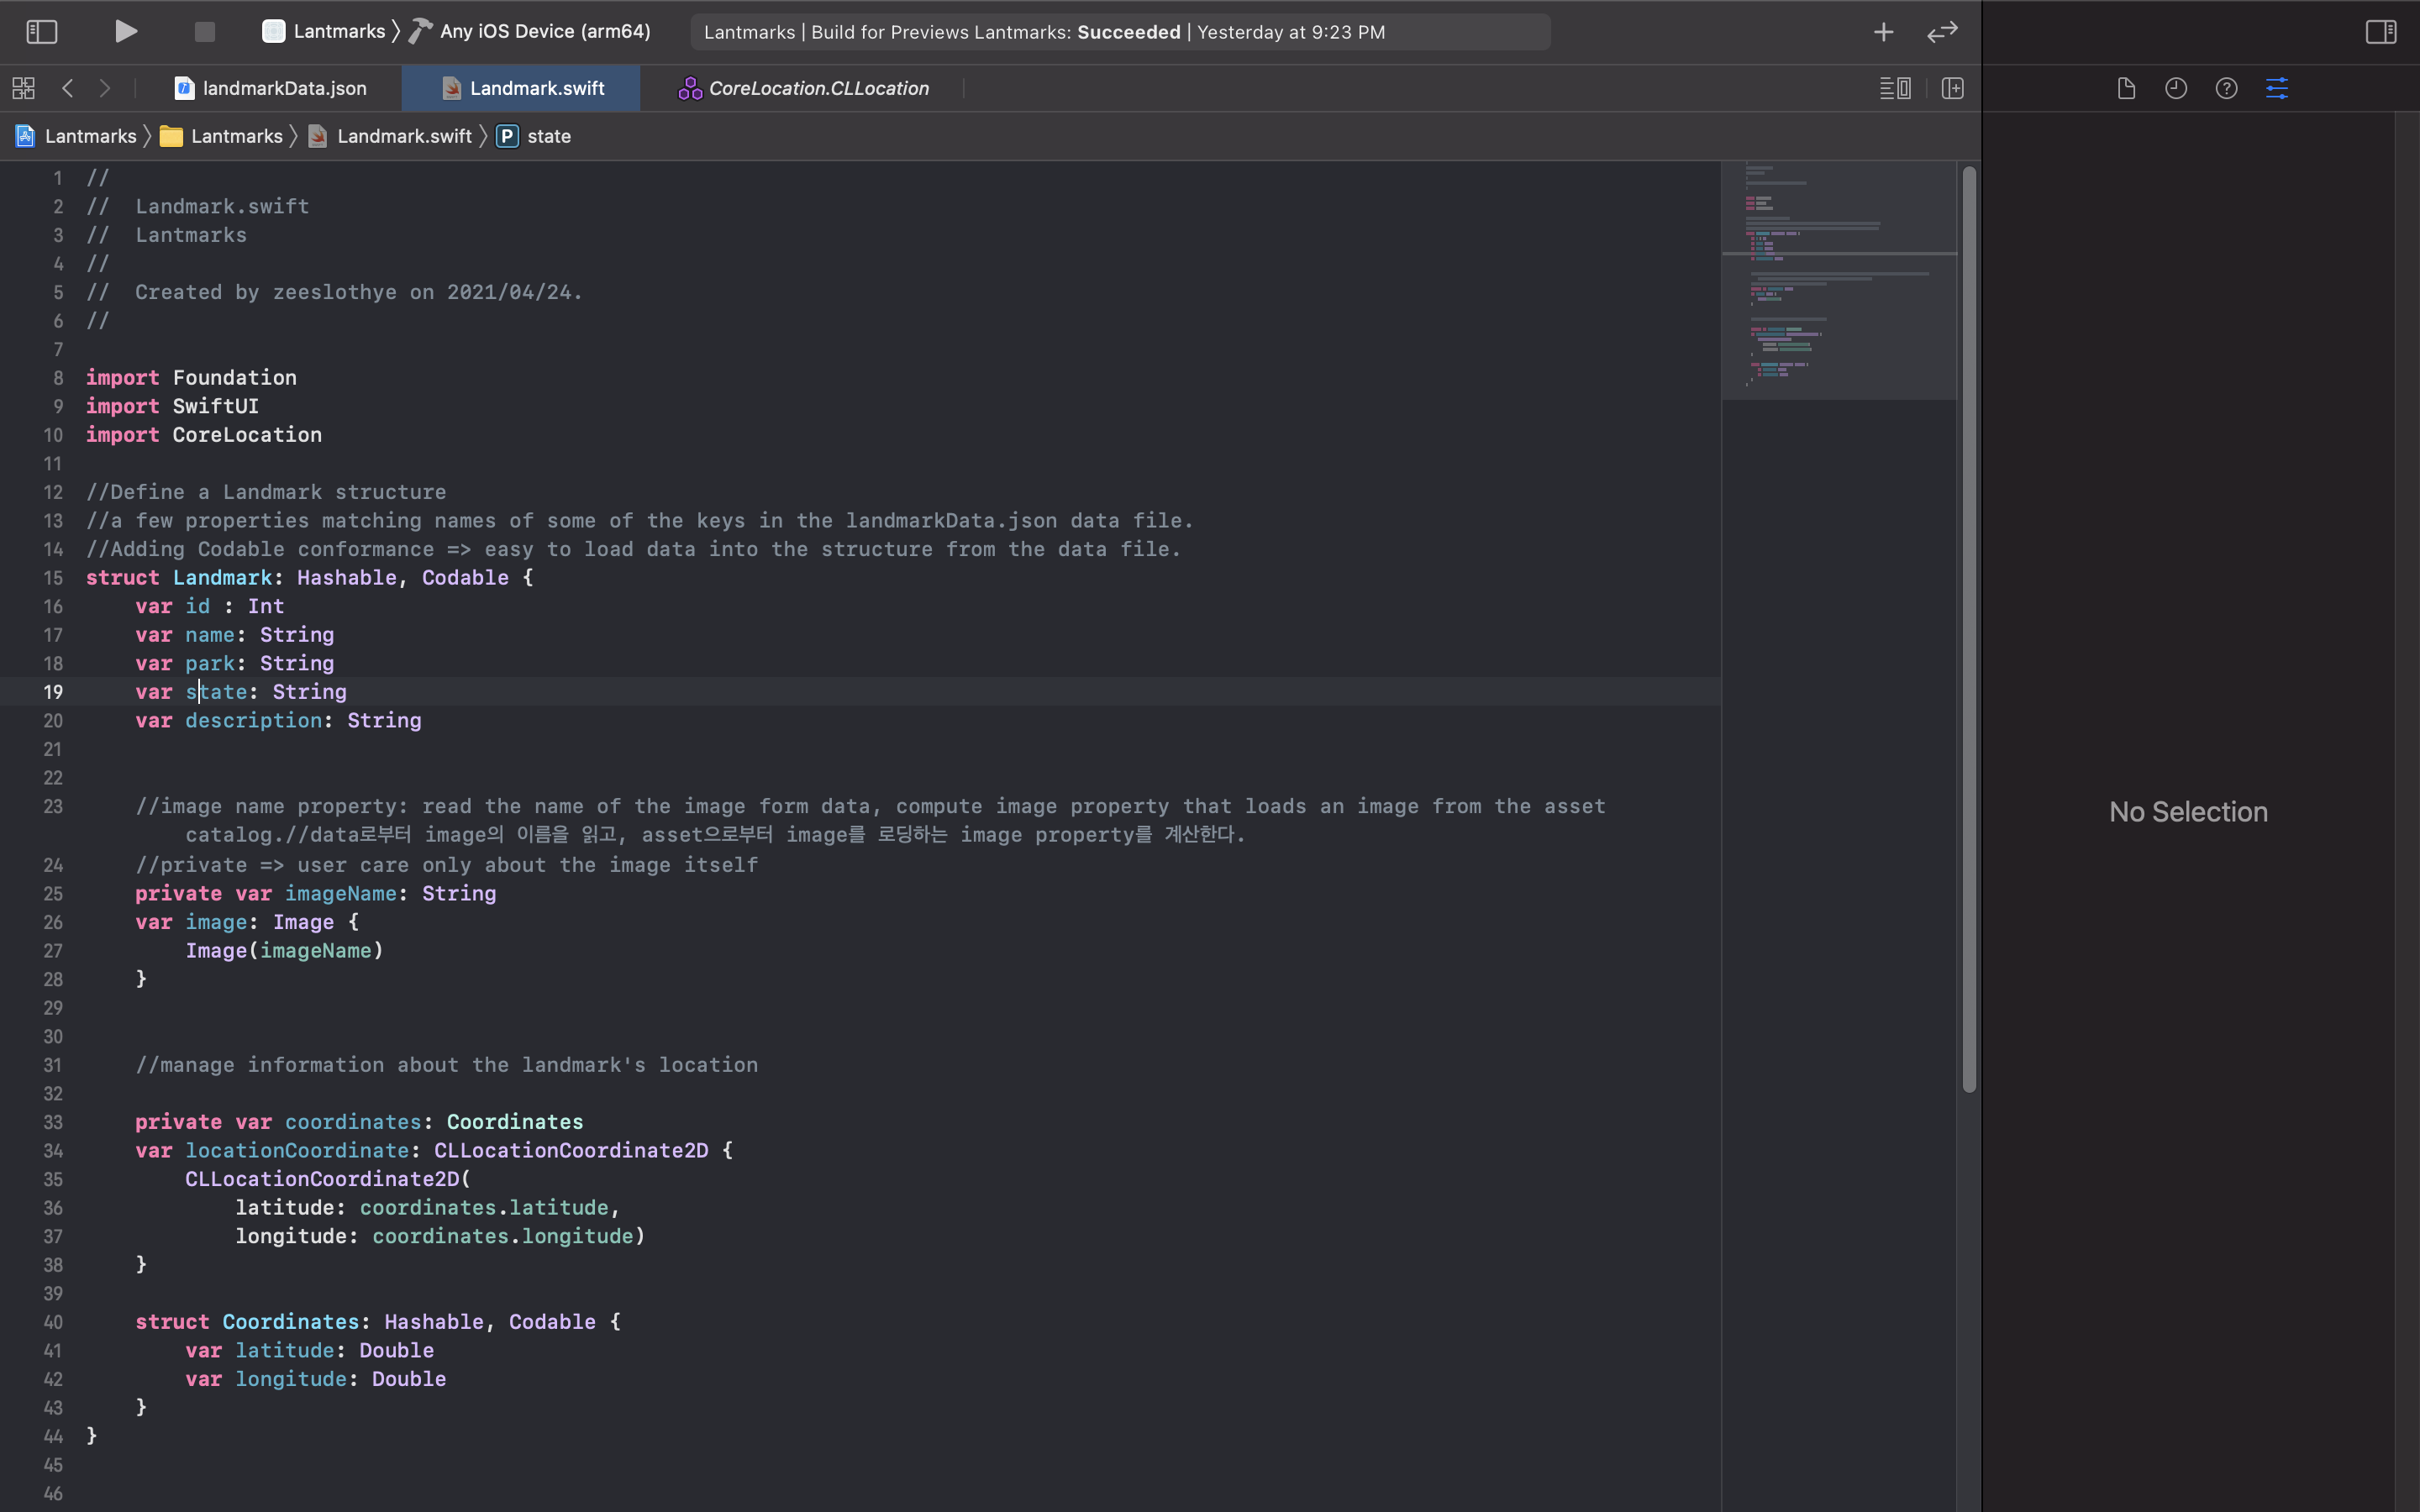
- imageName property를 추가하여 data의 image이름을 읽어옴.
property를 private로 선언함. ;user가 image만 care하니까. - landmark location 다룰꺼임. json data structure에 있는 coordinate property를 추가하고, structure만듦.
private로 선언함. ; you'll use it only to create a public computed property. - locationCookrdinate property를 만들어 MapKit framework와 interacting.
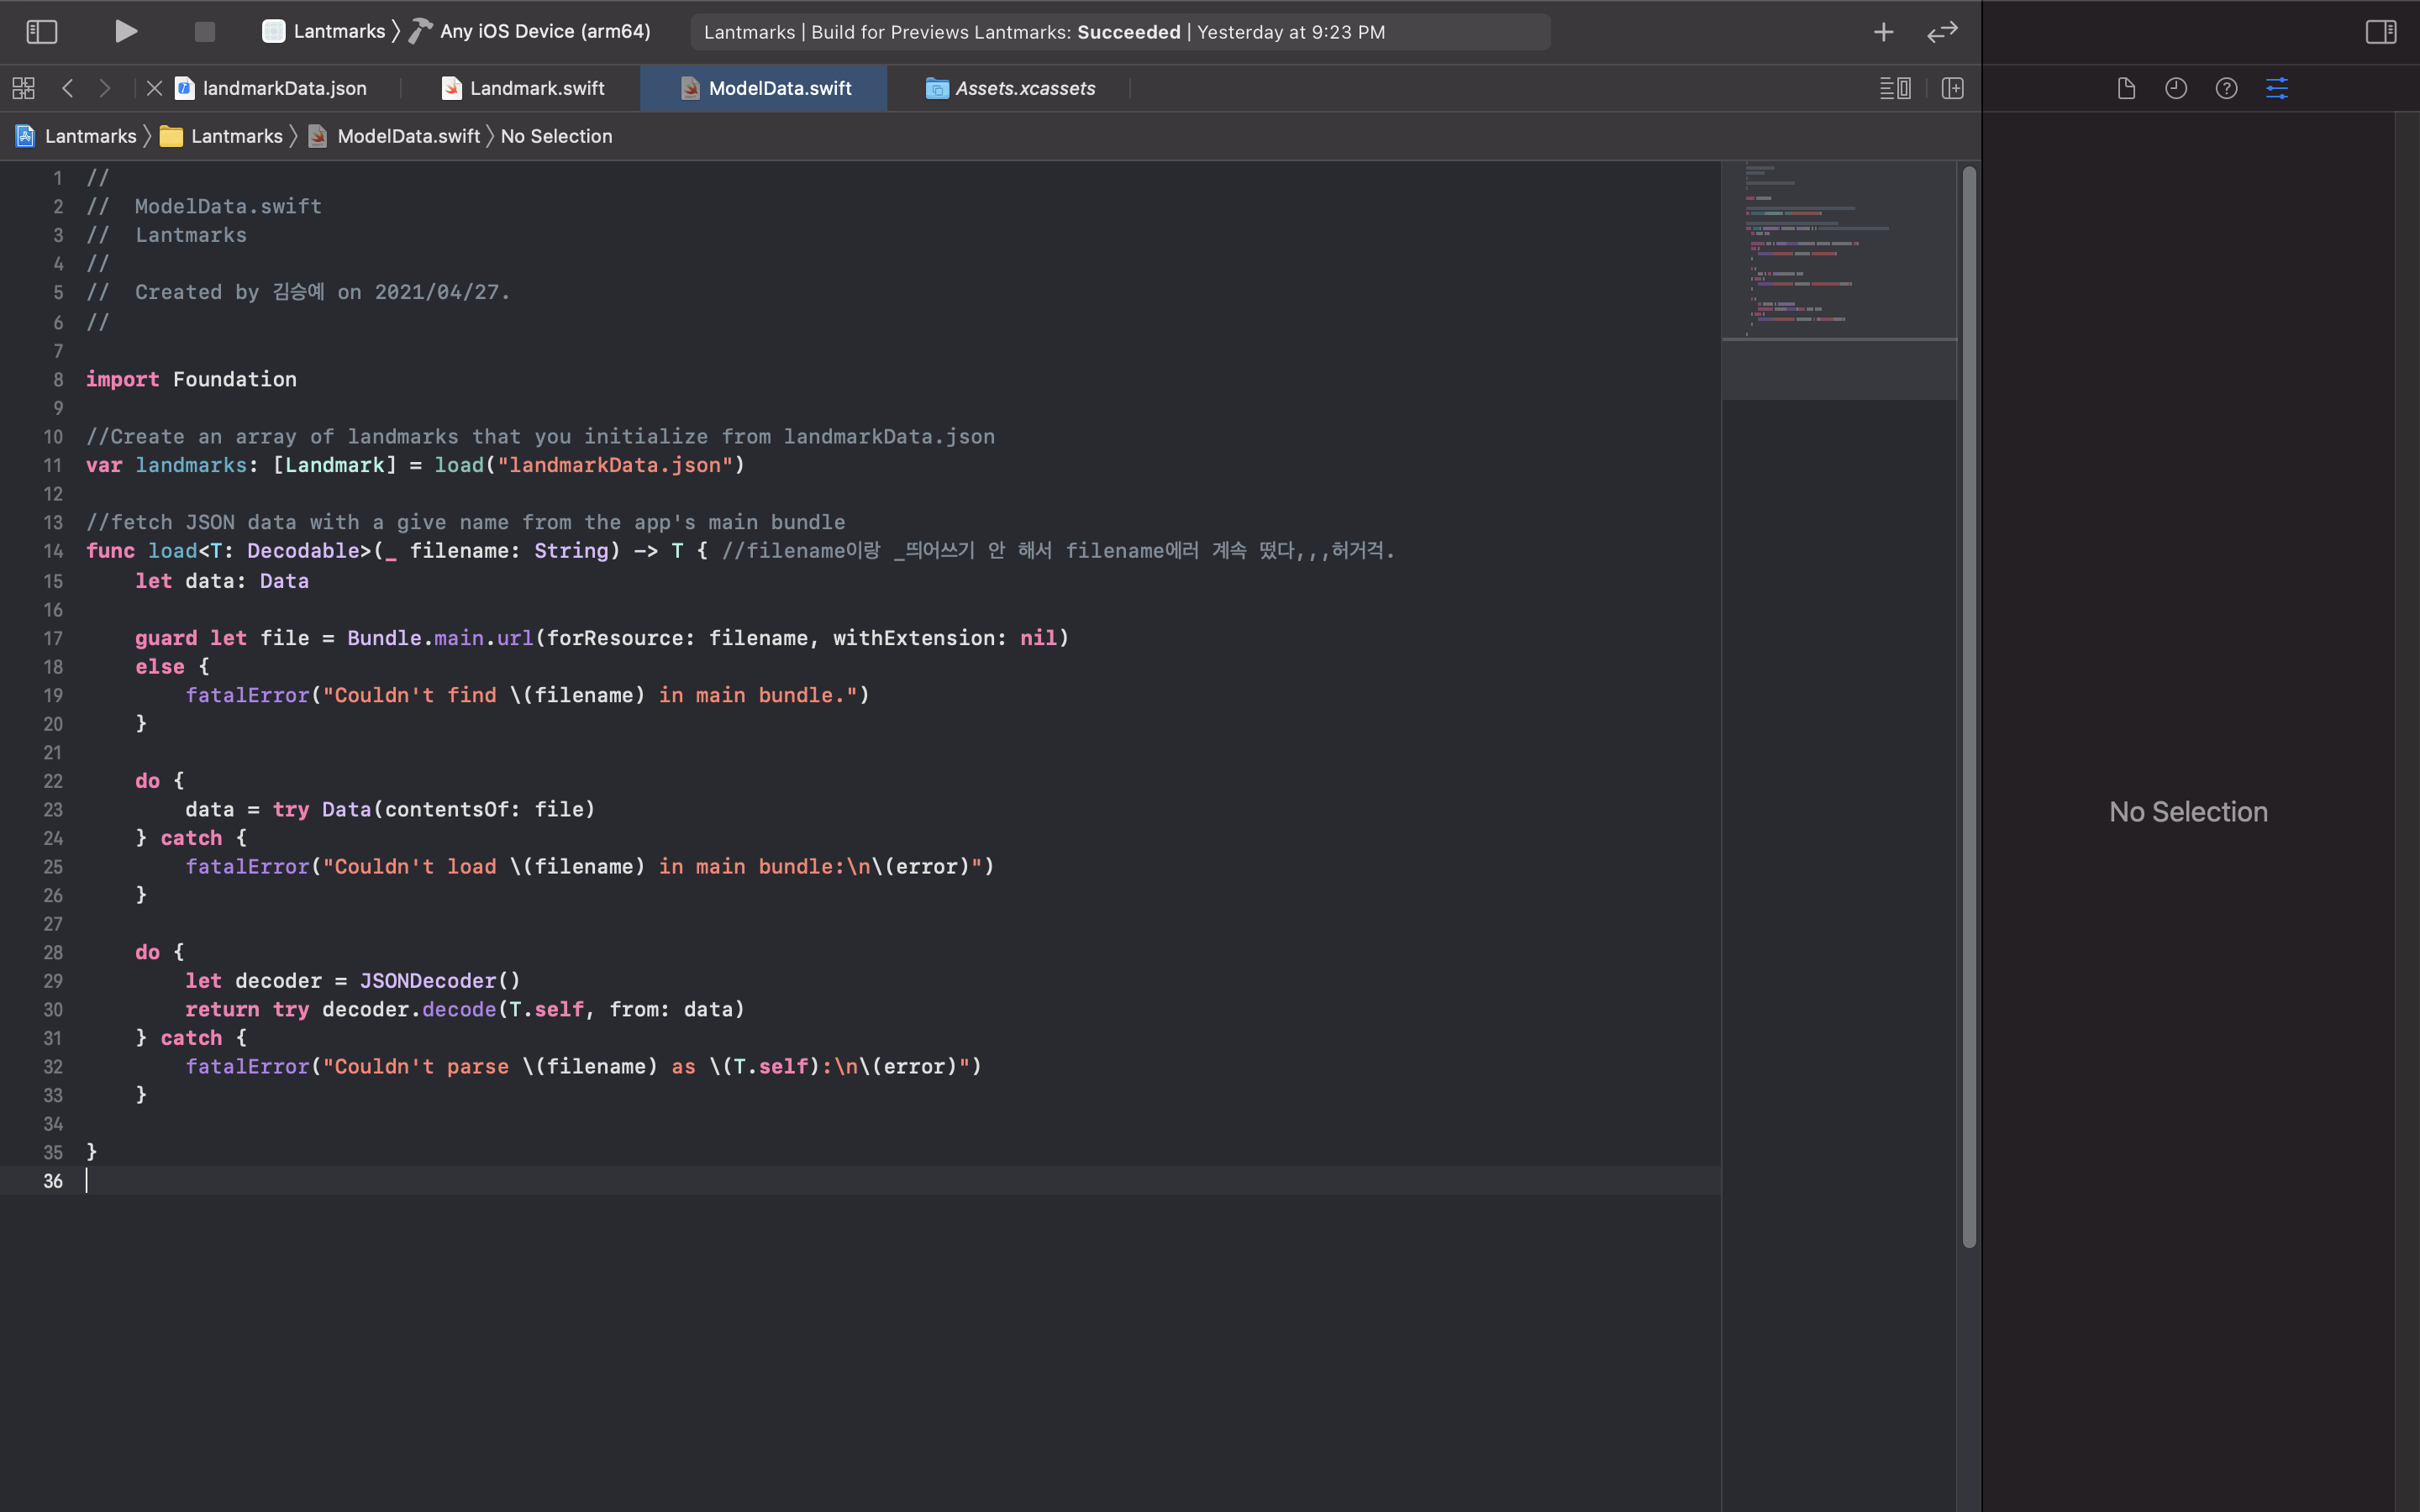
- ModelData.swift 파일 새로 만들고, app의 main bundle에 주어진 이름에 대한 JSON data를 불러오는 load method를 만듦.
load method는 Codable protocol의 return의 conformance에 일치함.
- struct, class의 차이점.
- T가 머지
- guard에서 상수 선언하고 else문?? nil은 또 뭐야
- do catch는 뭘까나...
- fatalError은 또 뭐고 data쓸땐 ( ) 하는갑다..
- landmark들 array만듦.
var landmarks: [Landmark] = load("landmarkData.json")
- 폴더 정리

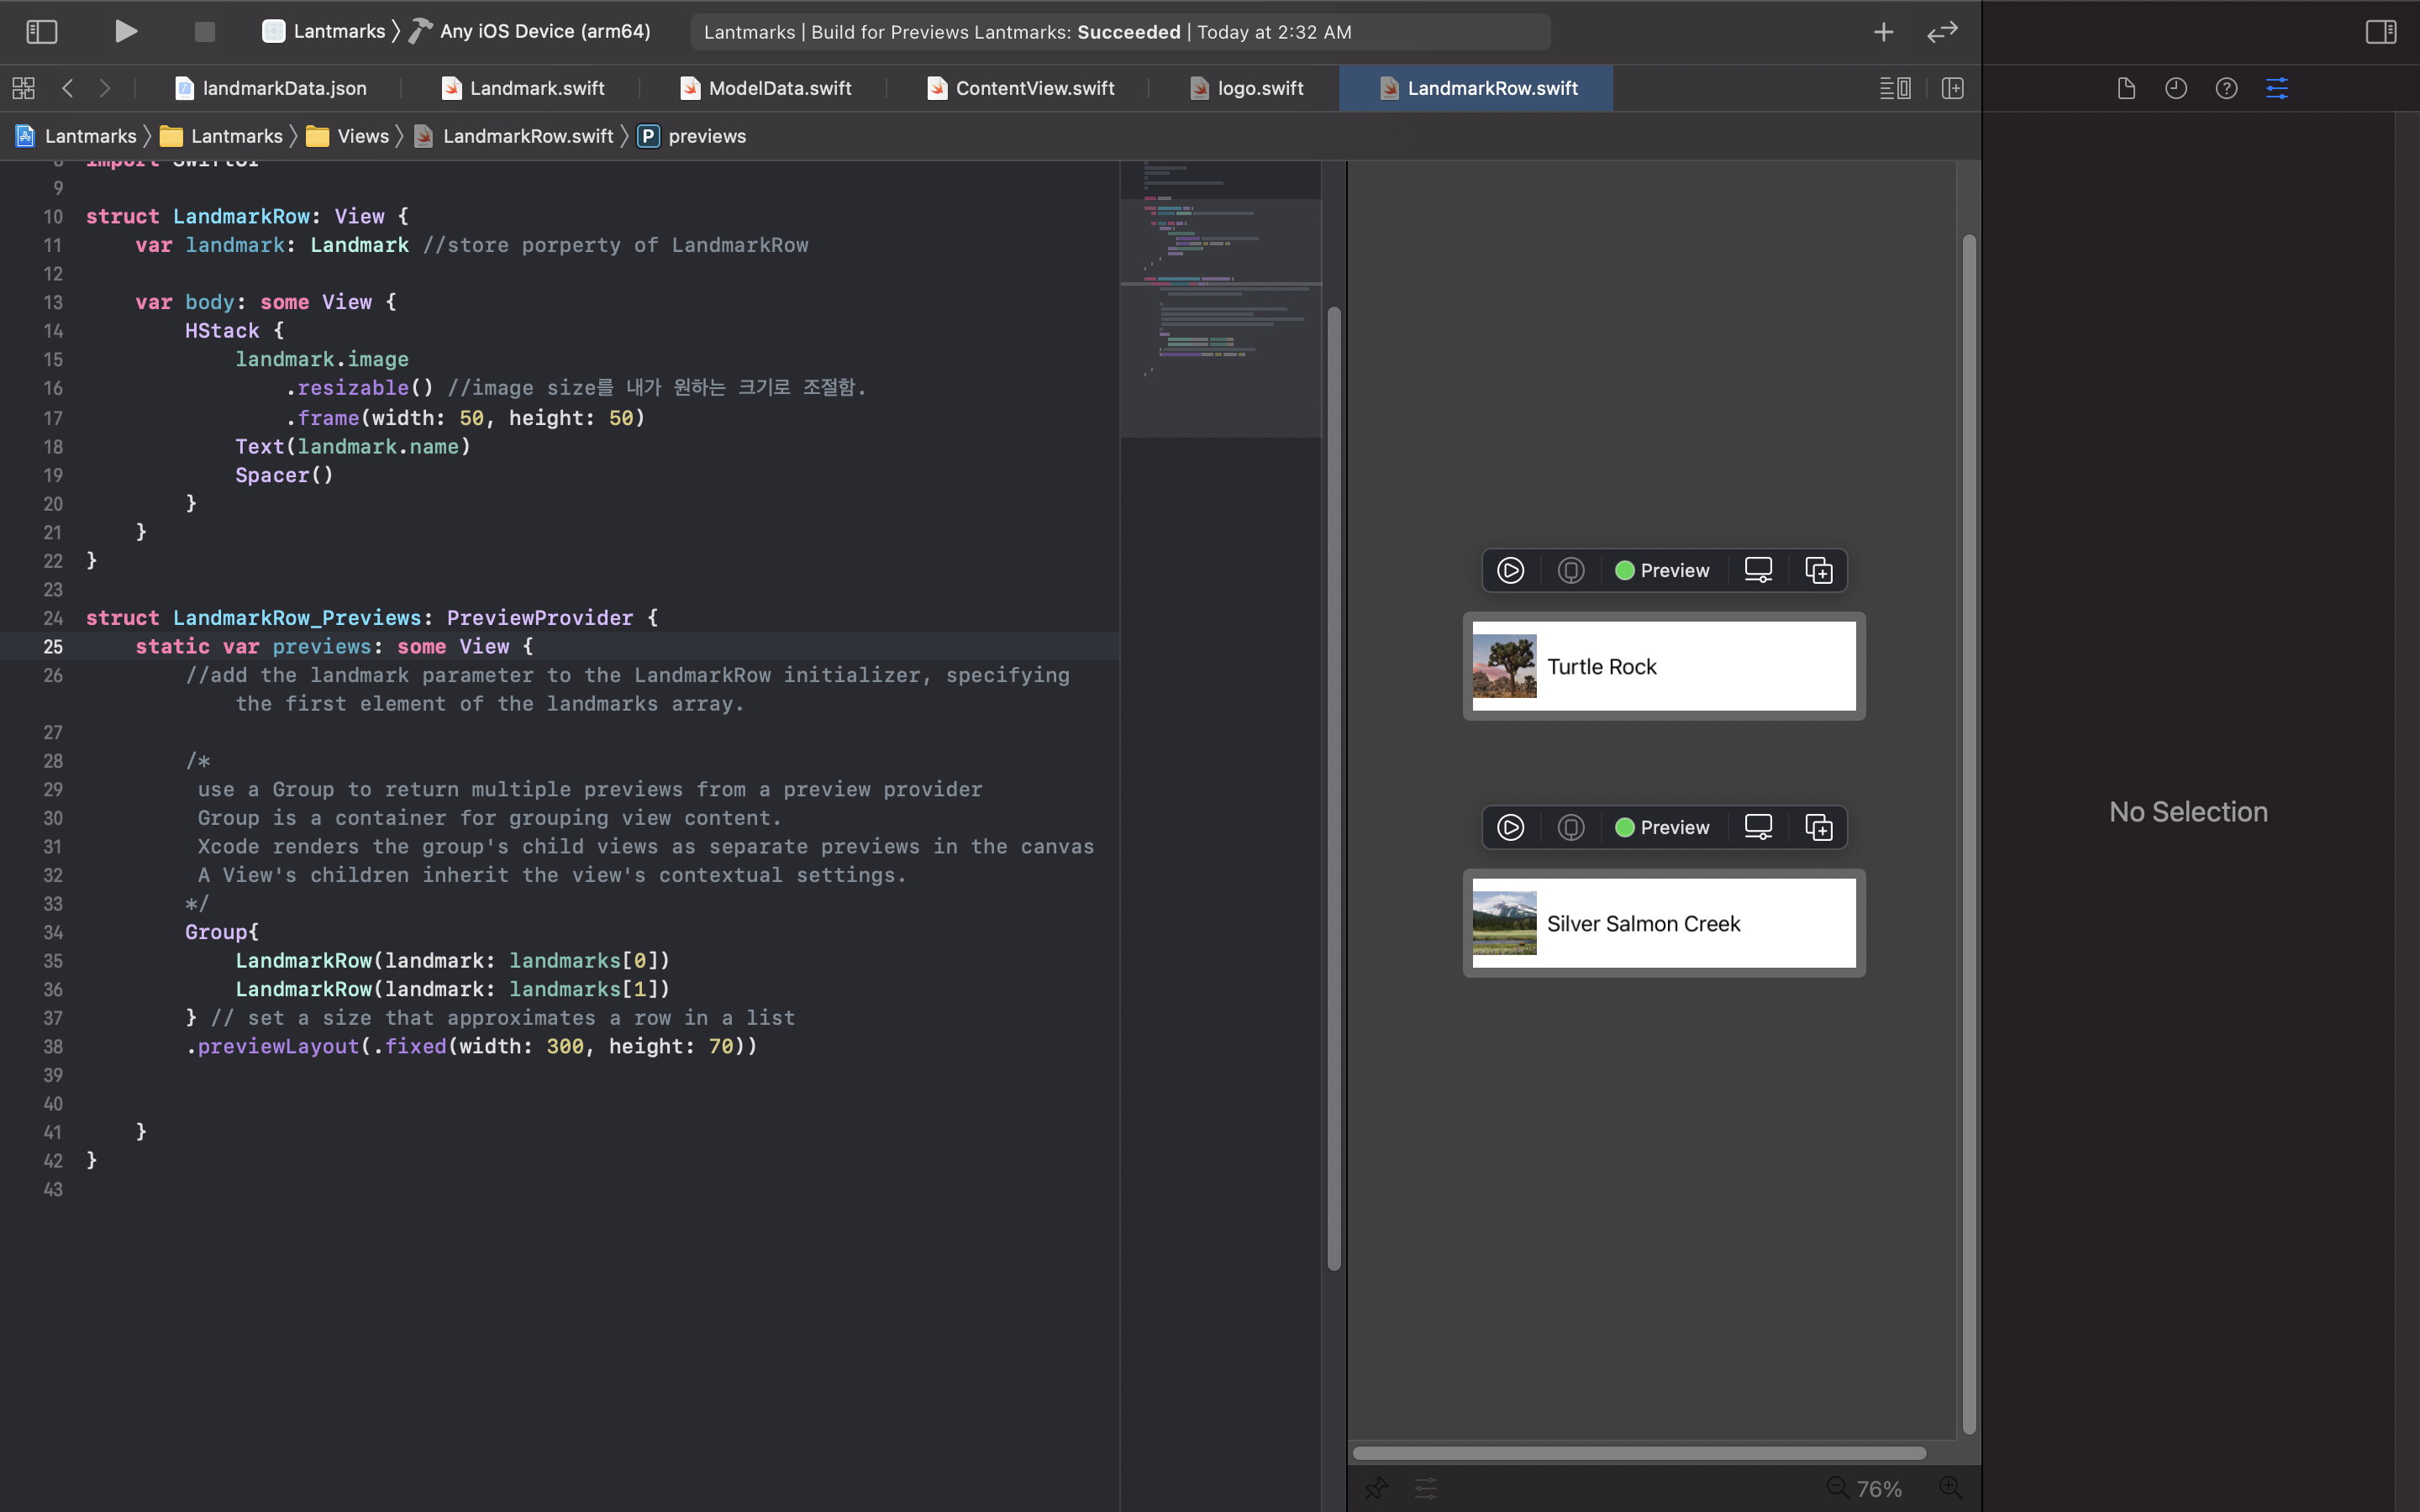
2. Create the Row View
- LandmarkRow swiftUI파일을 만들고, struct에 landmark 변수를 추가해 landmarkRow의 property를 저장함.
- 위에서 만든 landmarks를 landmark에 대입함.
- 근데 왜 다른 struct에서 만드는지 모르겠음.
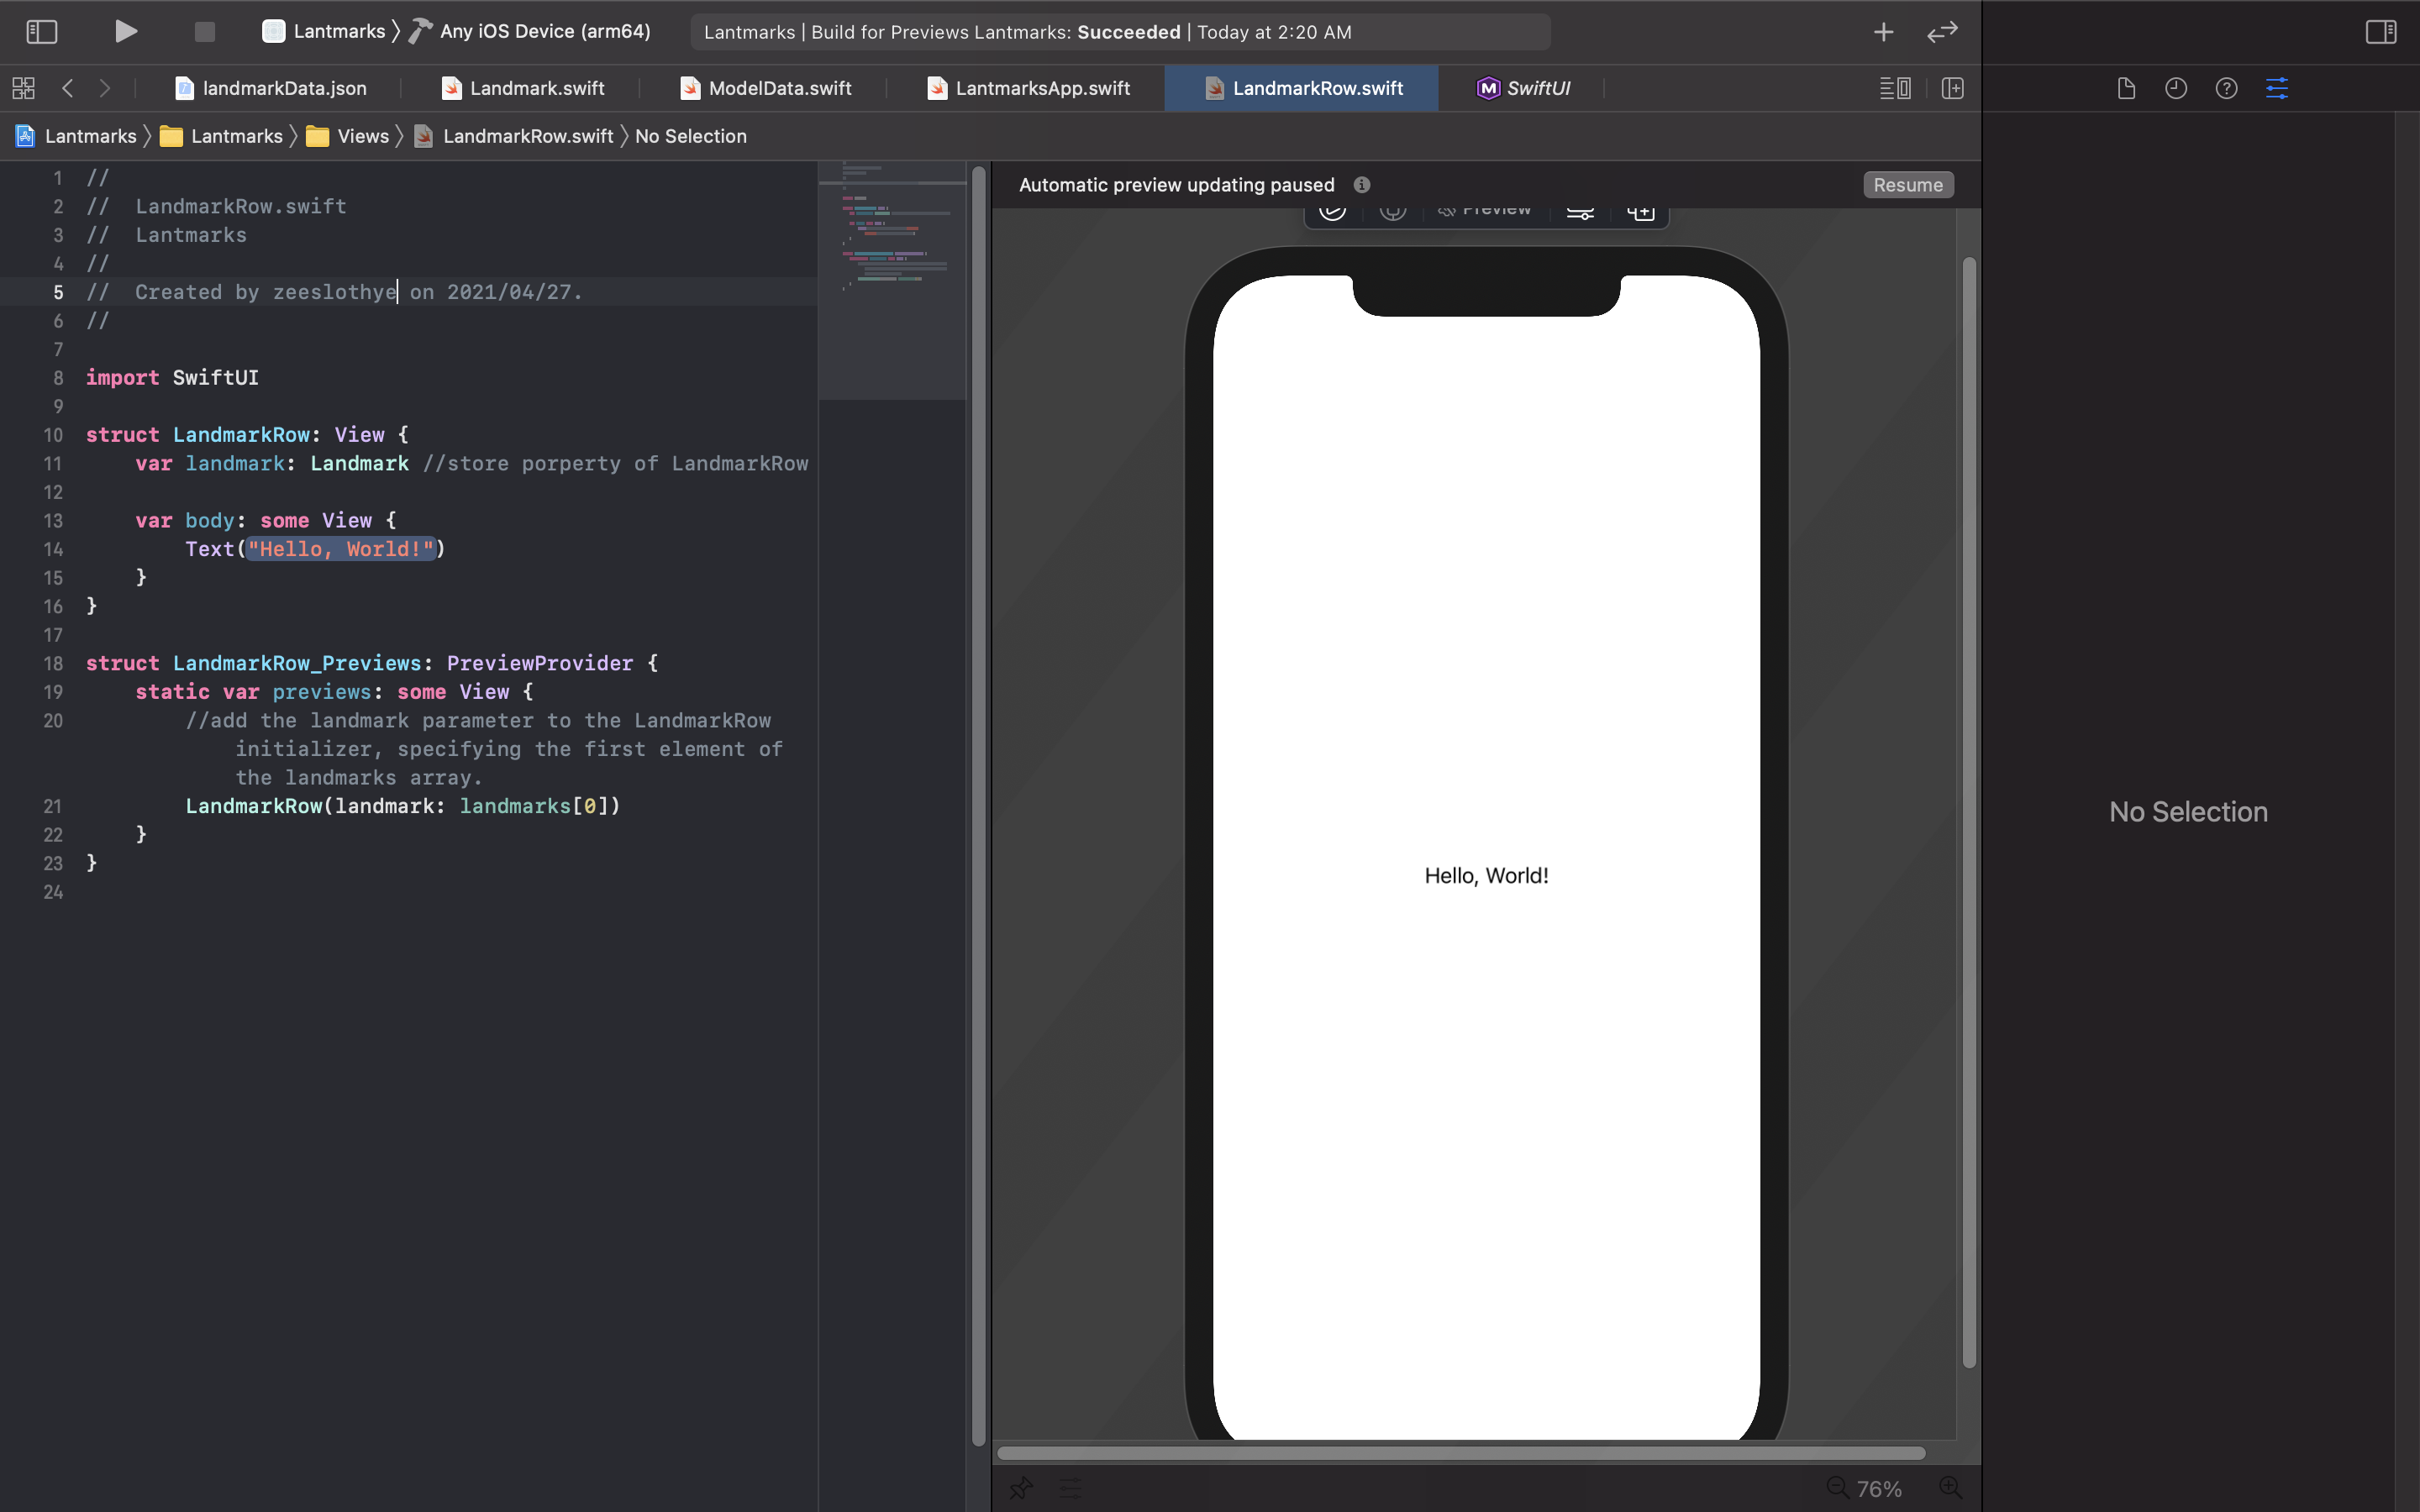
- LandmarkRow의 body를 Hstack으로 둬서 image, text, spacer 배치.
 image에서 resizable로 image크기 조절하는것같음. 이걸로 두숭이 사이즈 조절해서 배치 다시함.
3. Customize the Row Preview
- previewLayout: preview layout의 size조절.
- Group: 얘로 여러 화면에서 볼 수 있음. group전체에 대해 설정하면, group내 childern 각각에 대해 적용됨.
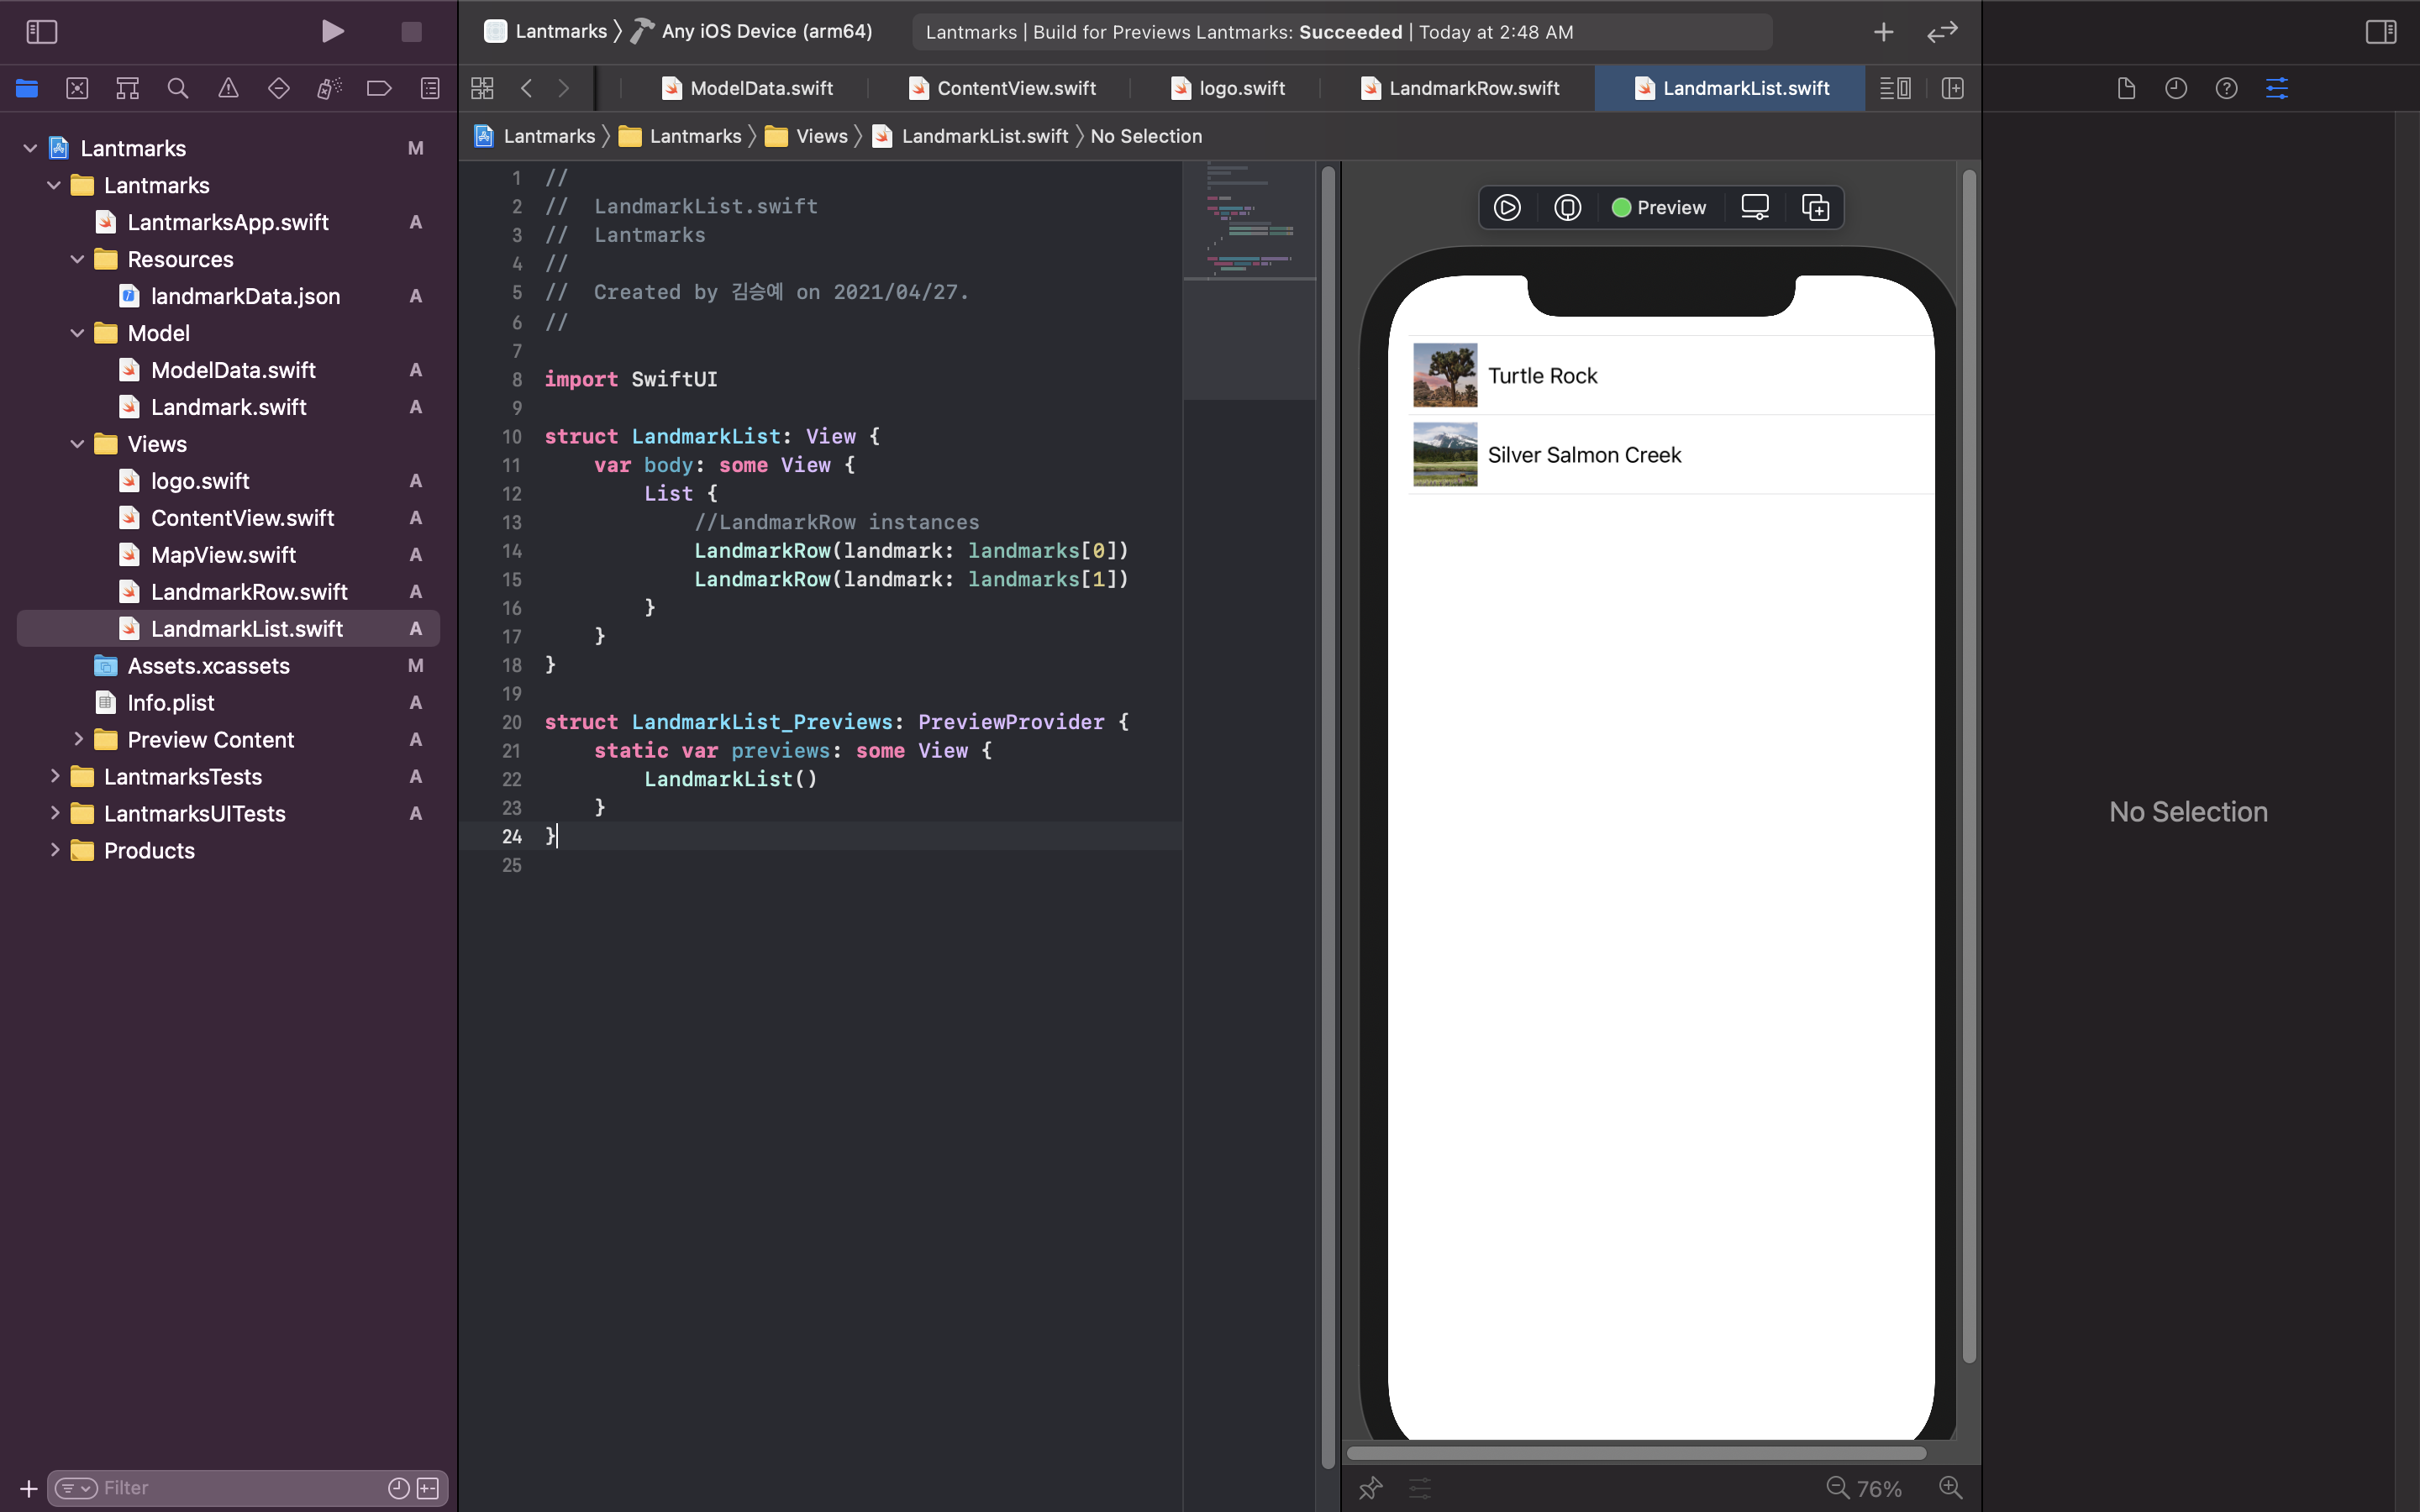
4. Create the List of Landmarks.
- LandmarkList swifthUI파일 새로 만듦.
- body에 List넣음. 그러고 LandmarkRow파일 불러오면, 리스트로 차곡차곡됨...?
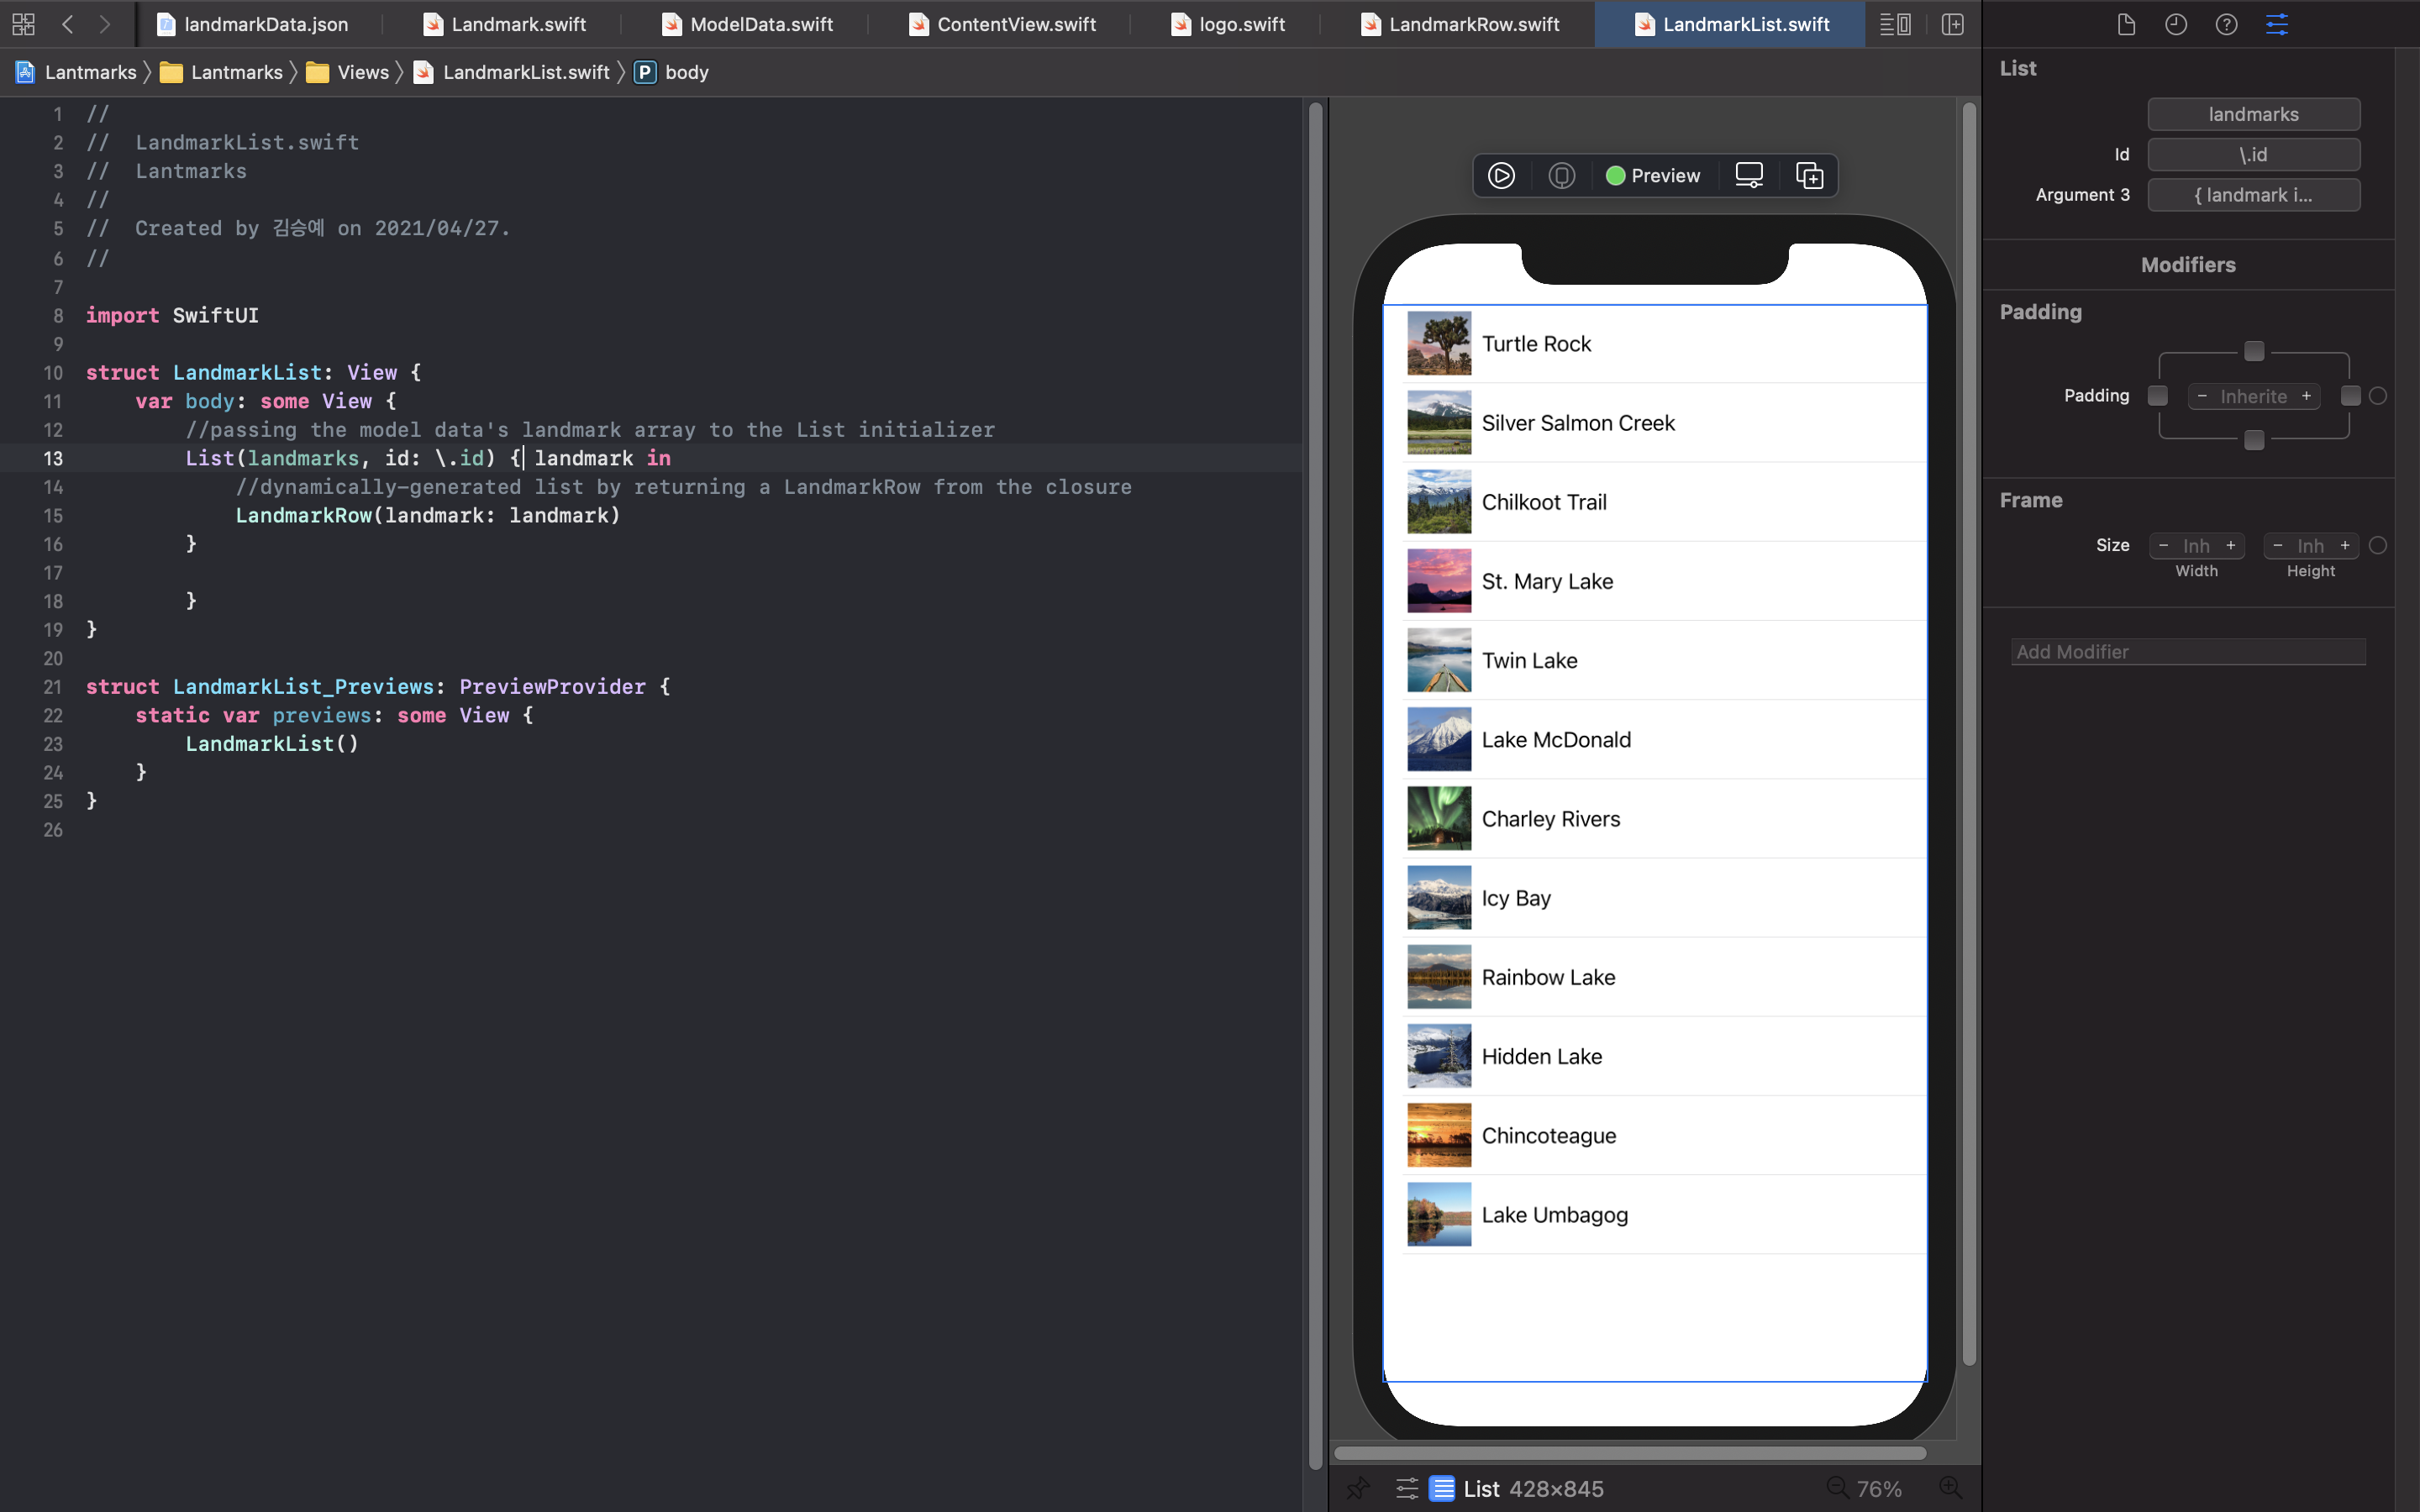
5. Make the List Dynamic
- model data의 landmark array를 list initializer로 사용
lists work with identifiable data
- you can make your data identiable
1. passing along with your data a key path to a property that uniquely identifies each element
List(landmarks, id: .id) { landmark in LandmarkRow(landmark: landmark) }```swift2. making your data type conform to the identifiable protocol ```swift ``` 애플은 왜 영어를 못알아 듣게 하는거지...? 내가 이상한건가...???
- LandmarkRow애들 불러오기.
- Landmark.swift에 struct에서 Identifiable conformance추가하기.
- LandmarkaList.swift에서 id parameter지우기.
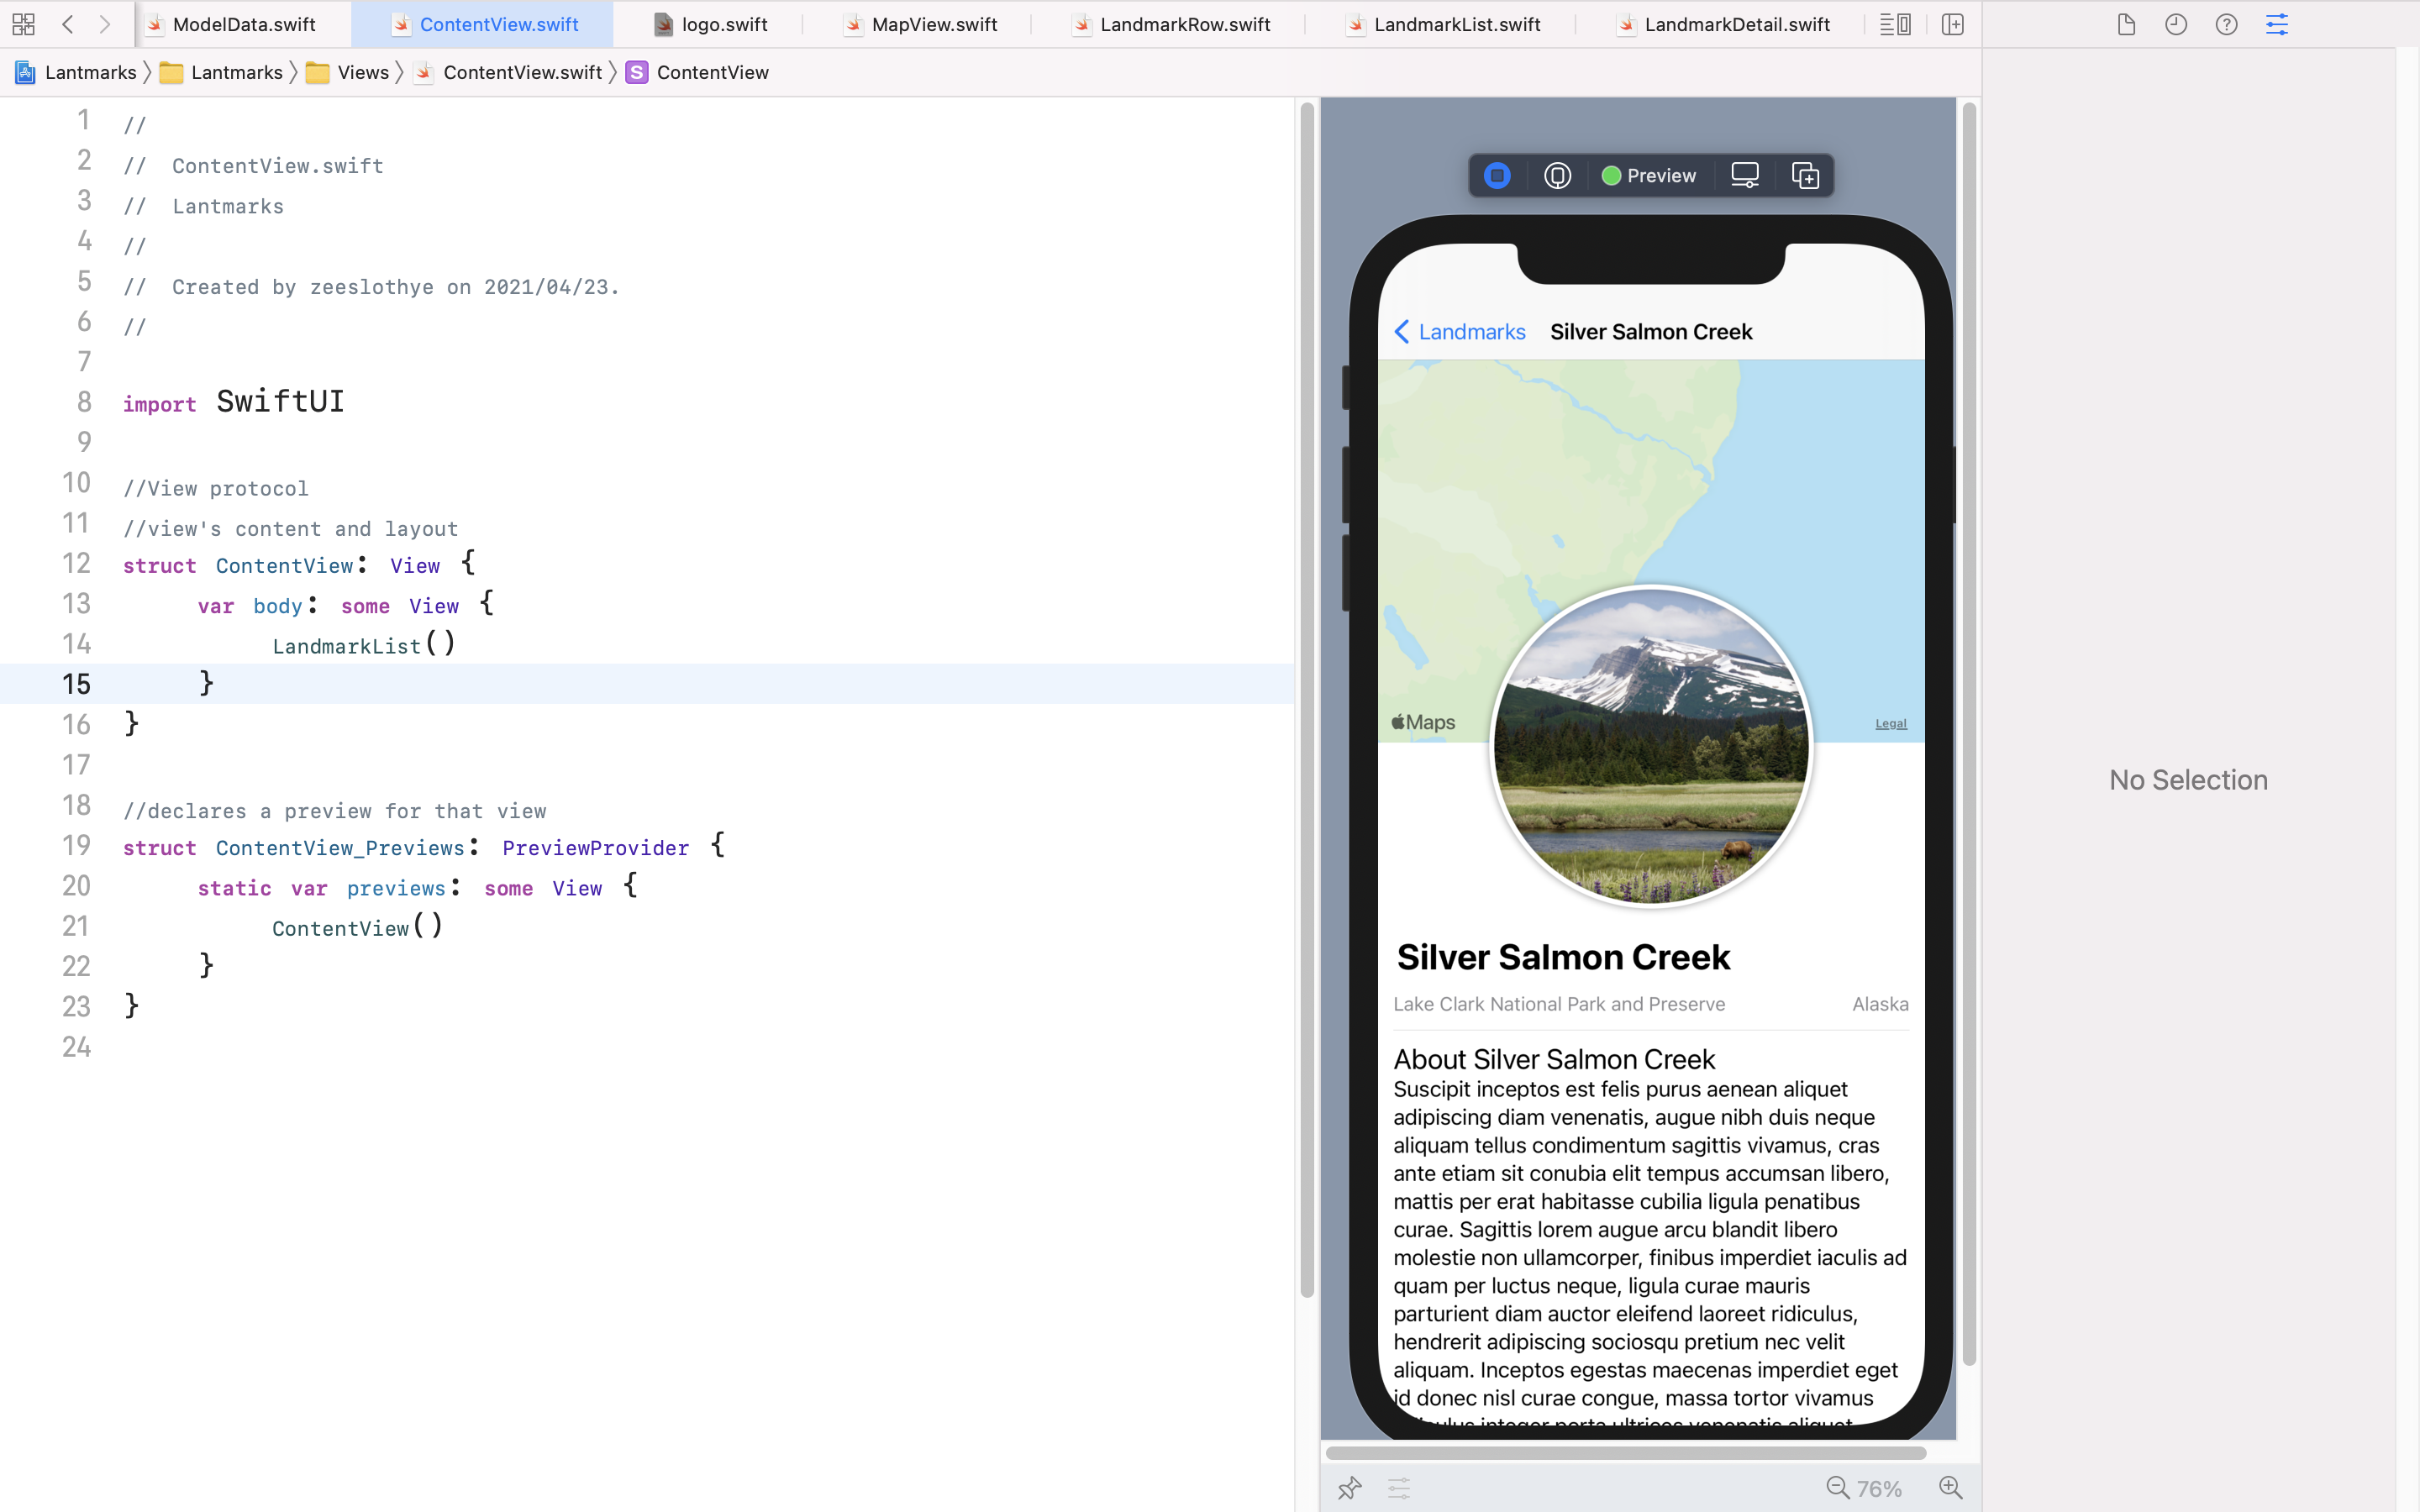
6. Set Up Navigation Between List and Detail
- LandmarkDetail.swift파일 새로 만들고, ContentView의 body profile을 LandmarkDetail로 옮긴다.
- ContentView에서는 LandmarkList()보여준다.
- LandmarkList.swift에서 List를 NavigationView로 감싸고,
- List의 navigationTitle을 정해 List가 보여질때 Title역시 보여지도록한다.
- List내의 LandmarkRow를 NavigationLink로 감싸 desti를 정해준다.

7. Pass Data into Child Views
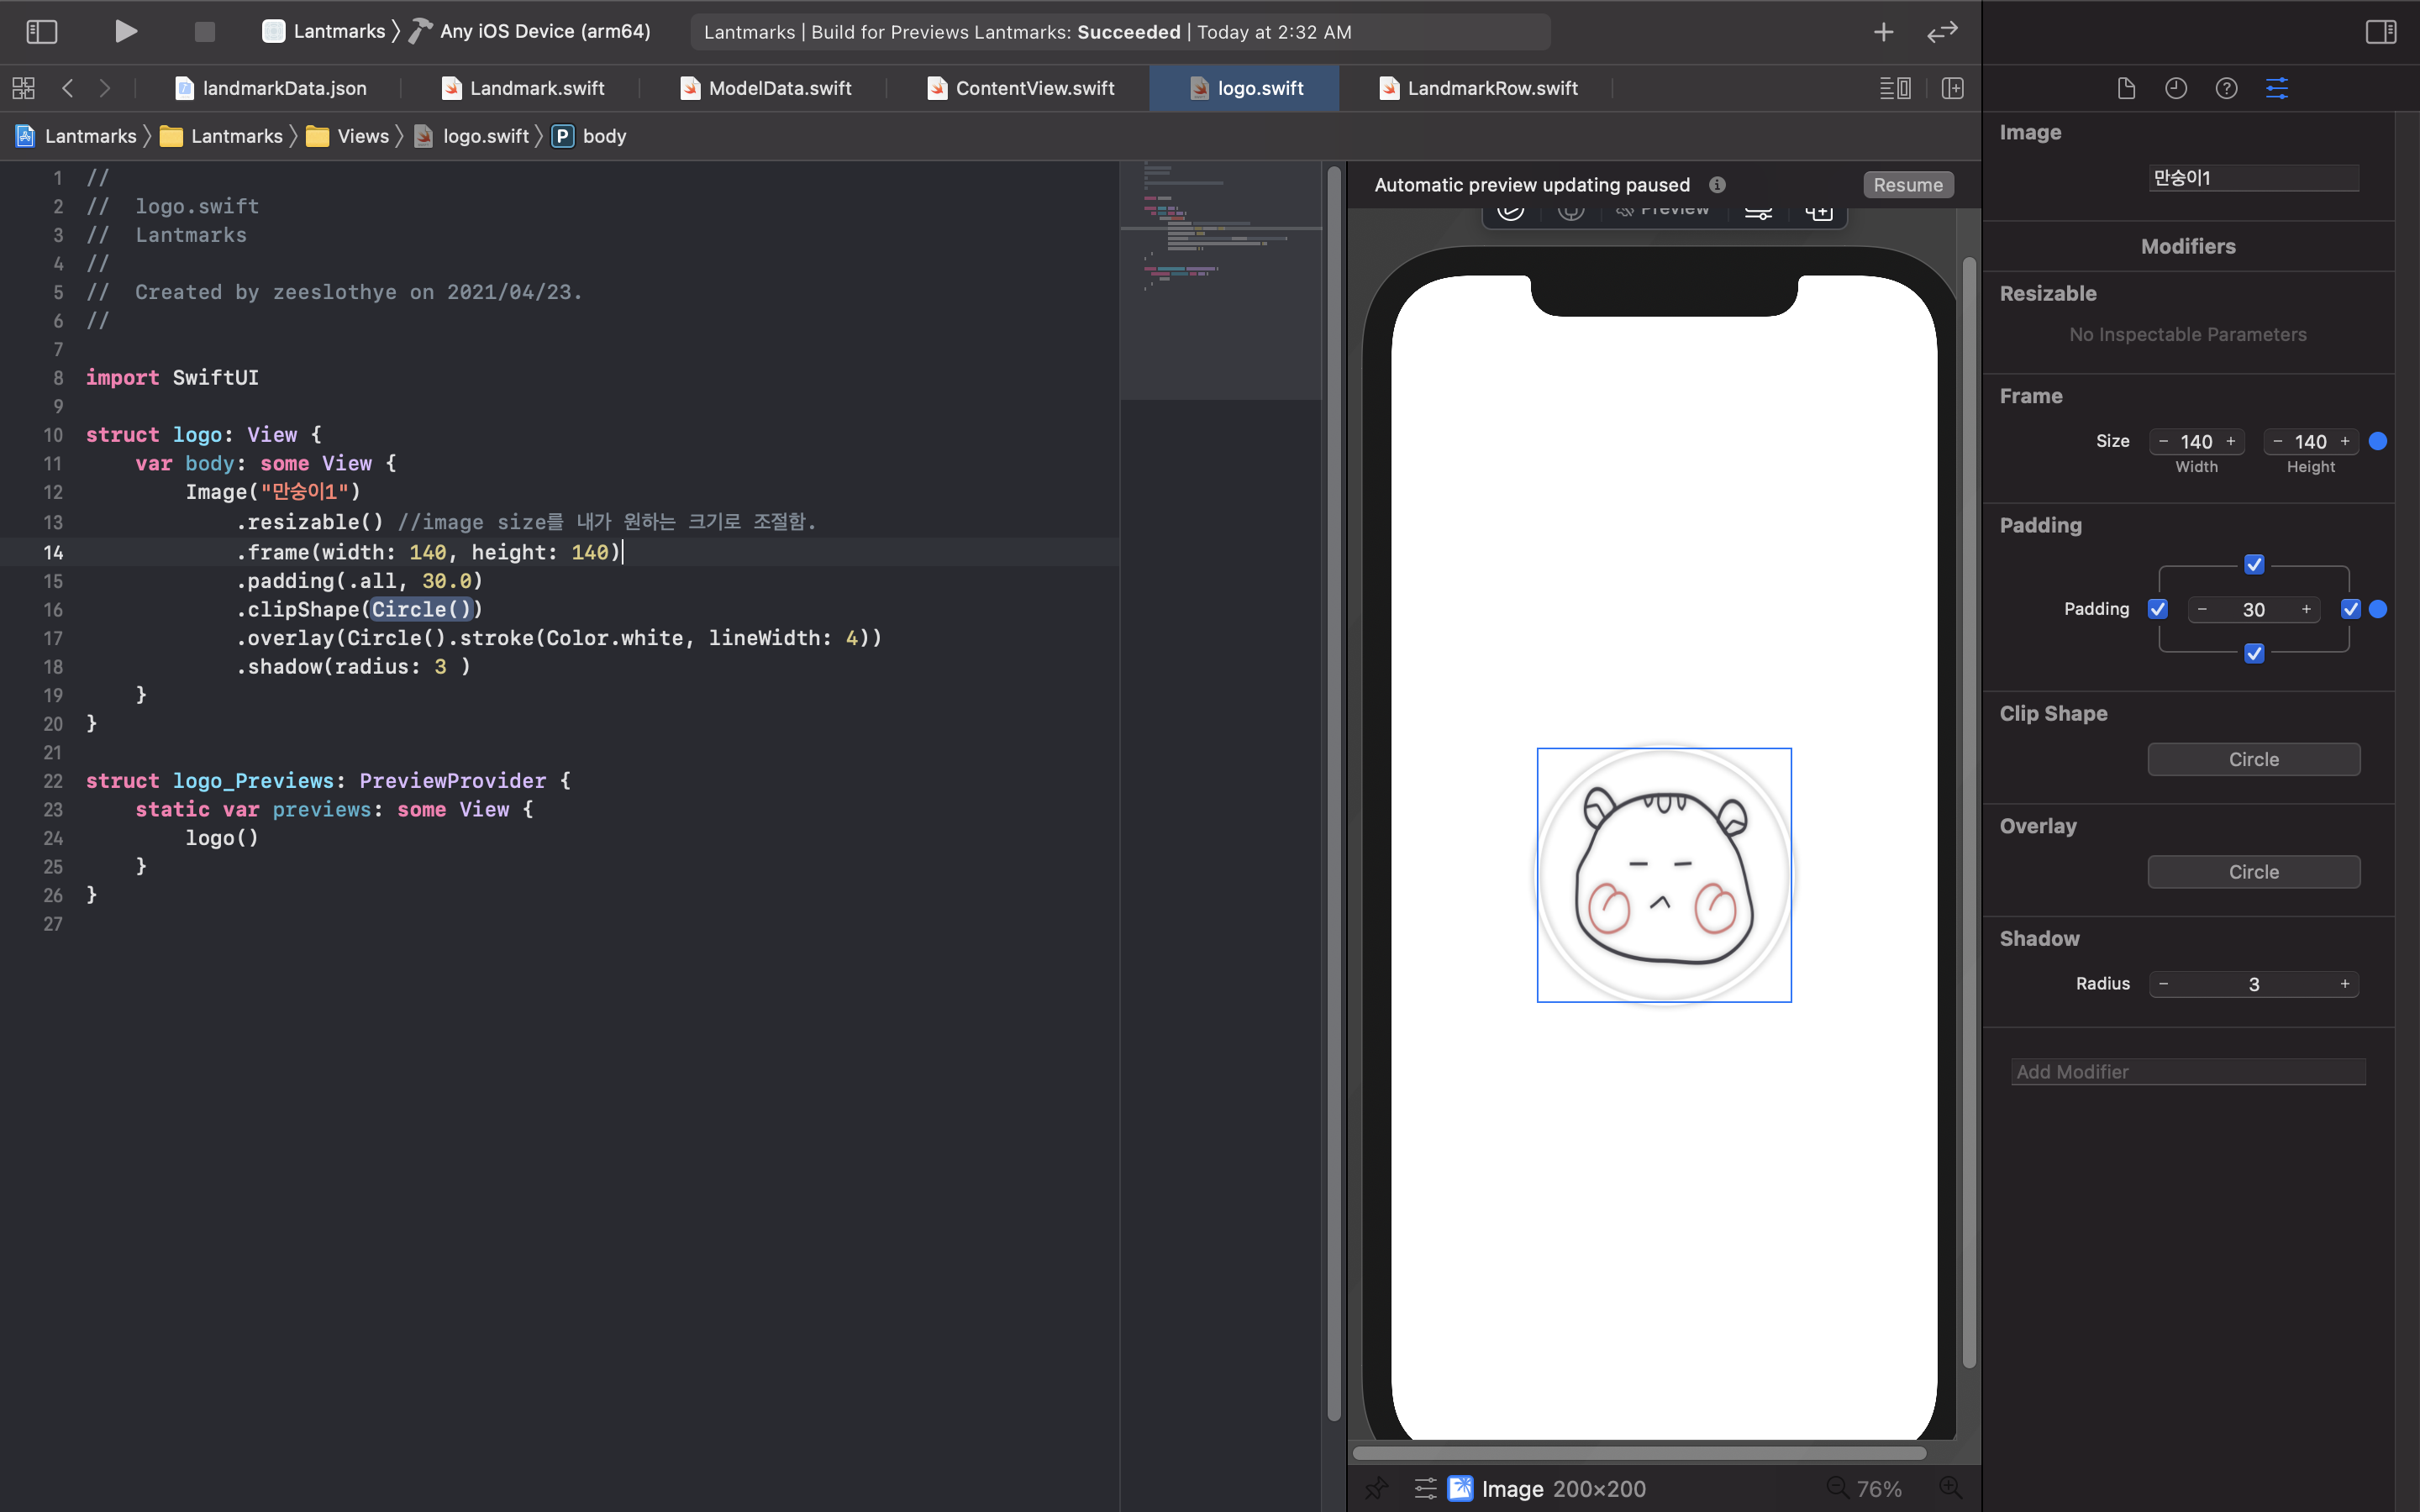
- convert CircleImage, MapView, LandmarkDetail to display data that's passed in.
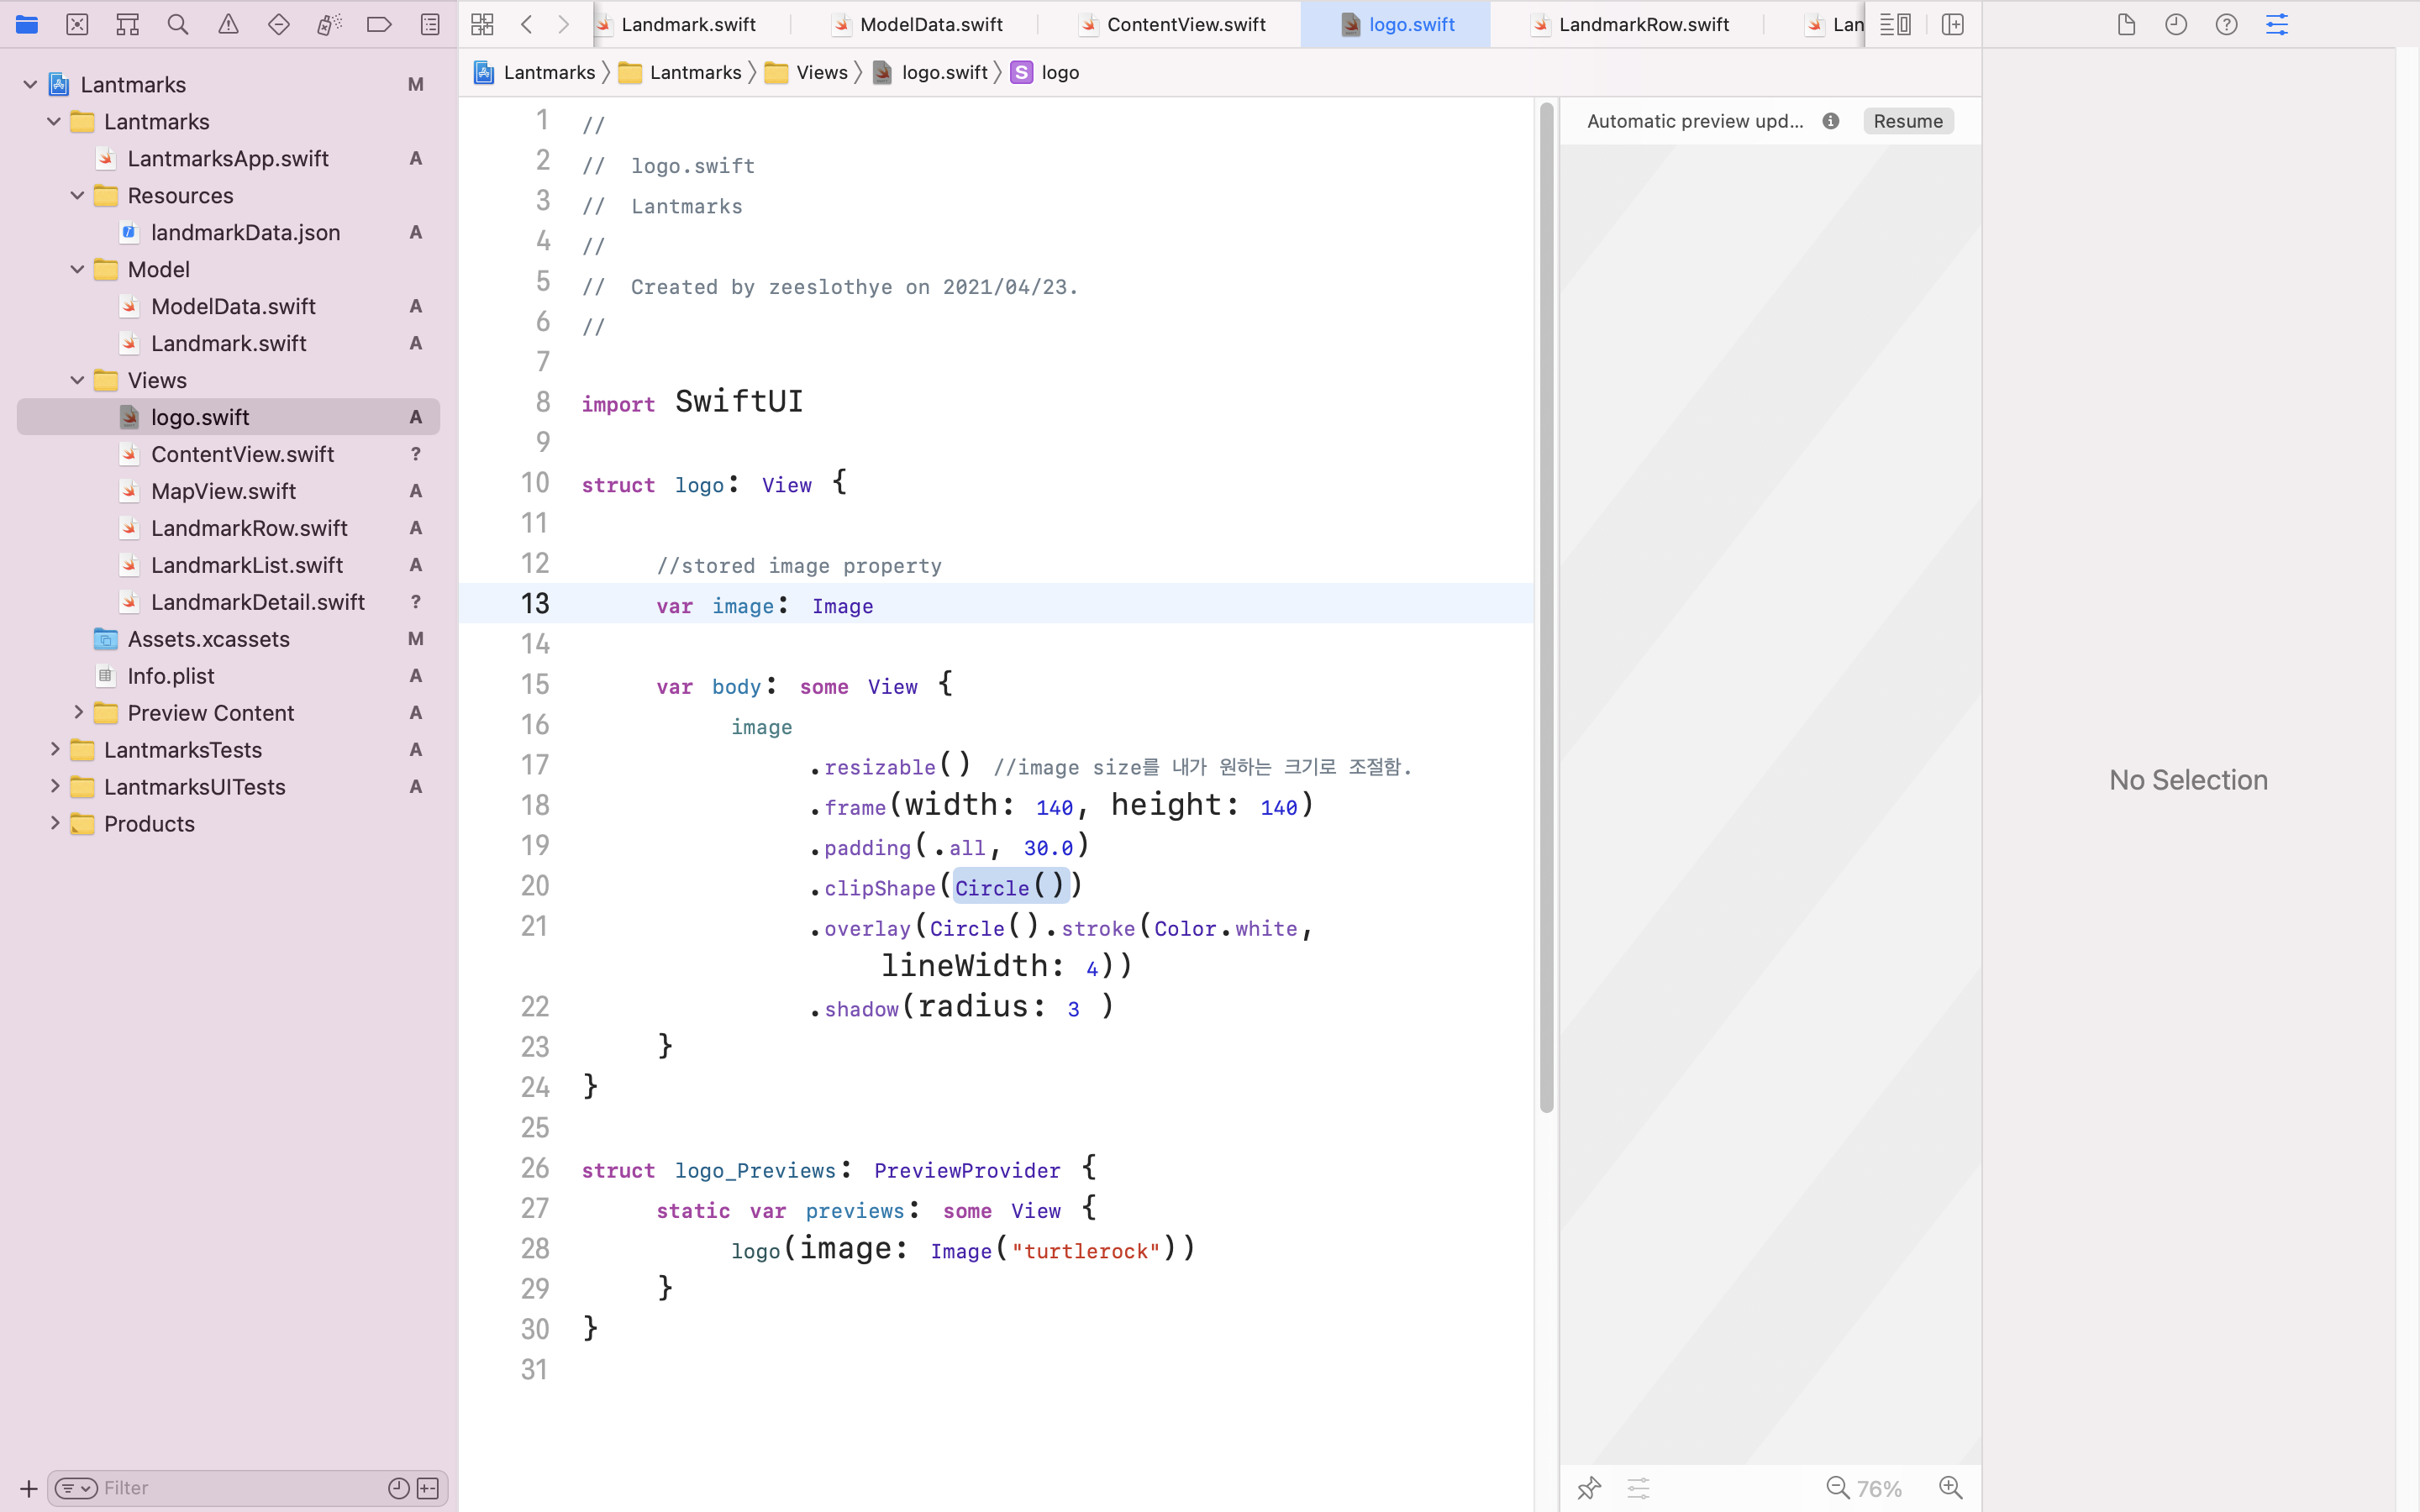
- logo.swift에서 image변수를 새로 생성해서, 입력하는 data값을 보여주도록함.
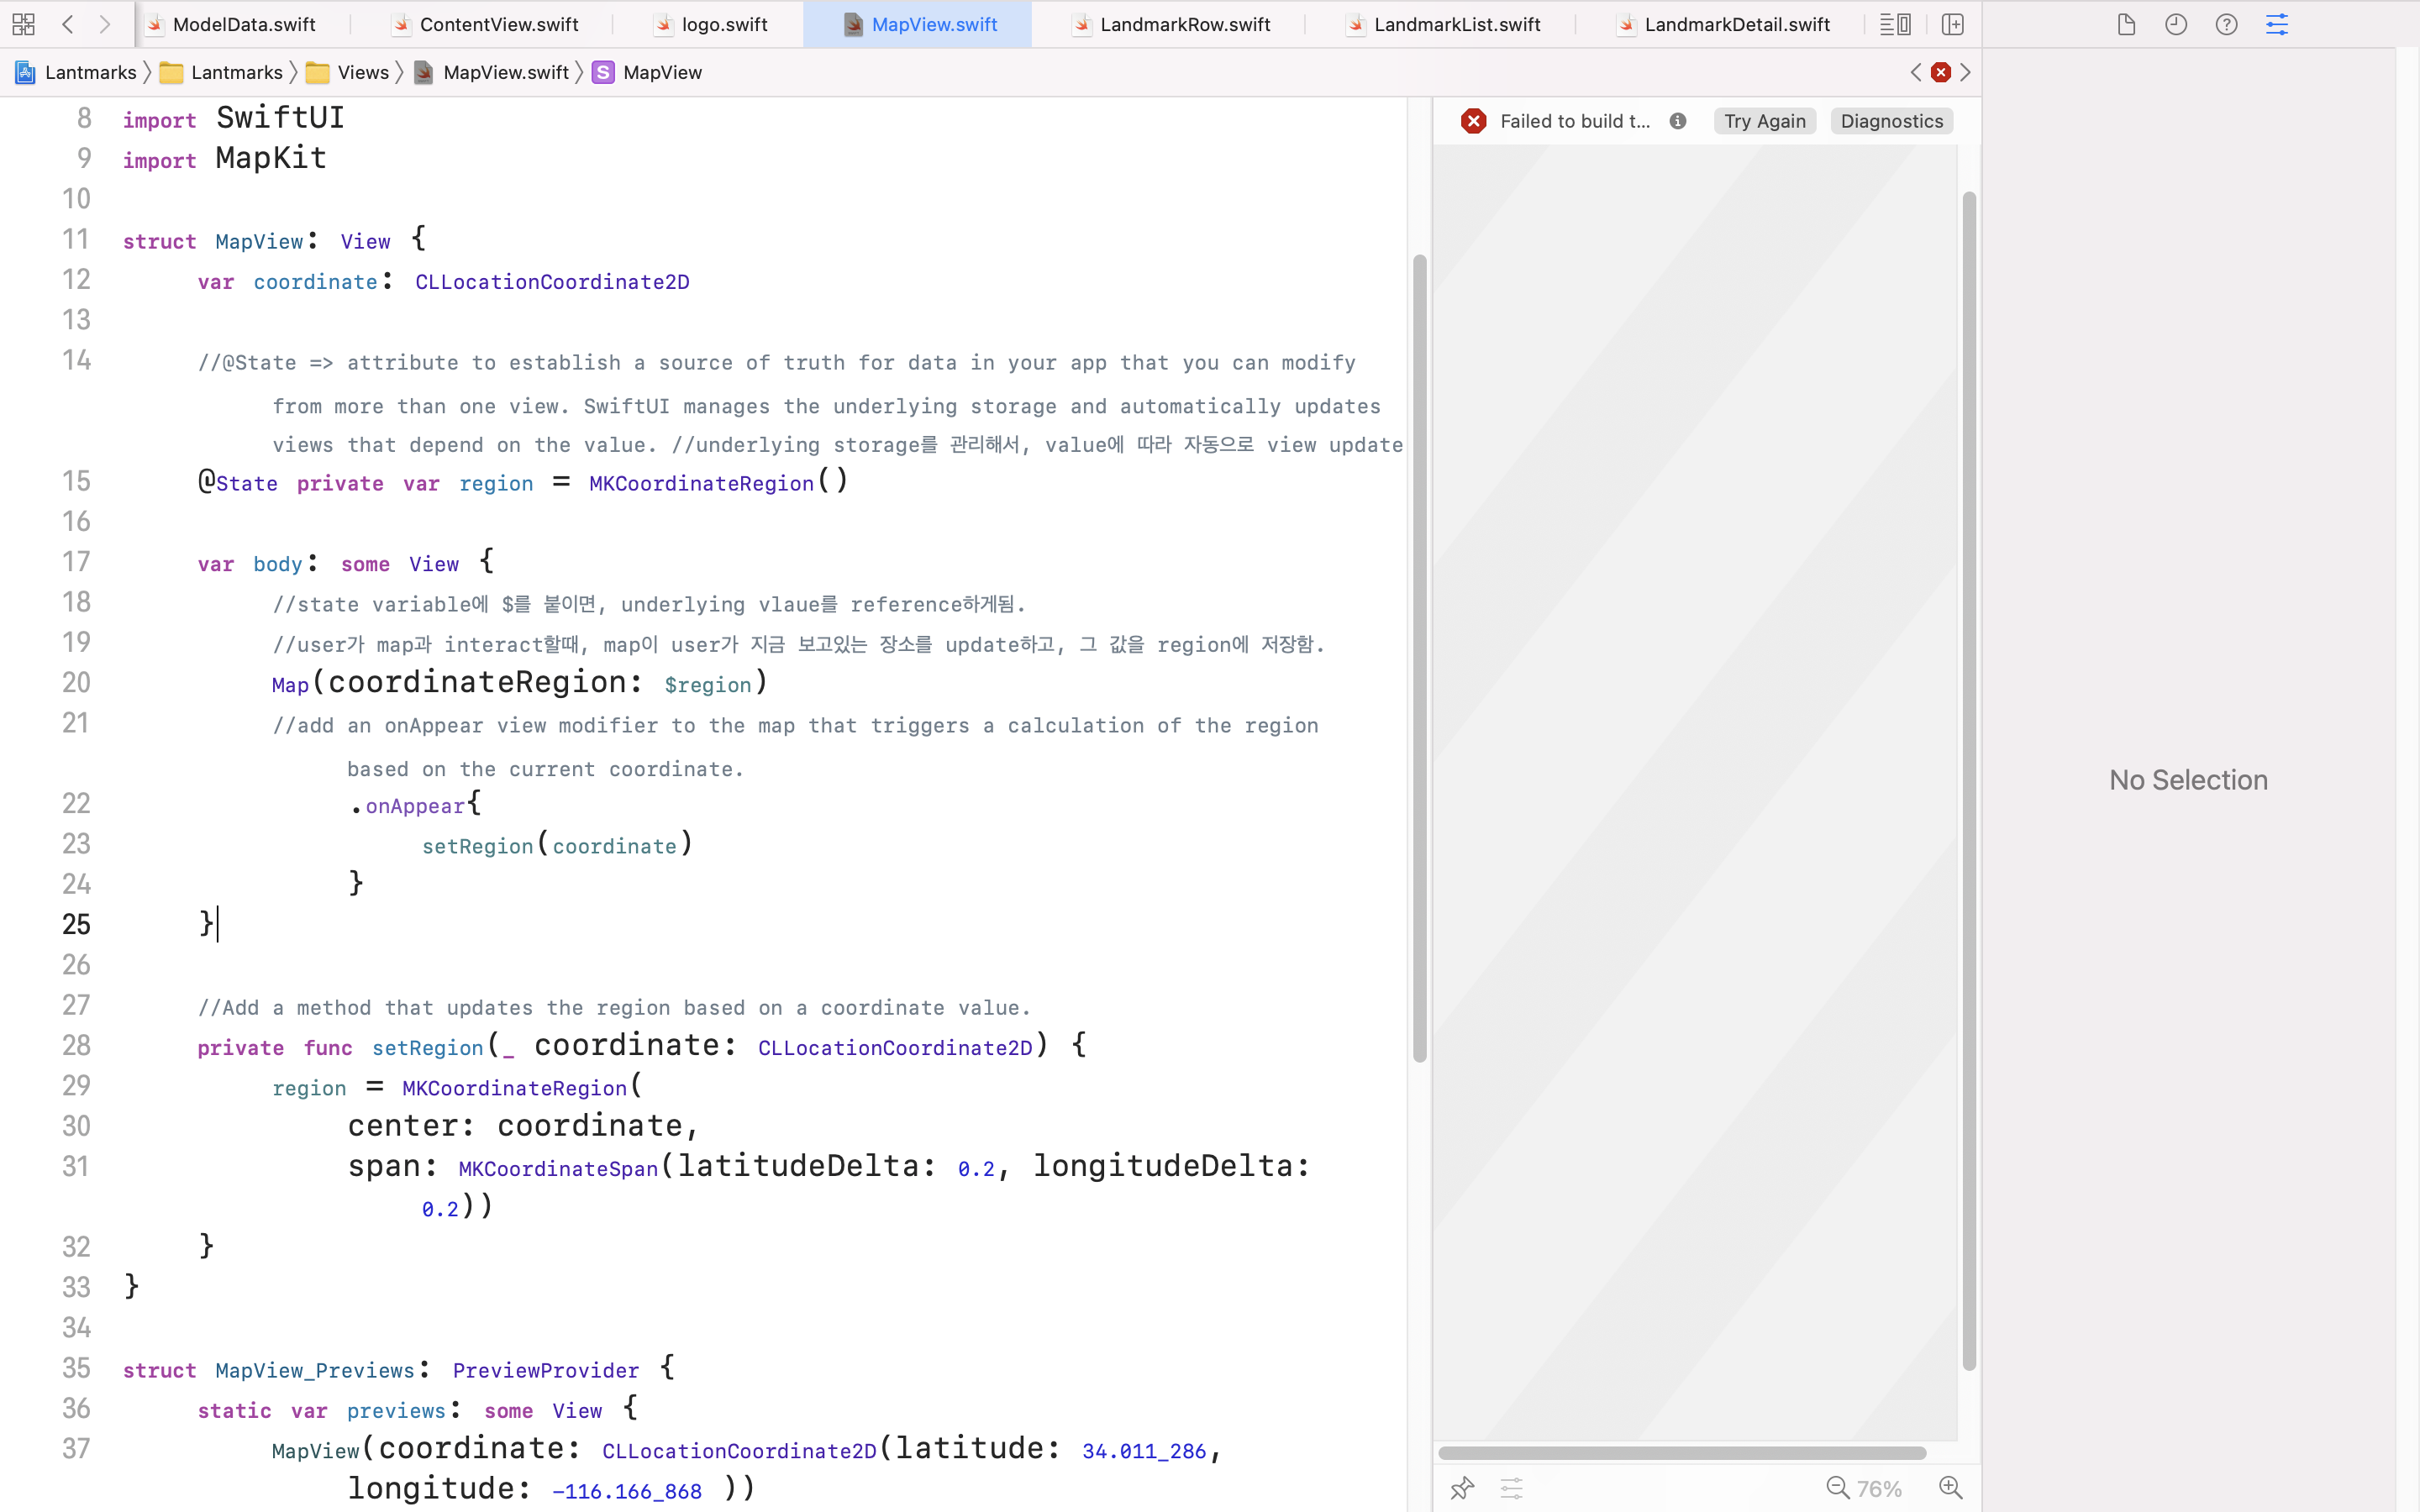
- MapView.swift에서도 coordinate 변수를 새로 생성해줌.
- 좌표값에 따라 region값을 update하는 method만듦.
    //Add a method that updates the region based on a coordinate value.
    private func setRegion(_ coordinate: CLLocationCoordinate2D) {
        region = MKCoordinateRegion(
            center: coordinate,
            span: MKCoordinateSpan(latitudeDelta: 0.2, longitudeDelta: 0.2))
}- onAppear를 사용해 setRegion method에 좌표값을 대입함.
        Map(coordinateRegion: $region)
        //add an onAppear view modifier to the map that triggers a calculation of the region based on the current coordinate.
            .onAppear{
                setRegion(coordinate)
            }
5. LandmarkDetail.swift에서 landmark변수를 만듦. (1이랑 비슷)
6. LandmarkList.swift에서 NavigationLink의 desti에, LandmarkDetail.swift에서 설정한 변수에 LandmarkList.swift의 landmark값을 대입함. (변수 이름이 계속 landmark니까 햇갈린다,,,)
NavigationLink(destination: LandmarkDetail(landmark: landmark)) {
                    LandmarkRow(landmark: landmark)
}- LandmarkDetail.swift에서 전체적으로 입력값에 따라 다른 data를 보여주도록 설정해줌. (변수에 값 대입_ 6번이랑 비슷.)
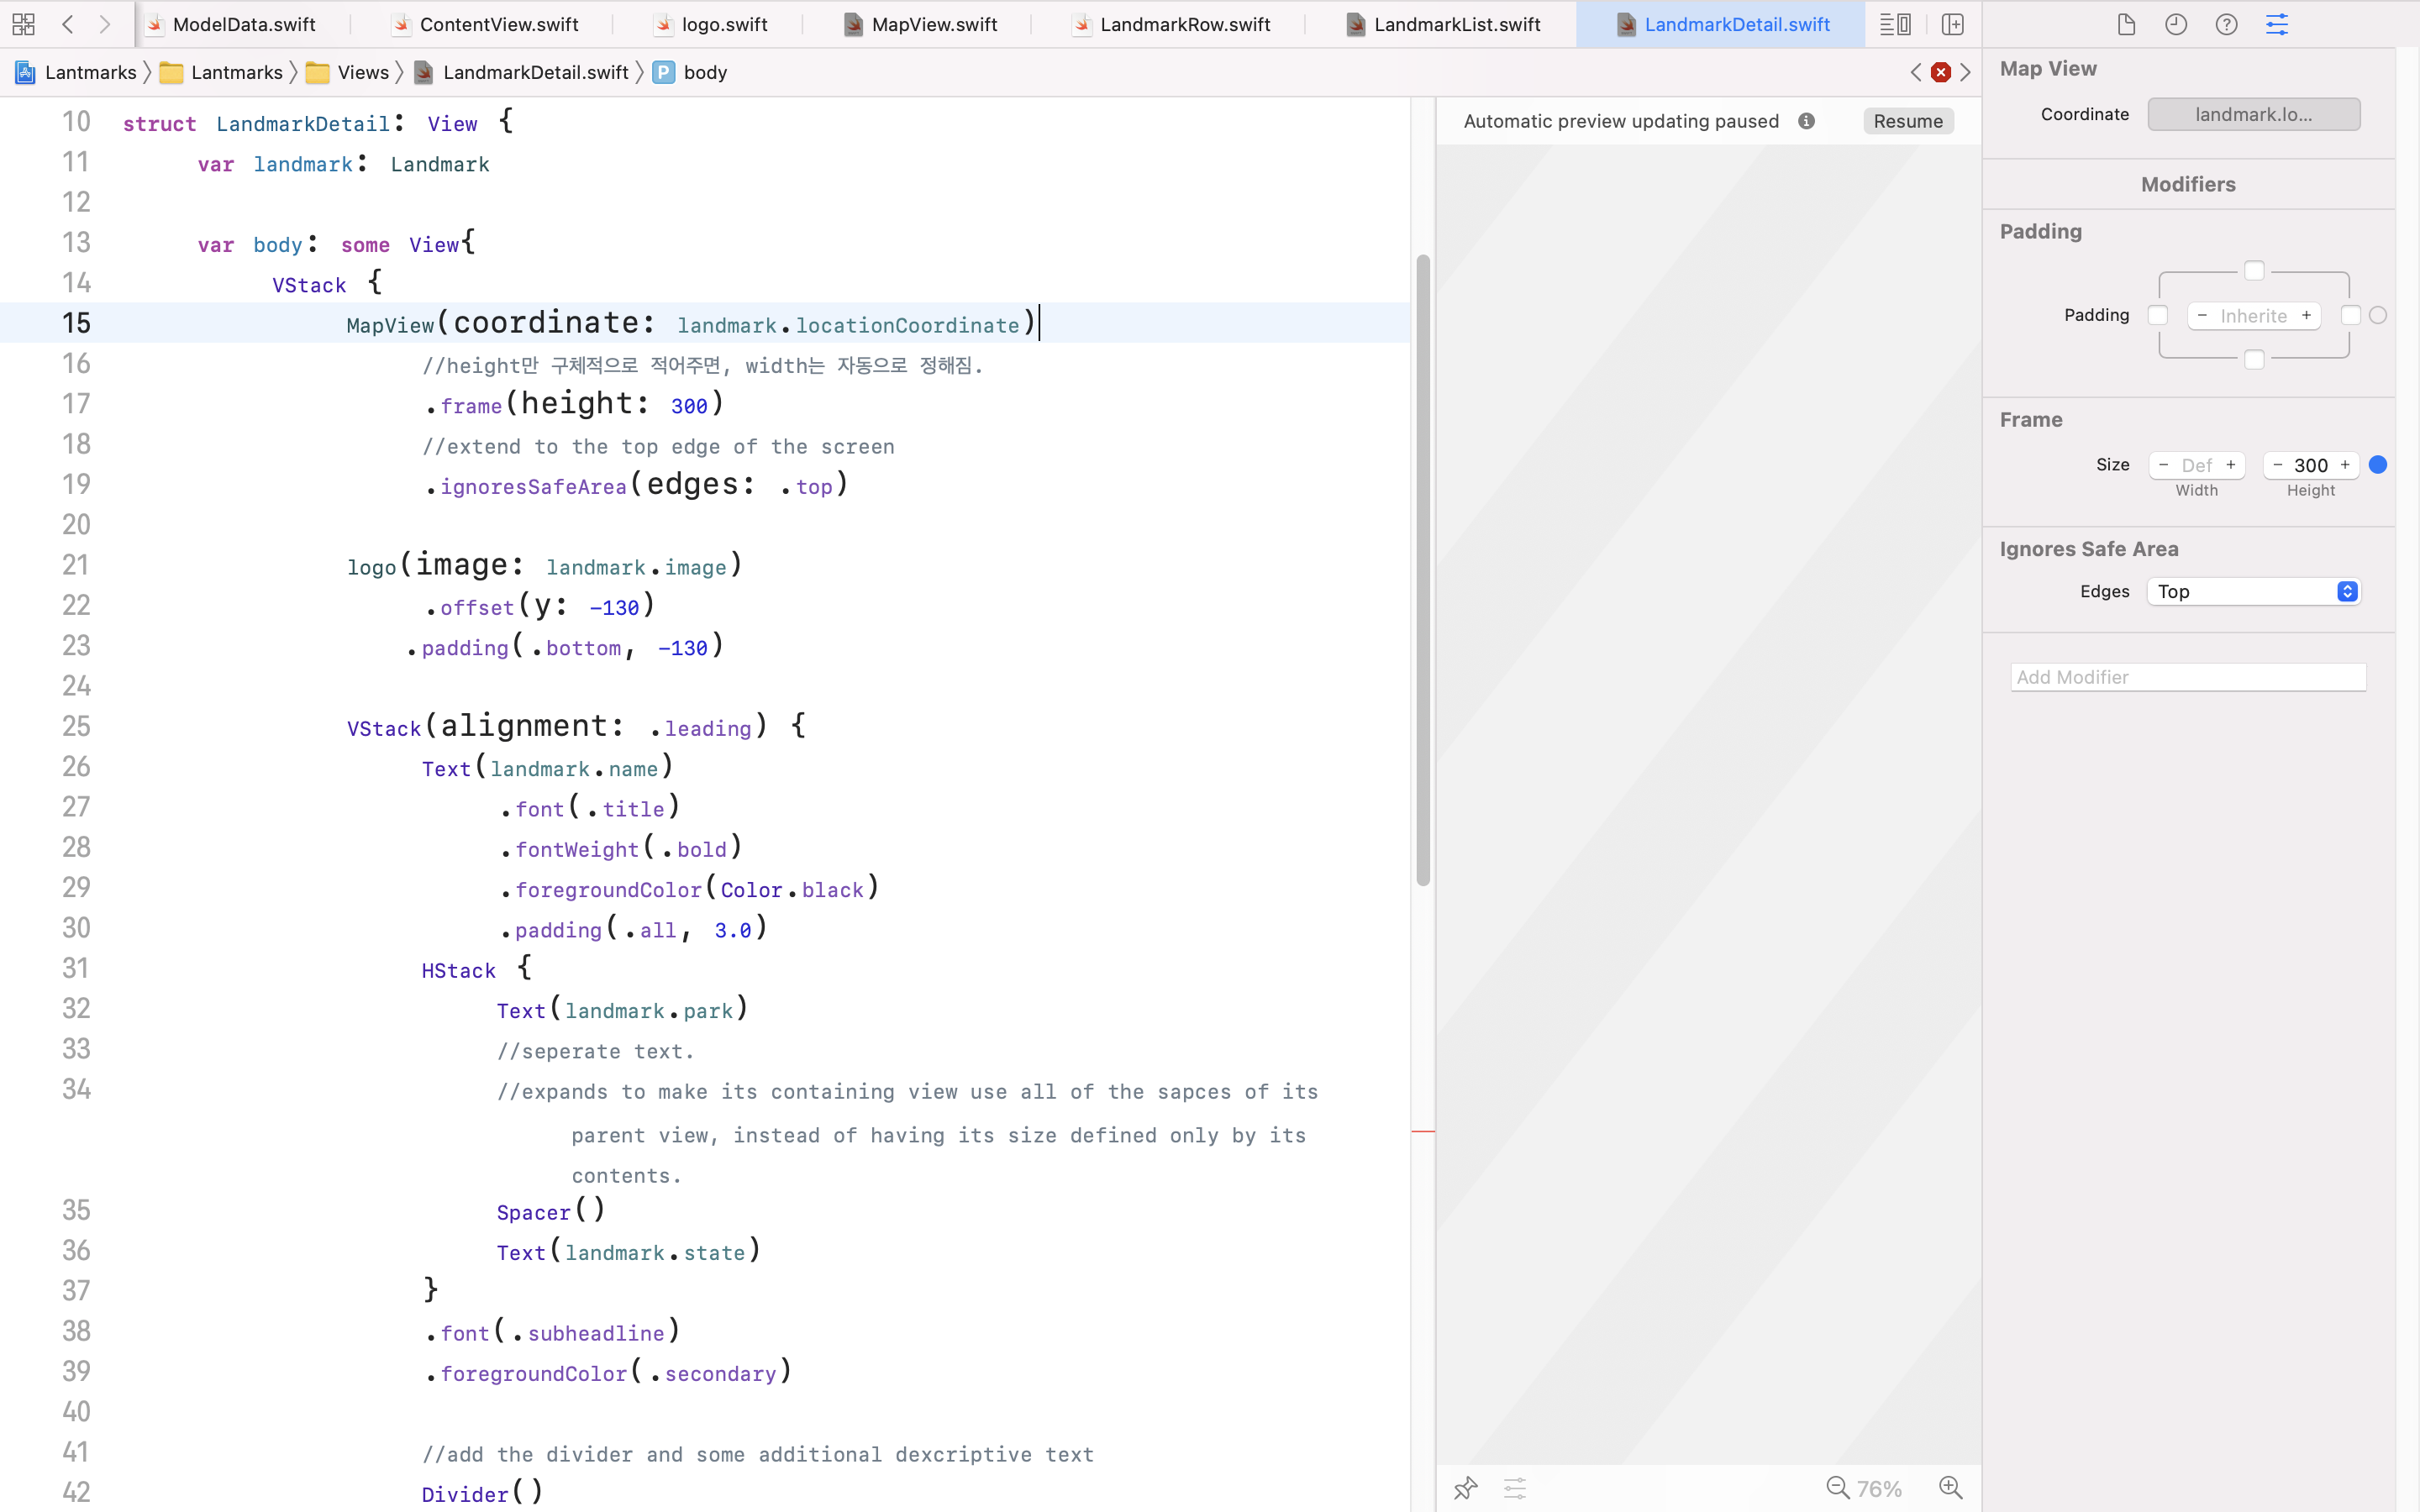
Landmark model에서 설정한 값들을 대입해줌. - VStack container를 ScrollView로 바꾸고, Spacer를 제거함.
- ScrollView의 navigationTitle를 설정해줌.
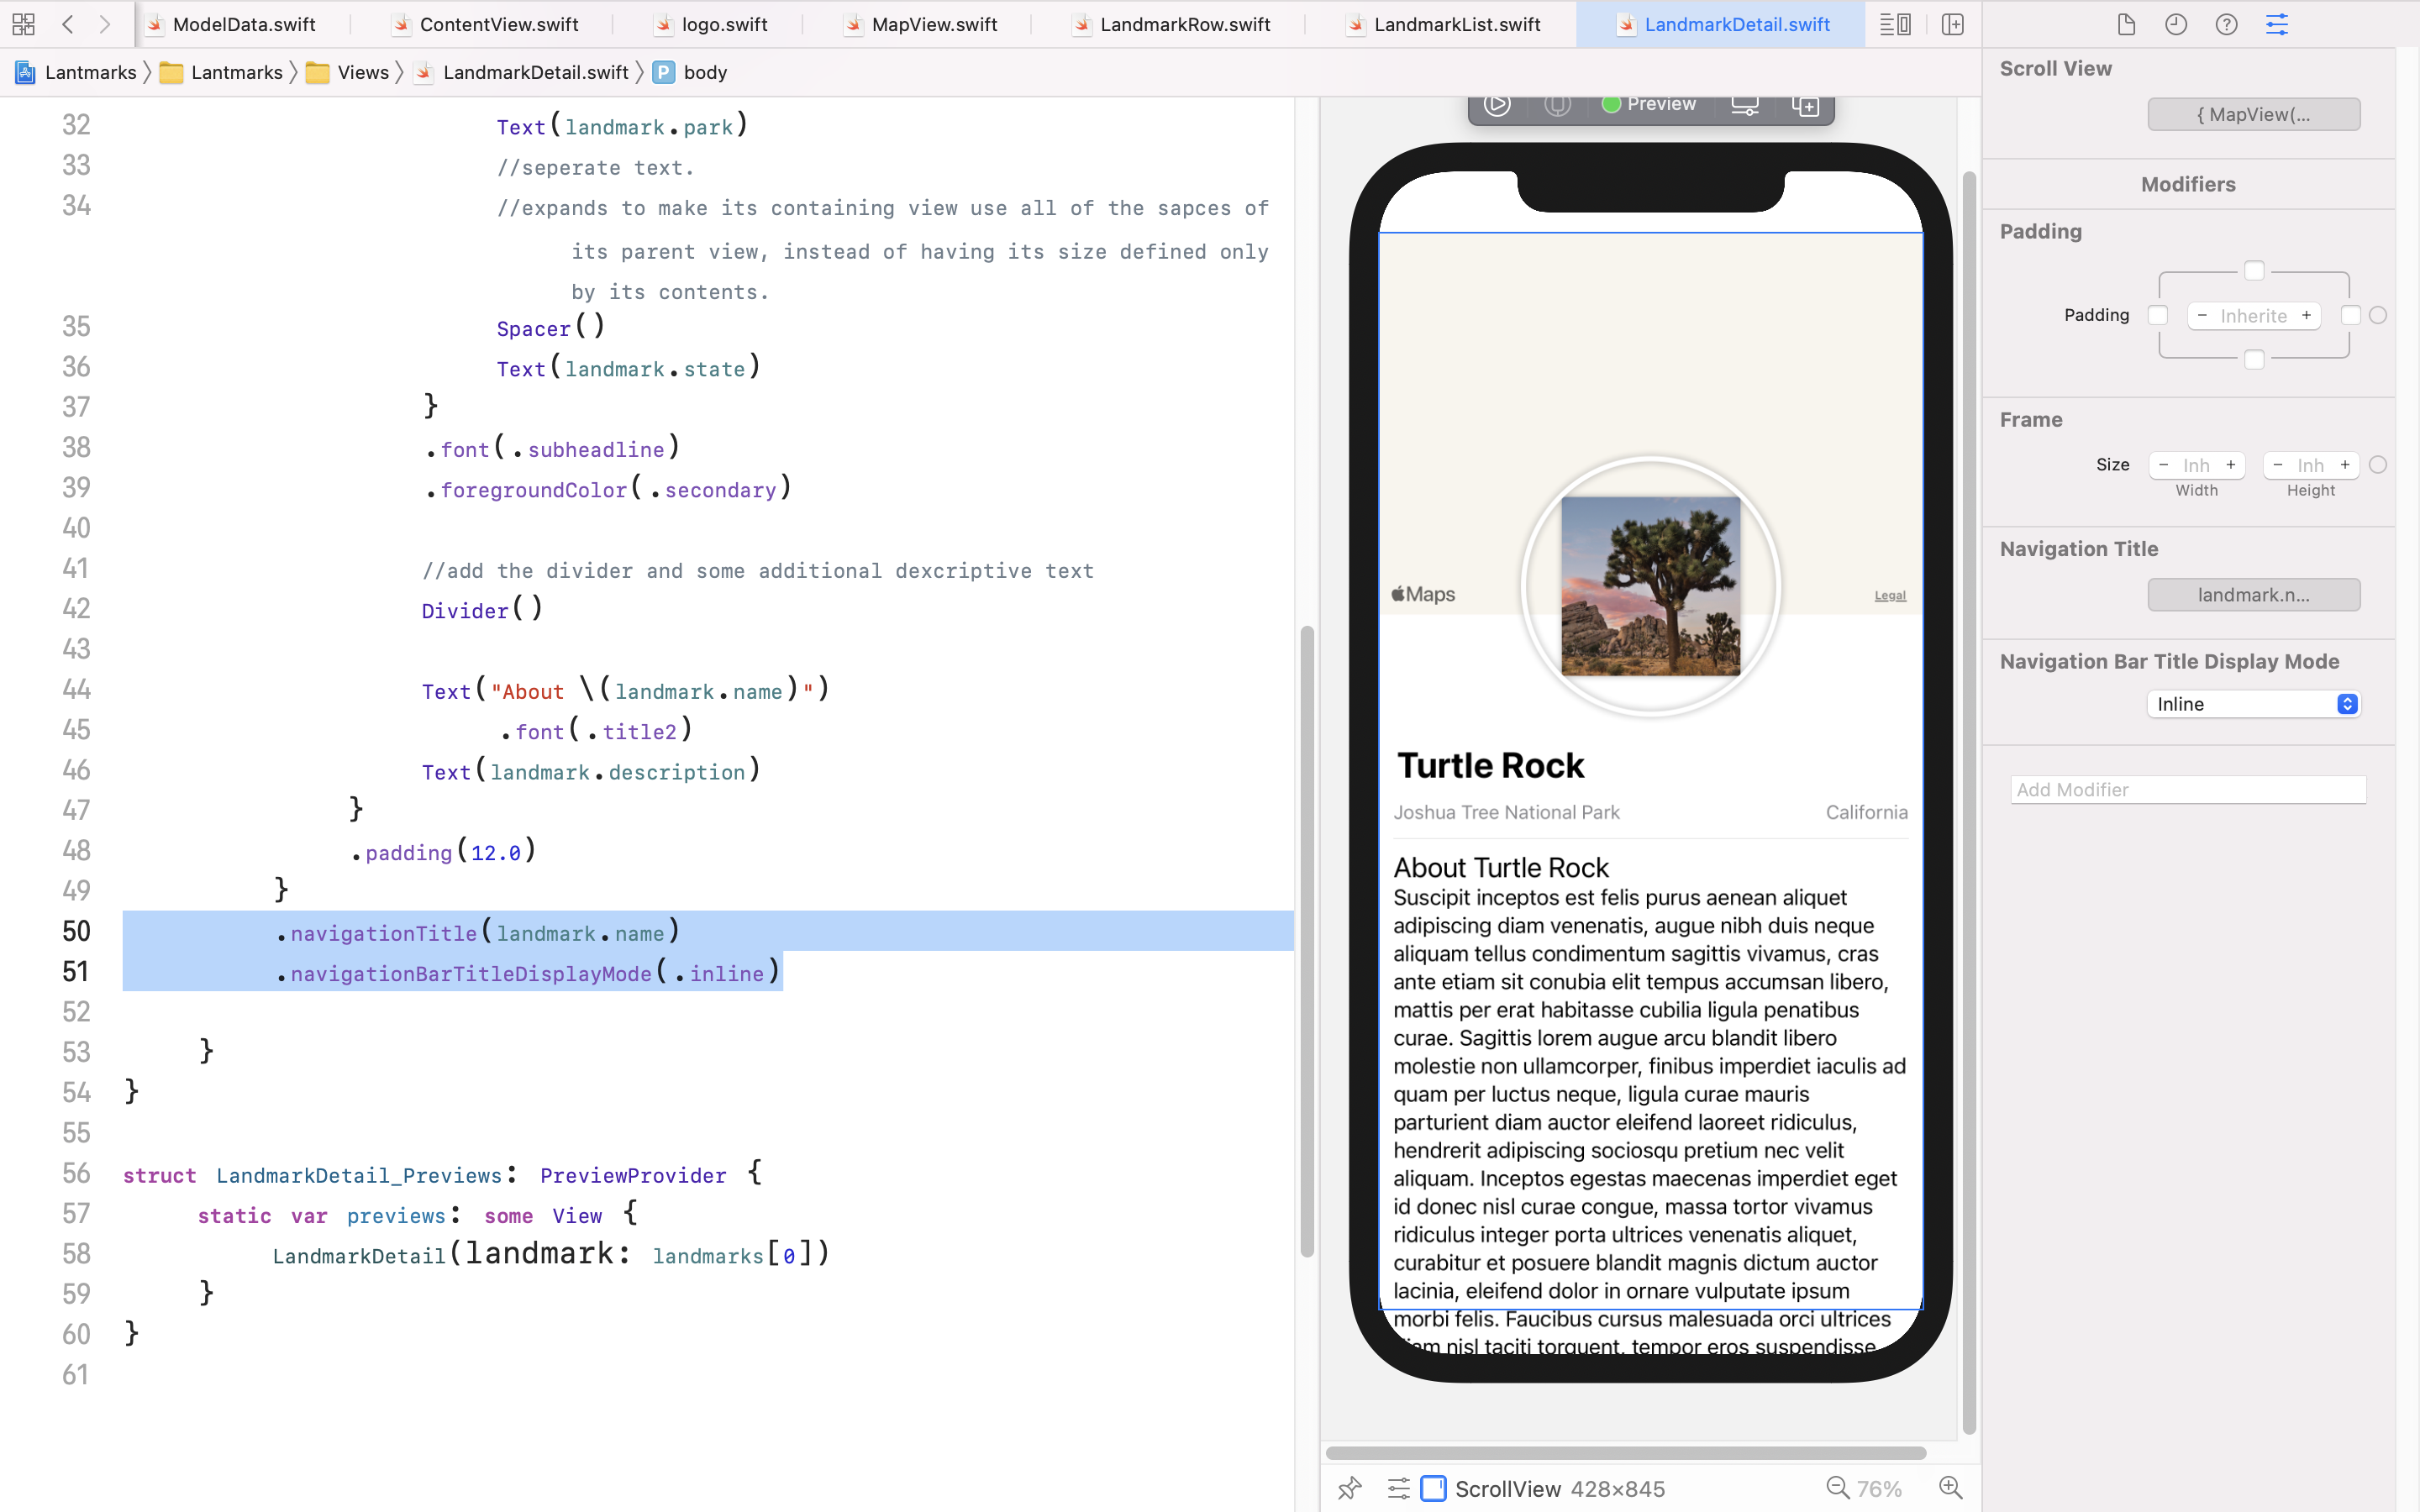
The navigation changes only have an effect when the view is part of a navigation stack. list에서 클릭해서 detail보여줄때 맨 위에 표시됨.
8. Generate Previews Dynamically
- preview를 different device size에서 보기.
- LandmarkList의 preview에서,
- 하나의 다른 display에서 보고싶다.
        LandmarkList()
.previewDevice(PreviewDevice(rawValue: "iPhone SE (2nd generation)"))- 여러개의 display에서 보고싶다. => ForEach사용.
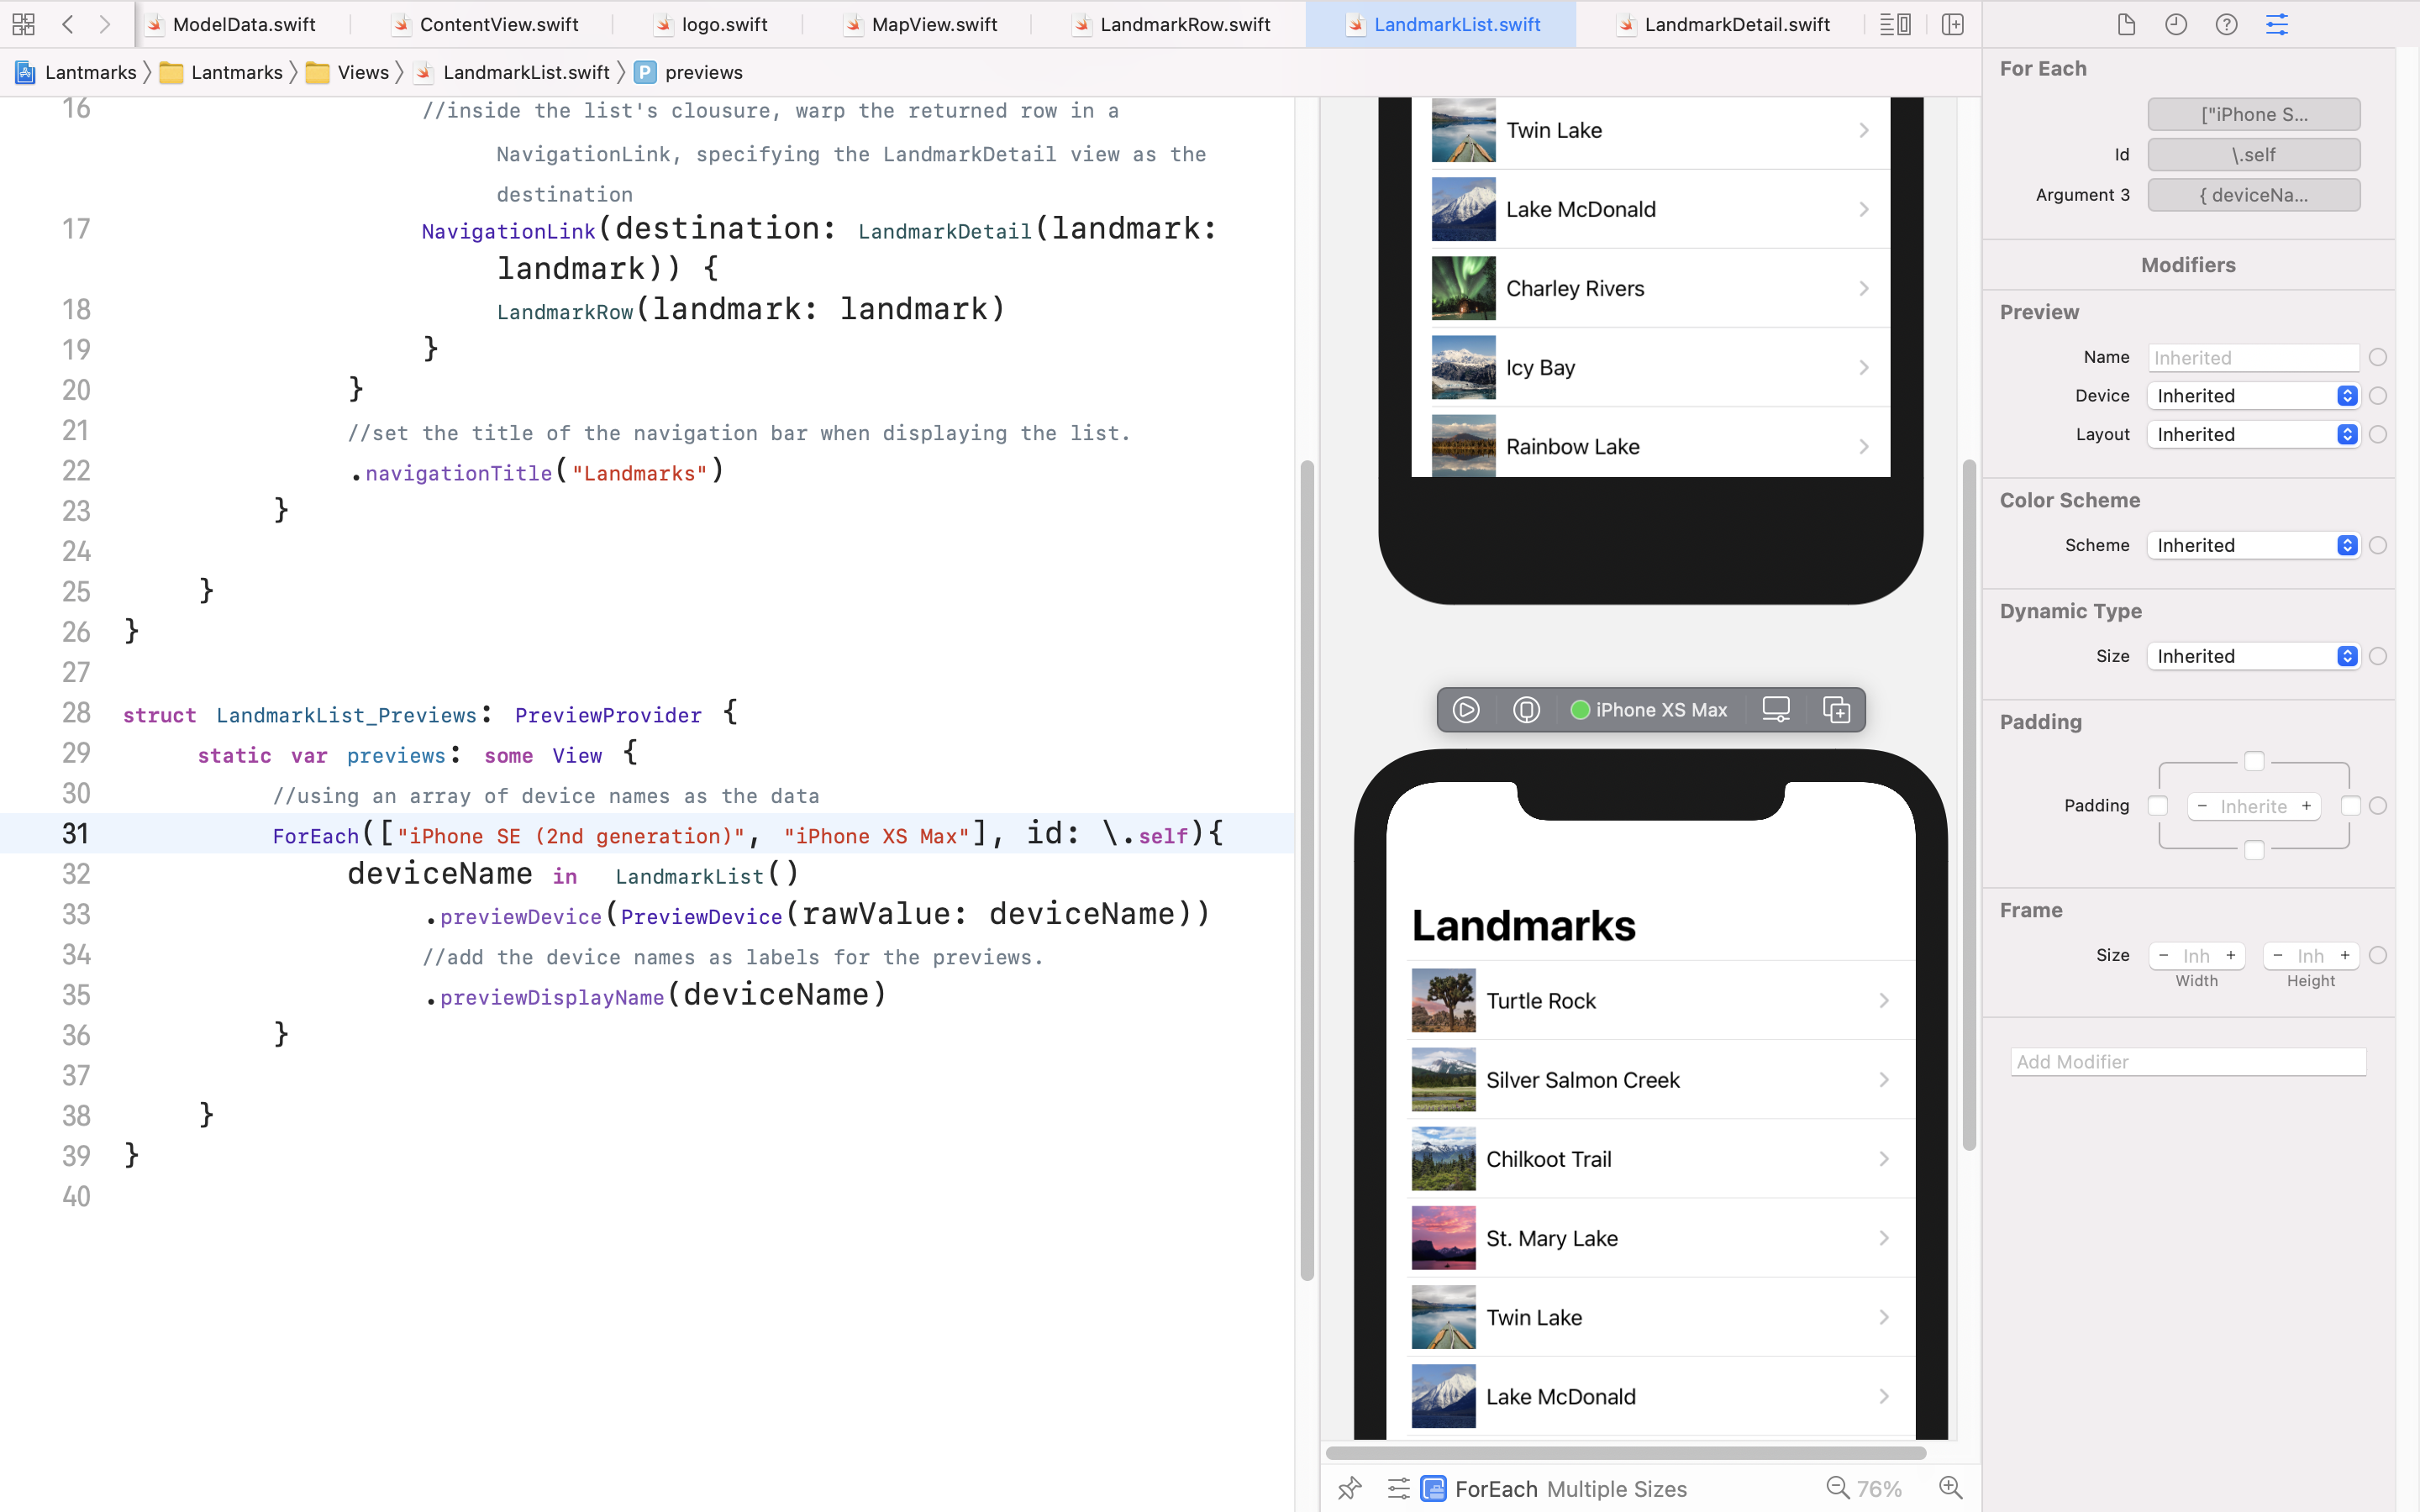
- forEach list내의 원소?들이 deviceName이 되고, 이걸 LandmarkList에 적용함? 맞나?

Noteing WIll