Table
css를 위해서 Table을 사용하면 안되고 아래와 같은 표를 생성할 때 사용한다.
자식 행과 열이 오면 안된다.
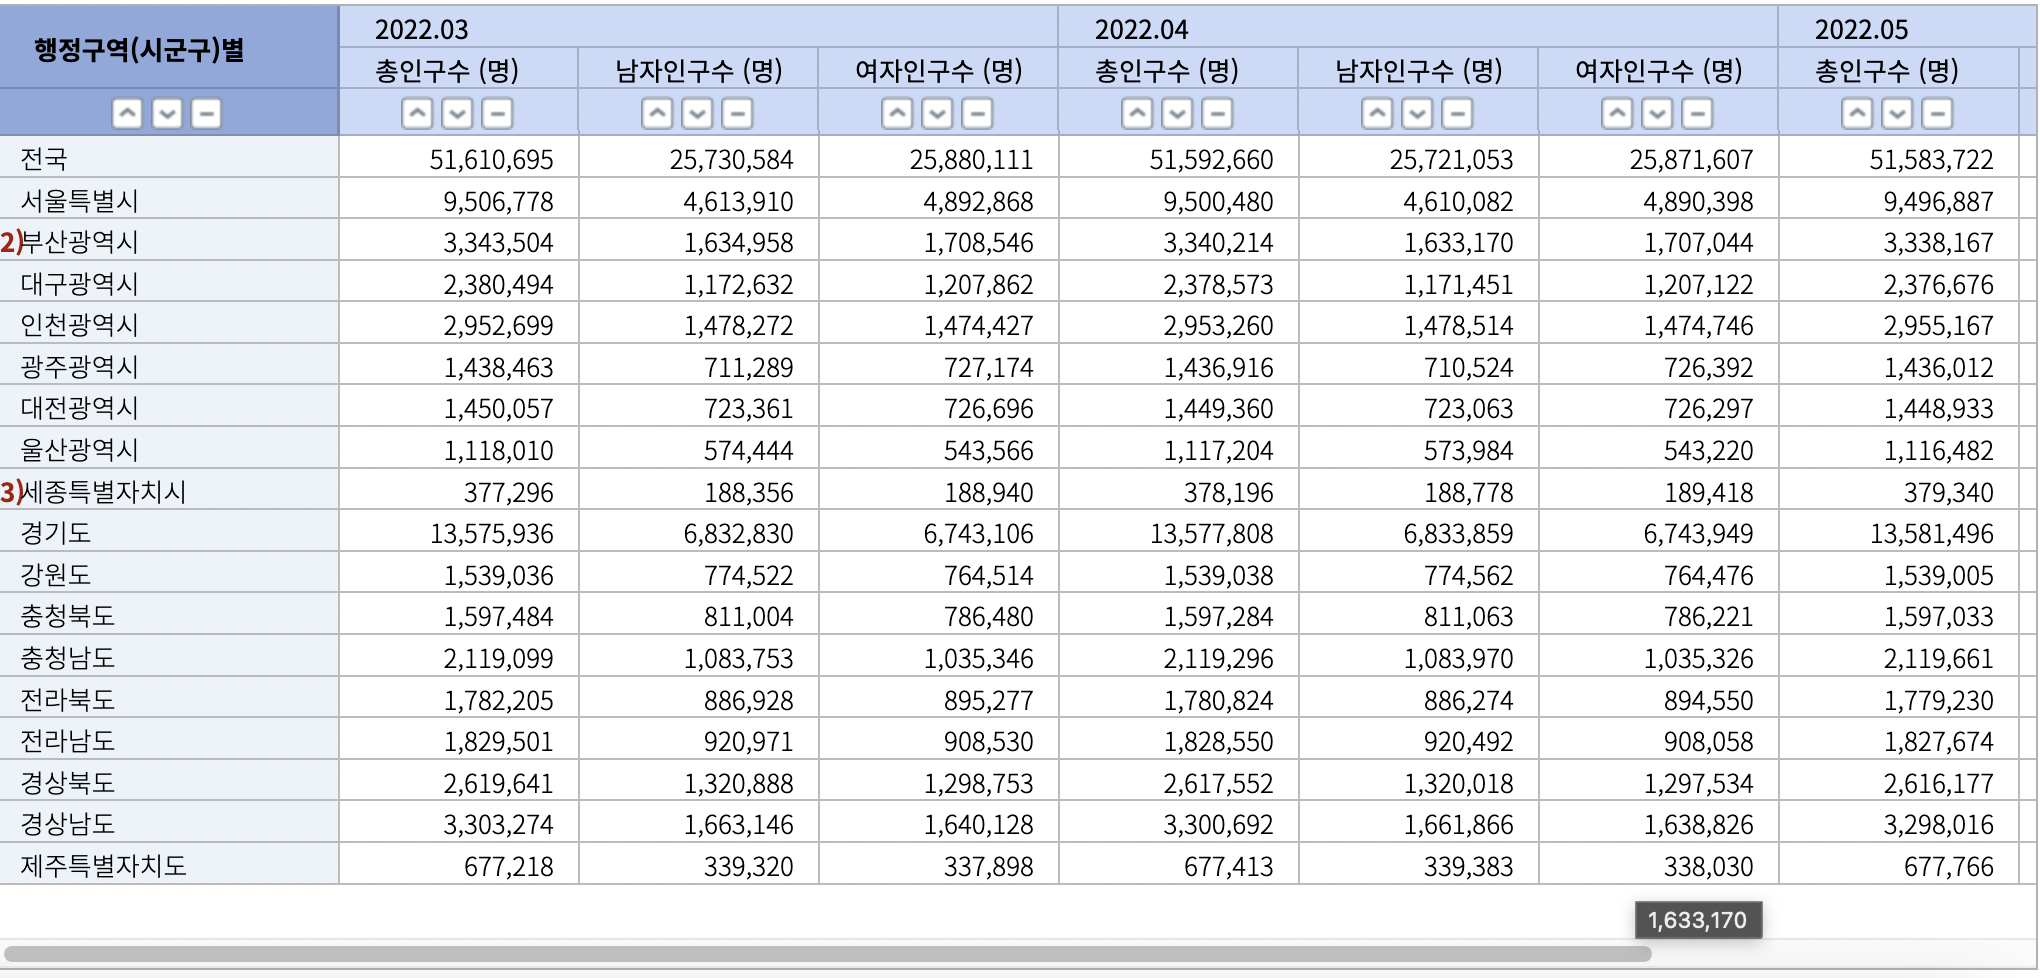
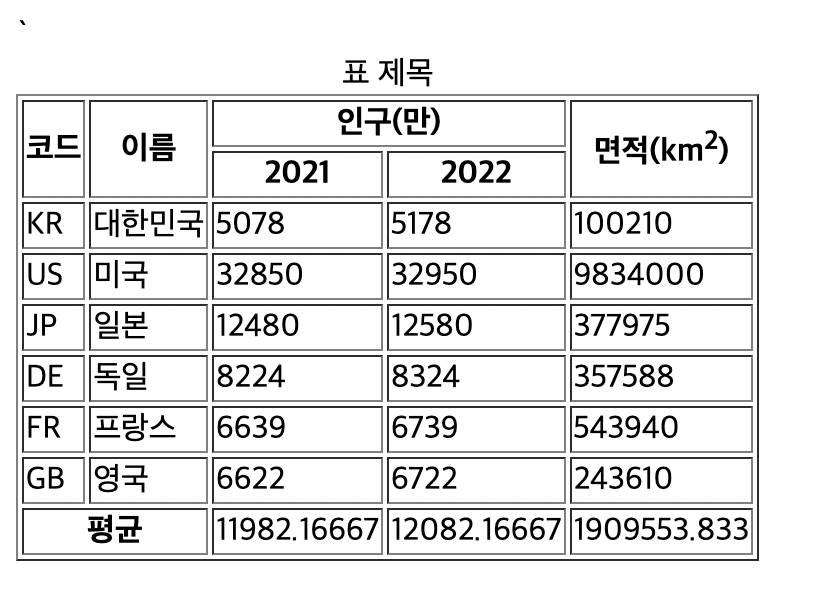
빠른 이해를 위해 아래의 시도별인구 표를 통해서 해당 부분 사진을 첨부하겠습니다.
caption
: 표의 제목 ( 선택 )
thead
: 표와 데이터가 아닌 열 이름 등을 담을 때 사용 ( 선택 )

tbody
: 표의 데이터를 담을 때 사용 ( 필수 )

tfoot
: 표의 데이터에 대한 통계(합계, 평균) 등을 담을 때 사용 ( 선택 )
tr
: Table Row, 하나의 행
( tr > ) th
: Table Heading, 열 이름을 담는 셀(칸)
- 대표할 수 있는 이름들을 주로 이곳에서 사용한다.

( tr > ) td
: 하나의 데이터 셀(data cell)
- th태그에서 정의한 제목 영역에 대한 데이터 및 정보를 나타낸다.

< example >
<table>
   <caption>표 제목</caption>
   <thead>
       <tr>
           <th>코드</th>
           <th>이름</th>
           <th>인구(만)</th>
           <th>면적(km<sup>2</sup>)</th>
       </tr>
   </thead>
   <tbody>
       <tr>
           <td>KR</td>
           <td>대한민국</td>
           <td>5178</td>
           <td>100210</td>
       </tr>
       ....> 생략
thead : 1행 4열 / tbody : 6행 4열
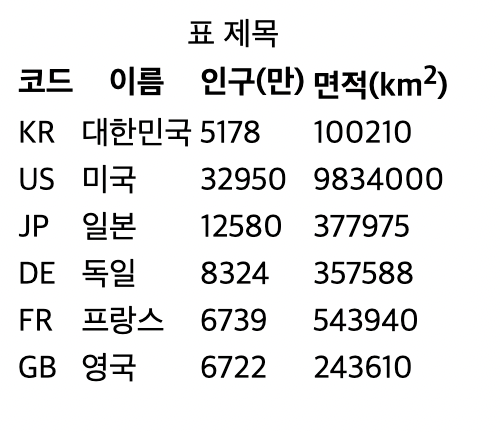
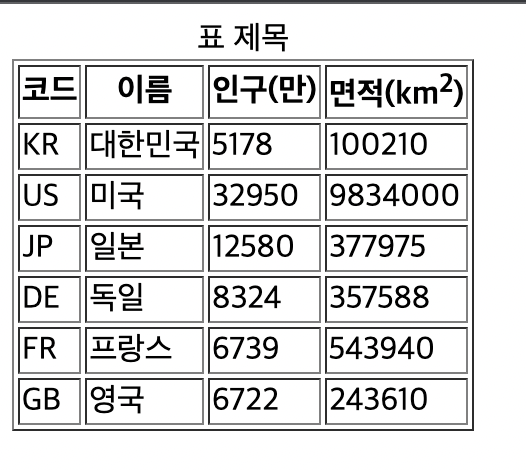
table 에 border을 주게 되면 테이블 border가 생긴다.

colspan 속성
: 열(가로) 방향으로 통합시킬 셀 개수(본 셀 포함)
rowspan 속성
: 행(세로) 방향으로 통합시킬 셀 개수(본 셀 포함)
< example >
<thead>
    <tr>
        <th rowspan="2">코드</th>
        <th rowspan="2">이름</th>
        <!-- 행 하나의 열 두개인 테이블 -->
        <th colspan="2">인구(만)</th>
        <th rowspan="2">면적(km<sup>2</sup>)</th>
    </tr>
    <tr>
        <th>2021</th>
        <th>2022</th>
    </tr>
</thead>
<tbody>
	<tr>
  	    <td>KR</td>
  	    <td>대한민국</td>
  	    <td>5078</td>
  	    <td>5178</td>
  	    <td>100210</td>
  	</tr> x6개 tr 반복
</tbody>
<tfoot>
   <tr>
       <th colspan="2">평균</th>
       <td>11982.16667</td>
       <td>12082.16667</td>
       <td>1909553.833</td>
   </tr>
</tfoot>
< 결과 >
🙀 여기서 의문이 생길 수 있다.
가로를 합치는데 왜 colspan을 쓰는것인가?
땡!!! 접근자체가 틀렸다.
가로를 합치는 것이 아닌 열을 합친다 라는 것에 포커스를 둬야한다.
그러면 자연스럽게 열은 column임으로 colspan이 된다.
input 태그
: 사용자로 부터 값을 입력 받기 위해 사용
- self-closing type
Form 태그
: 서로 관련이 있는 INPUT 태그들을 한번에 담기 위해 사용.
가령, 회원가입FORM, 로그인 FORM 등.
input 태그 속성
autofocus
: 속성 값을 부여하지 않음. 페이지가 로드되었을 때 자동으로 포커스를 준다.
<input>

<input autofocus>
페이지가 불러와지면 바로 값을 넣을 수 있게끔 해준다. ' = '해서 쓸건 없고 속성만 적으면 적용이 된다.
maxlength
: 사용자 입력값이 있을 때, 최대 길이
- 가령
maxlenght="5"5자 이상으로는 입력이 불가능하다.
name
: 서버로 하여금 해당 INPUT 값을 식별할 수 있께 하기 위한 존재.
max
: type 속성 값이 'number' 일 때, 최댓값.
min
: type 속성 값이 'number' 일 때, 최소값.
max & min 활용
<input type="number" max="10" min="5">
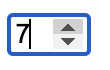
5~10 까지 올리고 내릴 수 있다.
placeholder
: 속성 값이 비어있을 때, 표시할 도움말.
- 한 글자라도 작성하면 사라지게 된다.
<input placeholder="검색어 입력">

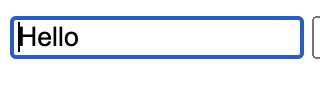
value
: 해당 INPUT의 값
<input value="Hello">
type
: 해당 INPUT 의 종류
type의 종류
text
: 일반 텍스트(기본값)
tel
: 연락처
: 이메일
- pc보다 모바일일때 차이가 크다. 모바일로 박스에 가져다대면 @가 생긴다.
password
: 비밀번호
<input type="password" placeholder="비밀번호">

비밀번호 입력시에 보이지 않는다.
checkbox
: 체크박스 ( 여/부 )
<input type="checkbox">

radio
: name이 같은 input들 중 하나만 선택할 수 있게함.
<input name="telecom" type="radio">SKT<br>
<input name="telecom" type="radio">LGU+<br>
<input name="telecom" type="radio">KT

=> 같은 이름으로 설정했기 때문에 하나만 선택이 가능해진다.
name을 똑같이 설정하지 않으면 기본값은 전체 선택으로 되어있다.
submit
: 해당 submit 버튼이 있는 form을 전송한다. (텍스트는 value로) FORM태그 안에 있을 때만 해당.
- 서버로 데이터를 보내기 위함
reset
: 해당 reset 버튼이 있는 form의 input을 초기화한다. (텍스트는 value로)
button
: 그냥 버튼 (텍스트는 value로)
< submit example >
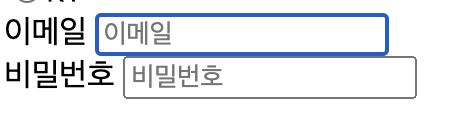
 <form>
     <label>
         <a>이메일</a>
         <input autofocus maxlength="50" name="email" placeholder="이메일" type="email">
    </label>
    <br>
    <label>
            <a>비밀번호</a>
            <input autofocus maxlength="50" name="password" placeholder="비밀번호" type="password">
    </label>
    <br>
    <label>
        <input name="autosign" type="checkbox">
        <a>자동 로그인</a>
    </label>
    <br>
    <input type="submit" value="로그인">
</form>

id : user01@saple.com password : 12345
아이디와 패스워드를 입력하고 로그인버튼을 누르니 주소경로가 이렇게 바뀌었다.
!!! form 태그 안에서만 이루어진다. !!!
로그인 전 경로 : ~ /input.html
로그인 후 경로 :
~/input.html?email=user01%40sample.com&password=12345
여기서 email은 input의 name 이 가서 붙은 것이다.
name="email"
? 앞까지가 실제 주소이다.
? 뒤에는 이페이지를 표시하는데 전달하는 데이터를 의미한다.
키 = 값 이 한 쌍으로 이루어져있다.
"email" 키 는user01%40sample.com값을 가지고
"password" 키 는12345값을 가지게 된다.
키 / 값 쌍 간의 구분은 앰퍼샌드 ( & ) 로 한다.
label
: 하나의 INPUT 을 설명과 함꼐 감싸는 역할. 시각장애인 등 접근성을 위한 조치
<label>
   <a>이메일</a>
   <input autofocus maxlength="50" name="email" placeholder="이메일" type="email">
</label>
<br>
<a>비밀번호</a>
<input autofocus maxlength="50" name="password" placeholder="비밀번호" type="password">
label / no label 차이점
label안에서 작성을 하게 되면 <a> 태그의 글(이메일, 비밀번호) 을 선택해도
input태그에 focus가 간다.
pps로 힌트로써 역할은 하게하나 보이게 하고싶지 않다면 hidden을 줄 수 있다.
hidden
: 태그를 보이지 않게 한다. 속성 값 없음.
<a hidden>비밀번호</a>
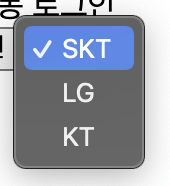
SELECT 태그
: 역할은 TYPE이 RADIO인 INPUT과 비슷. 드롭다운
<select name="drop">
    <option value="1">SKT</option>
    <option value="2">LG</option>
    <option value="3">KT</option>
</select>
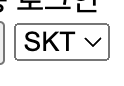

KT를 선택하고 로그인 버튼을 누르면 경로에 drop=3이라고 찍히게 된다.
OPTION 태그
: SELECT 태그 자식. 선택할 수 있는 항목
VALUE 속성
: 실제로 서버로 전송될 값
CHECKED 속성
: 해당 INPUT이 체크된 상태로 시작
SELECTED 속성
: 해당 OPTION이 선택된 상태로 시작.
< example >
<label>
	<input checked nema="radio" type="radio" value="1">
    <a>KT</a>
</label><option valuer = "3" selected> LG </option>radio랑 select가 비슷하게 쓰이는데 select의 특이점에 대해 알아보자
OPTGROUP
: OPTION 를 담기 위한 존재. 실질적으로 아무런 역할도 없음.
<select>
    <optgroup label="대구광역시">
        <option>북구</option>
        <option>동구</option>
        <option>수성구</option>
        <option>달서구</option>
    </optgroup>
    <optgroup label="서울특별시">
        <option>서초구</option>
        <option>강남구</option>
        <option>송파구</option>
        <option>강동구</option>
    </optgroup>
</select>
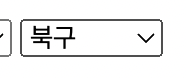
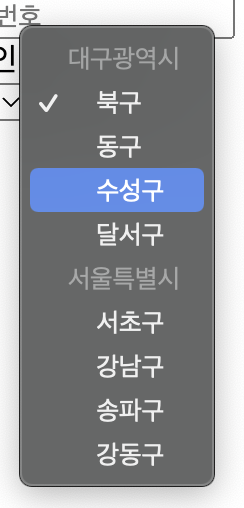
- 보다시피 대구광역시와 서울특별시는 선택할 수 없고 명시적으로만 자리한다.
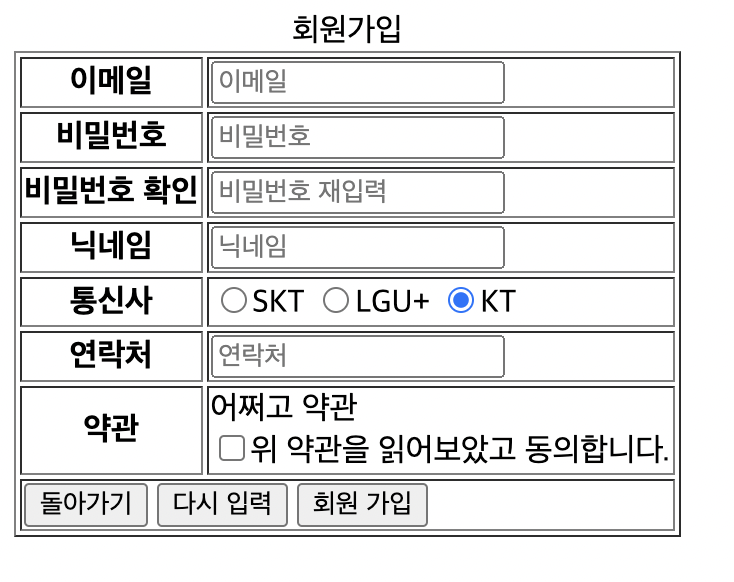
< final example >
	<form>
        <table border="1">
            <caption>회원가입</caption>
            <tbody>
                <tr>
                    <th>이메일</th>
                    <td><input autofocus maxlength="50" placeholder="이메일" name="email" type="email"></td>
                </tr>
                <tr>
                    <th>비밀번호</th>
                    <td><input maxlength="100" placeholder="비밀번호" name="password" type="password"></td>
                </tr>
                <tr>
                    <th>비밀번호 확인</th>
                    <td><input maxlength="100" placeholder="비밀번호 재입력" name="passwordCheck" type="password"></td>
                </tr>
                <tr>
                    <th>닉네임</th>
                    <td><input maxlength="10" placeholder="닉네임" name="nickname" type="text"></td>
                </tr>
                <tr>
                    <th>통신사</th>
                    <td>
                        <label>
                            <input name="telecom" type="radio">SKT
                        </label>
                        <label>
                            <input name="telecom" type="radio">LGU+
                        </label>
                        <label>
                            <input name="telecom" type="radio">KT
                        </label>
                    </td>
                </tr>
                <tr>
                    <th>연락처</th>
                    <td><input maxlength="11" placeholder="연락처" name="contact" type="tel"></td>
                </tr>
                    <tr>
                        <th>약관</th>
                        <td>어쩌고 약관<br>
                            <label>
                                <input type="checkbox">위 약관을 읽어보았고 동의합니다.
                            </label>
                        </td>
                    </tr>
                <tr >
                    <td colspan="2">
                        <button>돌아가기</button>
                        <label>
                            <button type="reset">다시 입력</button>
                        </label>
                        <button type="submit">회원 가입</button>
                    </td>
                </tr>
            </tbody>
        </table>
    </form>