이메일 인증 코드
-> UserCotroller
@RequestMapping(value = "verify-email", method = RequestMethod.GET)
    public ModelAndView getVerifyEmail(
            ModelAndView modelAndView,
    ) {
        return modelAndView;
}
-> UserEmailVerifyResult enum 생성
public enum UserEmailVerifyResult {
    EXPIRED,
    FAILURE,
    ILLEGAL,
    SUCCESS
}
-> UserEmailVerifyVo 생성
public class UserEmailVerifyVo extends UserEmailVerificationCodeEntity implements IResult<UserEmailVerifyResult> {
    private UserEmailVerifyResult result;

    @Override
    public UserEmailVerifyResult getResult() {
        return result;
    }

    @Override
    public void setResult(UserEmailVerifyResult result) {
        this.result = result;
    }
} //getter, setter
-> UserController
@RequestMapping(value = "verify-email", method = RequestMethod.GET)
    public ModelAndView getVerifyEmail(
            ModelAndView modelAndView,
            UserEmailVerifyVo userEmailVerifyVo,
            @RequestParam(name="c", required = true) String code,
            @RequestParam(name="s", required = true) String salt
    ) {
    	userEmailVerifyVo.setResult(null);
        userEmailVerifyVo.setIndex(0);
        userEmailVerifyVo.setCode(code);
        userEmailVerifyVo.setSalt(salt);
        return modelAndView;
}
- emailVerificationTemplate에 parametername을 그냥 c랑 s로 해놨기 때문에 c랑 s에 해당하는 값이 code와 salt에 자동으로 들어가지 않는다.
=> @RequestParam 사용해서 수동으로 넣어줘야한다.
-> UserService verifyEmail 메서드 생성
=> 이메일 인증을 위한 메서드
  public void verifyEmail(UserEmailVerifyVo userEmailVerifyVo) {
        if (userEmailVerifyVo.getCode() == null || userEmailVerifyVo.getSalt() == null ||
                !userEmailVerifyVo.getCode().matches("^([0-9a-z]{128})$") ||
                !userEmailVerifyVo.getSalt().matches("^([0-9a-z]{256})$")) {
            userEmailVerifyVo.setResult(UserEmailVerifyResult.ILLEGAL);
            return;
  }
- 이 정규식은 이메일을 인증할 때만 사용하기 때문에 따로 밖으로 뺴지 않는다.
-> IUserMapper 수정 및 추가
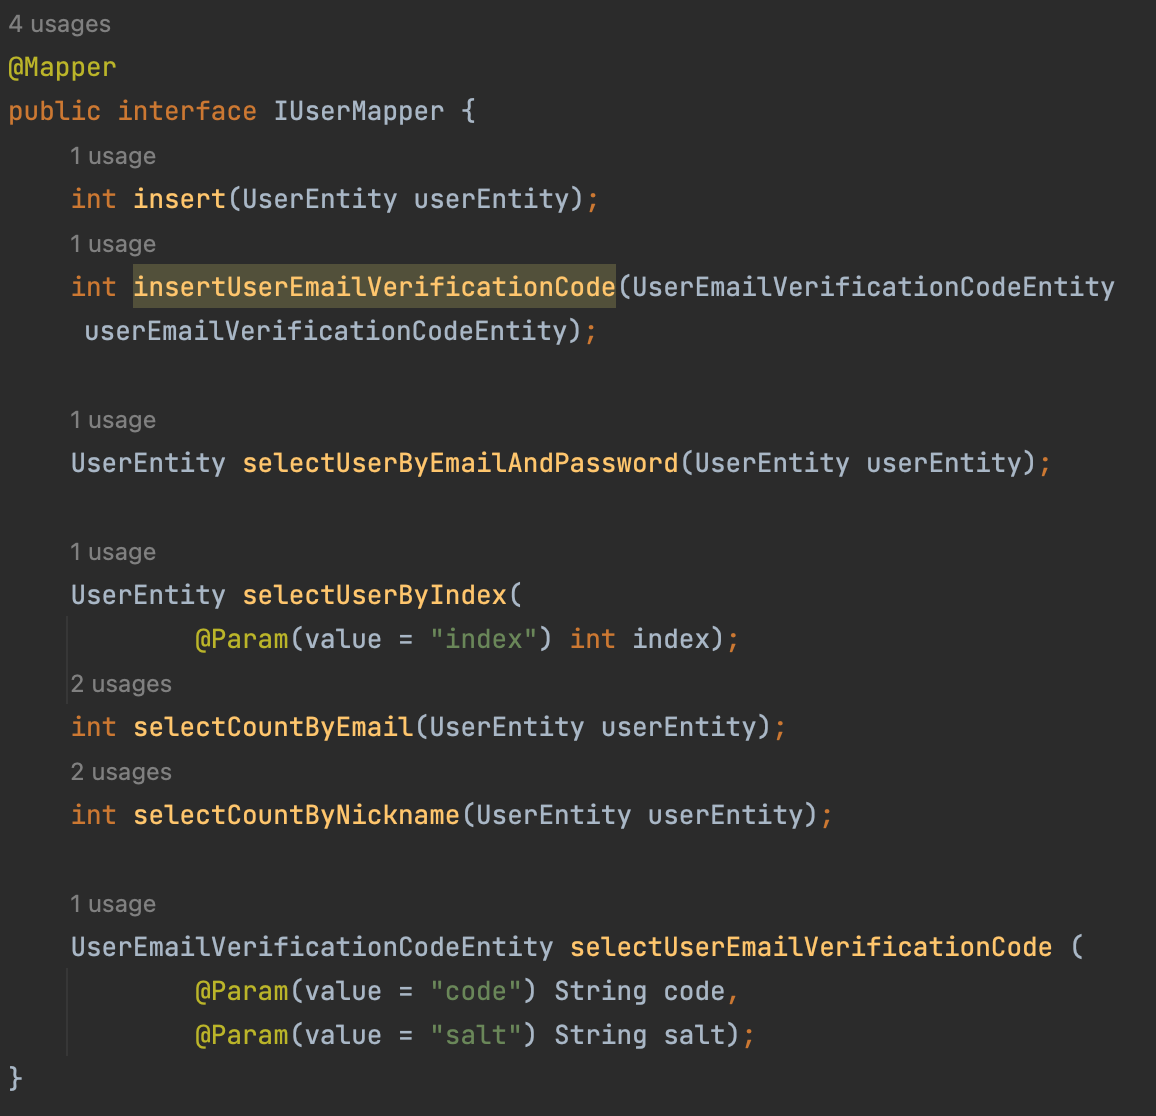
int insertUserEmailVerificationCode(UserEmailVerificationCodeEntity userEmailVerificationCodeEntity);
- 수정
UserEmailVerificationCodeEntity selectUserEmailVerificationCode (
	@Param(value = "code") String code,
	@Param(value = "salt") String salt);
UserEntity selectUserByIndex( @Param(value = "index") int index);
- 추가
-> UserMapper.xml select추가
<select id="selectUserEmailVerificationCode"
        resultType="dev.jwkim.bbsbasic.entities.UserEmailVerificationCodeEntity">
        SELECT `index`        AS `index`,
               `created_at`   AS `createdAt`,
               `expires_at`   AS `expiresAt`,
               `expired_flag` AS `isExpired`,
               `code`         AS `code`,
               `salt`         AS `salt`,
               `user_index`   AS `userIndex`
        FROM `spring3`.`user_email_verification_codes`
        WHERE `code` = #{code}
        AND `salt` = #{salt}
        LIMIT 1
</select> - code와 salt가 주어진 값과 일치하는 UserEmailVerificationCodeEntity 초기화하기 위해 열들을 선택했다.
-> UserService
UserEmailVerificationCodeEntity userEmailVerificationCodeEntity = this.userMapper
                .selectUserEmailVerificationCode(userEmailVerifyVo);
        if (userEmailVerificationCodeEntity == null || userEmailVerificationCodeEntity.getIndex() == 0) {
            userEmailVerifyVo.setResult(UserEmailVerifyResult.FAILURE);
            return;
        }
        if(userEmailVerificationCodeEntity.isExpired() ||
            userEmailVerificationCodeEntity.getExpiresAt().compareTo(new Date()) < 0) {
            userEmailVerifyVo.setResult(UserEmailVerifyResult.EXPIRED);
            return;
}
- 만료일시가 현재시간보다 과거라면 더 이상 사용하지 못한다.
getExipresAt은 Date 타입으로 돌려주고 Date타입은 compareTo라는 메서드를 가진다. compareTo 메서드보다 앞에 있는게 더 작다면 -1이 나온다.
- dt1.compareTo(dt2) > 0 : dt1이 dt2보다 미래임
- dt1.compareTo(dt2) == 0 : dt1과 dt2는 같음
- dt1.compareTo(dt2) < 0 : dt1이 dt2보다 과거임.
- 했는 결과가 -1이면 < 0 조건문 성사
-> IUserMapper
<select id="selectUserByIndex"
        parameterType="dev.jwkim.bbsbasic.entities.UserEntity"
        resultType="dev.jwkim.bbsbasic.entities.UserEntity">
        SELECT `index`               AS `index`,
               `email`               AS `email`,
               `password`            AS `password`,
               `nickname`            AS `nickname`,
               `address_postal`      AS `addressPostal`,
               `address_primary`     AS addressPrimary,
               `address_secondary`   AS `addressSecondary`,
               `email_verified_flag` AS `isEmailVerified`,
               `deleted_flag`        AS `isDeleted`,
               `suspended_flag`      AS `isSuspended`,
               `admin_flag`          AS `isAdmin`
        FROM `spring3`.`users`
        WHERE `index` = #{index}
        LIMIT 1
</select>
-> UserService 수정
- 아래에 있던 애를 맨위로 끌고 올라와서
public static붙인다. 이름도 다 변경- shift + fn + f6 => 전체수정으로 수정
보안절차
-> UserService
UserEntity userEntity = this.userMapper.selectUserByIndex(userEmailVerificationCodeEntity.getUserIndex());
String saltA = userEntity.getEmail();
String saltB = userEntity.getPassword();
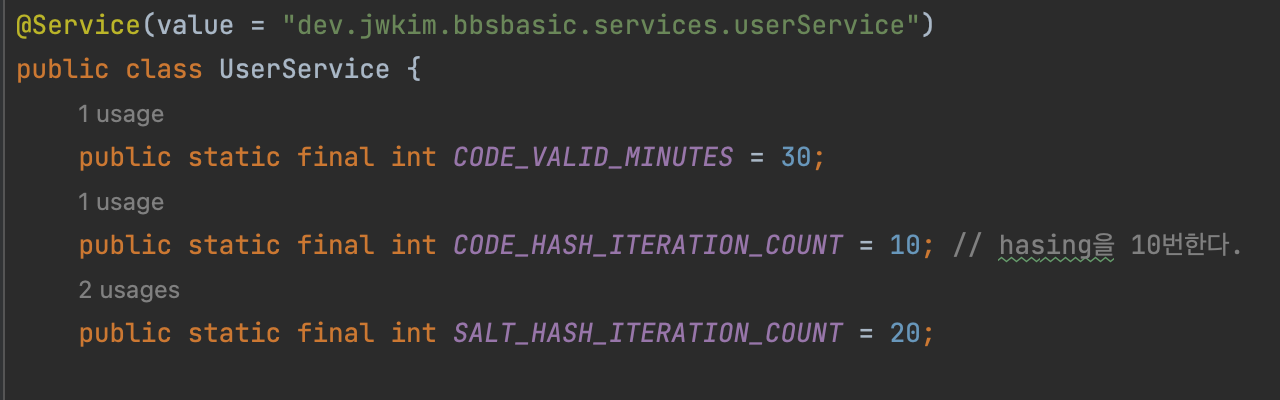
for (int i = 0; i< SALT_HASH_ITERATION_COUNT; i++) {
saltA = CryptoUtil.hash(CryptoUtil.Hash.SHA512, saltA);
saltB = CryptoUtil.hash(CryptoUtil.Hash.SHA512, saltB);
}
if(!userEmailVerificationCodeEntity.getSalt().equals(String.format("%s%s", saltA, saltB))) {
userEmailVerifyVo.setResult(UserEmailVerifyResult.FAILURE);
return;
}salt가 올바른 값인지 확인을 할껀데
salt(만들었던 규칙)는 이메일과 비밀번호를 각각 SALT_HASH_ITERATION_COUNT 만큼 돌려서 hasing 한 후 합친 값이다.
주어진 salt의 hash에 일치하는 userEntity가져와서 그 userEntity가 가진 이메일과 비밀번호를 분리해서 SALT_HASH_ITERATION_COUNT 만큼 각각 돌려주고 만약 값이 (String.format("%s%s", saltA, saltB)) 다르다면 FALIURE 을 돌려준다.
회원가입할 때 받은 이메일과 패스워드를 각각 hash해서 나온 saltA와 saltB를 합친게 salt 였다. (database에 들어가있음)
인증할때도 마찬가지로 주어진 코드와 salt를 이용해서 정상적인 값이라면 user을 받아올 수 있다. ( userIndex를 이용해서 userEntity 받아옴 ) 걔가 가진 이메일과 패스워드를 다시 hasing해서 나온 salt값과 방금 전달받은 salt값이 일치하는지 확인하는 과정이다. => : 보안절차
SALT_HASH_ITERATION_COUNT 그래서 얘를 맨위로 올렸다.
여기까지 왔다면 그 다음으로는 이메일 인증이 완료 되었으니깐 ( 이메일 인증을 받은 코드이니깐) userEmailVerificationCodeEntity의 isExpiredFlag를 true로 바꿔서 update해줘야하고 userEntity emailVarifiedFlag를 trun로 바꿔줘야한다.
update두번하고 SUCCESS로 뺀 다음 html로 받아서 alert로 띄우자.
지금까지..
- UserController
getVerifyEmail추가 - UserService
verifyEmail메소드 추가 - IUserMapper
selectUserByEmailAndPasswordselectUserByIndexselect 추가
update ( 이메일 인증 까지 완료 된 사용자에 대해서 )
-> IUserMapper
int updateUser(UserEntity userEntity);
int updateUserEmailVerificationCode(UserEmailVerificationCodeEntity userEmailVerificationCodeEntity);
-> UserMapper.xml추가
 <update id="updateUser"
            parameterType="dev.jwkim.bbsbasic.entities.UserEntity">
        UPDATE `spring3`.`users`
        SET `email`               = #{email},
            `pssword`             = #{password},
            `nickname`            = #{nickname},
            `address_postal`      = #{addressPostal},
            `address_primary`     = #{addressPrimary},
            `address_secondary`   = #{addressSecondary},
            `email_verified_flag` = #{isEmailVerified},
            `deleted_flag`        = #{isDeleted},
            `suspended_flag`      = #{isSuspended},
            `adimn_flag`          =#{isAdmin}
        WHERE `index` = #{index}
        LIMIT 1
</update>- update도 insert처럼 resultType는 없다.
=> 어차피 인터페이스에서 반환타입 int로 해놓으면 영향을 받을 레코드 수가 자동으로 반환되기 때문이다.
<update id="updateUserEmailVerificationCode"
            parameterType="dev.jwkim.bbsbasic.entities.UserEmailVerificationCodeEntity">
        UPDATE `spring3`.`user_email_verification_codes`
        SET `created_at`   = #{createdAt},
            `expires_at`   = #{expiresAt},
            `expired_flag` = #{isExpired},
            `code`         = #{code},
            `salt`         = #{salt},
            `user_index`   = #{userIndex}
        WHERE `index` = #{index}
            LIMIT 1
</update>
-> userService
userEntity.setEmailVerified(true);
         userEmailVerificationCodeEntity.setExpired(true);
         this.userMapper.updateUser(userEntity);
         this.userMapper.updateUserEmailVerificationCode(userEmailVerificationCodeEntity);
         // 자동으로 수정이 된다.
         userEmailVerifyVo.setResult(UserEmailVerifyResult.SUCCESS);
이메일 인증을 했으니 userEntity.setEmailVerified(true);
그리고 사용을 했으니 바꿔준다.
userEmailVerificationCodeEntity.setExpired(true);
-> UserController
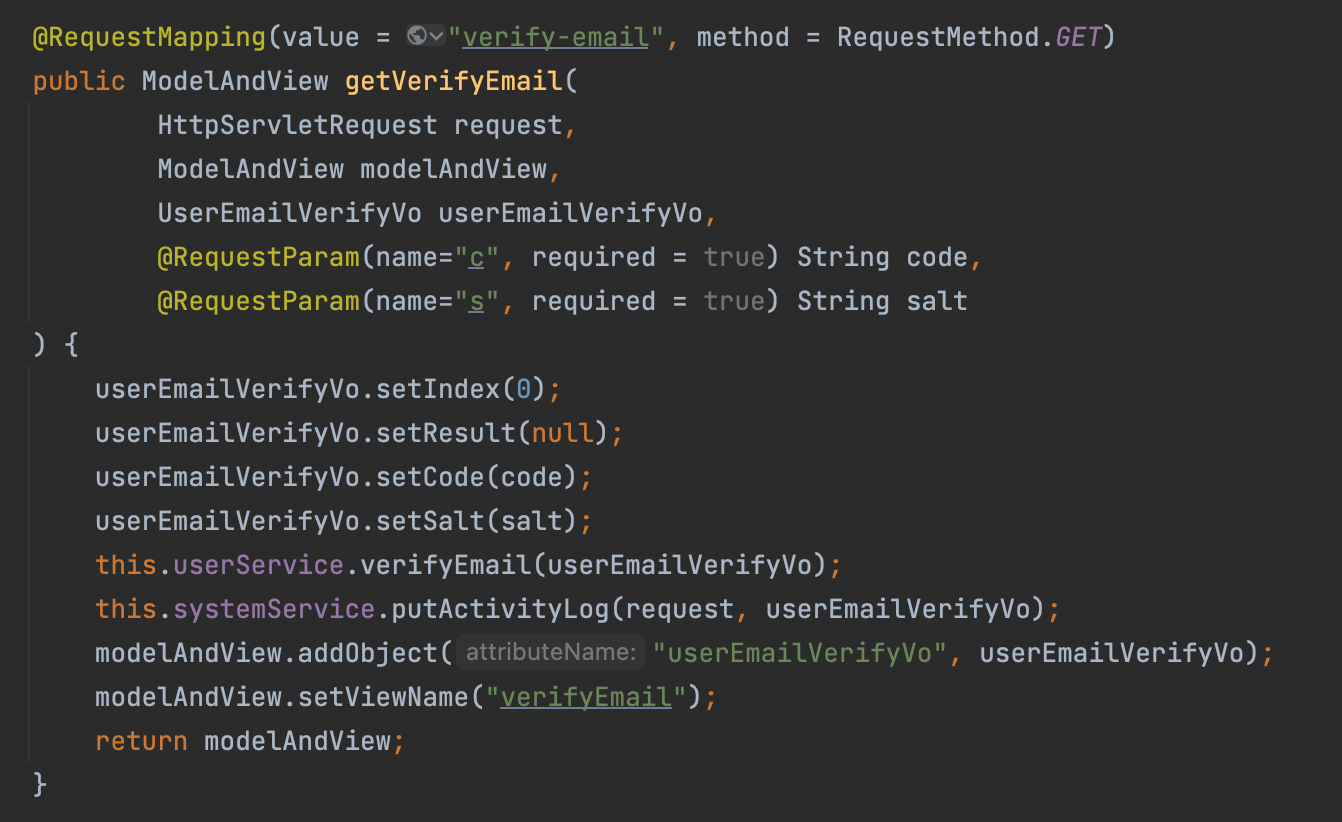
@RequestMapping(value = "verify-email", method = RequestMethod.GET)
    public ModelAndView getVerifyEmail(
            ModelAndView modelAndView,
            UserEmailVerifyVo userEmailVerifyVo,
            @RequestParam(name="c", required = true) String code,
            @RequestParam(name="s", required = true) String salt
    ) {
        userEmailVerifyVo.setIndex(0);
        userEmailVerifyVo.setResult(null);
        userEmailVerifyVo.setCode(code);
        userEmailVerifyVo.setSalt(salt);
        this.userService.verifyEmail(userEmailVerifyVo);
        modelAndView.addObject("userEmailVerifyVo", userEmailVerifyVo);
        modelAndView.setViewName("verifyEmail");
        return modelAndView;
}
-> verifyEmail.html
 <!DOCTYPE html>
<html lang="ko" xmlns:th="http://www.thymeleaf.org">
<head>
  <meta charset="UTF-8">
  <title>이메일 인증</title>
  <script th:if="${userEmailVerifyVo.getResult().name().equals('EXPIRED')}">
    alert('해당 인증 링크는 이미 사용되었거나 만료되었습니다');
    window.close();
  </script>
  <script th:if="${userEmailVerifyVo.getResult().name().equals('FAILURE')}">
    alert('잘못된 접근입니다.');
    window.close();
  </script>
  <script th:if="${userEmailVerifyVo.getResult().name().equals('SUCCESS')}">
    alert('이메일 인증이 완료되었습니다.');
    window.location.href = '/';
  </script>
</head>
</html>
window.close(); : 이 페이지에 남지 않고 자동으로 탭을 닫아주는 것. ( 없으면 흰 화면에 남아있는다.)
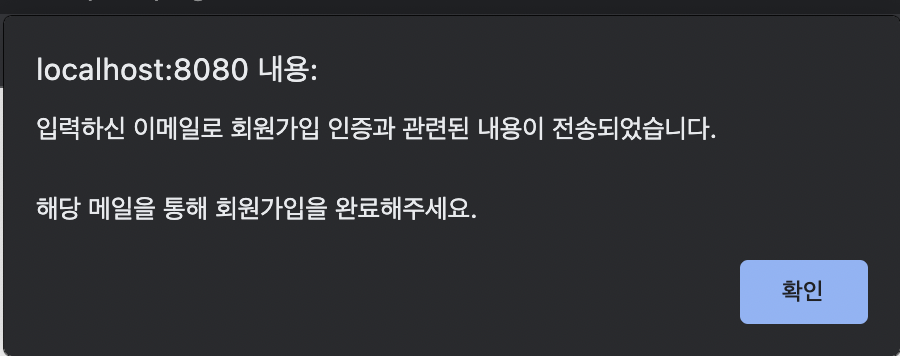
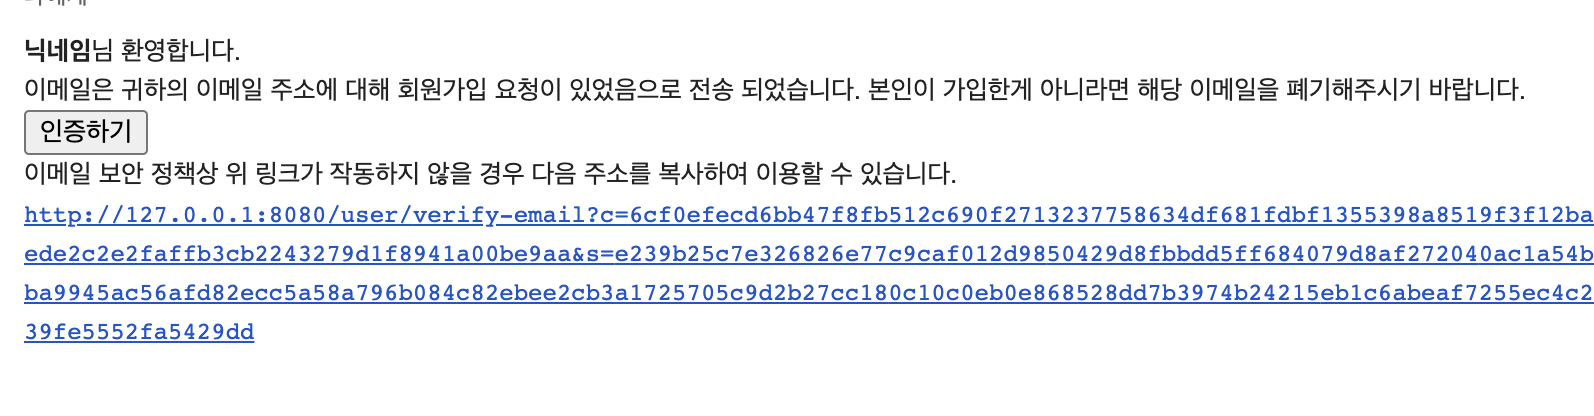
회원가입 후 이메일 인증 후 잘 작동되는 지 확인해보자.
- 회원가입을 하게 되면 이 alert가 뜬다.
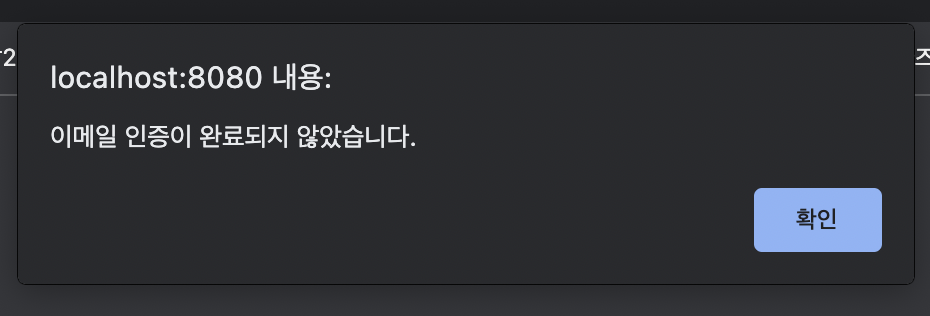
- 회원가입 직후 바로 로그인을 해보면 이메일 인증을 해달라고 alert가 뜬다.
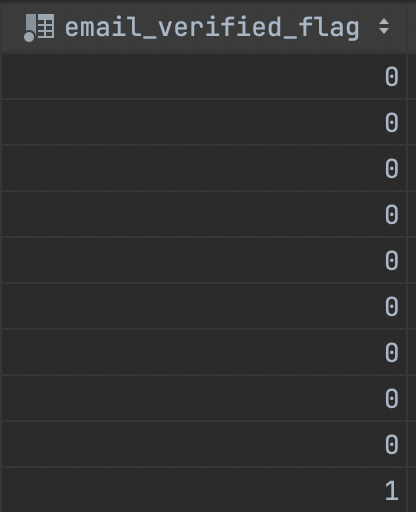
이메일 인증 후에는
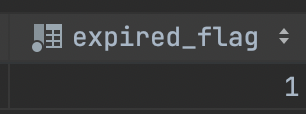
users테이블의 해당회원email_verified_flag가 1이 되어있어야한다.
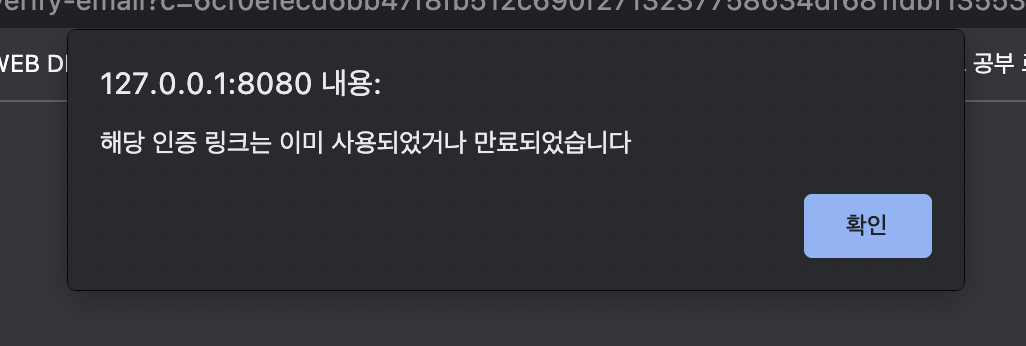
- 다시 한번 이메일 인증하기버튼을 누르게 되면 위 사진 처럼 경고가 뜬다. => 만료 or 이미 사용되었다.
그리고user_email_verification_codes테이블의 해당 코드expired_flag가 1이 되어야한다.
우리가 만든 로직에서 요청에 대한 응답이 돌아오는 것 중에 결과 값이 발생하는 것이 3가지가 있다.
- 회원가입, 이메일 인증, 로그인 ( SUCCESS, FALIURE ...같은 결과 값 )
얘네들을 데이터베이스에 남기려고 한다.
-> system_activity_logs system_exception_logs 테이블 생성
CREATE TABLE `spring3`.`system_activity_logs`
(
    `index`       BIGINT UNSIGNED NOT NULL AUTO_INCREMENT,
    `created_at`  DATETIME        NOT NULL DEFAULT NOW(),
    `client_ip`   VARCHAR(50)     NOT NULL,
    `client_ua`   VARCHAR(500)    NOT NULL,
    `request_url` VARCHAR(500)    NOT NULL,
    `result`      VARCHAR(50)     NOT NULL,
    CONSTRAINT PRIMARY KEY (`index`)
);
- client_ip : 누군가가
- client_ua : 어떤 브라우저로
- request_url : 어떤 주소를 요청했는데
- result : 어떤 결과 값이 나왔다.
CREATE TABLE `spring3`.`system_exception_logs`
(
    `index`      BIGINT UNSIGNED NOT NULL AUTO_INCREMENT,
    `created_at` DATETIME        NOT NULL DEFAULT NOW(),
    `message`    VARCHAR(1000)   NOT NULL,
    `stacktrace` VARCHAR(10000)  NOT NULL,
    CONSTRAINT PRIMARY KEY (`index`)
);
- stacktrace : 오류터졌을 때 밑에 뜨는 것.
-> StandardController 추가
@Component
public abstract class StandardController {
    protected final SystemService systemService;
    protected StandardController(SystemService systemService) {
        this.systemService = systemService;
    }
}
생성자의 접근 제한자를
protected로 두어 막는다.
- @Component : 어노테이션 계의 div같은 느낌.
spring이 인식가능한 범위내에 있는데 특정한 용도로 쓰일 것은 아니다.
얘가 실제 Controller로 쓰일 것이 아니기 때문이다.
-> SystemService 추가
@Service(value = "dev.dev.jwkim.bbsbasic.services.SystemService")
public class SystemService() {

}
-> StandardController 로 돌아와서
@Component
public abstract class StandardController {
    protected final SystemService systemService;
    @Autowired
    protected StandardController(SystemService systemService) {
        this.systemService = systemService;
    }
}
protected final SystemService systemService추가 후@Autowired해준다.- 여기서
@Component를 빼보니@Autowired에 경고등이 들어온다. Autowired를 사용하러면 Contoroller나 service나 뭐든 되야한다는 것이다.
정확히 StandardController의 종류를 구분할 수 없기때문에@Component를 사용한다.
-> UserControlller 수정
public class UserController extends StandardController {
    private final UserService userService;
    @Autowired
    public UserController(SystemService systemService, UserService userService) {
        super(systemService);
        this.userService = userService;
}
StandardController를 상속받으니 UserController가 다 박살이 났는데 그것은 부모인 StandardController의 생성자에 SystemService를 넘겨줘야하기 때문이다. 부모객체가 먼저 객체화가 이루어져야하기 때문에 자식이 부모 생성자를 호출해줘야한다. =>super(systemService);
-> SystemService putActivityLog 메서드 생성
생성하고 내용작성 전에
-> SystemActivityLogEntity 먼저 추가 (getter,setter)
public class SystemActivityLogEntity {
    private long index;
    private Date createdAt;
    private String clientIp;
    private String clientUa;
    private String requestUrl;
    private String result;
public void putActivityLog(HttpServletRequest request, IResult<? extends Enum<?>> iResult) {
Date createdAt = new Date();
String clientIp = request.getRemoteAddr();
String clientUa = request.getHeader("User-Agent");
String requestUrl = request.getRequestURI();
String result = iResult.getResult().name();
SystemActivityLogEntity systemActivityLogEntity = new SystemActivityLogEntity();
systemActivityLogEntity.setCreatedAt(createdAt);
systemActivityLogEntity.setClientIp(clientIp);
systemActivityLogEntity.setClientUa(clientUa);
systemActivityLogEntity.setRequestUrl(requestUrl);
systemActivityLogEntity.setResult(result);
}-> ISystemMapper 생성
@Mapper
public interface ISystemMapper {
    int insertActivityLog(SystemActivityLogEntity systemActivityLogEntity);
}
-> SystemMapper 생성
<mapper namespace="dev.jwkim.bbsbasic.mappers.ISystemMapper">
    <insert id="insertActivityLog"
            parameterType="dev.jwkim.bbsbasic.entities.SystemActivityLogEntity">
        INSERT INTO `spring3`.`system_activity_logs` (`created_at`, `client_ip`, `client_ua`, `request_url`, `result`)
        VALUES (#{createdAt},
                #{clientIp},
                SUBSTRING(#{clientUa}, 1, 500),
                SUBSTRING(#{requestUrl}, 1, 500),
                #{result})
    </insert>

</mapper>
- SUBSTRING 함수 : 문자열 자르기
clientUa와 requestUrl는 클라이언트마음대로 조작이 가능하기 때문에 500자를 넘어선다면 오류가 터져서 insert가 되지 않는다. 그것을 막기 위해 mariaDB에 있는 SUBSTRING 함수를 사용한다. 만약에 초과를 한다면 짜르겠다는 뜻이다.SUBSTRING의 예시 String str = "ABCDEFGHI"; str.substring(2,5); => 결과값BCDEF
-> SystemService추가

-> UserController

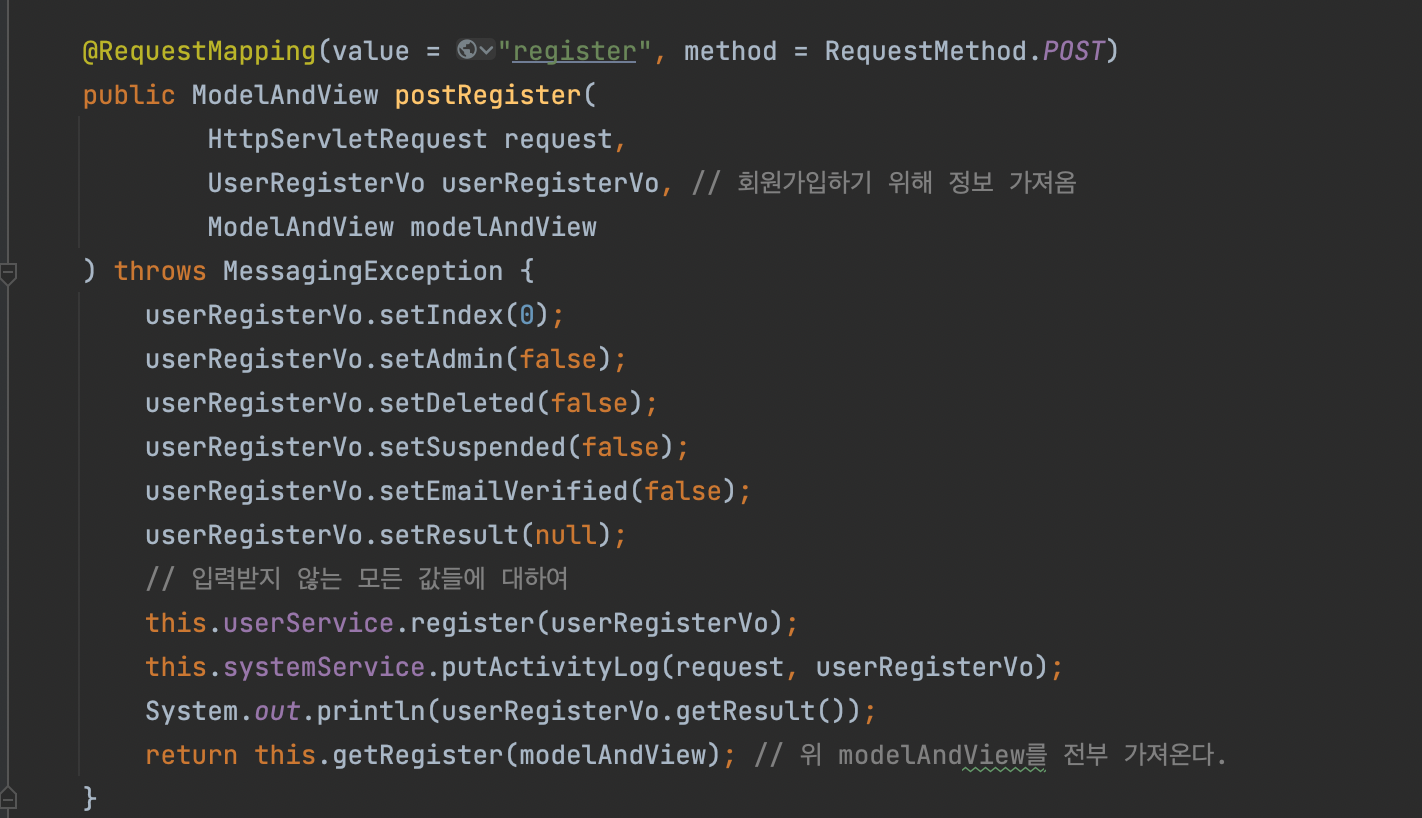
HttpServletRequest request,
this.systemService.putActivityLog(request, userLoginVo);
this.systemService.putActivityLog(request, userRegisterVo);
this.systemService.putActivityLog(request, userEmailVerifyVo);
추가

회원가입 진행 후
system_activity_logs에 이렇게 떠야한다.
로그인을 성공했다면 result = SUCCESS : log가 쌓이는 겋이다.